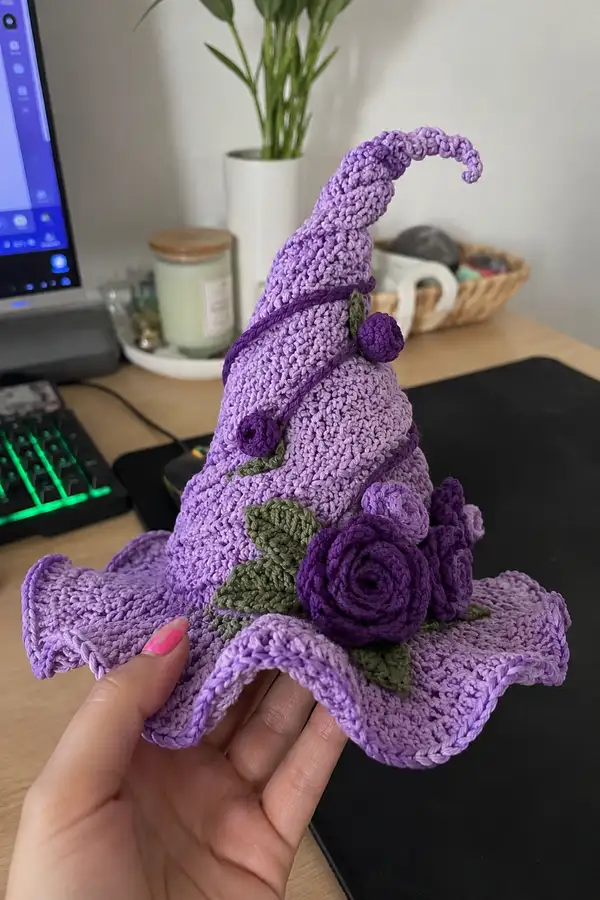
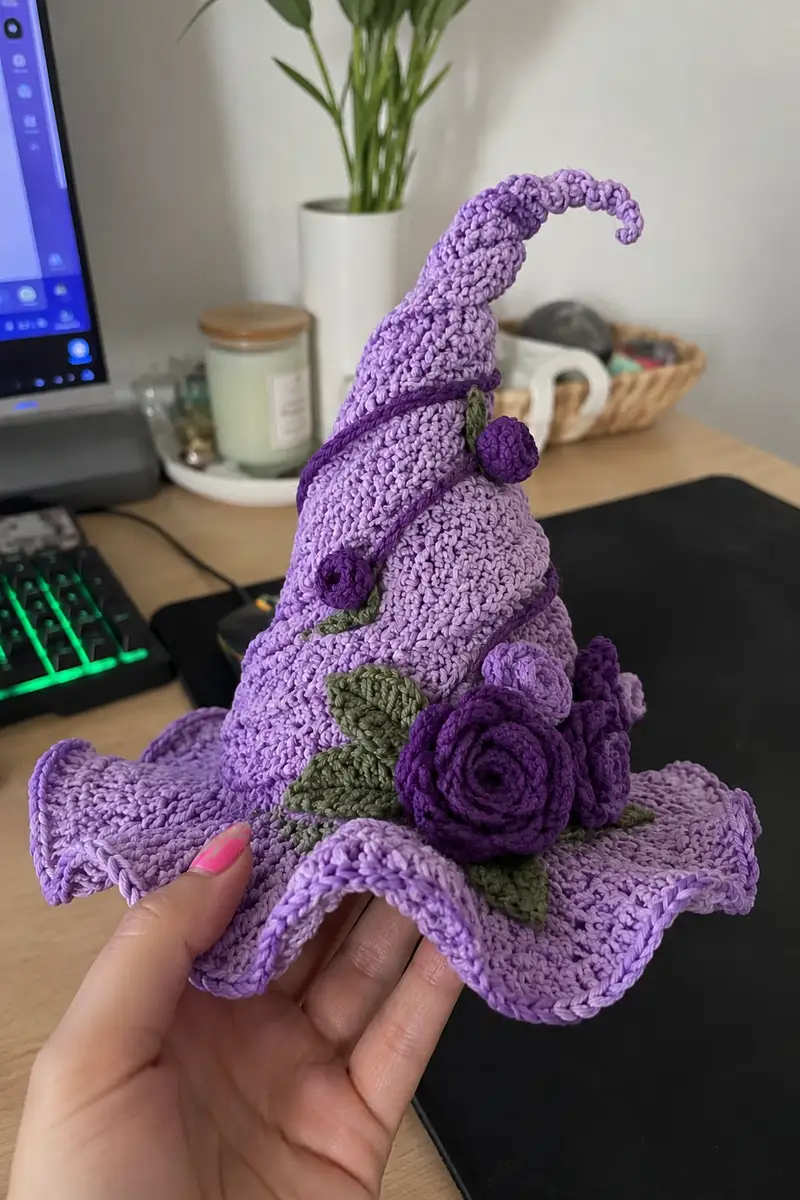
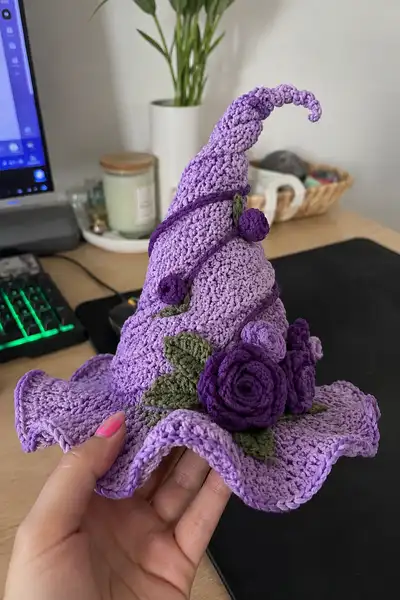
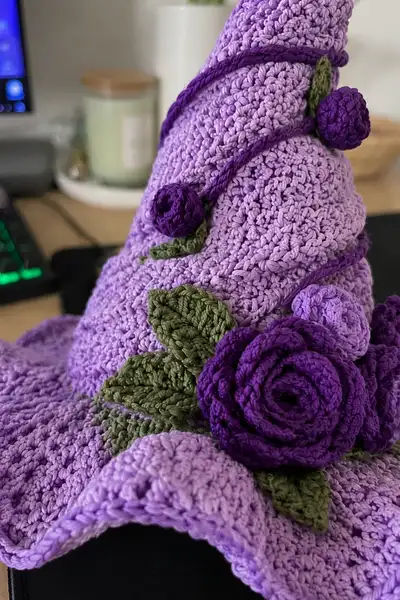
A whimsical lavender witch hat featuring a tall, twisted spiral crown, wide ruffled brim, and richly textured purple roses with olive-green leaves. This decorative accessory uses compact stitches and cotton-style yarn for a crisp, sculpted finish. The pattern includes step-by-step shaping, textured ridges, and separate tutorials for three rose sizes and multiple leaves to embellish the brim. Perfect for a display piece, costume accent, or charming shelf decor.
Progress Tracker
0% Complete
— Materials & Gauge :
Info :
Gauge is not critical for fit (this is a decorative hat), but for shape consistency: 16 sc x 18 rows = 4 inches in single crochet using 3.5mm hook and worsted cotton yarn. Work tightly to keep stuffing hidden.
— Crown (worked bottom-up from tip to base) :
Round 1 :
6 sc in magic ring (6)
Round 3 :
(1 sc, inc) x 6 (18)
Round 4 :
(2 sc, inc) x 6 (24)
Round 5 :
(3 sc, inc) x 6 (30)
Round 6 :
(4 sc, inc) x 6 (36)
Round 7 :
(5 sc, inc) x 6 (42)
Round 8 :
(6 sc, inc) x 6 (48)
Round 9 :
(7 sc, inc) x 6 (54)
Round 10 :
(8 sc, inc) x 6 (60)
Info :
At this point you have formed the base circumference for the crown (60 sts). If your yarn and hook produce a larger or smaller circumference, adjust the number of increase rounds to reach a comfortable base of approximately 55-65 sts for a medium-sized display hat.
Round 11-15 :
1 sc in each st around (60)
Info :
Begin stuffing very lightly through the top end now: use small amounts of fiberfill so tip stays narrow. You will add more stuffing later as the cone widens.
Round 16 :
1 sc in each st BLO (60)
Round 17 :
1 sc in each st FLO (60)
Round 18 :
1 sc in each st (60)
Info :
These alternating BLO/FLO rounds create subtle horizontal ridges that help the cone hold shape and provide an attractive textured look in the body of the crown.
Round 19 :
(7 sc, inc) x 6 (66)
Round 20 :
1 sc in each st (66)
Info :
If you prefer a slightly wider base for a dramatic brim, perform one or two increase rounds here. The pattern uses 66 sts at this stage for the ruffled brim to sit with fullness.
Round 21 :
1 sc in each st BLO (66)
Round 22 :
1 sc in each st FLO (66)
Round 23-28 :
1 sc in each st (66)
Info :
Continue stuffing gradually through rounds 23-28. Stuff more firmly toward the base of the cone but keep the top lighter so the hat looks natural when curls or top are added. Concentrate stuffing along the spiral area if you plan to sew the curled tip afterward.
Round 29 :
1 sc in each st BLO (66)
Round 30 :
1 sc in each st (66)
Info :
By round 30 the crown should measure approximately 12-14 cm (4.5-5.5 in) from tip to base depending on yarn and tension. If you'd like a taller crown, add additional even rounds before starting the brim. Keep track of round counts to match position for applique placement later.
— Brim (worked in the round to create wide ruffle) :
Info :
Attach main lavender yarn to any stitch of the base round (after round 30). The brim will be worked in continuous rounds; do not join between rounds for a smooth spiral ruffle. The following rounds create a ruffled effect by strategic increases and shell stitches.
Round 1 :
Sc evenly around into each st (66) — join with sl st if you prefer joined rounds, or continue in spiral
Round 2 :
(2 sc, inc) x 22 (88)
Round 3 :
1 sc in each st (88)
Round 4 :
(3 sc, inc) x 22 (110)
Info :
Increasing every few rounds causes the brim to flare. The numbers above yield a generous ruffle. If you prefer a subtler brim, perform fewer increase rounds or reduce repeats (e.g., (2 sc, inc) x 26 from 88 sts).
Round 5 :
1 sc in each st (110)
Round 6 :
Working shell ruffle: *skip 1 st, (2 dc, ch1, 2 dc) in next st, skip 1 st, sc in next 2 sts* repeat around — adjust last repeat to finish evenly (approx 110 sts/ shells)
Round 7 :
1 sc in each st (work into top of shells and sc spaces) — this evens out the shells and prepares the outer ruffle
Round 8 :
Outer ruffle round: (2 dc, ch2, 2 dc) in every shell space to create a pronounced wavy edge; if space is small, do (3 dc) in each shell peak. Fasten off and weave in ends.
Info :
Block the brim with water or steam and pin into gentle waves if you want the ruffles more pronounced and stable. Allow to dry fully before attaching decorations.
— Curled Tip Tube (optional internal wire) :
Info :
The visible curled tip in the photos is a narrow tube stitched in a spiral and then shaped around a thin length of floral wire or a pipe cleaner. Crocheting this tube separately allows you to pose the curl. Make one tube and sew it to the crown tip, or work it directly from the top if preferred.
Round 1 :
Ch 4, join into ring with sl st (or work 6 sc in mr) — if making tube from mr: 6 sc in mr (6)
Round 3 :
(1 sc, inc) x 6 (18)
Round 4-6 :
1 sc in each st (18)
Round 7 :
(2 sc, dec) x 6 (12)
Round 8-14 :
1 sc in each st (12)
Info :
When the tube is long enough to create the visible curl (approx 10-14 cm depending on how tight you want the spiral), insert wired pipe cleaner or floral wire. Fold wire back on itself and wrap with a short length of yarn to prevent ends from poking. Stuff tube very lightly so it holds its cylindrical shape without looking overfilled.
Round 15 :
1 sc in each st BLO to create a defined ridge (12)
Round 16 :
Fasten off leaving long tail for sewing. Bend the wired tube into a spiral and sew the base of the tube to the tip of the crown (see Assembly section).
— Decorative Cord & Small Pom-Buds :
Info :
The twisted cord that wraps the crown in the photos is a tightly crocheted rope (i-cord style) made by working a long chain and then sc around it in the round, or by crocheting an extended chain and slip-stitching around while keeping tension. Two small pom-buds are made by crocheting tiny tight spheres. Make a long cord approx 60-80 cm to wrap decoratively.
Cord Round 1 :
Ch 70 (or desired length), join to form a long chain rope. Work 1 sc in each chain across for 2 rows to compress the chain into a thick rope, or use a 3-chain I-cord method: using 3 loops, sc around, then sl st to close and repeat to length.
Info :
Alternatively, braid three strands of yarn tightly and secure ends. For a cleaner crocheted rope, use sc around a chain and tighten each round to form a compact cord.
Bud (make 3 small buds) Round 1 :
6 sc in magic ring (6)
Bud Round 3 :
(1 sc, inc) x 6 (18)
Bud Round 4-5 :
1 sc in each st (18) — stuff lightly
Bud Info :
Fasten off leaving long tail and sew bud closed. Attach buds along cord and crown with whip stitch so they sit snugly in small clusters.
— Large Rolled Rose (make 1) :
Info :
Large rolled roses are made as a long strip worked in rows and then rolled to form a spiral rose. Use deep purple for the largest bloom. The length of the strip determines the fullness of the rose.
Row 1 :
Ch 40, sc in 2nd ch from hook and in each across (39)
Row 2 :
Ch1, turn, sc in each st across (39)
Row 3 :
Ch1, turn, (sc, hdc, dc) across to create a fluted edge; work pattern so the outer edge will form petals. (Work approximately 39 sts: count will vary by yarn and tension)
Row 4 :
Ch1, turn, repeat row 3 to accentuate the scalloped edge. Fasten off leaving a long tail for sewing.
Info :
Lay the strip flat with the more ruffled side facing up. Starting at one end, roll tightly to form the center, then continue to wrap the strip, securing with whip stitch through the base of the roll every 4-6 turns. Adjust tightness to create a natural rose look. Sew base securely to a small round felt disk or directly onto the crown for stability.
Alternative Spiral Rose (if you prefer rounds) Row 1 :
Ch 35, sl st to first ch to form long loop, ch1, sc in each around forming a coil base.
Row 2-6 :
Work multiple rows of sc and (hdc, dc) clusters along the outer edge, then roll into a spiral as above.
Info :
For an extremely full rose, extend the initial chain length or add extra scalloped rows. Secure the rolled rose with sturdy thread plus a few hidden stitches through the center to prevent unrolling.
— Medium Rose (make 1) :
Row 1 :
Ch 28, sc in 2nd ch from hook and across (27)
Row 2 :
Ch1, turn, sc across (27)
Row 3 :
Ch1, turn, *(sc, hdc, dc) in next 3 sts* repeat to end to create petals
Row 4 :
Repeat row 3 and fasten off leaving long tail. Roll and sew as described for large rose (tighter, fewer wraps)
Info :
Position the medium rose slightly overlapping the large bloom and the brims edge. Pin before sewing to test placement and balance.
— Small Rosebuds (make 2-3) :
Row 1 :
Ch 16, sc in 2nd ch and across (15)
Row 2 :
Ch1, turn, sc across (15)
Row 3 :
Ch1, turn, (sc, hdc, dc) across to create small petal edge
Row 4 :
Fasten off leaving long tail. Roll tightly and sew closed to form buds. Make 2-3 buds to scatter around the main cluster.
Info :
Use contrasting lighter purple for one bud to create depth and variation among blooms.
— Leaves (make 6-8) :
Leaf Round 1 :
Ch 10, sc in 2nd ch from hook, hdc in next, dc in next 3, hdc in next, sc in next, sl st in last ch to form a pointed tip. Turn to work on opposite side: sc in next st, hdc in next, dc in next 3, hdc in next, sc in last, sl st to join at base. Fasten off. (About 18-20 sts total)
Leaf Round 2 :
If a larger leaf is desired, after forming the initial leaf, work a round of sc around the entire leaf (including tip) to thicken and provide structure.
Info :
Stiffen leaves by tacking a small amount of craft glue to the underside if needed, or block by pinning flat until dry. Use olive green yarn for natural contrast against lavender.
— Assembly Prep :
Info :
Before sewing any appliques, pin the large rose cluster where you want it on the base of the crown (about 2-3 cm above the brim edge on the front-left quadrant as shown in photos). Arrange the medium rose, small rose(s), and leaves to achieve a balanced cluster. Wrap the cord around the crown once or twice and arrange buds along the cord. Photograph your pinned arrangement for reference if you plan to make multiple hats.
Info :
Use a blunt yarn needle and matching thread or yarn to sew appliques. Sew through the base center of each rolled rose into the hat body using small backstitches; weave ends through several stitches and knot on the inside to secure.
— Sewing & Final Steps :
Info :
Sew the wired curled tip to the topmost round of the crown: position the tube so that its base overlaps about 1.5 cm with the top stitches of the crown. Fold a small section of stitches under and sew into place firmly. Sew additional stitches through the crown and tube base in a circular fashion for added security.
Info :
After sewing roses and leaves, stitch the cord in place at one or two anchor points to stop slippage. For a cleaner finish, tuck and sew cord tails into the inside of the crown and weave the ends into the fabric.
Info :
Trim any visible loose ends. Optional: a tiny dab of fabric glue on the inside of sewn appliques will help hold them permanently in place. If the brim needs further shaping, block gently with steam and pin to desired waves, then let cool and dry.
Info :
Final check: ensure no raw wire ends are exposed; wrap any internal wires with masking tape or extra yarn before inserting. Store the hat on a headform or stuffed inside to maintain shape.
This pretty lavender spiral witch hat is a joyful blend of structure and floral charm — a project that rewards careful shaping with whimsical results. Each rolled rose and leaf adds a layer of personality, and the poseable curled tip invites playful display. Working this hat is a delightful mix of precision and creativity; enjoy the rhythm of tight stitches building into soft ruffles and layered blooms. 🧶🌸 Display proudly or gift to a friend who loves magical, handmade accents!