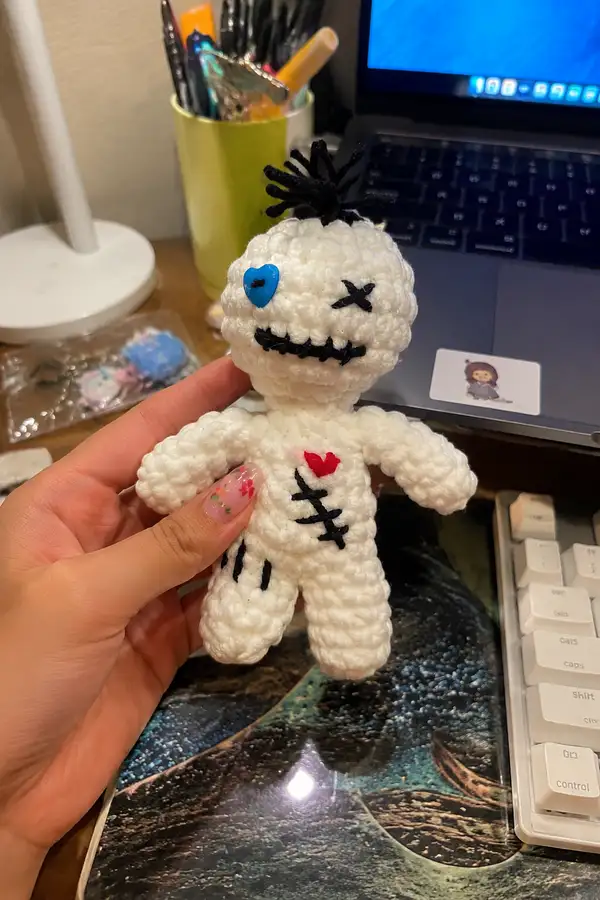
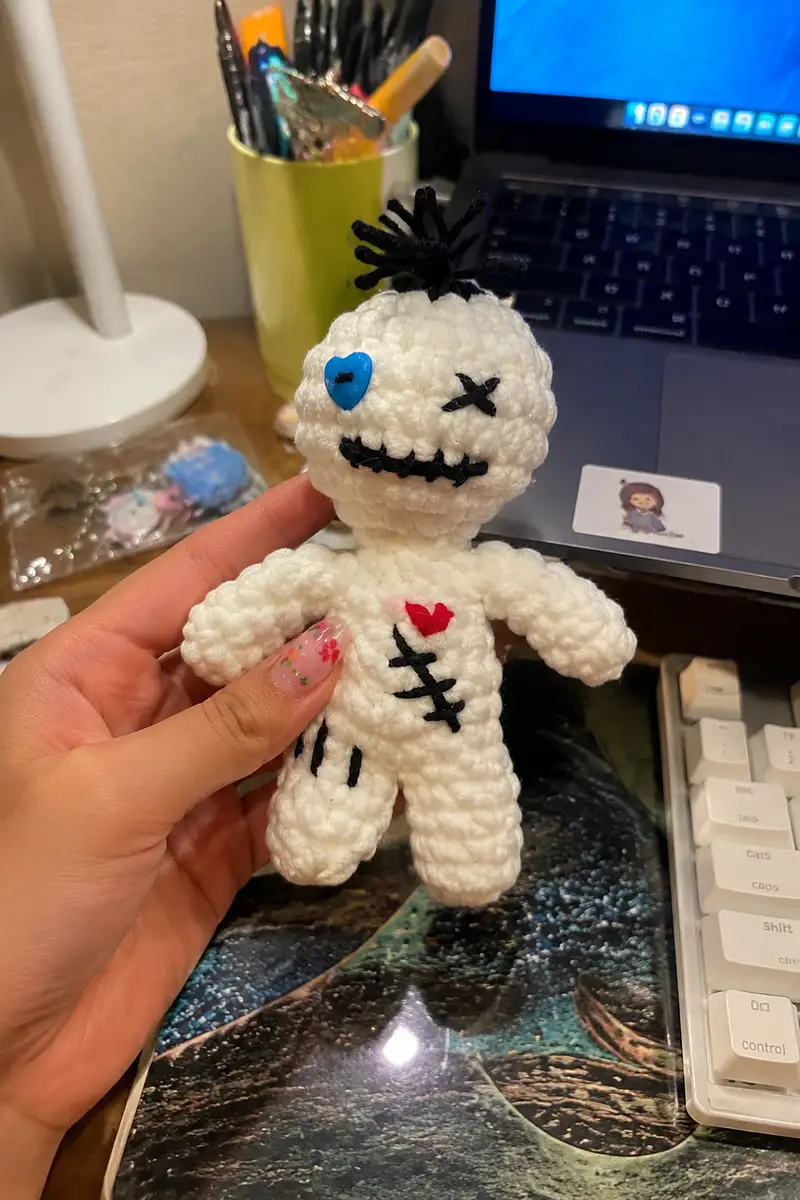
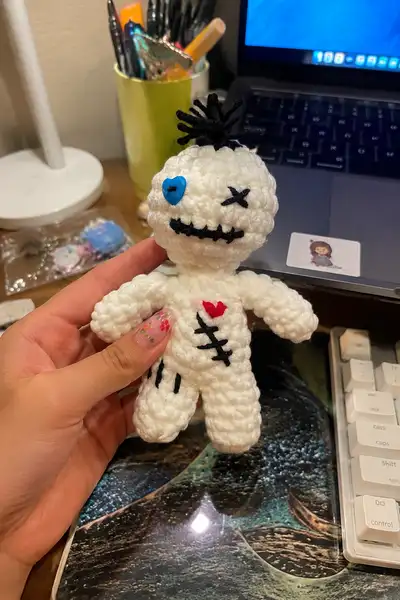
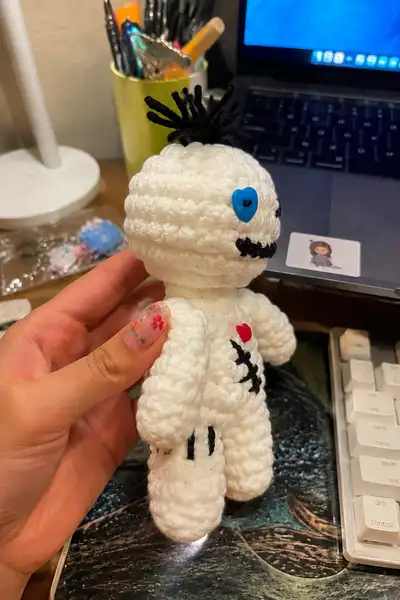
Create a spooky-cute voodoo doll amigurumi with soft ridged texture, stitched scars, a tiny red heart, a blue heart button eye and yarn tuft hair. This cuddly plush is worked in a chunky, plush yarn with embroidered black stitches and an adorable crooked mouth. Perfect for Halloween decorations, gift-giving, or a quirky shelf friend.
Progress Tracker
0% Complete
— Head :
Round 1 :
6 sc in magic ring (6)
Round 3 :
(1 sc, inc) x 6 (18)
Round 4 :
(2 sc, inc) x 6 (24)
Round 5 :
(3 sc, inc) x 6 (30)
Round 6 :
(4 sc, inc) x 6 (36)
Round 7 :
(5 sc, inc) x 6 (42)
Round 8 :
(6 sc, inc) x 6 (48)
Round 9-12 :
1 sc in each st (48)
Info :
These rounds build the top of the head. Work tightly enough that stuffing will not show through. Keep stitch marker in first stitch of every round and move marker up as you work.
Round 13-15 :
1 sc in each st (48)
Info :
Place safety eye or position button eye between rounds 13 and 14. For the blue heart button eye, insert the shank or sew through the two holes and secure on the inside. Place eye approximately 6-8 stitches left of center depending on how skewed you want the expression.
Round 16-18 :
1 sc in each st (48)
Info :
If using a button eye, sew it now with a short length of black yarn to create a visible black stitch through the button. If you prefer embroidered eyes, wait until head stuffing is complete and embroider an X or button eye later.
Round 19 :
(6 sc, dec) x 6 (42)
Round 20 :
(5 sc, dec) x 6 (36)
Info :
Begin stuffing the head firmly but not overstuffed. Use small amounts of fiberfill and press evenly to smooth the surface. Focus stuffing at the crown and cheeks to maintain a round shape.
Round 21 :
(4 sc, dec) x 6 (30)
Round 22 :
(3 sc, dec) x 6 (24)
Round 23 :
(2 sc, dec) x 6 (18)
Round 24 :
(1 sc, dec) x 6 (12)
Info :
Stop decreasing when you reach 12 stitches. This creates a stable neck opening. Stuff head well now — you want the head to be soft but full enough that the features will sit nicely. Leave remaining stuffing to add as you attach to the body if needed.
Round 25-28 :
1 sc in each st (12) (work 4 rounds) creating a short neck tube (12)
Info :
These rounds form the neck tube for sewing to the body. If you prefer a slightly longer neck, add 1-2 extra rounds in 12 sc. Keep a long tail for sewing to the body and fasten off when ready.
Round 29 :
Optional: If your neck feels loose, work 1 round BLO 1 sc in each st (12) to create a ridge and slightly narrow the neck without changing stitch count (12)
Round 30 :
Fasten off leaving a long tail for sewing. Finish stuffing head and set aside pending assembly (12)
— Tuft / Hair :
Info :
The tuft is a cluster of short black yarn pieces tied in the crown. Use small lengths of black yarn (approx 8-12 pieces of 6-8cm each) and tie through top center of head. Alternatively create a small pom-pom or looped tuft for a thicker look.
Round 1 :
Cut 8-12 strands of black yarn, fold each in half and use a crochet hook to pull the folded loop through a top stitch, then pull ends through loop to knot. Repeat to make a clustered tuft.
Info :
Trim yarn ends to desired tuft length and fluff. Secure inside with a knot and weave ends inside the head to hide tails.
— Body :
Round 1 :
6 sc in magic ring (6)
Round 3 :
(1 sc, inc) x 6 (18)
Round 4 :
(2 sc, inc) x 6 (24)
Round 5 :
(3 sc, inc) x 6 (30)
Round 6-10 :
1 sc in each st (30)
Info :
These rounds form the chest area. If you want the tiny red heart on the chest as pictured, embroider or sew a small heart applique after completing rounds 8-10. This is also a good point to work any decorative ribbing or clothing lines using BLO or FLO.
Round 11 :
1 sc BLO in each st (30)
Round 12-15 :
1 sc in each st (30)
Info :
Begin positioning for arm placement. Use pins to mark sides of body at rounds 12-13 where arms will be sewn. Mark front center—the heart applique will be placed about 6-8 stitches left of center chest depending on preference.
Round 16 :
(4 sc, dec) x 6 (24)
Round 17-20 :
1 sc in each st (24)
Info :
Begin stuffing the body gradually. Stuff firmly around the chest region and more moderately in the lower torso so the doll will sit upright and the head attaches without sinking into the body.
Round 21 :
(3 sc, dec) x 6 (18)
Round 22 :
(2 sc, dec) x 6 (12)
Info :
At this point you should have a neck opening of 12 stitches that will accept the head. Pin the head to the body, aligning the neck edges and checking orientation before sewing. Do not sew yet; finish torso shaping below so you have the correct foot placement.
Round 23 :
1 sc in each st (12)
Round 24 :
1 sc in each st (12)
Round 25 :
(1 sc, inc) x 6 (18)
Round 26-28 :
1 sc in each st (18)
Round 29 :
(2 sc, inc) x 6 (24)
Round 30 :
Leave body open for leg attachment. Fasten off leaving long tail for sewing legs if attaching later. If you prefer to crochet legs directly onto the body, follow the leg joining instructions below instead of fastening off.
— Left Arm (Make 1) :
Round 1 :
6 sc in magic ring (6)
Round 3 :
(1 sc, inc) x 6 (18)
Round 4-6 :
1 sc in each st (18)
Info :
The arm shape in the photos is slightly tapered. These initial rounds form the hand base. Stuff fingers/hand area firmly for definition, leaving the open end unstuffed a little to attach to the body more easily.
Round 7 :
(4 sc, dec) x 3 (15)
Round 8-11 :
1 sc in each st (15)
Round 12 :
(3 sc, dec) x 3 (12)
Round 13-16 :
1 sc in each st (12)
Round 17 :
(2 sc, dec) x 3 (9)
Round 18 :
1 sc in each st (9)
Info :
Stuff arm lightly from the open end, more firmly toward the hand. If adding wire for poseable limbs, slip the wire into the arm now, then stuff around it. Leave a long tail for sewing. Repeat for second arm.
— Right Arm (Make 1) :
Round 1 :
6 sc in magic ring (6)
Round 3 :
(1 sc, inc) x 6 (18)
Round 4-6 :
1 sc in each st (18)
Round 7 :
(4 sc, dec) x 3 (15)
Round 8-11 :
1 sc in each st (15)
Round 12 :
(3 sc, dec) x 3 (12)
Round 13-16 :
1 sc in each st (12)
Round 17 :
(2 sc, dec) x 3 (9)
Round 18 :
1 sc in each st (9)
Info :
Finish stuffing and leave long tail for sewing. Make sure left and right arms are congruent in length and stuffing. Pin in position at body rounds 12-13 before sewing to ensure symmetry.
— Left Leg (Make 1) :
Round 1 :
6 sc in magic ring (6)
Round 3 :
(1 sc, inc) x 6 (18)
Round 4 :
(2 sc, inc) x 6 (24)
Round 5-8 :
1 sc in each st (24)
Info :
The legs in the photos are fairly chunky and equal in thickness to the body base. These rounds form the foot and lower leg. Stuff the foot area quite firmly to make it stable for standing or sitting.
Round 9 :
(3 sc, dec) x 6 (18)
Round 10-14 :
1 sc in each st (18)
Round 15 :
(2 sc, dec) x 6 (12)
Round 16-18 :
1 sc in each st (12)
Round 19 :
(1 sc, dec) x 4, 4 sc (8) (This adjusts the top of leg for sewing snugly to the body)
Round 20 :
Fasten off leaving long tail for sewing. Stuff firmly. Repeat for right leg.
Info :
When attaching legs to body, spread them approx 6-8 stitches apart on the lower body round (round 25-29 area) to mimic the stuffed doll proportions shown. Sew securely with many passes for stability.
— Right Leg (Make 1) :
Round 1 :
6 sc in magic ring (6)
Round 3 :
(1 sc, inc) x 6 (18)
Round 4 :
(2 sc, inc) x 6 (24)
Round 5-8 :
1 sc in each st (24)
Round 9 :
(3 sc, dec) x 6 (18)
Round 10-14 :
1 sc in each st (18)
Round 15 :
(2 sc, dec) x 6 (12)
Round 16-18 :
1 sc in each st (12)
Round 19 :
(1 sc, dec) x 4, 4 sc (8)
Round 20 :
Fasten off leaving long tail for sewing. Stuff firmly.
— Small Red Heart Applique :
Info :
Make this tiny heart using red yarn scraps or a pre-made button applique. The heart is sewn to the chest about 3-4 stitches right or left of body center roughly between body rounds 8-10.
Round 1 :
With red yarn make a magic ring, 3 sc in ring (3)
Round 2 :
Inc in each st (6)
Round 3 :
1 sc in next 3 sts, sl st to next, ch 2, 2 dc in same st, sl st to next, ch 2, 2 dc in same st to form two small bumps, fasten off leaving tail to sew heart on (shape into heart and flatten when sewing) (approx 6-8 stitches total)
Info :
Sew the heart flat to the chest with secure stitches and weave in ends inside the body so it won’t come loose. Place it slightly off-center to mimic the handmade charm.
— Embroidered Stitches & Face Details :
Info :
Use black yarn and a yarn needle to embroider features. Work through single crochet v's on the surface to make visible stitches. Secure knots on the inside of the body or head and weave tails through for a neat finish.
Eye - Left (Button) :
Sew blue heart-shaped button onto head between rounds 13-14 with black yarn. Use two passes through the button and then drive the stitching into the head interior and knot securely. Trim ends and weave inside.
Eye - Right (Embroidered X) :
With black yarn, stitch an X eye by bringing yarn from inside the head to the outside, make a diagonal stitch approx 6-8mm across the face, bring yarn back inside, then repeat the opposite diagonal to form an X. Secure inside with a knot and weave tail in.
Mouth :
Using black yarn, stitch a crooked stitched smile across one row of the head between rounds 15-16. Make a small horizontal line of backstitch or blanket stitch approx 20-30 mm long with several vertical short stitches crossing it to mimic tacked stitches. Secure and weave tail inside.
Torso Stitches :
On the front of the body (rounds 12-18 area) embroider three or four vertical stitches to look like sewn-up seams. Begin with an anchor point inside the body, bring yarn out, take short vertical stitches (approx 4-6mm) and then insert back in. Repeat 2-3 times to make a stacked seam mark. Secure and weave ends in.
Leg Stitches :
On one leg, add 2-3 short black stitches on outer front to mimic the ragged stitched look in the photo. Use the same short backstitch method and keep stitches slightly uneven for character.
Info :
When embroidering, go slowly and test placement with pins first. Use small tacking stitches and slightly loose tension so stitches look like thread sewn through fabric, not too tight that they pucker the stitches.
— Assembly :
Info :
Block and shape pieces by gently stuffing and smoothing rounds with your fingers before sewing. Use pins to hold pieces in place and check symmetry from multiple angles.
Step 1 :
Attach head to body by inserting the neck portion into the body 12-st opening. Pin in place first, then sew securely using whip stitch or mattress stitch all around, ensuring even attachment. Use the long tail from the head for sewing.
Step 2 :
Position arms on sides of body around body rounds 12-13. Pin them with the hand slightly forward. Sew through both arm and body using a ladder stitch or whip stitch with multiple passes for strength.
Step 3 :
Attach legs to bottom of body at the larger base area (spread evenly about 6-8 stitches between legs). Sew each leg with many passes through body and leg top to secure. Add extra stitches through the base for stability if desired.
Step 4 :
Sew the small red heart applique to the chest about 3-4 stitches off center. Use tiny whip stitches around the edges and hide tail inside the body. Ensure the heart lies flat.
Step 5 :
Sew embroidered seams and mouth if not already done. Use matching or contrasting black yarn as shown in the photos. Work shallow stitches to keep them visible but not bulky.
Step 6 :
Secure tuft/hair at crown, weave in and trim any stray fibers. Tidy up and weave all tails into body and head. Add a dab of fabric glue under button if you want extra security (optional).
— Final Finishing Touches :
Info :
Shape the doll by distributing stuffing evenly, smoothing rounds with your palm, clipping stray fibers and trimming tuft to desired length. If making a gift, tuck in loose tails and add a small charm or tag.
Step :
Optional: Add subtle blush to cheeks using a tiny touch of pink pastel chalk or fabric-safe blush applied lightly with a cotton bud for a delicate finish. Avoid excess pigment as yarn can absorb dye.
This spooky-cute voodoo doll amigurumi is a charming mix of Halloween whimsy and cozy handmade character. Each carefully crafted stitch and embroidered scar adds personality and story, making it a delightful keepsake or gift. The plush bulky yarn makes it squishy and quick to crochet, while the tiny details — the blue heart eye, stitched X, tuft hair and red chest heart — give it a one-of-a-kind soul. 🧶🎃💖