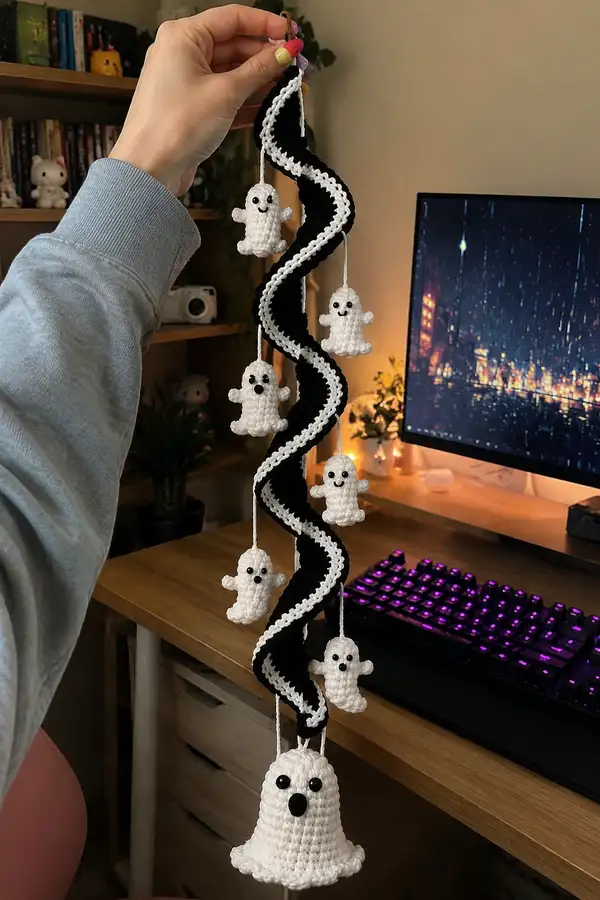
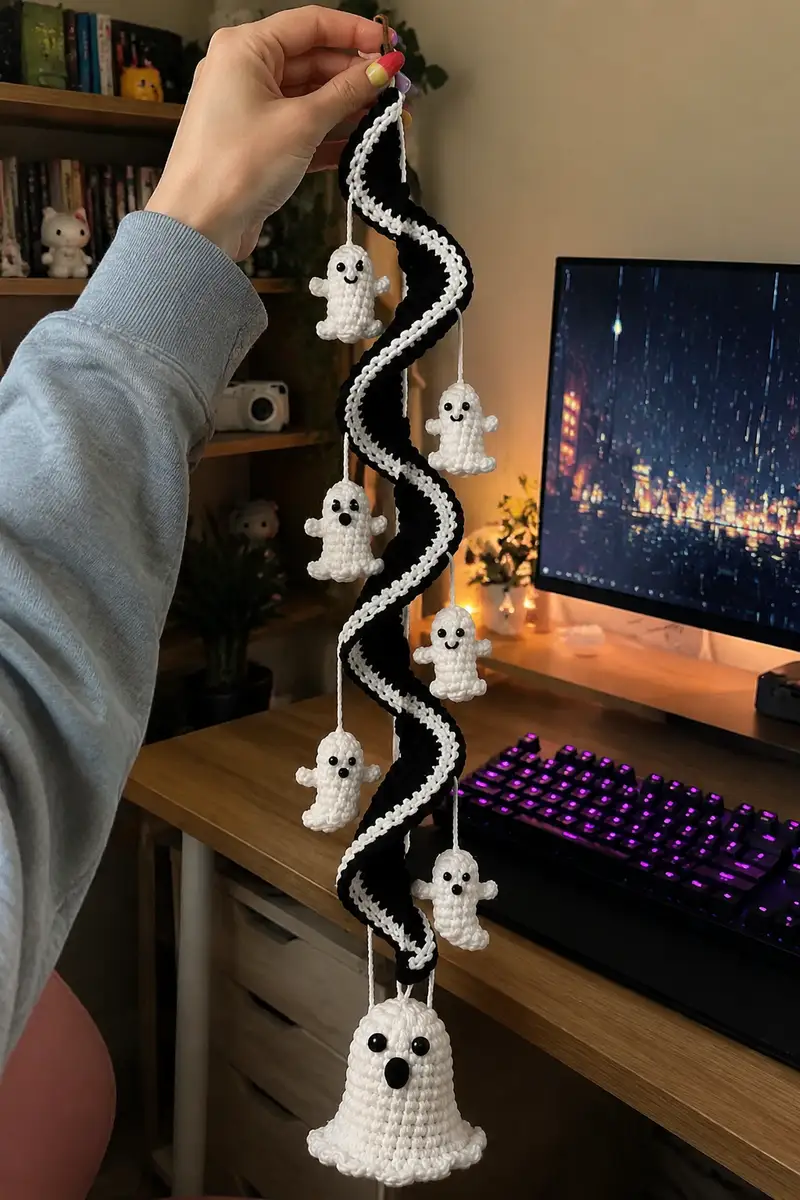
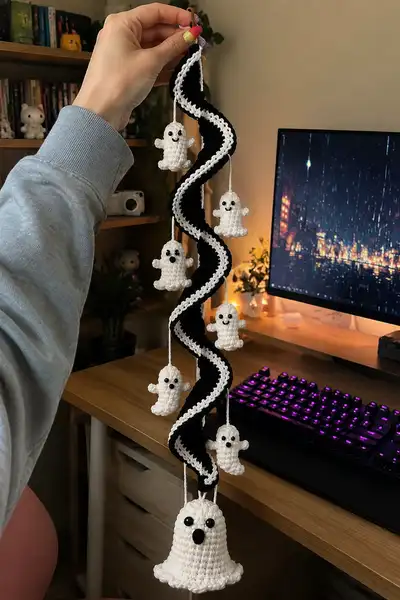
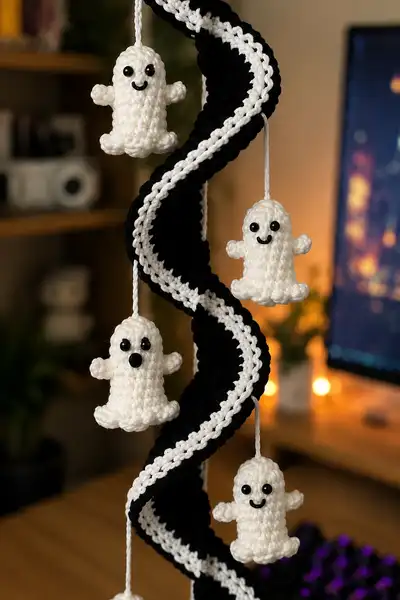
Create a dramatic hanging spiral garland of tiny smiling ghosts and a bell-shaped phantom for spooky hallway decor. This pattern features a long black spiral ribbon with contrasting white trim and six dangling mini ghosts plus a larger bell ghost at the base. The finished mobile is lightweight, portable, and perfect to hang in a doorway or hallway for Halloween ambiance.
Progress Tracker
0% Complete
— Spiral Core (Black Tube) :
Round 1 :
6 sc in magic ring (6)
Round 3 :
(1 sc, 1 inc) x 6 (18)
Round 4 :
(2 sc, 1 inc) x 6 (24)
Round 5 :
(3 sc, 1 inc) x 6 (30)
Round 6 :
(4 sc, 1 inc) x 6 (36)
Round 7 :
(5 sc, 1 inc) x 6 (42)
Round 8 :
(6 sc, 1 inc) x 6 (48)
Info :
This builds a stable tube circumference of 48 stitches. If you prefer a slightly thinner spiral, work Round 7 as (4 sc, 1 inc) x6 for 42 sts and proceed with that count. Mark the start of each round with a stitch marker and keep consistent tension to ensure an even tube.
Round 9-20 :
1 sc in each st (48)
Info :
These even rounds build height. Keep the tube straight by working in continuous rounds (do not join) and moving the marker up each round. The black spiral in the photo is relatively firm; a slightly smaller hook than yarn recommends helps it hold its shape.
Round 21-40 :
1 sc in each st (48)
Info :
Continue building length — the total number of rounds you work here controls how long your spiral will be. For a hallway-length spiral like the sample, we will continue building to approximately 120 rounds. If you prefer a shorter garland, stop earlier but maintain symmetry for ghost placement.
Round 41-80 :
1 sc in each st (48)
Info :
At this stage the tube is long. Every 8-10 rounds, run your fingers down the length and smooth any twisted sections. If you notice a visible twist that you didn't intend, you can untwist by reversing the tube direction gently and re-smoothing.
Round 81-110 :
1 sc in each st (48)
Round 111-120 :
1 sc in each st (48)
Info :
Work until you reach the desired hanging length; the sample pictured is approximately 110-120 rounds after the increase rounds, producing a long, flexible tube about 2-3 feet long depending on your yarn and tension. Finish the tube by fastening off leaving a long tail (approx 30-40cm) for assembly and sewing.
Round 121 :
FO leaving a long tail. We will use this tail to close and to attach at the top where we will add a hanging loop.
Info :
Optional: Leave the last 8-12 rounds unstuffed if you want the spiral to be compressible where it attaches to a top ring. We do not stuff the tube; it functions as a structural ribbon. If you want extra weight for a soft drape, insert a strip of lightweight batting inside before finishing.
— Decorative Edge & White Center Line :
Info :
To achieve the striking white outline seen in the photo, we will add two parallel surface slip stitch lines (one along each long edge) and a small picot/scallop row to emphasize contrast. Work these after the black tube is complete.
Round 1 (Edge Line A) :
Join white yarn at one end of the tube on the outside edge. Working along the outer loops of the side stitches of each round, sl st into each round end stitch approximately every 1-2 rows so the white line lies smooth; aim for approximately 48 sl sts per pass (48)
Round 2 (Edge Line A) :
Continue a second pass of sl st into the same side loops to build a thicker line (48)
Info :
Surface slip stitches are worked by inserting the hook under the side loops of each round (the loop formed by the row ends), pulling up a loop in white and finishing the sl st. Keep the tension slightly looser than the black tube to avoid cinching the tube inwards.
Round 3 (Edge Line B - opposite side) :
Turn the tube and repeat Round 1 on the opposite long edge, creating a second parallel white line (48)
Round 4 :
Work a scallop/picot decorative row along one or both of the white lines: *sc in next 3 side loops, (ch 2, sl st in 1st ch to create a tiny picot), sc in next 3* rep along length. If using many repeats, aim to maintain spacing so scallops sit evenly (approx 12-16 scallops per side depending on spacing)
Info :
For a crisper scallop, make the picots slightly smaller (ch1 sl st into first ch) or for a larger ruffle use (hdc, dc, hdc) clusters into the side loops. The photo shows a thin white ridge; use the smaller picot for a similar effect.
Round 5 :
Fasten off and weave in ends along the tube interior to avoid visible joins.
— Top Hanging Loop :
Round 1 :
At one end of the tube, use the long tail left from finishing the tube. Fold tail into a loop of desired hanging length (~8-10cm) and stitch the loop securely to the inside of the tube using mattress stitch across 8-10 sts. Reinforce with 3 passes (no numerical change in stitches)
Info :
You can also add a small metal keyring or an O-ring at the top for easier hanging and to provide a strong anchor for the spiral. Sew ring through the tube wall and over-stitch for security.
— Large Bell Ghost (Base) - Head :
Round 1 :
6 sc in magic ring (6)
Round 3 :
(1 sc, 1 inc) x 6 (18)
Round 4 :
(2 sc, 1 inc) x 6 (24)
Round 5 :
(3 sc, 1 inc) x 6 (30)
Round 6 :
(4 sc, 1 inc) x 6 (36)
Round 7 :
(5 sc, 1 inc) x 6 (42)
Round 8 :
1 sc in each st (42)
Round 9 :
1 sc in each st (42)
Info :
Place 10mm safety eyes between rounds 7 and 8, spaced approximately 10-12 stitches apart for a friendly bell-face. Embroider or attach a black felt or safety nose slightly below center if you want the surprised bell expression.
Round 10-15 :
1 sc in each st (42)
Info :
Begin stuffing the head firmly at round 12-13 so the face holds shape. The bell shape requires firmer stuffing at the top for lift and slightly less at the bottom to allow the scalloped fringe to sit neatly.
Round 16 :
(5 sc, 1 dec) x 6 (36)
Round 17 :
(4 sc, 1 dec) x 6 (30)
Round 18 :
(3 sc, 1 dec) x 6 (24)
Round 19 :
(2 sc, 1 dec) x 6 (18)
Round 20 :
(1 sc, 1 dec) x 6 (12)
Info :
Fasten off leaving a long tail for attaching the bell ghost to the bottom of the spiral. Finish stuffing and close the hole using the tail with an invisible finish. We will attach the bell to the tube with three evenly spaced strands sewn through the tube interior.
— Large Bell Ghost - Skirt (Scalloped Hem) :
Attach yarn :
Join white or use the same white used for trim to the last round perimeter where you want scallops. Join with sl st.
Round 1 :
*sc in next 2 sts, (ch 2, sl st in 1st ch) picot, sc in next 2* rep around to form tiny scallops. Work evenly to produce approximately 21-24 scallops depending on final stitch count.
Round 2 :
Optional additional scallop row: *sc in next 1, (hdc, dc, hdc) in next st, sc in next 1* rep around for a more pronounced ruffle.
Info :
Use a smaller hook (one size down) for the scalloped edge to make the ruffle crisp. If you plan to hang bells or beads, sew them inside the bell center before finishing for a gentle jingle.
— Large Bell Ghost - Attachment Strands :
Strand 1 :
Cut a 25cm length of white yarn, fold into a loop and use the long tail from the bell to sew the loop into the top interior of the bell head. Fasten securely. Repeat twice more at evenly spaced points around the top (3 attachment points total).
Info :
Sew these three strands through the bottom center of the spiral tube and knot securely inside the tube so the bell hangs centered. Pin the bell to the spiral while positioning to check balance before final stitching.
— Small Ghost (Make 6) - Body/Head :
Round 1 :
6 sc in magic ring (6)
Round 3 :
(1 sc, 1 inc) x 6 (18)
Round 4 :
(2 sc, 1 inc) x 6 (24)
Round 5-8 :
1 sc in each st (24)
Info :
The small ghosts are short cylindrical shapes with a ruffled base. Place 6mm safety eyes between rounds 6-7 approx 6-8 sts apart depending on expression. Embroider a smile with black yarn or use small crochet slip-stitch for a grin.
Round 9 :
(3 sc, 1 dec) x 4 (20)
Round 10 :
(2 sc, 1 dec) x 4 (16)
Round 11 :
1 sc in each st (16)
Round 12 :
(1 sc, 1 dec) x 5, 1 sc (11)
Round 13 :
Start base ruffle: *sc in next st, (ch 2, sl st in 1st ch) picot, sc in next st* repeat around to create tiny scallops (approx 6-8 scallops)
Info :
Stuff the ghost lightly before final decrease so it is soft but not lumpy. The little arms will be stitched onto the sides after the scalloped base is completed.
Round 14 :
Fasten off leaving a long tail for attaching to hanging cord. Weave tail through the top to create a small hanging loop or knot the cord to hang the ghost from the spiral.
— Small Ghost - Arms (Make 12 total, 2 per ghost) :
Round 1 :
4 sc in magic ring (4)
Round 2 :
1 sc in each st (4)
Round 3 :
(1 sc, 1 inc) x 2 (6)
Round 4-6 :
1 sc in each st (6)
Round 7 :
Shape little hand: (sc, dec, sc) across to form tiny cup (4)
Info :
Fasten off leaving a long tail and use tail to sew arms to rounds 6-8 of the small ghost body, positioning them slightly below the eyes for a cute waving pose. Use stuffing sparingly in arms to keep them flexible and small.
— Hanging Cord for Small Ghosts :
Step 1 :
Cut a 20-25cm length of white yarn for each small ghost. Fold in half and knot at the end to create a loop for hanging, or leave two loose tails to stitch to the top of each ghost head.
Info :
In the sample there are 6 small ghosts spaced evenly along the spiral. Mark approximate positions on the tube using pins and tack each hanging cord to the inside of the tube using small secure stitches so ghosts hang at different depths to create a layered look.
— Assembling Small Ghosts to the Spiral :
Step 1 :
Decide on a layout: the sample places ghosts staggered along the S-shape so they do not overlap. Mark locations by holding the spiral in the hanging position and pinning the cords through the interior of the tube to the white inner line area.
Step 2 :
Sew each cord to the inside of the tube using mattress stitch across 6-8 stitches, then reinforce with 2-3 additional passes of running stitch. Knot and weave ends inside to hide them.
Info :
To prevent cords from slipping, tie a small overhand knot on the interior of the tube before final sewing and cover with a couple of whip stitches. If using a metal ring at the top, run some cords through the ring as well to better distribute weight.
— Creating the S-Shape Spiral :
Step 1 :
Lay the finished tube flat and gently twist it into an S-shape by looping it around your hand or a cylindrical object of about 5-8cm diameter at alternating points along its length. The decorative white lines will naturally show on the outer edges of each curve.
Step 2 :
Pin the spiral into the desired shape on a foam board or towel, using rustproof pins placed through the tube interior where the interior seam would be (not through the visible edges). Arrange the large bell ghost at the bottom center and small ghosts staggered along curves.
Step 3 :
Sew tacking stitches through the tube layers at each curve apex to maintain the S-shape. Use long mattress stitches that grab several rounds of the tube; do not pull too tightly to preserve the roundness of the tube (no numerical change).
Info :
If you prefer a permanent shape, run a thin strand of wire through the tube interior before closing the ends, anchoring the wire at both ends with back stitches. The sample was left soft with tacking stitches only, which keeps the piece lightweight for hallway hanging.
— Finishing Touches (Faces and Details) :
Eye Placement :
Small ghosts: position 6mm safety eyes between rounds 6-7 and secure with washers. Large bell ghost: 10mm eyes between rounds 7-8. Ensure eyes are symmetric and firmly locked. Approximate spacing: small ghosts 6-8 stitches apart; large ghost about 10-12 stitches apart.
Mouth Embroidery :
Using black yarn and a yarn needle, embroider small smiles using chain stitches or satin stitch. For the bell surprised mouth, embroider a small oval and stuff a small felt circle inside for added contrast if desired.
Info :
Safety eyes should be secured before stuffing. If you are making this for young children, embroider all facial features instead of using plastic eyes to avoid choking hazards.
— Extra Decorative Options :
Option 1 :
Add tiny black felt noses or use small pony beads sewn on for a 3D effect. Option 2: add glow-in-the-dark yarn accents to the white trim for subtle night-time shimmer. Option 3: sew small bells or beads inside the large ghost for a chime effect when the garland moves.
Info :
When adding hardware or beads, make sure they are secured and placed inside seams so they cannot be pulled off during normal handling. Reinforce with extra stitching and, if desired, a small dab of fabric glue on the knot for non-child items.
This spooky spiral garland is a delightful combination of small amigurumi ghosts and bold sculptural crochet. The black tube and crisp white trim make a graphic statement, while the tiny smiling ghosts lend charm and playfulness. Hang it in a hallway for a whimsical trick-or-treat ready display or use it as a memorable seasonal gift. ✨👻🧶