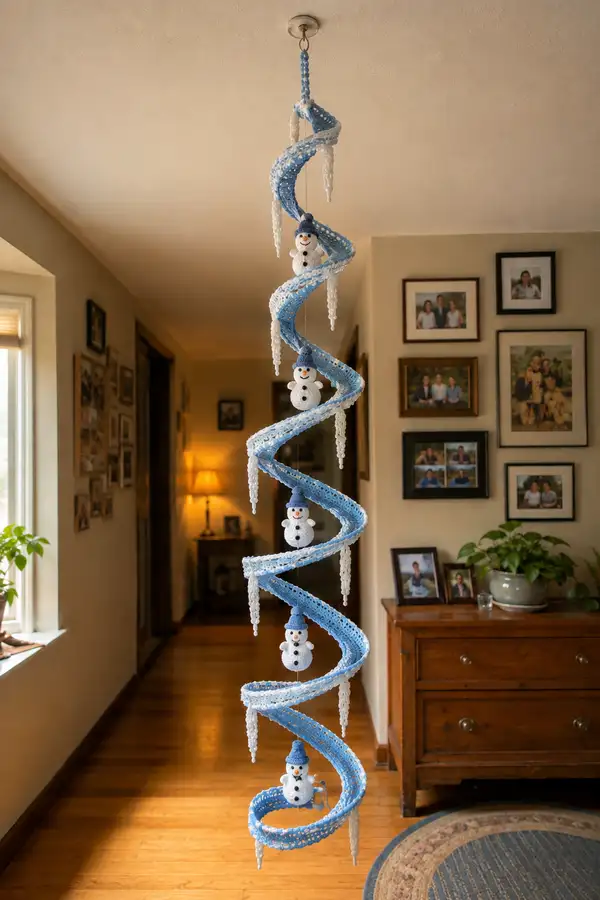
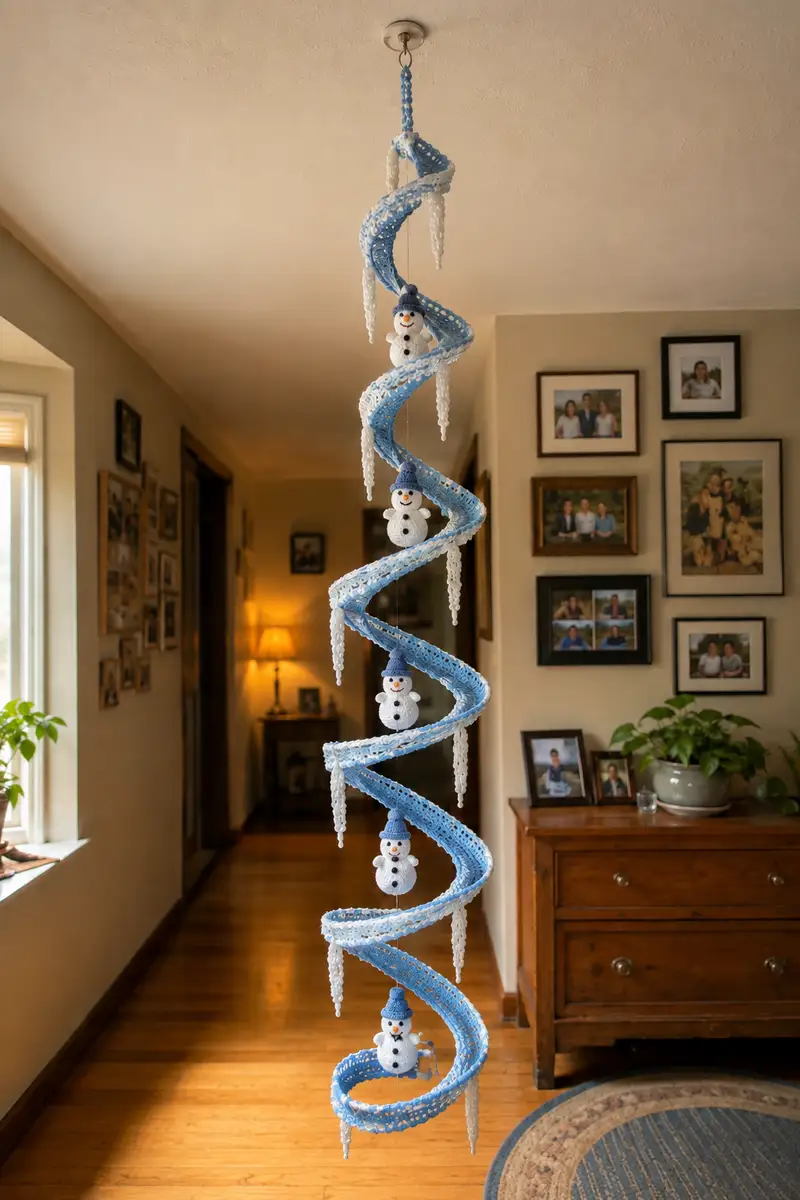
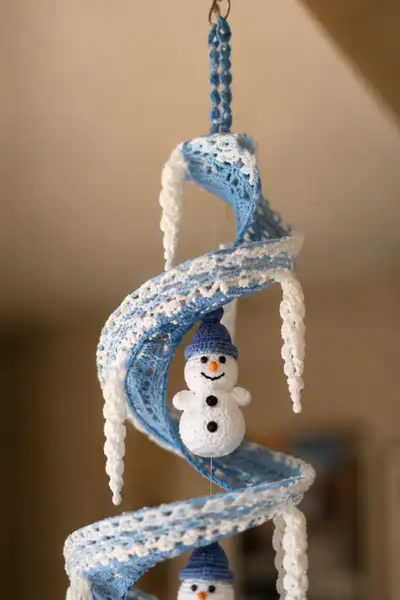
Create a whimsical hanging spiral garland filled with tiny amigurumi snowmen, icicle drops and lacy edges in soft icy blues and bright white. This pattern includes step-by-step construction for crocheting the spiral ribbon, the little snowmen with hats and button details, and elongated icicle drops — everything you need to assemble a dreamy winter mobile. Perfect for holiday decor, porches, or a winter-themed room accent.
Progress Tracker
0% Complete
— Materials & Gauge :
Info :
Gauge is not critical for this decorative piece, but for amigurumi parts work tightly: 18 sc rows x 20 rounds = approx 6 cm using 3.5mm hook with DK yarn. Make a small swatch if you want precise sizing.
— Snowman Head (Make 4) :
Round 1 :
6 sc in magic ring (6)
Round 3 :
(1 sc, inc) x 6 (18)
Round 4 :
(2 sc, inc) x 6 (24)
Round 5 :
(3 sc, inc) x 6 (30)
Round 6 :
(4 sc, inc) x 6 (36)
Round 7 :
(5 sc, inc) x 6 (42)
Round 8 :
(6 sc, inc) x 6 (48)
Round 9-20 :
1 sc in each st (48)
Info :
Place safety eyes between rounds 14-15, approximately 6-8 stitches apart for the expression shown. If using safety eyes, insert washers now before stuffing. If embroidering, leave this step until after stuffing for better control.
Round 21 :
(6 sc, dec) x 6 (42)
Round 22 :
(5 sc, dec) x 6 (36)
Info :
Begin stuffing the head firmly but not rock-hard. Use small pieces of fiberfill to avoid lumps and distribute evenly using your yarn needle.
Round 23 :
(4 sc, dec) x 6 (30)
Round 24 :
(3 sc, dec) x 6 (24)
Round 25 :
(2 sc, dec) x 6 (18)
Round 26 :
(1 sc, dec) x 6 (12)
Round 27 :
1 sc in each st (12)
Round 28 :
1 sc in each st (12)
Round 29 :
(1 sc, dec) x 4 (8)
Info :
Finish stuffing to desired firmness. Fasten off leaving a long tail for sewing the head to the body (do not close this small opening entirely; instead leave tail for assembly so you can sew tightly to the body later).
— Snowman Body (Make 4) :
Round 1 :
6 sc in magic ring (6)
Round 3 :
(1 sc, inc) x 6 (18)
Round 4 :
(2 sc, inc) x 6 (24)
Round 5 :
(3 sc, inc) x 6 (30)
Round 6 :
(4 sc, inc) x 6 (36)
Round 7 :
(5 sc, inc) x 6 (42)
Round 8 :
(6 sc, inc) x 6 (48)
Round 9 :
(7 sc, inc) x 6 (54)
Round 10-16 :
1 sc in each st (54)
Info :
Body acts as the lower snowball; stuff more firmly than the head so the snowman sits nicely. Use small pieces of fiberfill pushed into edges for a smooth round look.
Round 17 :
(8 sc, dec) x 6 (48)
Round 18 :
(7 sc, dec) x 6 (42)
Round 19 :
(6 sc, dec) x 6 (36)
Round 20 :
(5 sc, dec) x 6 (30)
Round 21 :
(4 sc, dec) x 6 (24)
Round 22 :
(3 sc, dec) x 6 (18)
Round 23 :
(2 sc, dec) x 6 (12)
Round 25 :
1 sc in each st (6)
Round 26 :
1 sc in each st (6)
Round 27 :
Fasten off leaving long tail for sewing to the head and for attaching to the spiral suspension line
Info :
Sew the head to the body by using the long tail from the head and the tail from the body to create a secure join. We recommend a round of whip stitch around the joined edge and then weave the tails through remaining stitches for security.
— Snowman Arms (Make 8 - two per snowman) :
Round 1 :
6 sc in magic ring (6)
Round 3 :
(1 sc, inc) x 6 (18)
Round 4-6 :
1 sc in each st (18)
Info :
These arms are tiny stubby rounds visible near the sides of the snowman midline. Stuff lightly for a soft look. You can flatten and sew them slightly to create a mitten shape if you prefer.
Round 7 :
(4 sc, dec) x 3 (15)
Round 8 :
1 sc in each st (15)
Round 9 :
(1 sc, dec) x 5 (10)
Round 10-12 :
1 sc in each st (10)
Round 13 :
(1 sc, inc) x 5 (15)
Round 14-16 :
1 sc in each st (15)
Info :
Fasten off leaving long tail for sewing. Position arms at the neck seam where head and body join; sew through head and body for stability using extra passes to make sure arms stay in place when the garland is moved.
— Snowman Hat (Make 4) :
Info :
Hat is worked in dark blue. It will be slightly cone-shaped then folded at the brim and sewn to the head top.
Round 1 :
6 sc in magic ring (6)
Round 3 :
(1 sc, inc) x 6 (18)
Round 4 :
(2 sc, inc) x 6 (24)
Round 5-6 :
1 sc in each st (24)
Round 7 :
1 sc in each st BLO (24)
Round 8 :
(2 sc, dec) x 6 (18)
Round 9 :
(1 sc, dec) x 6 (12)
Info :
Fasten off leaving a long tail. Fold the brim (the BLO round forms a neat folded brim) and sew the folded edge to secure. Sew the hat to the top center of the snowman head in a slightly tilted position for a playful look.
— Snowman Details (Face & Buttons) :
Info :
Use small black beads or embroidered stitches for eyes and buttons. Use orange yarn or French knot embroidery for the tiny carrot nose. Embroider smile with black yarn. Attach two or three black buttons (sew or glue) centered on the body front.
— Icicle Drops (Make 8-10) :
Info :
Icicles hang from the spiral edges. Work them in white yarn and create a tapered cone with small picot or bead at the tip for a drippy look. Make several of varying lengths for visual interest.
Round 1 :
6 sc in magic ring (6)
Round 3 :
(1 sc, inc) x 6 (18)
Round 4 :
1 sc in each st (18)
Round 5 :
(2 sc, dec) x 3 (12)
Round 6 :
(1 sc, dec) x 4 (8)
Round 8 :
1 sc in each st (4)
Round 9 :
Fasten off leaving long tail. Optional: add a picot tip: ch 3, sl st in first ch to create little drip and weave tail through bottom. Variate sizes by stopping earlier or working extra rounds at top before tapering.
— Spiral Ribbon (Main Decorative Strip) :
Info :
This spiral is a long flat lace strip worked in rows. The base strip is light blue. Final white edging and icicles are joined during assembly or crocheted and sewn. For structure we insert a thin flexible wire along the center length before blocking. The strip is about 160-200 cm long for a 6-7 loop spiral, but adjust length to fit your ceiling height and desired number of coils.
Round 1 :
Foundation chain: ch 37 (or any multiple of 6 + 1 for the shell repeat), turn, sc in 2nd ch from hook and each across (36 sc)
Round 2 :
ch 3 (counts as dc), *skip next st, shell in next st: (2 dc, ch 2, 2 dc) in same st, skip next st, dc in next 2 sts* rep across to last st, dc in final st (36 sts across, shells spaced evenly)
Round 3 :
ch 1, sc across each stitch and across the ch-2 spaces of shells to maintain 36 sc counts (36)
Round 4 :
Repeat Round 2 to build a repeating shell motif; shells will align vertically. Work in light blue (36 visible motif repeats across width)
Round 5 :
ch 1, sc in each st (36) - this forms the steady backbone for shaping
Info :
Work the first 6 rounds as a motif and repeat this 6-row motif to create the full length. Keep track of rows and change color as desired for a faint stripe: for every 8 rows change to white for the open-edge effect, or work the main body fully in light blue and add a white lace border later.
Round 6 :
ch 3, shell repeat across as Round 2 (36)
Rounds 7-60 :
Repeat Rounds 3-6 in sequence, building the length of the strip. Maintain 36-stitch width; after every 8-12 rows you can change to white for a short row to create a white stripe effect along the ridge that will become the spiral edge. Continue until the strip reaches desired length (approx 160-200cm for 6 loops). Count rows as you work to achieve symmetry (target 60 rows for a medium-length spiral).
Info :
To make a neat edge for sewing icicles and for a crisp spiral, when you have completed the strip join a 1-2 row white lace border along both long edges. With white yarn, work single crochet edge then a scallop edge: *skip 2, 5 dc in next, skip 2, sl st* across. This will create the white scalloped icicle-ready trim.
Round 61 :
Switch to white yarn. Attach at one edge and sc evenly around the long side edge to create a firm border (approx 36 sc along each end and 1 sc into each end stitch). Work across the long edge to match length.
Round 62 :
Scallop round for lace: *skip 2 sts, 5 dc in next st, skip 2 sts, sl st in next* across the edge. Repeat on the opposite edge to produce two scalloped white borders (even count maintained by spacing; adjust last repeat if needed to match ends).
Info :
Insert flexible wire along the center of the strip after blocking. To do this, weave the wire into a narrow tunnel formed by folding the strip lengthwise and whip-stitching a loose seam along the fold, leaving openings every 10-15 cm to ease the wire through. The wire should run nearly the entire length but leave about 3 cm free at each end to anchor to the top hanger and bottom coil. Secure wire ends with a dab of glue and wrap in leftover yarn for a neat finish.
Round 63-70 :
If you prefer a spiral with alternating interior and exterior color, sow a narrow white crocheted chain inside the shell openings every 10 rows before stitching edges closed. This step is optional and purely decorative.
Info :
Blocking: wet-block or lightly spray the strip and pin it straight to the desired width and length. Allow to dry. The blocking will help the scallops stay open and make it easier to form the uniform spiral.
— Hanging Loop & Top Chain :
Round 1 :
Make a short decorative chain in light blue: ch 18, sl st to form loop or join to a jump ring that will hang from the ceiling. Optionally work a row of crab stitch (reverse single crochet) around the chain to give it thickness and grip.
Info :
Attach the chain to a keyring or metal jump ring with a few wrap stitches of yarn to secure. This ring will anchor to a ceiling hook or screw eye.
— Assembly & Suspension :
Info :
Cut four lengths of monofilament fishing line to desired spacing (for example, 20cm, 50cm, 80cm, 110cm down from top). Fasten each snowman to the line by threading the monofilament through the top of the snowman (through the top of the hat and body) and knotting or using a dab of clear glue. Each snowman should be positioned to sit centrally inside each coil of the spiral.
Info :
Pin the spiral from the top ring, then gently curve it into a helix by bending the wire core. The scalloped edges will naturally form outward loops. Make 6-7 coils depending on your ceiling height. Secure the top wire tail to the hanger ring and anchor the bottom wire tail to a small weight or tie it into the final coil to maintain tension.
Info :
Sew icicles to the scalloped edge at even intervals using the long tails left when finishing icicles: space them between snowmen and at each coil bottom to achieve the look in the photo. Use pins to test placement before sewing. Trim threads and weave ends to the inside of the spiral to hide them.
Info :
To attach snowmen so they appear centered in each coil, tie monofilament from the top ring to the top of each snowman and adjust length so the snowman rests in the center of the coil when the spiral is hanging. A small dab of glue between the snowman back and the inside wall of the spiral helps keep them steady.
— Finishing Touches :
Info :
Embroider faces and sew on buttons; add a tiny pompom to each hat if desired. For extra sparkle apply a light dusting of glitter fabric glue to icicles and scalloped edges. Inspect all joins and reinforce any weak spots with extra sewing. Trim and weave in all ends thoroughly.
This icy spiral garland brings cozy, wintry charm to any room and is a joyful combination of delicate lacework and sweet amigurumi snowmen. Each loop becomes a tiny scene with snowmen floating among icicle drops — perfect for hanging in a doorway or by a window. I hope the process delights you as much as the finished spiral delights your guests. Happy stitching and enjoy your frosty creation! ☃️❄️