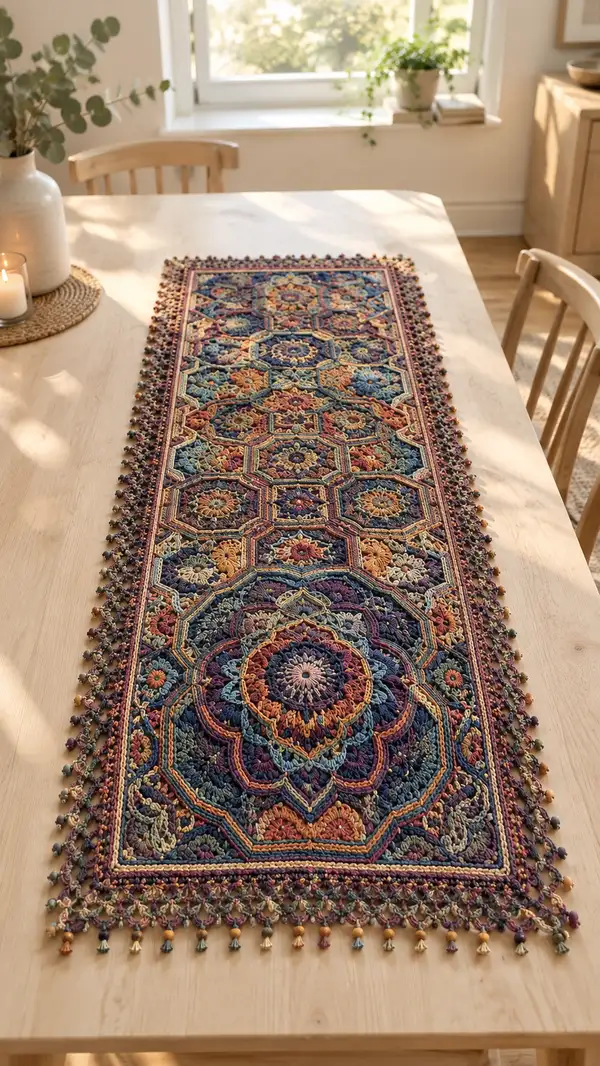
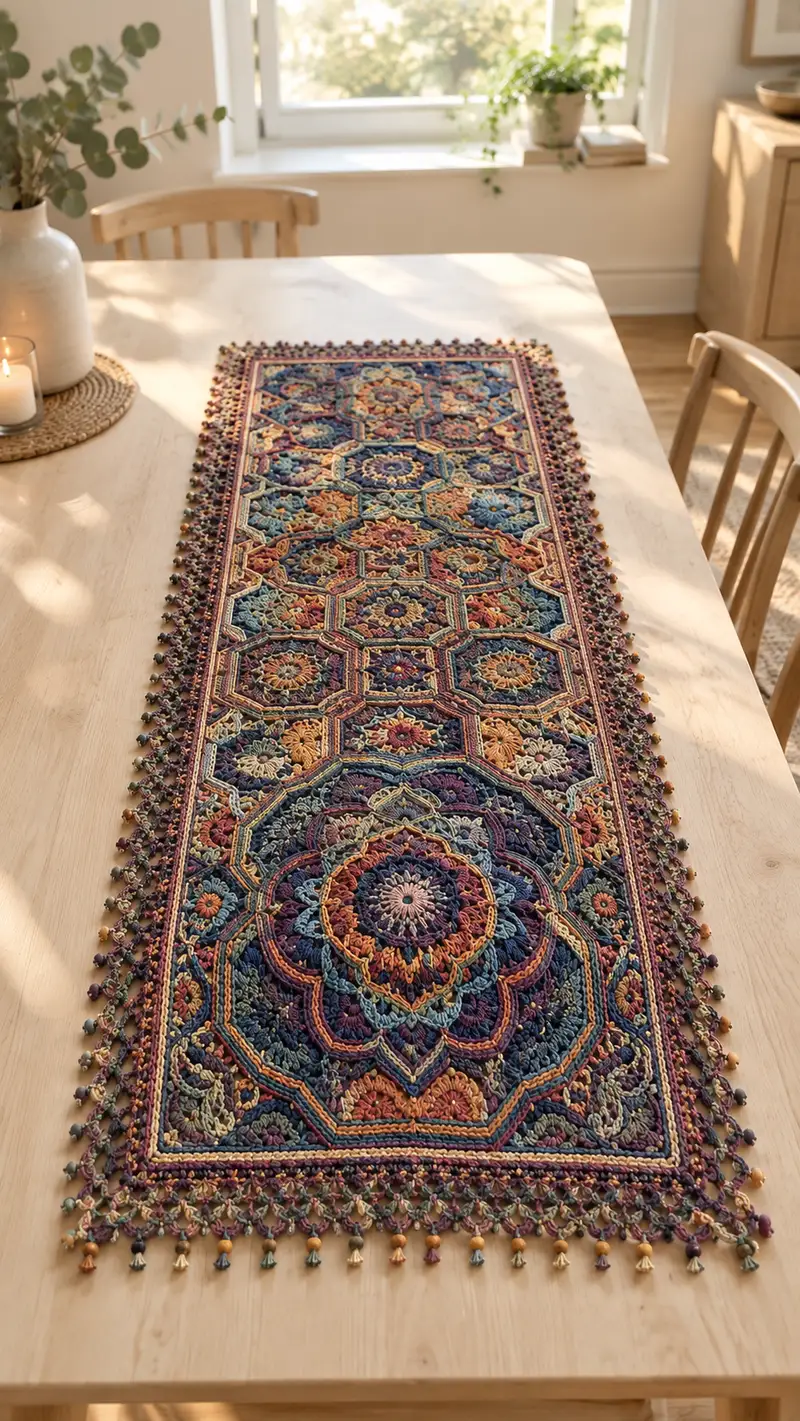
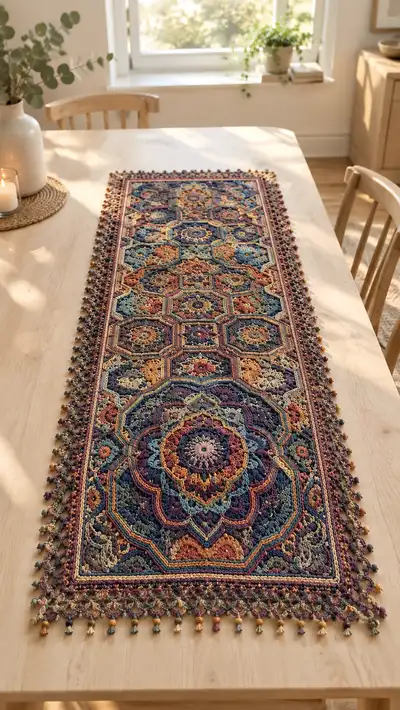
A richly textured mosaic table runner worked from interlocking medallion motifs in jewel-toned variegated shades. This pattern features layered mandalas, hexagon connectors, delicate join-as-you-go borders, and a beaded tassel fringe for an elegant, heirloom finish. Detailed round-by-round instructions and multiple Info tips guide you through each motif, color change, and the final assembly.
Progress Tracker
0% Complete
— Notes & Gauge :
Info :
This runner is constructed from three motif types: a Large Round Medallion, a Hexagon Motif, and a Small Octagon/Connector Motif. Motifs are worked in the round and joined using a join-as-you-go (JAYG) method. Gauge is flexible for this decorative runner; if using different yarn or hook your final size will vary. For reference: one large medallion measures approximately 12" diameter with the given yarn and a 3.5mm hook. Measurements for the pictured runner are approximately 14" wide by 56" long after blocking and fringe. Blocking will open the lace and improve motif alignment.
Info :
Techniques used: puff stitch, cluster stitches, raised slip-stitch outlining (worked in FLO/BLO for contrast), picot edging, join-as-you-go seaming, beaded tassel edging. If you haven't worked with puff stitches or join-as-you-go before, try a small practice motif first.
— Large Round Medallion (Make 2) :
Round 1 :
Ch 4, join to form ring or work mr; ch3 (counts as dc), 11 dc into ring, join with sl st to top ch3 (12)
Round 2 :
Ch3, dc in same st, (ch1, 2 dc in next dc) x11, ch1, join to top of ch3 (24 dc, 12 ch-1 spaces)
Round 3 :
Ch1, sc in same st, (ch3, skip next dc, sc in next ch-1 space) x12, join (12 ch-3 loops, 12 sc)
Round 4 :
Work in ch-3 loops: join with sc in first loop, ch3, (3 dc, ch2, 3 dc) in same loop (shell), *sc in next loop; repeat from * around, join (12 shells, 12 sc)
Info :
Change to contrast color now for raised outlines if desired. Carry the previous color behind the work or fasten off and rejoin. This round introduces puff clusters and textured petals; keep tension slightly looser than body rounds to allow puff height.
Round 5 :
With contrast: sl st to center of a shell, (ch1, puff (yarn over, insert hook, pull up loop, repeat 3 times to get 7 loops on hook), yarn over and pull through all loops, ch1, sl st to secure) in center of each shell. Between each puff, sl st to next sc to anchor (12 puffs, 12 sl st anchors)
Round 6 :
Ch3, (2 dc, ch1, 3 dc) in same space under each puff to create layered petal; sl st to join (12 large petals)
Round 7 :
Ch1, sc around working 3 sc across each petal group and 1 sc in each anchor sl st (total 48 sc) (48)
Round 8 :
(2 sc, inc) x12 (60)
Round 9 :
1 sc in each st (60)
Info :
This section builds a framed medallion. Use FLO for the next round if you want a raised ridge between layers; otherwise work normal sc. Also place a stitch marker to mark the top center of this motif for alignment within the runner.
Round 10 :
1 sc in each st BLO (60)
Round 11 :
(4 sc, inc) x10 (70)
Round 12 :
1 sc in each st (70)
Round 13 :
(5 sc, inc) x10 (80)
Round 14 :
1 sc in each st (80)
Info :
Now we will add a raised slip-stitch outline to emphasize medallion geometry. Work the slip stitches in FLO to make a visible ridge; use the contrast outline color chosen earlier.
Round 15 :
With outline color: sl st in FLO in each st around to create a raised round. Work slowly to keep stitches even (80 sl st in FLO creating a ridge)
Round 16 :
Ch1, sc in each st around (80)
Round 17 :
(7 sc, inc) x10 (90)
Round 18 :
1 sc in each st (90)
Info :
Introduce alternating picot-and-shell accents to add lacy texture in the outer rounds. If you intend to join medallions edge-to-edge, pause and block this motif before proceeding. Blocking improves join alignment.
Round 19 :
(Ch3, dc in same st, ch1, picot (ch3, sl st in top of ch3), skip 4, sc in next) x through to create decorative looped edge; adjust repeat to maintain 90 sts evenly (formed decorative loops around the outer edge)
Round 20 :
1 sc in each st (90)
Round 21 :
(8 sc, inc) x10 (100)
Round 22 :
1 sc in each st (100)
Info :
Finishing the medallion: add layered corner arcs to create octagonal illusion for smooth joining with hexagon motifs on either side. Make sure motif is flat; if it cups or ruffles, block then continue.
Round 23 :
(6 sc, ch4, sk 6) x around to form looped arches at measured intervals (creates 16 looped arches around outer circumference)
Round 24 :
In each loop: (3 dc, ch2, 3 dc) to form petal arches; sl st between arches to anchor (16 arches created)
Round 25 :
1 sc in each st around to tidy up (total depends on previous round counts; keep even spacing - approximately 112 sc)
Info :
Fasten off and weave tails. Block each completed medallion to the stated measurement before joining (approx 12" diameter). Place pins at 12 o'clock, 3, 6, 9 and at center points of edges to ensure even joins later.
— Hexagon Motif (Make 10) :
Round 1 :
mr, ch1, 6 sc in mr, pull tight, join (6)
Round 2 :
Inc in each st (12)
Round 3 :
(1 sc, inc) x6 (18)
Round 4 :
(2 sc, inc) x6 (24)
Round 5 :
(3 sc, inc) x6 (30)
Round 6 :
1 sc around (30)
Info :
To shape the hexagon, we will create 6 flat sides by working increases at 6 evenly-spaced points and forming short side separators. Place markers at each corner while counting.
Round 7 :
*(4 sc, ch2, sc) in corner st to create a corner ch-2 space, 6 sc across next side*; repeat from * around to form hexagon sides (maintain even counts, approximately 36 sc plus 6 ch-2 corners)
Round 8 :
Work picot/cluster flower centers: in each side center, form a small flower: sl st to center, (ch3, 3 dc, ch3) sl st back to form a puff center, sl st to next corner. This decorates every side (6 small flowers)
Round 9 :
1 sc in each st and 2 sc in each corner ch-2 space to tighten edges (44 sc total approximated)
Round 10 :
(2 sc, inc) x... continue to shape so that final outer count aligns with join points; increase evenly to reach approx 60 sc for smooth joining with medallion edges
Info :
Work a raised ridge in FLO if you want the hexagon outlines to sit under the medallion edges visually. Keep each hexagon blocked to a consistent side length (approx 4.5" across opposite corners).
Round 11 :
1 sc in each st BLO around to create a ridge (approx 60)
Round 12 :
1 sc in each st (60)
Round 13 :
Slip stitch decorative chain between corner spaces to create small loops used later for join-as-you-go (work evenly around to produce 6 loops)
Round 14 :
Fasten off leaving long tail for final weave-in if you intend to sew rather than JAYG. Block hexagons before joining.
— Small Octagon Connector Motif (Make 12) :
Round 1 :
mr, ch3 (counts as dc), 11 dc into ring, join (12)
Round 2 :
(1 dc, ch1, 1 dc) in each dc around to create openwork ring (12 ch-1 spaces)
Round 3 :
In each ch-1 space: (sc, ch3, sc) to form small loops for later connection (12 little loops)
Round 4 :
1 sc around to tidy (approx 36 sc)
Round 5 :
(2 sc, inc) x12 to expand round evenly (48)
Round 6 :
Work 8 small picot clusters distributed to match hexagon corner joins; leave long tail for JAYG or fasten off and block.
Info :
These small connectors fit between medallions and hexagons to create the repeating lattice. Block to a consistent size and mark orientation so each connector lines up consistently during assembly.
— Join-As-You-Go Assembly Instructions :
Info :
Set up your layout: 2 large medallions are placed centered in the runner length with hexagons and small connectors folding around them to form the long rectangular arrangement shown. Lay the blocked motifs on a flat surface and pin into the final arrangement before joining to visualize the final shape. Use a thin contrasting yarn for the joining slip-stitches to highlight the mosaic effect or the same color to blend the seams.
Round J1 :
Start at the top edge of a medallion: join with sl st to outer loop, ch1. Work 1 sc in each outer st until you reach a designated join point where a connector will meet. At join point: ch1, insert hook through corresponding loop in neighboring motif, sl st through both loops to join, ch1, continue 1 sc in next st. Repeat for each join point around the motif where pieces meet. The number of sl st joins will equal the number of adjacency points between motifs (approx 8-12 joins per medallion depending on layout).
Info :
When joining, use a consistent tension and pull joins snug but not tight to avoid warping motifs. Work joins on the right side so the seam looks intentional; practice on two motifs first to get comfortable with the technique.
Round J2 :
Once a medallion has been joined to its adjacent hexagons and connectors on one side, flip the work and reinforce the joins by working a reverse sl st row along the inside seam: sl st in back loop of each join to tidy and strengthen the connection. Repeat for all major joins across the runner.
Info :
Keep checking motif alignment against your pinned layout; adjust join locations by inserting additional slip stitches in the neighbor motif until the overall lattice remains flat and rectangular. Use blocking pins to align seams if slightly off.
— Interlocking Border & Frame (Worked after joining all motifs) :
Round B1 :
With main outline color, work 1 sc evenly around the entire assembled runner to create a tidy foundation edge. Work 3 sc in concave corner points to allow the runner to lie flat. Count total stitches and note for subsequent rounds (approx 680-760 sc depending on motif arrangement).
Round B2 :
1 sc in each st BLO to create a raised inner ridge (use contrast color for visible frame effect)
Round B3 :
(4 sc, ch3, sc) in every corner or arch point around to create small loops for the decorative final edging (repeat around to create even looped frame)
Round B4 :
1 sc in each st around (maintain count), fasten off color if you plan a multi-stripe frame.
Info :
We now add three decorative rounds of stacked threads and raised lines to mimic the runner's inset panels. Use 2-3 contrasting narrow stripes; carry unused yarn along back if you prefer not to fasten off between colors.
Round B5 :
With color A: 1 hdc in each st around (gives a softer, flatter row) (same stitch count)
Round B6 :
With color B: 1 sc in each st in FLO to create raised rib (same stitch count)
Round B7 :
With color A: 1 sc around to tidy (same stitch count)
Info :
Prepare for ornamental picot-and-bead fringe: count loops or ch-3 spaces along outermost edge (approx 80-100 loops depending on final runner circumference). You will work a repeating picot cluster and attach small beads before finishing each tassel if adding beaded fringe.
Round B8 :
*Ch5, sl st into base to form loop, ch3, picot (ch3, sl st back into same base), sl st to next designated anchor; repeat from * across entire outer edge (creates looped edging every 4-6 stitches)
Round B9 :
1 sc in each st to reinforce loops and tidy the frame (same stitch count)
Round B10 :
Fasten off and weave ends. Block the entire runner flat to final measurements; use many pins to square corners and set the motif geometry. Allow to dry fully before attaching tassels.
— Beaded Tassel Fringe (Optional, repeat for each loop) :
Round T1 :
To make each tassel: Cut 18 strands of yarn, 6" longer than desired tassel length. Fold in half and loop through one picot loop created in B8 using a lark's head knot to attach. Trim tassel ends evenly.
Round T2 :
Thread a bead onto a single folded strand before knotting the tassel top if you want a beaded head. Optionally secure bead with a tiny dab of fabric glue for fragile beads. Work beads on alternating tassels to create the pictured color rhythm.
Info :
Use a small beading needle and carefully pass the bead down the folded strand to sit snug above the knot. Adjust spacing before securing. For a shallow runner or heavy bead choices, ensure tassels do not weigh the runner down and cause it to sag.
Round T4 :
Repeat T1-T3 for each loop around the entire runner edge until fringe is complete (expected 80-100 tassels). Trim tassels so they are all uniform in length and lightly steam-block for a tidy finish if desired.
— Finishing Details & Tips :
Info :
Weave in all tails on the wrong side using a yarn needle, burying ends across several stitches. Use blocking pins and a damp cloth to set the final fabric. If you used multiple colors and carried yarn on the back, check the wrong side to tidy any long floats by weaving them through backing stitches.
Info :
Spot-clean the runner as needed; because it is decorative and made from worsted yarn, hand-washing and flat drying is recommended to maintain the motifs and fringe. Avoid machine washing unless you know the yarn is machine washable and you are comfortable with potential relaxing of the blocking.
Info :
Storage: store flat or rolled to prevent creasing. If stacking with tableware, use tissue between runner and heavy items to avoid crushing the raised textures.
Completing this mosaic medallion table runner is a truly satisfying project — every motif you finish reveals more of the rich, tapestry-like pattern. The layered textures, raised outlines and beaded tassel fringe create a show-stopping piece that looks handwoven. Enjoy the soothing rhythm of working repeating motifs and the joyful moment of pinning the blocked runner into its final form. 🧶✨ This heirloom-quality accent will brighten your table for years and makes a wonderful handmade gift. 🎁