About This Jellyfish Amigurumi Pattern
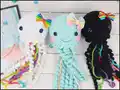
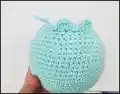
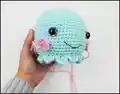
This pattern teaches you how to crochet a sweet amigurumi jellyfish with a detailed head, curly tentacles, chain tentacles, and cheek accents. It uses worsted weight #4 yarn and a 3.25 mm hook to create a plush, tactile toy. The instructions include exact round-by-round stitch counts and helpful photos for assembly.
You will make the head, add a decorative ridge, create both chain and curly tentacles, and sew cheeks and a smile. The pattern is written in continuous rounds and provides full assembly guidance.
Why You'll Love This Jellyfish Amigurumi Pattern
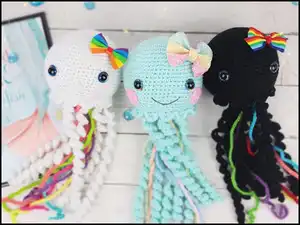
I absolutely love this pattern because it creates such a joyful, tactile toy that appeals to all ages. I enjoy the mix of textures — a smooth crocheted head with playful curly tentacles — which makes each jellyfish feel unique. The step-by-step rounds and clear assembly directions make the construction satisfying and reliable. I also love that it is highly customizable by color and tentacle combinations, so every finished jellyfish can have its own personality.
Switch Things Up
I love changing up colors to make each jellyfish unique; try pastels for a soft nursery look or bright neons for a playful toy.
I sometimes swap the worsted yarn for a lighter DK yarn and a smaller hook to make a tiny keychain-sized jellyfish.
Using bulky yarn and a larger hook creates a chunky, cuddly version perfect for a gift or pillow-like toy.
I add felt or embroidered details instead of safety eyes for a completely child-safe version for toddlers.
Try varying the number of tentacles to change the silhouette — fewer chain tentacles and more curly tentacles produce a fuller look.
I often embellish with small bows, beads, or tiny crocheted flowers sewn to the ridge to personalize the character.
For a posable toy, consider inserting a short piece of wire inside a tentacle bundle before sewing, being sure to secure and wrap wire ends safely.
I sometimes braid a few colorful strands into the chain tentacles for a multi-textured, whimsical effect.
You can embroider different smiles or add blushing on the cheeks with yarn or fabric-safe markers to give a different expression.
If making for sale, I mix and match eye sizes and colors to create a range of finished products that appeal to different buyers.
Common Mistakes & How to Fix Them
✗ Skipping stitch markers when working in a continuous spiral can make your rounds lose alignment; always place a marker at the beginning of each round and move it up as you work.
✗ Forgetting to stuff gradually causes uneven shaping and lumps; start stuffing after the indicated round and add fiberfill in small amounts while shaping the head.
✗ Not placing the safety eyes at the suggested rounds will change facial proportions; place the eyes between rounds 17 and 18 leaving eleven stitches between them for correct placement.
✗ Sewing tentacles without pinning first can produce uneven spacing and tension; pin chain tentacles in a circle in the center, then arrange curly tentacles around them before sewing.