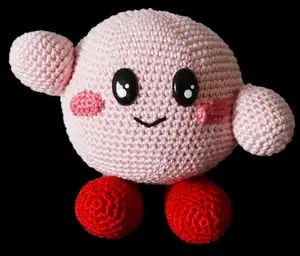
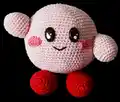
Make your own adorable Kirbi amigurumi with this clear, friendly crochet pattern. You will create a small 4.7-inch character with cute cheeks, sewn-on arms and legs, and a stitched smile. The pattern uses basic stitches and step-by-step round counts so you can follow along with confidence. Perfect for gifting or keeping as a sweet handmade companion.
Progress Tracker
0% Complete
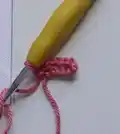
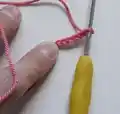
— Cheeks :
Info :
it is crocheted in rounds
Info :
in dark pink cast on 4+1ch (Picture 1), begin from the 2st from the needle and crochet:
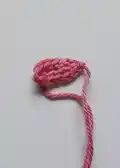
Round 1 :
in the first 3stitches each 1sc, in the last stitch 3sc (Picture 2), now we continue on the other side: in the next 2stitches each 1sc, in the last stitch 2sc, sl in the first sc (=10sc) (Picture 3)
Info :
Lasst einen Faden zum annähen.
— Arms :
Info :
it is crocheted in rounds
Info :
in pink cast on 6sc in a magic ring (Picture 4)
Round 1 :
increase every stitch (=12sc)
Round 2 :
increase every 2. stitch (=18sc)
Round 3 :
increase every 3. stitch (=24sc)
Round 4-9 :
crochet in every stitch 1sc (=24sc)
Round 10 :
decrease every 3. and 4. stitch together (=18sc)
Round 11 :
decrease every 2. and 3. stitch together (=12sc)
Info :
Fills the Arm (Picture 5).
Round 12 :
decrease each two stitches together (=6sc)
Info :
Sew up the rest hole and leaving long tail for sewing (Picture 6).
— Legs :
Info :
it is crocheted in rounds
Info :
in red cast on 6sc in a magic ring (Picture 7)
Round 1 :
increase every stitch (=12sc)
Round 2 :
increase every 2. stitch (=18sc)
Round 3 :
increase every 3. stitch (=24sc)
Round 4-13 :
crochet in every stitch 1sc (=24sc)
Round 14 :
decrease every 3. and 4. stitch together (=18sc)
Round 15 :
decrease every 2. and 3. stitch together (=12sc)
Info :
Fills the leg (Picture 8).
Round 16 :
decrease each two stitches together (=6sc) (Picture 9)
Info :
Sew up the rest hole and pull the thread through to the top, so that the leg can sew on later (Picture 10).
— Head/body :
Info :
it is crocheted in rounds
Info :
in grey cast on 6sc in a magic ring (Picture 11)
Round 1 :
increase every stitch (=12sc)
Round 2 :
increase every 2. stitch (=18sc)
Round 3 :
increase every 3. stitch (=24sc)
Round 4 :
increase every 4. stitch (=30sc)
Round 5 :
increase every 5. stitch (=36sc)
Round 6 :
increase every 6. stitch (=42sc)
Round 7 :
increase every 7. stitch (=48sc)
Round 8 :
increase every 8. stitch (=54sc)
Round 9 :
increase every9. stitch (=60sc)
Round 10 :
increase every 10. stitch (=66sc)
Round 11 :
increase every 11. stitch (=72sc)
Round 12-26 :
crochet in every stitch 1sc (=72sc)
Round 27 :
decrease every 11. and 12. stitch together (=66sc)
Round 28 :
decrease every 10. and 11. stitch together (=60sc)
Round 29 :
decrease every 9. and 10. stitch together (=54sc)
Round 30 :
decrease every 8. and 9. stitch together (=48sc)
Round 31 :
decrease every 7. and 8. stitch together (=42sc)
Round 32 :
decrease every 6. and 7. stitch together (=36sc)
Round 33 :
decrease every 5. and 6. stitch together (=30sc)
Round 34 :
decrease every 4. and 5. stitch together (=24sc)
Info :
-continue on page 5...
— Head/body - Continuation :
Info :
Now attach the safety eyes, embroider a mouth with black on (Picture12/13)
Info :
and fills the head/body (Picture 14).
Info :
Take the cheeks and sew them on (Picture 15).
Round 35 :
decrease every 3. and 4. stitch together (=18sc)
Round 36 :
decrease every 2. and 3. stitch together (=12sc)
Info :
Refill if necessary.
Round 37 :
decrease each two stitches together (=6sc)
Info :
Sew up the rest hole and fasten off (Picture 16).
— Completion :
Info :
Sew the legs and arms to the body/head (Picture 17/18).
This Kirbi amigurumi pattern is designed with love to give you a sweet, pocket-sized friend that brings smiles. It combines quick builds and charming details so you can finish a polished toy in an afternoon. Use it as a gift, decor, or a lovely handmade keepsake. 🧶🧵😊