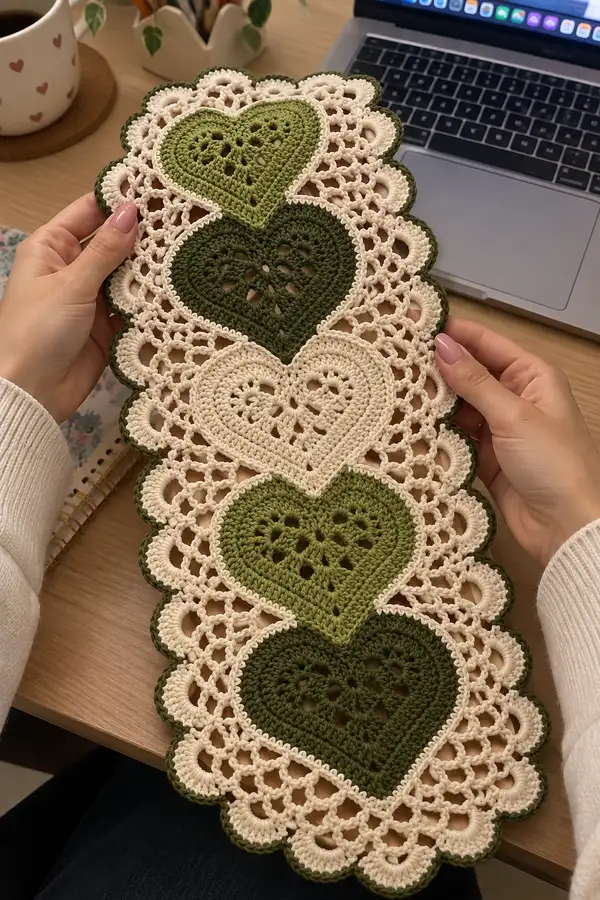
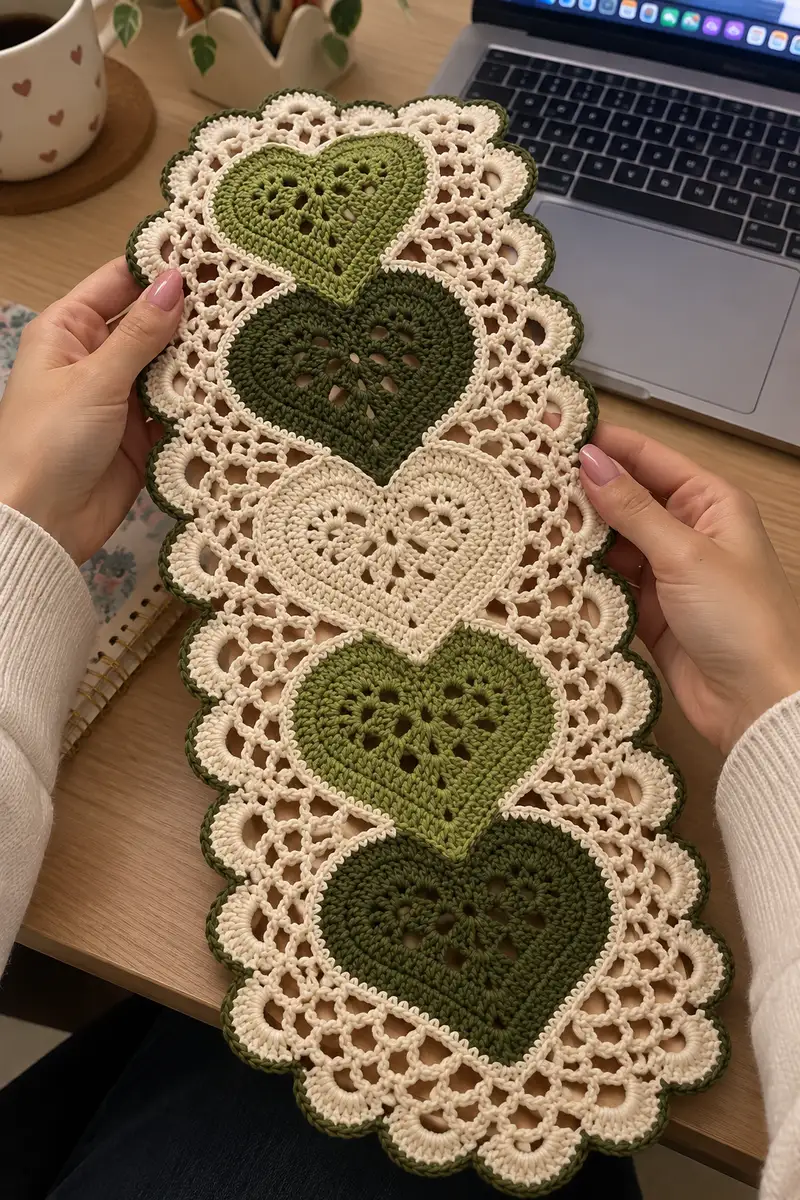
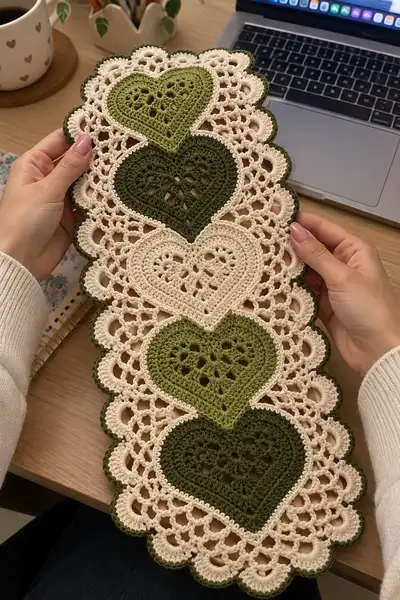
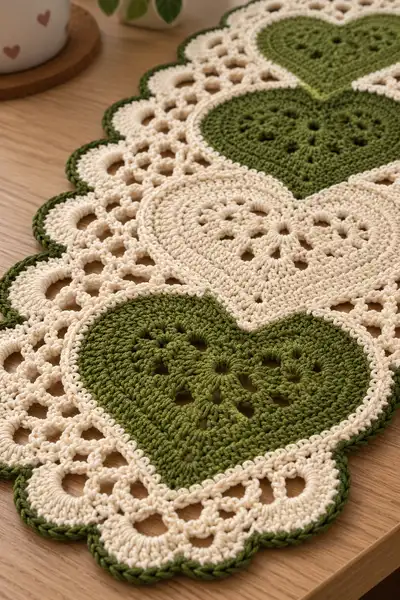
This elegant lace table runner features a repeating row of ornate heart motifs joined by airy mesh and finished with a scalloped edge. Worked in two tonal shades of green and a soft cream, it creates a vintage-inspired, modern farmhouse look. Perfect for styling a console table, dresser, or as a centerpiece accent. The openwork stitches and scalloped border showcase both texture and delicate detail.
Progress Tracker
0% Complete
— Heart Motif: Make 1 (Repeat for Heart 1 - Heart 4, changing colors as noted) :
Round 1 :
6 sc in magic ring (6)
Round 3 :
(1 sc, inc) x 6 (18)
Round 4 :
(2 sc, inc) x 6 (24)
Round 5 :
(3 sc, inc) x 6 (30)
Round 6 :
(4 sc, inc) x 6 (36)
Round 7 :
(5 sc, inc) x 6 (42)
Round 8 :
(6 sc, inc) x 6 (48)
Info :
For each heart, choose either dark olive, light olive or cream. Work Round 1-8 in the motif color. Use tight, consistent tension so the heart is flat. Place a stitch marker at the start of each round to keep track of round starts.
Round 9 :
1 sc in each st around (48)
Round 10 :
1 sc in each st around (48)
Round 11 :
(1 sc, 1 dc) x 24 (48)
Round 12 :
(1 dc, 1 sc) x 24 (48)
Info :
Rounds 11-12 build slight texture and introduce small open stitches that will later form the decorative holes seen in the photographed hearts. Keep dc tension slightly looser than sc to allow the small eyelets to form evenly.
Round 13 :
(5 sc, inc) x 6 (54)
Round 14 :
(6 sc, inc) x 6 (60)
Round 15 :
1 sc in each st around (60)
Round 16 :
1 sc in each st around (60)
Info :
At the completion of Round 16 the heart has reached its widest shaping for the top lobes. These larger rounds allow the heart to sit flat when joined into the runner. If you prefer a denser heart, work Rounds 15-16 in sc BLO to create a small ridge.
Round 17 :
(6 sc, dec) x 6 (54)
Round 18 :
(5 sc, dec) x 6 (48)
Round 19 :
(4 sc, dec) x 6 (42)
Round 20 :
(3 sc, dec) x 6 (36)
Info :
Begin gentle shaping toward the heart point. Start stuffing lightly only if you plan to make a filled ornament; for this flat runner we do not stuff — simply maintain even tension and keep the motif flat.
Round 21 :
(2 sc, dec) x 6 (30)
Round 22 :
(1 sc, dec) x 6 (24)
Round 23 :
1 sc in each st around (24)
Round 24 :
1 sc in each st around, sl st to join, fasten off leaving a 30 cm tail for joining (24)
Info :
Weave the tail inside the back of the motif later when assembling the runner. If your motifs curl slightly, pin them flat and steam or wet-block before joining.
Note :
Repeat the complete Heart Motif above to make four motifs. Color order used in the sample project is: Heart 1 (dark olive), Heart 2 (light olive), Heart 3 (cream), Heart 4 (dark olive). Change color at Round 1 of each motif as required and fasten off after Round 24 as instructed.
— Connector Lace Panel: Create the mesh join between hearts :
Info :
Join motifs horizontally using a rectangular openwork mesh built in rows that link the rounded sides of each heart. The Connector is worked in cream yarn for contrast. You will create a long strip made of repeating 'ladder' rows that align with the scalloped edges of each heart.
Round 1 :
With cream yarn, ch 60 (or sufficient length to span between the first and fourth heart). Join with sl st to form a long chain foundation for the mesh (60 ch)
Round 2 :
Ch 3 (counts as dc), dc in same st, *ch 3, sk 3, 2 dc in next 2 sts* repeat across, ending with dc in last st. Turn (approx 40 dc clusters with ch-3 spaces)
Info :
This row establishes evenly spaced ch-3 eyelets that will be used to join the hearts. Adjust the initial chain length so that when motifs are pinned beside the mesh, ch-3 spaces align with heart outer lobes. If your hearts are slightly larger or smaller, add/subtract chains in multiples of 2 to maintain symmetry.
Round 3 :
Ch 1, sc in first dc, *ch 3, sk ch-3 sp, sc in the top of the next dc cluster* across. Turn (these sc anchor the mesh)
Round 4 :
Ch 4 (counts as tr), tr in each sc across, placing 1 tr in each sc and 1 tr in each ch-3 space to form arches across the row. Turn (st count variable depending on your foundation length)
Round 5 :
Ch 3, dc in next tr, *ch 3, sk 2 tr, 2 dc in next 2 tr* repeat across creating small double-dc clusters separated by ch-3 spaces. Turn
Info :
Work the Connector Panel until its vertical height aligns with the hearts' midline (the scalloped border area). Frequently pin a motif next to the mesh to check alignment. The pattern uses repeatable rows that build a neat net-like look; you will repeat Rounds 3-5 until you have built 8-10 rows of mesh, then use specialized connecting rounds to affix motifs.
Round 6-11 :
Repeat Rounds 3-5 twice (6 rounds total) to build mesh height. Keep edge stitches consistent to maintain flatness
Round 12 :
Ch 1, sc evenly across the top edge, placing 1 sc in each ch-3 space and 1 sc in each dc cluster top. This creates an anchoring row for motif attachment (st count equals number of supporting points, adjust to fit).
Info :
When this anchoring row is finished, lay one heart on top aligning its outer round scallop holes with the sc anchor points; use pins to secure prior to sewing. Stitch through the heart motif back loops and the mesh front loops to create a flat invisible join.
Round 13 :
Attach hearts now by aligning and whip-stitching the motifs to the anchoring row. Use the 30cm tail left on each heart and the tapestry needle to sew through the outer edge (the larger rounds around each heart) and the mesh anchors. Secure and weave tails inside the back of the runner.
Round 14 :
After all hearts are sewn to the first connector strip, work an additional mesh strip on the opposite side of the hearts mirroring Rounds 1-12 to create a double-sided mesh frame (repeat Rounds 1-12).
Info :
By creating two mirrored mesh panels and attaching hearts between them you get the dense open area shown in the photo. Be sure to keep the stitch counts in both panels identical for a symmetrical look. Pin motifs and mesh frequently to keep everything even.
Round 15-20 :
Continue repeating mesh pattern rows (R3-R5) to extend across the full length of the runner, working in multiples to maintain the repeating arches and keep the runner flat. End with an anchoring sc row as in Round 12.
Round 21 :
Ch 1, sc around the entire combined mesh+motif perimeter (work 1 sc in each visible stitch around the outermost edge). Work slowly and count to keep the edge flush for the scalloped border to come.
Info :
This long anchoring round is critical — keep the runner pinned flat on a blocking board and maintain the same number of stitches along corresponding sides so the scallops line up evenly.
— Border Scallops and Final Edge :
Round 1 :
With contrasting dark green, join with sl st to any sc on the outer edge, ch 1, sc in same st to secure (this starts the scallop edging)
Round 2 :
*Ch 3, sk 2 sc, 6 dc in next sc (shell), sk 2 sc, ch 3, sl st in next sc* repeat around to make scallops. Adjust repeats to fit the edge — you want evenly spaced shells around the hearts and across mesh arches.
Info :
Count scallops along each long side so that scallops are mirrored on both sides and sit centered over the mesh arches between hearts. If your foundation sc round had fewer or more stitches, change the number of skipped stitches between shells for even spacing.
Round 3 :
Join shells together: sl st to top of next shell, ch 1, 1 sc in same st, *ch 4, 1 sc in center of next shell (3rd dc) to create small looped separators* repeat around to add open loops between scallops
Round 4 :
Finish scallop edge by working 1 sc around each ch-4 loop, then 5 hdc across the top of each shell for added solidity. End with sl st and finish off, weave in ends.
Info :
For the crisp finished look in the photos a final round of single crochet worked tightly in contrasting green creates a defined border. If you prefer a softer edge, use hdc or work the final round in BLO for a small ridge.
Optional Finishing Round :
With the lightest olive, work 1 sc in each st across the scallop tops to create a second contrast line and to flatten the edge. Slip stitch, fasten off and weave ends.
Info :
Block the finished runner damp and pin to the desired shape, making sure scallops are even. Allow to dry fully to set stitches and flatten the mesh. This step dramatically improves the final appearance.
— Detailed Heart Variations (Heart 2, Heart 3, Heart 4) :
Info :
Repeat the full Heart Motif sequence for Heart 2, Heart 3 and Heart 4. For the runner pictured, the hearts alternate dark olive, light olive, cream then dark olive again. To achieve exact color positions change yarn color before Round 1 of each heart and fasten off after Round 24 with tails reserved for joining.
Assembly Info :
Pin all four hearts on the mesh connector with approximately 2-3 cm spacing between each heart so the scalloped nets flow seamlessly. Sew each heart using the tail left on Round 24 through the outermost sc rounds and the mesh anchoring row, taking care that the right side of the hearts faces up.
Final Info :
Weave all tails into the back of the mesh. Steam or wet-block the entire piece pinned to size to flatten the scallops and openwork. Trim any remaining stray fibers and press lightly after fully dry if desired. Your runner is complete and ready to style.
This lace heart runner is a beautiful mix of vintage charm and modern minimalism — the layered hearts and airy mesh add texture and romance to any surface. Each scallop and openwork stitch comes together to create a runner you'll be proud to display at brunches, holidays, or everyday styling. 🧶 The careful blocking and finishing transform simple motifs into a unified, elegant piece. Enjoy the slow, satisfying process and share your finished runner for others to admire! 🌿