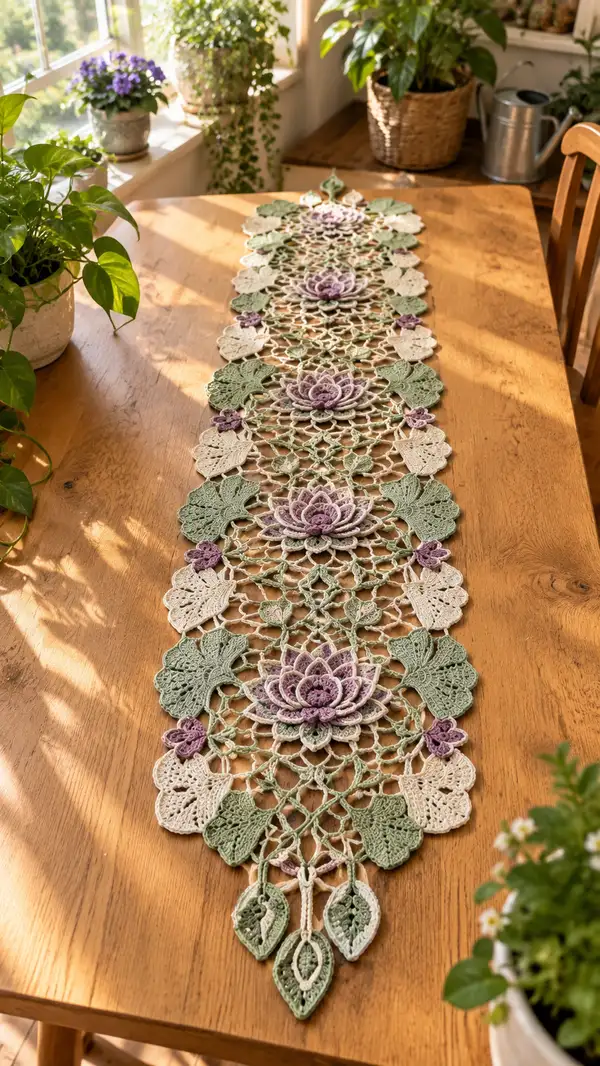
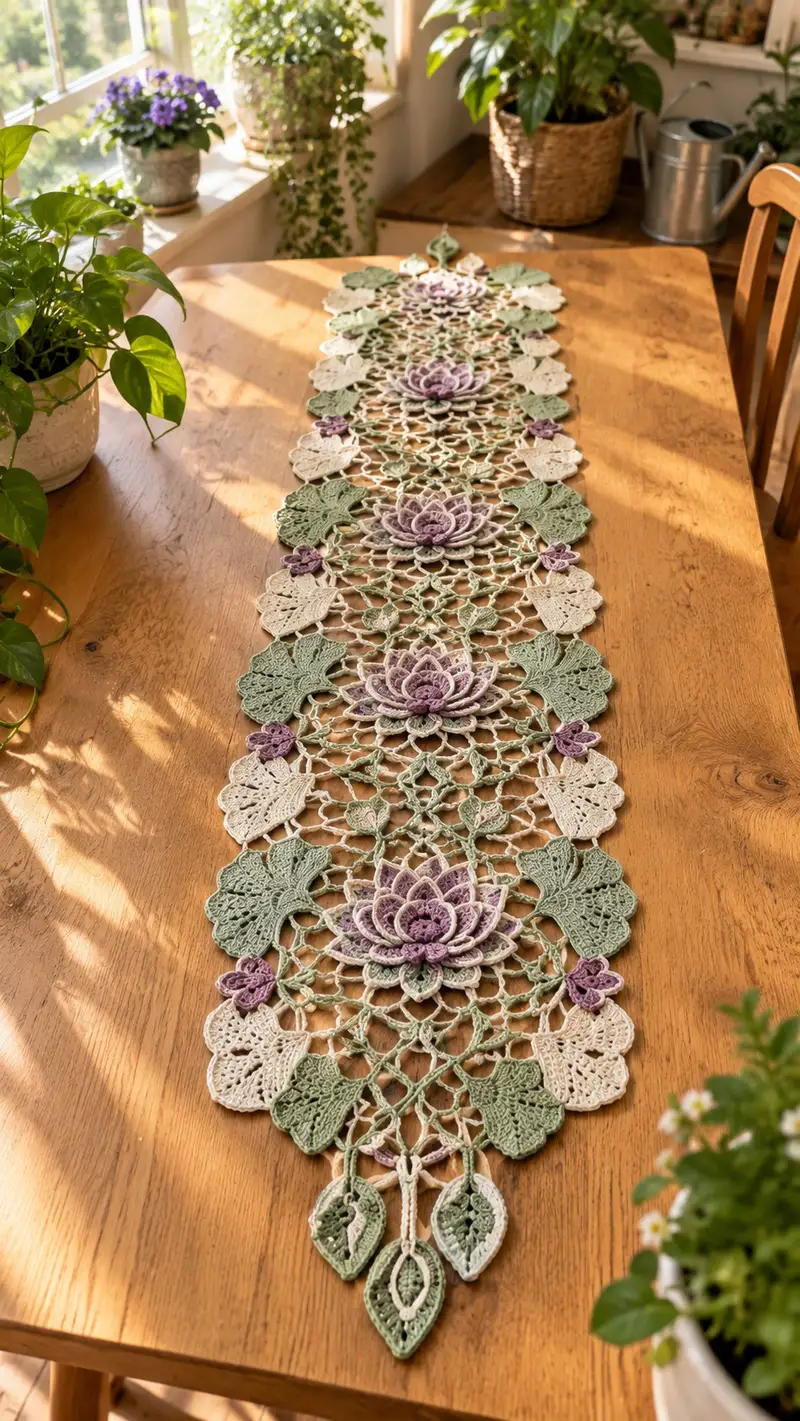
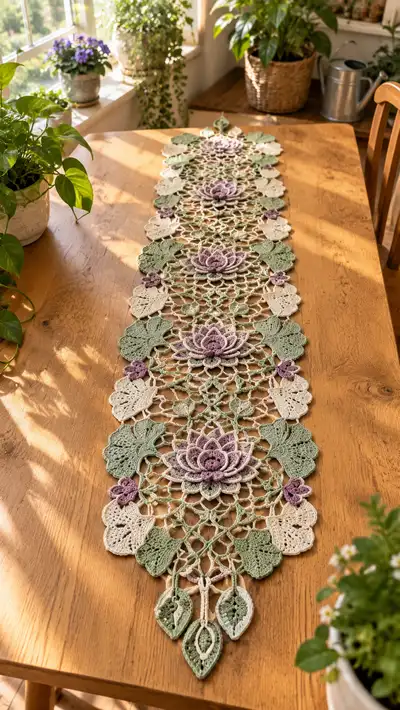
A delicate, botanical-inspired lace table runner featuring layered lotus motifs, scalloped leaf clusters, and airy connecting mesh. Worked in soft muted sage green, cream and lavender, this long runner brings a romantic vintage vibe to any table. Detailed motif repeats and join-as-you-go mesh create a light, dimensional piece that blocks beautifully. Perfect for bringing handmade charm to your dining room or gift-giving for loved ones.
Progress Tracker
0% Complete
— Materials & Gauge :
Info :
Gauge is not critical for lace runner, but for best proportions work a swatch of motif center (one lotus) and adjust hook to make petals lie flat. Finished runner in photo measures approximately 120-140cm long by 22-26cm wide depending on blocking and number of repeats.
— Center Lotus Motif (Make 4 large motifs, adjust count for desired length) :
Round 1 :
6 sc in magic ring (6)
Round 3 :
(1 sc, 1 inc) x 12 (24)
Round 4 :
(2 sc, 1 inc) x 12 (36)
Round 5 :
(3 sc, 1 inc) x 12 (48)
Round 6 :
(4 sc, 1 inc) x 12 (60)
Info :
At this point you have a round disk of 60 sts; this will form the base for petal anchors. Place a stitch marker at the first stitch of this round to track repeats of 12 petal anchor points (every 5 sts between anchors).
Round 7 :
*sc in next 4 sts, ch9, skip next 5 sts, sl st in next st to anchor* x 12 petal anchors (12 loops)
Info :
Each ch9 loop will form a petal foundation. Keep tension even so loops are uniform. If ch9 is too loose, reduce to ch8 based on yarn weight.
Round 8 :
Work petals into loops: Sl st into first ch9 loop, (ch2, 2 dc, tr, dtr, tr, 2 dc, ch2) all into same loop, sl st to base to finish petal. Repeat for each ch9 loop (12 petals)
Round 9 :
Slip to base between petals, sc around base working 2 sc between petals to create space (24)
Info :
Petals should sit upright; use your fingers to shape each petal outward. Use color for petals (lavender) at Round 8 if working multi-color petals - change color at end of Round 7 before petal rows.
Round 10 :
Join new color (lighter lavender or contrast) if desired. In each petal: sl st at base, ch2, (2 dc, tr) into tip, ch2, sl st into base. Repeat for 12 petals to create second petal layer (24 visible tips)
Round 11 :
Turn petals outward by working sc around base: *sc in 1 st between petals, sc in base of next petal* x 24 (24)
Round 12 :
Begin second (inner) petal ring: attach yarn between every other petal base, ch4, (2 dc, tr, 2 dc) into ch space to form smaller inner petals. Work 12 inner petals
Info :
Work inner petals with slightly shorter stitches (no dtr) so they sit nested inside outer petals. Use contrast color only at inner petals if you want a two-tone lotus center.
Round 13 :
Sc evenly around inner petals to secure, approx 36 sc (sc in bases and chain spaces) (36)
Round 14 :
Ch1, *sc in next 2 sts, ch6, sl st into a base point to create decorative loop* x 12 (12 loops)
Round 15 :
Work picot edging into each ch6 loop: (sc, ch3, sl st in base) then secure with sc around to maintain shape. Resulting base sts remain approx (36)
Info :
At this point center lotus measures roughly 10-12cm across with DK cotton; adjust hook to get your preferred dimension. Finish and weave in ends for the lotus center if you prefer to block before joining.
Round 16 :
For a decorative raised center, in the very middle work 6 sc in magic ring separately (6) then sew to center, or maintain flat center as preferred
Round 17-20 :
Optional: Add a third petal tier by creating long chain loops (ch12) anchored between outer petals and working elongated shells into those loops to create a larger silhouette (12 shells). Secure with sc round afterward
Info :
Weave tails invisibly to the back and clip. Make 4 identical lotus motifs for runner pictured; you can make more or fewer to adjust length.
— Small Four-Petal Flower (Make 8) :
Round 1 :
6 sc in magic ring (6)
Round 3 :
*sl st, ch5, sl st in next st* around creating 12 loops (12 loops)
Round 4 :
Into every third loop work a petal: (ch2, 3 dc, ch2, sl st) in loop to make 4 larger petals. Result: 4 petals spaced evenly
Round 5 :
Sc around base to tidy (12)
Info :
These small flowers are the little lavender accents seen between larger leaves. Make 8-10 and set aside. Fasten off and leave tails for sewing.
— Large Fan Leaf Motif (Make 8 in sage green) :
Round 1 :
6 sc in magic ring (6)
Round 3 :
(1 sc, 1 inc) x 12 (24)
Round 4 :
(2 sc, 1 inc) x 12 (36)
Round 5 :
Ch1, sc around making 36 sc (36)
Round 6 :
*ch4, skip 2, dc in next, ch4, skip 2, sc* across to create scalloped wings; repeat so leaf has 12 scallops (12 scallops)
Info :
Work this round with a slightly smaller hook if you want tighter lacy scallops. Leaves are slightly cupped; block flat if you prefer.
Round 7 :
Edge: in each scallop work (sc, hdc, 3 dc, hdc, sc) to create picot-like scallop (approx 72 stitches total around leaf edge)
Round 8 :
Work venation: with contrasting sage or same color, embroider veins with surface slip stitch from center to scallop tips (6 main veins)
Info :
Sew leaves to runner at specified join points, overlapping slightly with the mesh to create the organic layered look shown in the photo.
— Small Fan Leaf / Lacy Leaf (Make 8 in cream) :
Round 1 :
6 sc in magic ring (6)
Round 3 :
(1 sc, 1 inc) x 6, sc across to create semi-circular fan base (18)
Round 4 :
Work shells into fan: *ch6, sl st into base to create 6 loops* (6 loops)
Round 5 :
Into each loop work (sc, hdc, 3 dc, hdc, sc) to make 6 scalloped edges. Finish with picot at each tip if desired
Info :
These cream fans provide lighter contrast and are placed alternating with green leaves along the runner edge.
— Connector Mesh / Join-As-You-Go (Main mesh that links motifs) :
Info :
The mesh is worked round-by-round connecting each large motif, leaf and small flower. Work the first motif and then join next motif into mesh on specified rounds. Keep stitch markers to note joining points. The mesh consists of alternating chain arches and small diamond spaces.
Round 1 :
With cream yarn, attach at an anchor point on the back of a lotus motif. Ch6, sl st to a corresponding anchor on the other side of motif to create bridge. Repeat to make 12 bridges around motif to form initial ring (12 bridges)
Round 2 :
Round of arches: *ch5, sc in next bridge base* around linking to form 12 arches (12 arches)
Info :
When joining the second lotus, connect its bridge points into these arches using sl st or sc as indicated to achieve join-as-you-go; pin pieces before joining for accurate alignment.
Round 3 :
Work diamond connectors: *ch6, sl st in arch base two arches ahead* around to create diamond network points (12 diamonds)
Round 4 :
At diamond tips sketched above, work small 3dc fan: (hdc, 3 dc, hdc) to make decorative nodes, sl st into next diamond join (12 nodes)
Round 5 :
Ch8 arches between nodes and secure with sc into node bases, creating elongated mesh. Work evenly to maintain rectangular repeat units (12 elongated arches)
Info :
As you work this mesh, incorporate leaves and small flowers by slipping into their designated anchor points: when you reach a position marked for leaf, sl st into base of leaf and continue mesh; this locks leaf to mesh neatly.
Round 6 :
Repeat diamond network to expand mesh outward: *in ch8 arch: (sc, ch6, sc) in center of arch, sl st to next node* repeat around. This forms new join loops for adjacent motif anchors (12)
Round 7-12 :
Continue alternating rounds of decorative small fans and chain arches to build mesh between centers. Each motif connection uses 6-8 mesh repeats to create the wide open pattern shown. Maintain symmetry by working same number of arches between motifs on both sides.
Info :
For join-as-you-go: when you reach the anchor position on an already-made motif or leaf, insert hook through the anchor stitch and sl st to join as if working into motif stitch; secure and continue mesh round. Use locking sl st or a final sc to make join firm.
Round 13 :
When joining two lotus centers, use three evenly spaced sl st joins along the outer ornamental ring to secure them so petals sit staggered, not stacked.
Round 14-20 :
Expand mesh to connect adjacent motifs: create alternating small diamond and larger arch rounds so the runner has an even, airy look. For each diamond round count remains equal to number of motif repeats (12 diamonds per motif join)
Info :
Place small flower accents into mesh junctions by working them separately and sewing or by crocheting them directly at the diamond tips with a small sl st join.
— Edge Leaf Drops and Tails (Ends of runner) :
Round 1 :
Make leaf drop: 10 sc in magic ring (10)
Round 2 :
(1 sc, 1 inc) x 10 (20)
Round 3 :
Work elongated leaf: ch1, *sc in next 3 sts, ch8, sl st to create tip, sc next 3 sts* to form pointed drop; single leaf base remains approx 20
Round 4 :
Work edging: in ch8 tip make (sc, hdc, 3 dc, hdc, sc) to form leaf tip. Finish with picot on top
Info :
Make 3 leaf drops for each end and attach to mesh points at terminal diamond nodes to form decorative tassel-like end. Block drops to point sharply.
— Assembly & Joining Advice (Final join-as-you-go rounds) :
Round 1 :
Arrange motifs in desired linear order: lotus, mesh, leaf clusters, repeat. Pin carefully on blocking board before final joining.
Info :
Use removable stitch markers to mark where each leaf and flower meets mesh. Join motifs with sl st or sc into the mesh loops so joins are flat and secure.
Round 2 :
Once all motifs are joined, work an outer edging in cream: ch3, *sc in next arch base, ch5* around to create a fine lace border that unifies the runner. Work evenly to maintain rectangular edge.
Round 3 :
Final decorative edging: into each ch5 loop work (sc, hdc, 2 dc, hdc, sc) and finish with a picot on outermost stitch to mimic scalloped leaf edges.
Info :
Weave in all ends on reverse side; leave long tails where joining motifs so you can adjust tension after blocking. After final assembly wet block to shape, pin petals and leaf scallops outward to achieve the airy look in the photo.
— Blocking & Finishing :
Info :
Soak runner in lukewarm water with a gentle detergent, press out excess water without wringing. Pin to blocking board to measured dimensions, pulling petals and leaves to open shape. Allow to dry fully. Steam-block lightly if needed to smooth any irregularities. Light starch can be applied if a stiffer table runner is desired.
Info :
Optional: add a thin backing or non-slip felt strips underneath runner for delicate table surfaces. Sew felt to underside at a few discrete points to avoid shifting during use.
Completing this lace runner is a lovely, meditative project that rewards patience with graceful, floral detail. Each petal and leaf becomes a small triumph as you shape and block the motifs. The finished piece brings a romantic, handcrafted touch to any table and makes a cherished gift for housewarmings or holidays. 🌿🧶 Take your time, enjoy the process, and celebrate each joined motif as part of the whole. Happy stitching and sharing your beautiful runner! 🌸