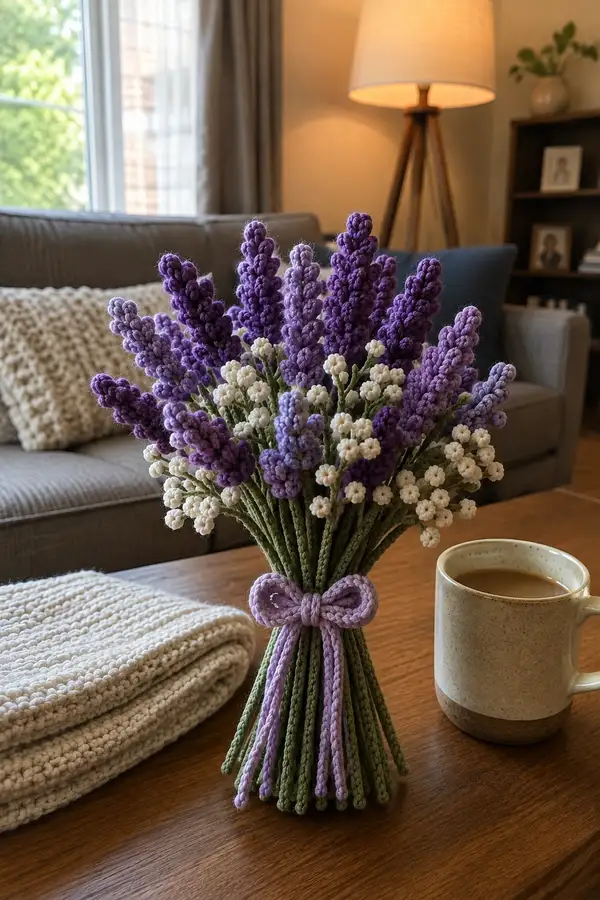
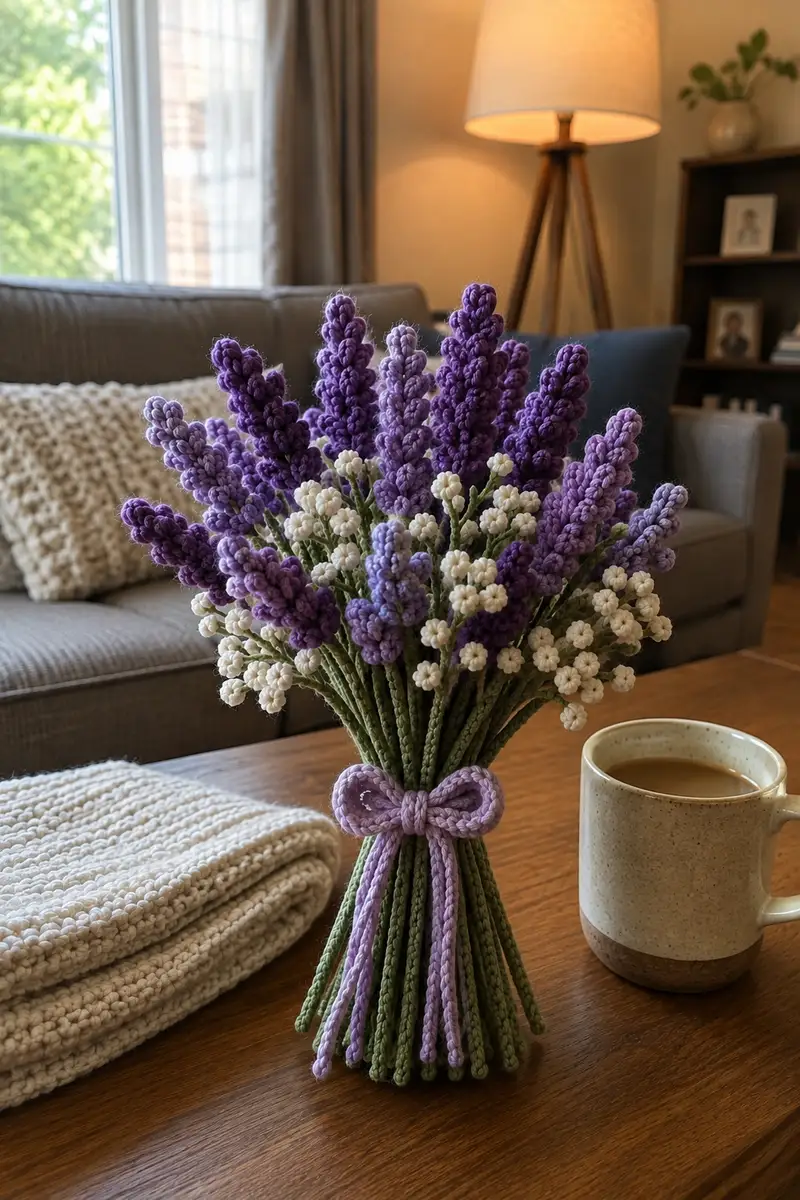
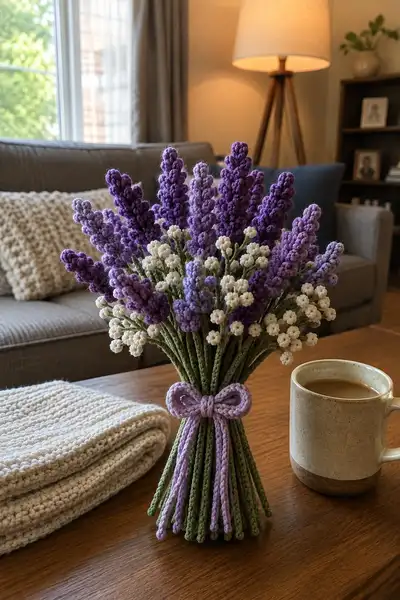
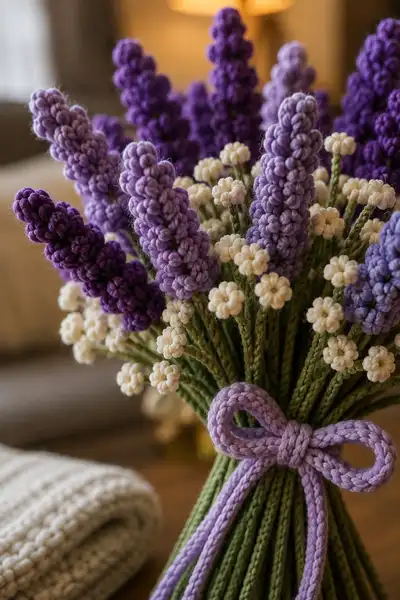
Create a lifelike, long-lasting lavender and baby’s breath bouquet with this detailed crochet pattern. The arrangement features tall purple lavender spikes in three tonal values, delicate clustered white baby’s breath blooms, sturdy green stems and a pretty lilac bow to tie it all together. Clear step-by-step instructions walk you through crocheting each spike, tiny flower and stem, plus assembly tips to create a full, natural-looking bouquet perfect for home decor or gifts.
Progress Tracker
0% Complete
— Notes Before You Begin :
Info :
Make one lavender spike sample first to confirm gauge and height. This bouquet is modular: you will make multiple spikes in three purple values plus many baby’s breath florets and stems, then assemble. Work tightly (smaller hook if necessary) so stuffing and wire do not show. Flower counts used in photos: 16 tall spikes, 10 medium, 6 short, and ~40-60 tiny baby’s breath clusters. Adjust to taste.
— Materials & Techniques :
Info :
Puff stitch technique: Yarn over, insert hook into stitch, yarn over and pull up a long loop (approx 8-10 mm), repeat this loop-insert process 3 times into the same base stitch (so there are 4 loops on hook), yarn over and pull through all loops, chain 1 to close puff if desired. Each puff counts as 1 stitch when stated. When working puff + sc rows, the stitch counts should remain mathematically consistent by alternating puff rows and sc rows as instructed.
— Lavender Spike (Make 16 Tall, 10 Medium, 6 Short — pattern for one spike) :
Round 1 :
6 sc in magic ring (6)
Round 3-6 :
1 sc in each st (12) (Rounds 3,4,5,6)
Info :
After Round 4 or Round 6 (depending on desired spike base length), insert a length of floral wire about 3-5 cm longer than final spike length. If the tube is still open, slide wire into the center and position it along the core. Continue crocheting around wire. This inside wire gives straight support and allows shaping. Fold end of wire to prevent sharp tip from poking out or cap it with a small bit of tape.
Round 7 :
(puff in next st, 1 sc in next st) x6 (12)
Round 8 :
1 sc in each st (12)
Round 9 :
(puff in next st, 1 sc in next st) x6 (12)
Round 10 :
1 sc in each st (12)
Info :
The main lavender texture is made by repeating a puff row then a plain sc row. The puff rows create small bud clusters; alternate them evenly so puffs stack. Keep tension consistent so puffs align vertically for a spike look.
Round 11 :
(puff in next st, 1 sc in next st) x6 (12)
Round 12 :
1 sc in each st (12)
Round 13 :
(puff in next st, 1 sc in next st) x6 (12)
Round 14 :
1 sc in each st (12)
Round 15 :
(puff in next st, 1 sc in next st) x6 (12)
Round 16 :
1 sc in each st (12)
Info :
For taller spikes repeat the puff+sc sequence more times. Tall spikes in the pictured arrangement used 10 puff rows total (i.e., five repeats of puff+sc after the tube base). Medium spikes use 6 puff rows total and short spikes 3–4 puff rows total. Count your repeats to keep spike heights consistent across the bouquet.
Round 17 :
(puff in next st, 1 sc in next st) x6 (12)
Round 18 :
1 sc in each st (12)
Round 19 :
(puff in next st, 1 sc in next st) x6 (12)
Round 20 :
1 sc in each st (12)
Round 21 :
(puff in next st, 1 sc in next st) x6 (12)
Round 22 :
1 sc in each st (12)
Info :
To create subtle color variation similar to the photos, change to a slightly lighter/darker purple yarn between puff band groups. Change yarn using the Info method: carry unused yarn inside the tube for short runs, or fasten off and weave ends if changing for many rounds.
Round 23 :
1 sc in each st (12)
Round 24 :
(puff in next st, 1 sc in next st) x6 (12)
Round 25 :
1 sc in each st (12)
Round 26 :
(puff in next st, 1 sc in next st) x6 (12)
Info :
Begin tapering the spike top once you have the desired height of puff bands. Tapering is done by decreasing selected stitches across a round so puff clusters condense toward the tip and the spike cones to a point.
Round 27 :
(2 sc, dec) x3 (9)
Round 28 :
(1 sc, dec) x3 (6)
Round 31 :
3 dec (closing to 0) — if necessary seq as (1 sc, dec) x1 then finish (0-1) depending on your final top size
Info :
Fasten off leaving a long tail. If using wire, bend the top wire slightly down and anchor by stitching through the top opening before pulling tightly. Weave the tail into the inside of the tube and trim. For very pointy tips you can add a small dab of hot glue to keep final stitches secure.
— Stem (Make one for each spike; recommended: 32-36 stems) :
Round 1 :
6 sc in magic ring (6)
Round 3-40 :
1 sc in each st (12) (work as many rounds as needed to reach desired stem length; typical stem uses 28-36 rounds for 20-25 cm length)
Info :
Work the stem as a tight tube around florist wire. After Round 2 (12 sts) push wire into the center and continue crocheting. Do not stuff stems solidly — a touch of fiberfill near the base helps bulk but leave tubes flexible. For very long stems, extend rounds to taste. To change to a paler green for lower stems, change yarn at an even round and continue.
Round 41 :
1 sc in each st (12)
Info :
When stem length is complete, fasten off and leave a long tail for sewing the flower spike tube to the stem. To assemble, insert the top of the wire of the stem into the base of the spike tube; overlap 1-2 rounds and whip-stitch through both tube walls to secure. Weave ends into stem.
— Baby's Breath Floret (Make 40-60 clusters; each cluster is 1 flower on a short stem) :
Round 1 :
6 sc in magic ring (6)
Round 2 :
sc in next st, ch2, sl st into same base to form tiny petal, *sl st into next st, ch2, sl st into same base* rep around until you have created 6 looped petals. (6 petals)
Round 3 :
Fasten off leaving long tail; insert a short length of 20-24 gauge floral wire at center and use long tail to sew through base to anchor the wire and secure petal shape
Info :
Alternate floret method (if you prefer a puffed center): Round 1 make mr 6 (6), Round 2: in each sc make a small puff stitch (puff in each st x6) then finish and attach to wire. The ch2 loop method yields a dainty star-like baby’s breath floret similar to photos.
Round 4 :
Optional: Using a tiny hook (3.0mm or 2.75mm) for smaller petals, repeat Round 2 to produce smaller florets; secure and fasten off as above
Info :
Cluster placement: Baby’s breath stems in the photo are short — 3-4 cm lengths — and are wired. Make many and bend them to tuck into the lavender bouquet. Leave slightly longer tails on some florets to create depth.
— Baby's Breath Spray (Alternative: small spray with multiple florets on one stem) :
Round 1 :
Chain 4, sl st to form small loop as base for multiple florets (forming a little hub)
Round 2 :
Work 4 small floret motifs as described in baby’s breath floret section, sewing each into the hub and attaching a short wire for each bloom
Info :
Make several sprays of 3-6 mini florets and tuck them between lavender spikes for a fuller, airier look. These clustered sprays save time compared to single florets when you want volume.
— Bow & Bow-Tie Cord :
Round 1 :
Make an I-cord style chain: ch 45 (adjust length to wrap around bouquet), sc in 2nd ch from hook and across (44 sc)
Round 2-6 :
Turn, ch1, sc in each st back across (44) (work 5 more rows to create a flat, thick cord)
Info :
After forming a flat cord, roll or fold it into a rounded cord by stitching the long edges together with slip stitch or by crocheting around the edge to create a tube. For a more traditional rounded bow, use a 3-strand braid made from three thinner cords of ch30 each and braid then stitch ends closed.
Round 7 :
Fold cord in half and shape a bow loop: create two loops by folding cord and securing center with a short piece of yarn wrapped around the middle three times, then sew ends neatly at the back (no numeric stitch count required for shaping)
Round 8 :
Make a second short cord (ch 12, sc across for 3-4 rows) to wrap around bow center. Fasten, weave tail and use this cord to cinch the bow before stitching it onto bouquet
Info :
Bow color in photos is lilac. Using the same yarn as lighter lavender creates visual continuity. You can optionally pipe the cord with hot glue to keep bow loops curved and stable.
— Assembly (Preparing to Gather Stems) :
Info :
Lay out your stems grouped by height. Create core groups: 3-4 tallest lavender, surrounded by medium, then short spikes. Tuck baby’s breath sprays between spikes as you build layers. Use floral tape or a temporary tie to keep grouping while you position pieces.
Round 1 :
Position 3 tall spikes in center, then add 3 medium around them and 2 short around the perimeter to mimic natural cluster (no stitch count; assembly step)
Info :
Splay stems slightly as you tighten the bundle to create the triangular bouquet profile seen in the photos. Space baby’s breath evenly; some stems should peek slightly above the lavender and many should fall lower to create fullness near the base.
Round 2 :
Use the long tail of each spike to sew its tube onto its stem tube by overlapping one or two rounds and stitching through both walls with mattress or whip stitch. Secure tightly and weave ends into the stem.
Round 3 :
When the whole bouquet shape pleases you, wrap bouquet center with the long cord you made for the bow. Tie a temporary knot then stitch bow in place through stems with yarn needle and secure center wrap with a few tight stitches. Trim stems evenly at bottom if desired.
Info :
For extra stability use a dab of hot glue between stem wires near the base, then wrap with yarn cord or floral tape to hide glue. Make sure glue and tape do not show on the visible portion of stems.
— Extra Styling & Finishing Touches :
Info :
To achieve the ombre look seen in the photograph, vary which purple yarn you use for each spike: deep purple for the back/tallest, medium for middle, and pale for front/shorter. Tease the puff stitches very slightly with your fingers to create a soft halo that mimics dried lavender fluff if desired. Avoid over-teasing or the puff will lose definition.
Info :
To keep bouquet looking natural on display, slightly bend a few stems outward and stagger baby’s breath clusters so they don’t appear in a single plane. If you plan to gift, wrap base of stems with kraft paper and secure with a narrow ribbon in a coordinating shade.
This lavender and baby’s breath bouquet brings the scentless serenity of a cottage garden to your home with yarn and care. Each puff cluster and delicate floret is made to last, so you can enjoy blooms forever. Tie it with the pretty lilac bow, place it on your table, and watch how it brightens any room. 🧶💜 Thank you for making handmade — it truly adds magic to everyday moments.