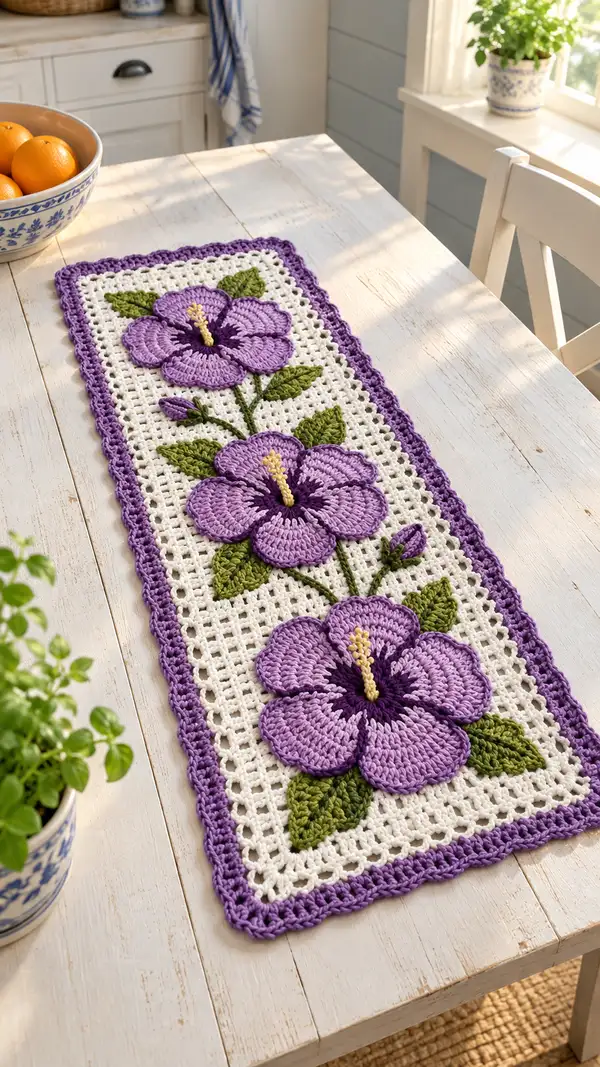
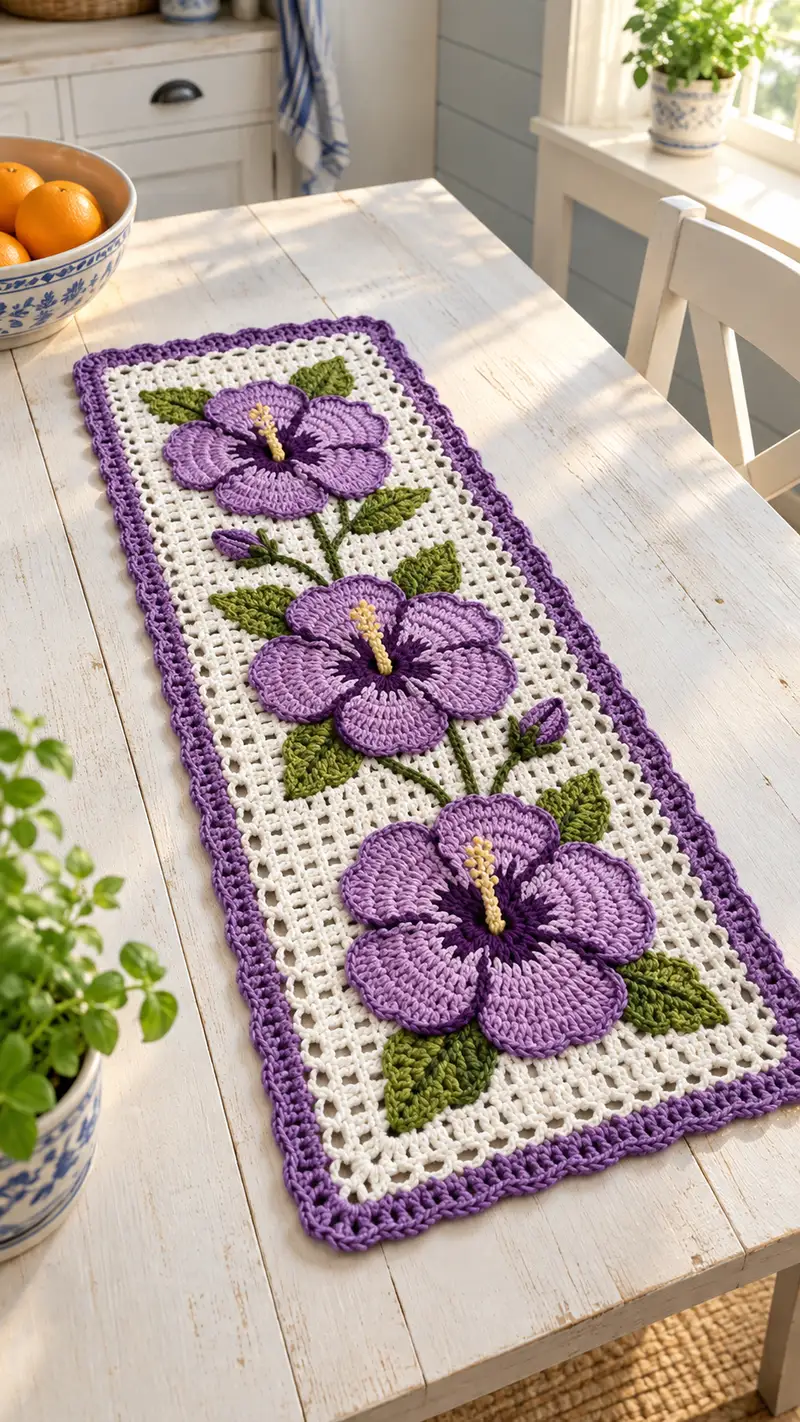
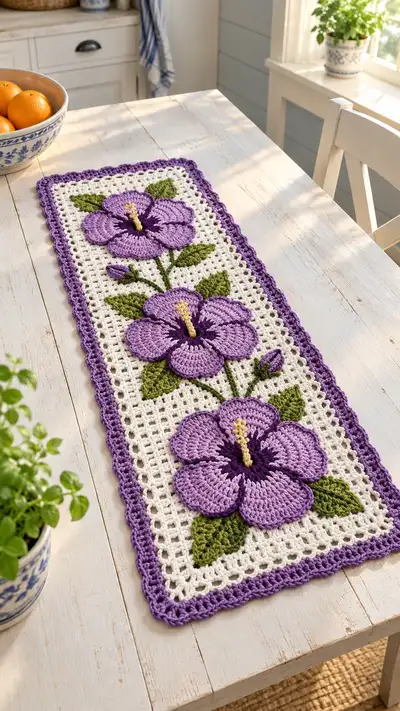
Bring a fresh garden touch to your table with this hand-crocheted Lavender Hibiscus Table Runner. Three dimensional purple hibiscus flowers with raised petals and textured green leaves sit on a crisp white open mesh background, finished with a scalloped lilac border. This elegant runner adds a soft, cottage-style accent to dining or console tables and works beautifully in seasonal or everyday decor. Detailed stitch-by-stitch instructions, assembly tips, and finishing notes help you recreate the exact look.
Progress Tracker
0% Complete
— Notes & Gauge :
Info :
Runner measures approximately 11" wide x 36" long when using worsted weight yarn and 4.0mm hook. Gauge for mesh: 10 squares (filet blocks) = approx 2" across. Changing hook or yarn weight will alter finished size; make a 10x10 block swatch to check tension. Pattern components: mesh background worked first, flower motifs worked separately and appliqued, stems surface-crocheted, then scalloped border added. Work with consistent tension throughout.
Info :
Color shorthand used in rounds: BG = Background (White/Cream), P = Petal Lavender, PA = Petal Accent (darker purple), G = Green (leaf), Y = Yellow (stamen). Keep spare small bobbins for color changes when working petals and leaves.
— Mesh Background (Foundation Rectangle) :
Info :
Work the mesh as an open filet grid with dc and ch-2 spaces. Foundation chain must be multiple of 4 plus 1 to keep border symmetry. This pattern uses ch85 foundation for approx 11" width; if you prefer wider/narrower, add/subtract multiples of 4.
Round 1 :
With BG, ch85. Turn, ch3 (counts as first dc), dc in 4th ch from hook and in each ch across — total 83 dc plus ch3 turning (84 dc units) (85 counting the initial ch)
Round 2 :
Ch3 (counts as dc), turn. *ch2, sk next 2 dc, dc in next dc; rep from * across to last dc, dc in top of turning ch (maintains 21 ch2 mesh spaces across) (84 units)
Round 3 :
Ch3, turn. Dc in each dc and in each ch2 space across, working one dc into each ch2- space (84 dc) — this re-establishes the row of solid stitches alternating with mesh rows.
Round 4-62 :
Repeat Rounds 2-3 alternately to build the rectangular mesh until piece measures approx 34" long from foundation chain edge to give room for border and motifs; this will be about 60 rows (end after an even number of rows so the top edge matches bottom). Count: each even-numbered row has 21 ch2 mesh spaces and 63 dc positions (84 stitch units). Keep a stitch marker on the turning ch to track rows.
Info :
Place temporary markers where the three hibiscus centers will sit before you finish the mesh — approximate vertical spacing: center of bottom flower at row 8-12 from bottom, middle flower at row 26-30, top flower at row 44-48 (adjust to taste). Horizontal center is the mid stitch (st/space 42-43 area). Mark centers lightly with pins or removable markers through the mesh.
Round 63 :
Work one final dc row (Ch3, turn, dc in each stitch across) to give a solid edge for appliqué and border attachment (84 dc).
Info :
If your mesh length differs, place motif markers proportionally: divide the working length into quarters and mark centers at 1/6, 1/2, and 5/6 for even spacing of three flowers. Block the mesh rectangle lightly to square it before attaching motifs for accurate placement.
— Flower Motif (Make 3 identical; work 1 then repeat) :
Info :
Each hibiscus is composed of: dark center disk (PA), five sculpted petals (P), optional under-plate to support petals, tubular yellow stamen (Y), and 3–4 leaves (G) worked separately. Work motifs on small scrap circle or directly onto mesh by positioning and slip-stitching the center into place; petals are worked flat and then slightly cupped through post-stitch shaping.
Round 1 :
With PA (dark purple), make a magic ring. Work 6 sc into ring. (6)
Round 2 :
Inc in each st around (6 inc) (12)
Round 3 :
(1 sc, inc) x6 (18)
Round 4 :
(2 sc, inc) x6 (24)
Round 5 :
Sl st into each of next 4 stitches to create a slightly flattened disk shape. Fasten off leaving a long tail for sewing. This disk will be the base center for petals.
Info :
Sew the center disk to mesh at the pin marker using the long tail and a whip stitch through the base. Position so there is a small hole in center for the petal attachment. Secure but do not over-tighten; the center wants to sit slightly raised to receive petal stitches.
Petal Construction Overview :
Each flower has 5 large petals worked individually. Petals are worked flat beginning at the base and increasing to arch then decreasing to a rounded tip. Use P (lavender). For a sculpted look, work taller stitches (dc, tr) on outer rounds and use post stitches or BLO on inner rounds to cup the petal slightly.
Petal 1 — Round 1 :
With P and at the edge of center disk, ch2, work 6 sc into same join space across the top edge of center (6). This forms the base of petal 1.
Petal 1 — Round 2 :
Ch2 (counts as first hdc), turn. (hdc, hdcinc) x3 across the base to shape (9) — interpretation: increase evenly across to widen the petal base.
Petal 1 — Round 3 :
Ch2, turn. (1 hdc, 1 dc) x3, ending with a dc in final stitch (12). This introduces taller stitches toward the petal outer surface.
Petal 1 — Round 4 :
Ch3, turn. Work (1 dc, 1 tr) x6 across to begin peak shaping (18). Work into the back loops of previous row for slight cupping at base if desired.
Petal 1 — Round 5 :
Ch3, turn. Work 1 tr in next 2 sts, 3 tr cluster in center 3 sts, 1 tr in next 2 sts (18). Fasten off and weave tail to base. This creates a rounded tip with a subtle ridge formed by the cluster.
Info :
Work petals 2–5 following the exact stitch counts as Petal 1. Space petals evenly around the center disk; when sewing each petal down, slightly overlap the base of the previous petal by 3-4 stitches to create a natural, contiguous flower shape. Use pins to hold the petals before sewing for symmetry.
Petal 2-5 :
Repeat Petal 1 steps to create petals 2, 3, 4 and 5 (each: base 6 sc, progressive rows increasing to 18 sts with final tr cluster). After completing all five petals, arrange them evenly and sew bases to the PA center disk and into the mesh with long tails for a secure join.
Info :
Optional: For a petal outline, work a surface slip stitch in PA (dark purple) around each petal's outer edge — using the smaller 3.5mm hook and PA, sl st evenly spaced around the petal to emphasize the petal shape. This adds a crisp definition visible in the finished piece.
Petal Detail Round (Edge Definition) :
With PA and 3.5mm hook: Join at any outer edge point, *(sl st 1 in next st, ch1) repeat around the petal edge to create a delicate picot-like outline; fasten off. This accent adds contrast and depth. Ensure even spacing — about 18 sl sts around each petal edge matching the petal counts.
Round — Stamen (Tubular) :
With Y, join at center hole. Ch10. Sl st back along chain to form a short tube (9 sl st). Fasten off leaving a long tail for sewing. Insert tube into the small central hole created earlier and sew through the base so stamen stands upright. If desired, make a cluster of small french knots with leftover yellow yarn around the top of the tube to mimic pollen.
Info :
If you prefer a fuller stamen, make two chains of ch10 and braid lightly then sew through center so it sits higher; secure inside with a few whip stitches on the underside of the center disk.
Round — Petal Center Accent :
With PA, embroider small radial bars from the center outwards between petals using long straight stitches or use a darker yarn to stitch tiny lines that simulate vein accents — approx 5–7 stitches per petal, length 6–10 mm depending on petal size. Knot securely on the underside.
Info :
Repeat motif construction for remaining two flowers. For consistent size, work petals with the same hook and measure each motif against the first; adjust final petal rows if necessary to match diameter (approx 4.5" across each finished flower in this gauge).
— Leaf (Make 9–12 total; 3–4 per flower) :
Info :
Leaves are worked flat with shaping to a pointed tip and a textured vein created by post stitches. Work each leaf in G (green) and add a slightly darker edge if desired with PA (or a darker green).
Round 1 :
With G, ch9. Row 1: sc in 2nd ch from hook, sc in next 3 (4 sc), hdc in next 2, dc in last ch — turning to work along other side of chain: continue dc in next, hdc in next 2, sc in next 3, sl st in last. (Total approximate stitch count around leaf perimeter: 18-20 stitches)
Round 2 :
Turn the leaf tip to the ch foundation; ch1, sc in each sc along one side until the tip, 2 sc in tip ch to create point, sc along other side to base; at center on one side, work 3 hdc back post stitches (BLO) to form a central vein. Fasten off and weave in ends.
Info :
Leaf size should be approx 2"–2.5" long. Make a mix of small (ch7) and medium (ch11) leaves for natural variation. Block leaves flat and slightly cupped if desired to add realism.
— Bud (Optional, Make 3–6) :
Round 1 :
With PA, ch5. Row 1: sc in 2nd ch from hook and across (4 sc). Turn. Row 2-4: sc around to make a small tube (4 sc per round). Fasten off leaving tail. Place bud near the stem under the upper petal and sew securely.
Info :
Buds add visual interest between flowers; vary sizes by changing starting chain length. Add a tiny green leaf or a short length of green chain stitched as a calyx base.
— Stems (Surface Crochet — 3 main stems) :
Info :
Stems are created using surface slip-stitching or chain and sl st sewn to mesh. Use G and tapestry needle to embroider smooth lines from bottom flower center up to top flower center. You may also crochet a cord (ch60–80) and sew it on for raised stems if preferred.
Round 1 :
Determine stem path by marking mesh with pins. With G held at center underside, use tapestry needle and G yarn to surface slip-stitch (or couch a ch-cord) along path connecting flowers. Work slow and even stitches to keep stem flat but raised. Attach leaves and buds where stems meet using whip stitch.
Info :
When attaching, secure stems at least every 1/2" with a small hidden stitch through the mesh to prevent snagging. For a natural look, vary the stem width slightly by couching two thin cords together where the stem approaches a thicker junction.
— Attaching Motifs to Mesh :
Info :
Pin each flower center to its pre-marked location on the blocked mesh. Arrange petals to overlap slightly and position leaves as in the photo. Sew center disk to mesh with long tail using small whip-stitches through the mesh and disk base; then secure the base of each petal to the mesh with several small stitches along the petal base. Sew leaves in place with small stitches through their base and into the adjacent mesh squares. Keep stitches invisible on the right side by catching only the thread bar on the underside of the mesh.
Info :
Check placement by temporarily placing the runner on the intended table to ensure spacing looks even. Adjust pins if necessary before final sewing. Use blocking pins as anchors while sewing to avoid shifting.
— Border (Scalloped Edge) :
Info :
Border is worked in rounds around entire runner once motifs are attached. Work in P (lavender) to echo the flowers. Keep corner shaping smooth and consistent with extra stitches in corners to avoid puckering. The border is three rounds: a foundation sc round, a shell round, and a picot/shell finish round.
Round 1 :
With runner flat, join P at middle of one long edge. Work sc evenly around the entire runner edge into the sides of mesh rows: approximately 3 sc per mesh row end and 1 sc per dc across top and bottom; work (3 sc, ch2, 3 sc) in each corner to create a mitered corner. Maintain an approximate total stitch count for the long edge: 84 sc per long side, and 11 sc per short side (these are approximate and will align proportionally with mesh). Fasten off and weave in ends.
Info :
If your mesh stitch counts differ, evenly distribute sc around edges and add 2–4 extra sc in each corner for smooth curve. Mark each corner's center with a stitch marker to keep symmetry for the scallop rows.
Round 2 :
Join P at any sc. *Skip 2 sc, 5 dc in next sc (shell), skip 2 sc, sl st in next sc; rep around. At corners, place shells evenly and ensure sl st joins do not bunch. After last repeat, sl st into starting sl st to join. (Creates repeating scallop shells around runner.)
Round 3 :
Join P into center dc of each shell: (ch1, sc, picot (ch3, sl st in base), sc) in each shell center to form small decorative peaks. This gives the scalloped, feminine finish seen in the image. Fasten off and weave ends. Block entire runner again to set scallops.
Info :
For a more delicate edge, use BLO on the previous sc round then work shells into the front loop only to create a raised ridge under the shell. Alternate with a contrasting color if desired.
— Finishing & Blocking :
Info :
Gently wash piece in lukewarm water with mild soap. Press between towels to remove excess water then pin to blocking mat to exact dimensions. Use rust-proof pins to shape mesh edges and shell scallops. Allow to dry completely before removing pins. Lightly mist with fabric stiffener for slightly more structure if desired.
Info :
Weave in all tails on the backside and secure with a few extra small stitches if needed. Trim ends close to work. Inspect the right side for any visible sewing stitches and adjust by re-securing seams from the underside if necessary.
— Special Techniques & Tips :
Info :
To create uniform petals, use a stitch counter or mark the middle of each petal base before joining. When sewing petals to mesh, pick up a thread bar from the mesh (not an entire stitch) to keep the right side neat. Use a blunt tapestry needle to avoid splitting yarn when working close to petal edges.
Info :
If your petals flare too much, block them flat on a curved surface (like the edge of a jar) and spritz lightly to set a gentle cup. For more dramatic relief, add a small dot of fabric glue at the base underside where the petal joins the center to help it stand higher.
Info :
For durable table use, consider sewing a thin fabric backing or interfacing to the underside of the mesh before attaching motifs; this helps protect against spills seeping through. If adding backing, attach motifs after backing is sewn on so placement remains consistent.
This Lavender Hibiscus Table Runner brings handmade charm to every meal — three raised, sculpted flowers sit gracefully on an airy mesh, finished with a scalloped border for a classic look. Creating this runner is a satisfying project that combines simple mesh construction with dimensional crochet florals. Enjoy the calming rhythm of the mesh rows and the joyful finishing of each petal — then sit back and admire your beautiful centerpiece! 🌸🧶