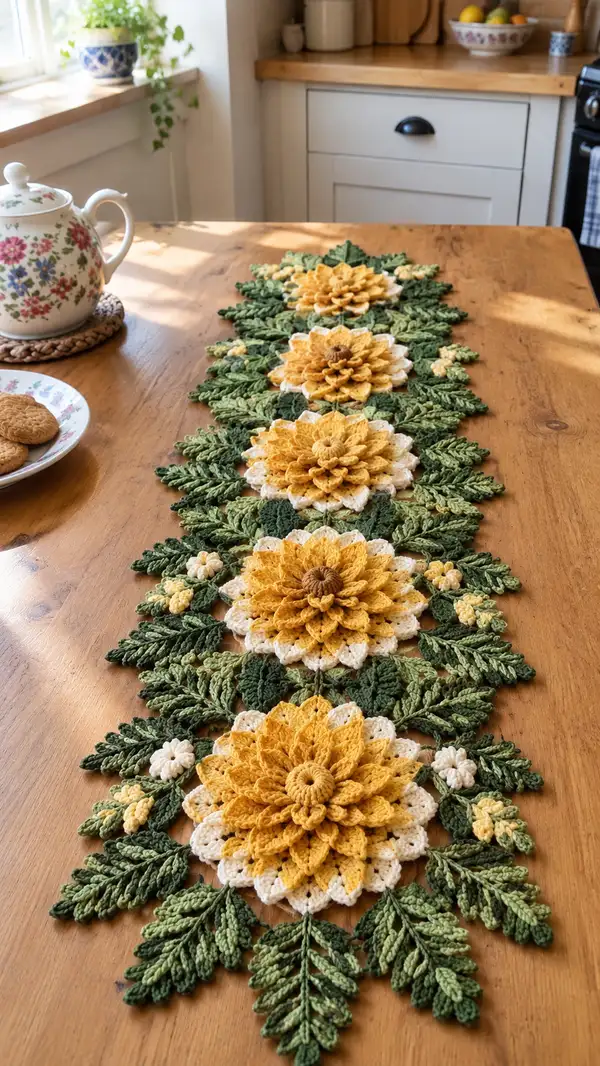
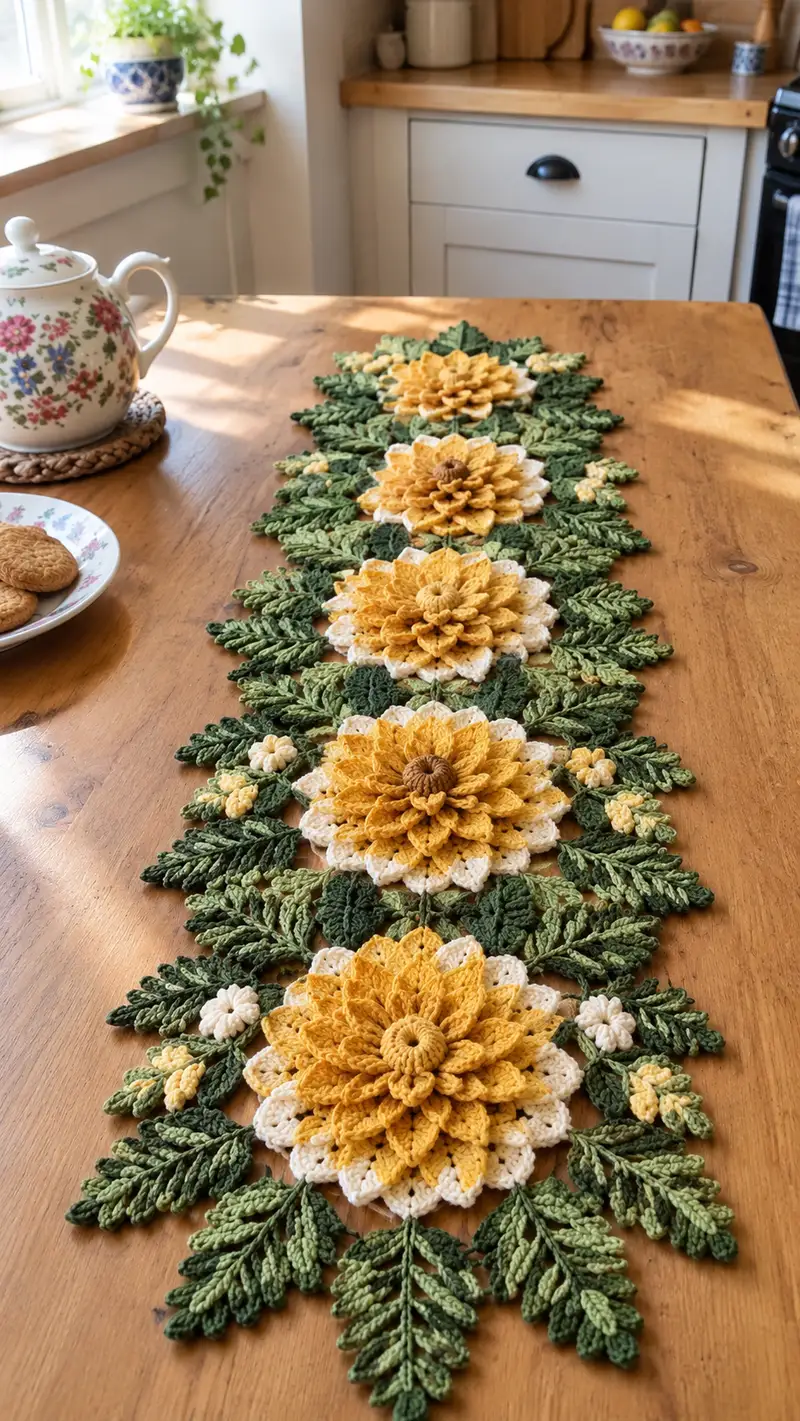
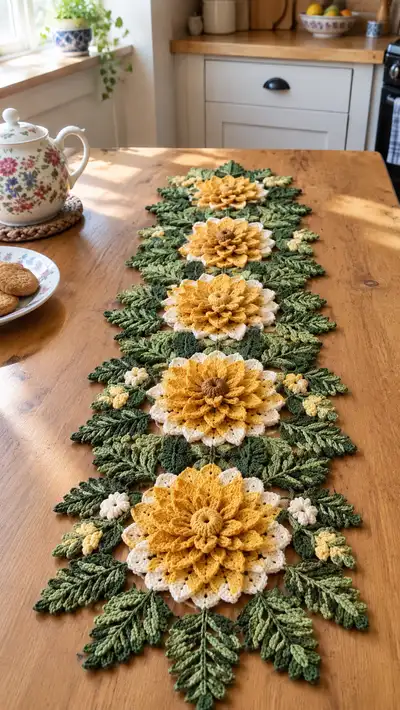
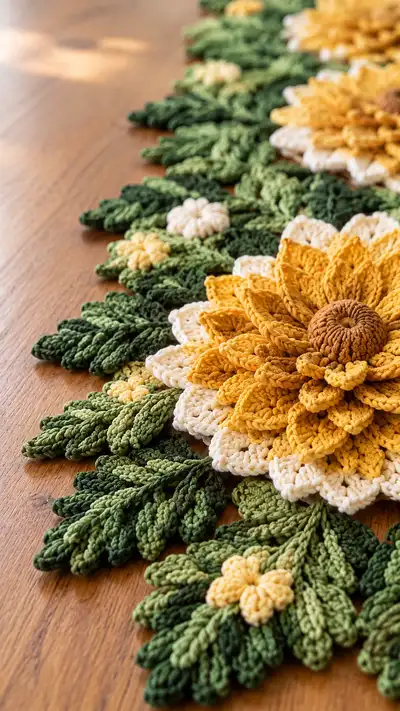
A stunning layered sunflower table runner featuring large 3D floral medallions with deep mustard petals, cream base petals and rich multi-tonal green foliage. This runner is worked as separate floral and leafy motifs then joined to form a long centerpiece ideal for dining tables. Textured petals, raised centers and sculpted leaves give beautiful depth and seasonal charm.
Progress Tracker
0% Complete
— Notes & Gauge :
Info :
Gauge is not critical for this decorative runner, but for approximate sizing aim for 18 sc x 20 rows = 4 in (10 cm) in worsted cotton with 3.5mm hook. Each large flower medallion finished diameter with recommended yarn and hooks is approximately 18-20 cm (7-8 in). Leaves are approximately 12-14 cm (4.5-5.5 in) tip to base.
Info :
Work motifs flat in continuous rounds unless otherwise noted. Use stitch markers to mark the first stitch of each round. Join petals and leaves using whip stitch and mattress stitch for invisible seams.
— Flower Module Overview :
Info :
Each flower module consists of: Center corded rosette (Rounds 1-6), base doily rounds in cream (Rounds 7-14), 1st petal layer (Rounds 15-22 mustard), 2nd petal layer (Rounds 23-30 mustard), 3rd petal layer (Rounds 31-38 mustard), contrasting brown corded center finishing (Rounds 39-42). Work each round exactly and block petal layers flat before stacking.
— Flower Center (corded rosette) :
Round 1 :
6 sc in magic ring (6)
Round 2 :
Inc in each st around (12)
Round 3 :
(1 sc, inc) x 6 (18)
Round 4 :
(2 sc, inc) x 6 (24)
Info :
Switch to brown yarn if making a separate corded center now. Keep tension slightly tighter to make a neat cord; do not stuff heavily.
Round 5 :
1 sc in each st (24)
Round 6 :
Working in BLO: 1 sc in each st BLO (24). Fasten off leaving long tail. Coil center into a tight spiral, overlap and sew through adjacent coils to form a compact corded button finish (approx. 3-4 cm diameter).
Info :
If you prefer a padded button center, wind small amount of polyfill inside before finishing coil. Sew tail neatly into back of coil.
— Base Doily (Cream) :
Round 1 :
Join cream yarn to any stitch of center ring. Ch1 (does not count), 6 sc into same st around (6)
Round 2 :
Inc in each st around (12)
Round 3 :
(1 sc, inc) x 6 (18)
Round 4 :
(2 sc, inc) x 6 (24)
Round 5 :
(3 sc, inc) x 6 (30)
Info :
Even spacing in this round sets base for petal placement. Flatten and pin if needed to check round is flat before continuing.
Round 6 :
1 sc in each st (30)
Round 7 :
(4 sc, inc) x 6 (36)
Round 8 :
1 sc in each st (36)
Round 9 :
*Ch3, sk 1, sc in next* repeat around to create small scallops (36 ch3 loops)
Info :
This round forms the anchoring loops for the first petal layer. Keep ch3 loops even; they will be the stitches you work petal bases into.
Round 10 :
Slip stitch into base of first ch3 loop to start petal bases. (This round is a scaffold — do not fasten off) Sl st in each ch3 loop evenly (36)
Info :
Leave the base doily pinned and blocked flat; this will give a stable platform for multiple petal layers so the petals sit neatly above the cream base.
— Petal Layer 1 (Outer Base Petals - Cream / Transition) :
Round 11 :
Change to mustard if you want a shifting tone or keep cream for contrast: For cream transition, ch1, sc in same, *[work petal: (ch2, (dc, tr, dc) in same loop, ch2, sl st in next loop)]* repeat in each of 12 evenly spaced loops around to create wide petals (12 petals)
Round 12 :
Working behind petals: 1 sc between each petal along base to stabilize (24)
Round 13 :
Picot edging: *sc, ch3, sl st into last sc* around petals to give a scalloped finish (approx. 36 points). Fasten off and block petals flat, shaping each petal so it lifts slightly from the base.
Info :
Block petals with pins and a little steam so they retain a shallow cupped shape. This keeps subsequent layers from flattening the base petals.
— Petal Layer 2 (Inner Mustard Tier - 1st full petal round) :
Round 14 :
Join mustard yarn behind the base doily at inner ring. Ch1, sc in same, *ch4, sk next sc on base, sc in next* repeat to create 12 ch4 loops aligned between base petals (12 ch4 loops)
Round 15 :
Into each ch4 loop: (sl st, ch2, 3 dc, tr, 3 dc, ch2, sl st) to create a tall layered petal; secure at base (12 large petals)
Round 16 :
Working behind these petals: 1 sc between each petal along inner ring to stabilize (24)
Info :
Work petals with 3.0mm hook for firmer textured petals; carry tail through back or weave in later. These petals are sculpting layer 1 of the mustard petals.
Round 17 :
Round of small slip stitch loops behind petal tips for attachment of next layer: *ch2, sl st in top of next petal* repeat 12 times. Fasten off and block these petals separately to ensure uniform height.
— Petal Layer 3 (Middle Mustard Tier - petal duplication) :
Round 18 :
Rejoin mustard yarn to center at base, ch1, sc in same, *work in next sl st loop: (sl st, ch3, 4 dc, tr, 4 dc, ch3, sl st)* repeat 12 times (12 mid petals)
Round 19 :
1 sc between each mid petal along base to anchor (24)
Info :
Offset this mid layer so the mid petals sit between outer petals below and overlap slightly. Pin in place and block again to keep the 3D look.
Round 20 :
Optional decorative ridge: 1 sc BLO around petal bases to create a subtle ridge where petals meet the center (24)
— Petal Layer 4 (Inner Mustard Tier - smaller top petals) :
Round 21 :
Join mustard yarn closer to center, ch1, sc in same, *ch3, sk next base sc, sc in next* repeat to create 12 ch3 loops (12)
Round 22 :
Into each ch3 loop: (sl st, ch1, 3 hdc, dc, 3 hdc, ch1, sl st) to create short rounded petals (12)
Round 23 :
1 sc between each small petal around base to tidy the join (24). Fasten off and block.
Info :
These shorter inner petals create the dense layered look near the center. Stiffen slightly by blocking with a low steam if you want them more upright.
— Finishing Center Cord (Brown) :
Round 24 :
With brown, make a tiny 10-stitch spiral: mr, 8 sc in ring (8)
Round 25 :
Inc in each st around (16)
Round 26 :
1 sc in each st (16)
Round 27 :
Working in FLO: *sc around to create ribbing for corded look (16)*. Fasten off leaving long tail to whip stitch coil onto center. Slightly stuff the brown coil if desired for a puffed center.
Info :
Sew the brown corded coil to the very center of the stacked petals, stitching through the inner petals and base doily to anchor securely. Hide tail under the coil.
— Small Bud / Puff Flower (Make multiple) :
Round 1 :
With pale yellow, mr, 6 sc in ring (6)
Round 2 :
Inc in each st (12)
Round 3 :
*(ch2, 5 dc in same st, ch2, sl st in next)* repeat 6 times to create 6 puff petals. Fasten off leaving tail for sewing (6 puff petals)
Info :
Make small buds in both pale yellow and cream. Attach clusters near leaf bases to mimic the small pale flowers visible in the photos.
— Leaf Module Overview :
Info :
Leaves are worked in single leaf modules that mimic a fern/cedar spray. Each leaf module has a central stem chain and pairs of textured leaflets worked on either side using hdc/dc and post stitches to create fern texture. Work leaves in three sizes: full spray leaf, medium leaf and small filler leaf.
— Leaf Module (Full Spray) :
Round 1 :
Using dark green, ch24 (this is the central stem chain). Sc in 2nd ch from hook and across to the end (23 sc)
Round 2 :
Turn. Working along opposite side of foundation chain: sc in first 3 sts, hdc in next 3, dc in next 4, tr in next 6, dc in next 4, hdc in next 2, sc in last 1 (23 total, varying heights)
Round 3 :
Fold leaf slightly and work 1 sc behind each higher post to create small raised vein: *1 sc into base opposite each longer post* around (approx. 23)
Info :
This establishes a textured single-sided leaf. For a more three-dimensional leaf, work a second identical leaf and sew the two together along the base.
Round 4 :
Edge with picots for serrated look: *sc, ch2, sl st into same sc* across tip regions (approx. 12 picots). Fasten off leaving long tail for joining.
Info :
For color variation, change to mid green for the middle of the leaf by joining mid green yarn at Round 2 and carrying dark green through the base if you want subtle ombre.
— Leaf Module (Medium & Small) :
Round 1 :
Medium leaf: ch18. Sc across (17). Work opposite side with hdc/dc/tr distribution (17). Fasten off. Small leaf: ch12, sc across, work opposite side lightly with hdc/dc, fasten off. Sizes will be approximately 10-14 cm for medium, 6-8 cm for small.
Info :
Make leaves in dark, mid and light green to cluster and create depth. Make enough leaves so that between each flower medallion you have roughly 6-10 leaves total (mix of sizes) depending on desired fullness.
— Leaf Vein Detailing (Optional) :
Round 1 :
Using lighter green and 3.0mm hook, embroider a central raised chain by sewing a surface chain down the center of each leaf and anchoring with small stitches; this gives bright veining contrast.
Info :
Use duplicate stitch or surface slip-stitching. Do this after blocking leaves for the cleanest result.
— Joining & Connector Chain (Creates continuity) :
Round 1 :
Make join chains in mid green: ch30, sc back along chain, at ends attach to leaf tip and opposite leaf tip of next flower module with sl st, creating a slight curve. Repeat between each flower medallion so leaves link as a continuous runner.
Round 2 :
Where chains meet flower base, secure with 2-3 slip stitches and a few small mattress stitches from underside so join is invisible from top.
Info :
Pin the full runner on a flat surface and assemble left to right, placing flower modules spaced evenly (approx. 20-25 cm center-to-center for the pictured look). Adjust spacing to match your table length and desired overlap of leaves.
— Assembly Sequence (Detailed) :
Step 1 :
Block each petal layer and leaf module individually. Press gently with steam or pin-block to correct shape. Let dry fully.
Step 2 :
Stack petal layers: base doily (cream) first, then Petal Layer 2 (tall mustard), then Petal Layer 3 (mid), then Petal Layer 4 (short inner). Use long tail from center to sew layers together at inner base using ladder stitch. Check alignment of petals so they stagger naturally.
Info :
Sew through back loops of petal base rounds to hide stitches. Keep tension even so petals are not drawn tight; they should remain slightly domed.
Step 3 :
Sew the brown corded center to the flat center of the stacked petals, stitching through the innermost petal row and base doily to secure. Make sure the coil is centered and sewn tight so it won't shift.
Step 4 :
Arrange leaves around the flower base. For the pictured look place 3 full spray leaves radiating from one side of each flower and 2 medium + 2 small filler leaves on alternating sides. Sew leaves to the underside of the cream base using mattress stitch and secure with 8-12 stitches each leaf base.
Info :
Use pins to position leaves symmetrically before sewing. Step back and check from above to ensure a pleasing silhouette.
Step 5 :
Sew small buds into clusters near leaf junctions. Tuck the base of each bud behind leaf bases and secure with a few whip stitches so they look naturally nestled.
Step 6 :
Connect each finished flower module to the next using the mid green connector chains. Lay modules on a table in desired order, measure center-to-center distance, then attach chains by sewing chain ends under leaf bases and reinforcing with small stitches along chain to flower underside.
Info :
Test drape across the length of the table before permanently stitching connector chains. You may prefer to add removable snaps or ties for storage ease.
— Repeat & Scaling Notes :
Info :
The pattern for one flower module above can be repeated to form a runner of any length. For the pictured runner, 5 flower modules with leaves between each yields an approximately 90-110 cm (35-43 in) runner; adjust spacing to fit your own table. To make a shorter table runner use 3 flowers and a longer table runner can use 6-7 flowers.
Info :
To alter scale: use a lighter or heavier yarn and change hooks accordingly. If you use bulkier yarn, increase chain and stitch counts for leaf stems and base rounds slightly (+20% across rounds) to maintain proportion.
— Finishing Touches :
Info :
Weave in all yarn tails neatly on the underside. Optionally spray with fabric stiffener diluted 50/50 with water for more rigid petals. For long-term care, hand wash gently and re-block to reshape if necessary.
Info :
Trim any stray fuzz with small scissors and use a toothbrush to gently brush nap if yarn is slightly fuzzy to reveal crisp stitch definition.
— Troubleshooting & Tips :
Info :
If petals are collapsing, add a row of 1 sc BLO around base to act as a shelf. If leaves curl inward, steam-block them flat and weigh down tips with pins until cooled. For uneven flower diameters, examine base rounds for missed increases and adjust by adding or removing a few sc before petal placement.
Info :
Keep a sample flower made as a gauge/template to check future petals and leaves against so the runner stays consistent across repeated modules.
This layered sunflower runner brings sunshine to your table with beautiful texture and a handcrafted feel. Each motif is a small celebration of stitch work — block, stack, and sew to watch the petals bloom into a stunning centerpiece. Whether for everyday coziness or special meals, this piece will spark compliments and warm conversation. 🌿🌞 Add your own color choices to personalize it for any season and enjoy the slow, satisfying progress of making each flower. Happy stitching and don't forget to share your finished runner! 🧶