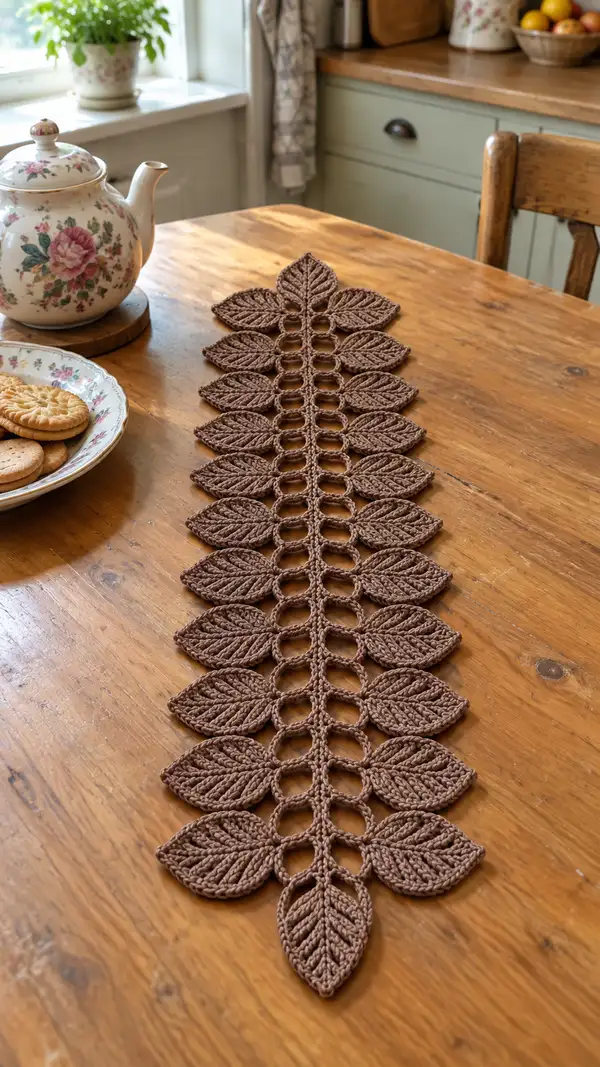
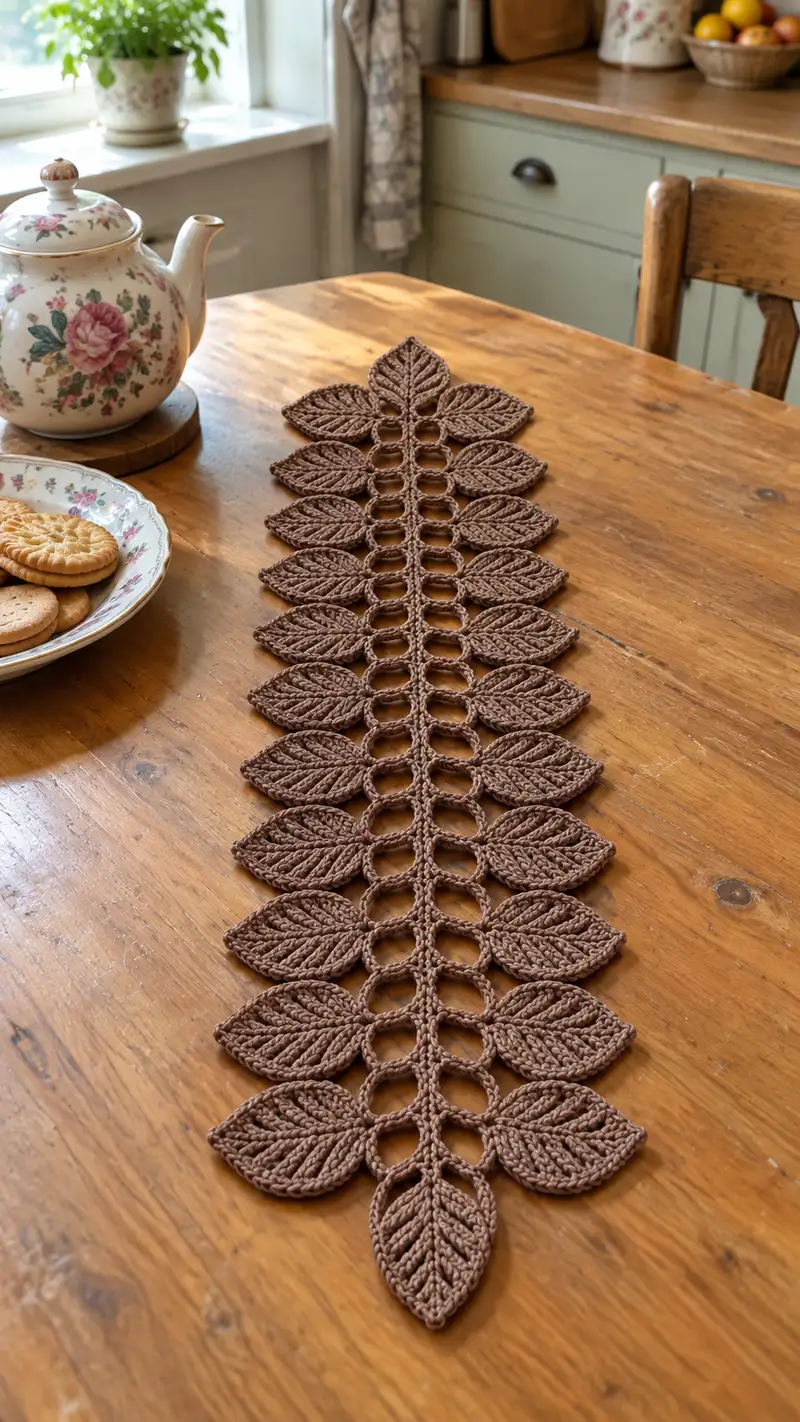
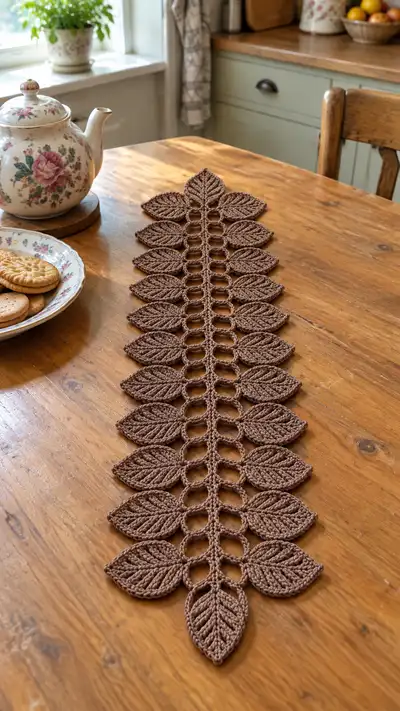
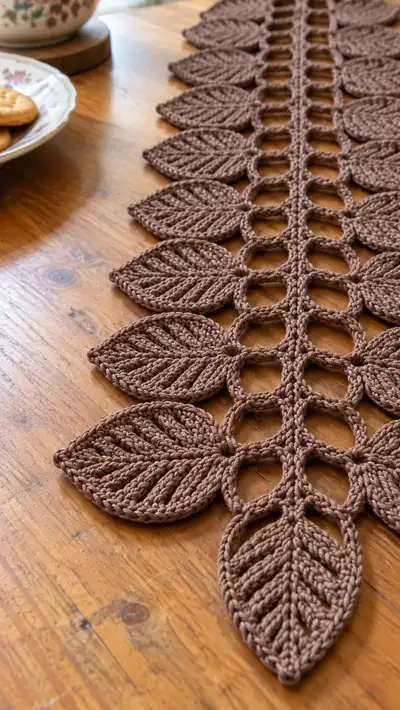
Create an elegant leaf-lace table runner worked in a soft worsted-weight cotton blend. This long, narrow runner is built from sculpted flat leaves joined by a vertical column of lacy oval loops to form a botanical spine. The rich warm brown color, raised ribbed leaf veins and open ring connects make a striking, modern vintage-style centerpiece for any wooden table.
Progress Tracker
0% Complete
— Overview :
Info :
This pattern is modular: you will make a series of identical sculpted leaves and a central column of oval loops (the spine). Leaves are worked flat using a turned-row method around a foundation chain and finished with post-stitch veins. The central spine is made of a series of vertical oval ring motifs joined into a column. Finally, leaves are joined to the column to create a symmetrical runner.
Finished Size :
Approximately 34-36in (86-92cm) long and 6-8in (15-20cm) wide depending on yarn, hook and number of repeats. The sample photographed has 12 leaf-pairs (24 leaves) and measures approximately 36in long.
Gauge :
Leaf width (at widest point) approx 2.25in / 5.5cm when using 4.0mm hook and worsted cotton. Adjust hook size to match desired crispness.
— Techniques & Notes :
Info :
Recommended techniques used: foundation chains, working around a chain to form a flat leaf, front-post double crochet (FPdc) for raised ribs, back-post stitches for subtle reverse texture, slip-stitch joining, and joining-as-you-go options. Place a marker on the first stitch when working each round/row to count accurately.
Info :
All stitch counts shown at the end of rounds refer to number of stitches along the outer edge when working around both sides of the foundation chain, unless noted otherwise. This runner is worked mostly in one color; if you change color, do so in the last yarn-over of the round before the new color round.
— Leaf Motif (Make 24 leaves or desired number) :
Info :
Each leaf is worked flat from a foundation chain, worked around both sides to form a closed leaf. Follow the rounds below for one leaf and repeat to make the number required. The leaf below creates a medium sized leaf similar to those in the photo. Make 24 leaves (12 pairs) for a long runner; reduce or increase number to alter length.
Round 1 :
Ch 21. 1 sc in 2nd ch from hook and in each ch across to last ch, 3 sc in last ch (tip cluster), continue working down the opposite side of foundation chain: 1 sc in each remaining ch across, 2 sc in first ch to close (45 sts) (45)
Round 2 :
Ch 1, turn. 1 sc in same st, 3 sc in next st at the tip-curve (spread increases evenly across the 3 tip sts), 1 sc in each sc along opposite side back to start, 2 sc in first st to close row into outer edge. This will create a continuous flat oval edge while widening slightly across the tip (49)
Round 3 :
Ch 1, turn. Sc in first 2 sts, (inc) in next st, sc in next 6 sts, (2 sc, inc) in each of the 3 tip sts to accentuate the point, sc in next 6 sts, inc in next st, sc to end. This creates a gentle triangular shaping toward the tip (55)
Round 4 :
Ch 1, turn. Sc in each st around, but in the 3 tip sts work (1 sc, hdc, 1 sc) in each to create a little thickness at the point, sc in each remaining st (55)
Info :
From this point forward you will work inset rows to create the raised center vein. Use a stitch marker to mark the center of the leaf base (the stitch opposite the tip) so you can align your FPdc ribs.
Round 5 :
Ch 2 (does not count as st), 1 hdc in same st, *skip next 2 sts, 3 dc cluster (work 3 dc in next st) to begin a rib that will be worked as FPdc on return; continue sc across until you reach the tip cluster; in tip cluster place 5 dc evenly spaced around the tip; continue sc around to base; 1 hdc in last st (maintain 55)
Round 6 :
Ch 1, turn. Work 1 sc in each sc and hdc around except where you encounter the dc clusters placed on Round 5: work FPdc around each of those dc clusters (yarn over, insert hook from front to back to front around the post of the cluster, yarn over and complete dc). These FPdc form the raised ribs. (55)
Info :
FPdc ribs: When making FPdc pick up the post or center of the 3-dc cluster placed on the previous row; this will create strong raised lines radiating from the center toward the tip. Place ribs symmetrically on both sides of the center line—three ribs per side in the sample leaf.
Round 7 :
Ch 1, 1 sc in next 3 sts, *(1 sc, FPdc) in next st to define a rib; rep from * across until you reach tip cluster; in tip cluster work 3 sc evenly spaced; continue (FPdc, sc) pattern mirrored down the other side, finish sc to end (55)
Round 8 :
Ch 1, sc in each st around keeping ribs defined (work sc into the front loop only on non-rib stitches to allow ribs to remain raised). If a rib feels flat, add an extra FPdc into the same post on this round for reinforcement. (55)
Info :
From Rounds 5-8 you are establishing and reinforcing the ribs. The ribs are built using FPdc that wrap around the previous row's clusters and then by keeping adjacent stitches worked into the FLO to let the ribs stand proud. Use your fingers to coax the rib into shape as you go.
Round 9 :
Ch 1, 1 sc in next 4 sts, (dec) over next 2 sts, sc in next 6 sts, (sc, dec) in each of the 3 tip sts to start narrowing toward the tip, sc in next 6 sts, dec over next 2 sts, sc to end (51)
Round 10 :
Ch 1, sc in each st around; work FPdc on the same posts as previous FPdc but place them slightly shorter (insert hook slightly to the side) to give a tapered rib effect toward the tip (51)
Round 11 :
Ch 1, sc in next 3 sts, dec over next 2 sts, sc in next 4 sts, (dec, sc) across the 3 tip sts to narrow tip further, sc in next 4 sts, dec over next 2 sts, sc to end (47)
Round 12 :
Ch 1, sc around keeping ribs defined; if your leaf is too wide reduce one extra stitch on each side by working 1 fewer sc in the widest segments to keep symmetry (47)
Info :
At this stage the leaf is mostly shaped. Check alignment of ribs: there should be a central axis point (the middle of the leaf along which ribs mirror). If the ribs appear uneven, place a few blocking pins to coax them into place before final edge rounds.
Round 13 :
Ch 1, sc in next 2 sts, (dec) over next 2 sts, sc in next 2 sts, (dec) across the 3 tip sts (work sc2tog or sc-dec as appropriate), sc in next 2 sts, dec over next 2 sts, sc to end (43)
Round 14 :
Ch 1, sc in each st around; work a tidy edging by working 1 sc in each st but work the last 3 sts as (hdc, sc, sl st) to create a clean pointed tip finish (43)
Round 15 :
Ch 1, sc in next 3 sts then work (sl st, ch 3, sl st) at the base center to create a small loop for joining later if you prefer a join-as-you-go method; otherwise sc evenly around to finish the leaf edge (43)
Round 16 :
Ch 1, sc around to tidy; fasten off leaving a 16-20in tail for sewing if you will sew leaves to the spine later. Block each leaf gently to flatten and set shape. (43)
Info :
Make 24 leaves (or the number that fits your desired length). The sample runner uses 24 leaves: 12 leaves mirrored on each side of the central column. If you want a shorter runner make fewer leaves, for longer add more repeats.
— Central Oval Loop Column (Spine) :
Info :
The central spine is a column of linked oval rings built vertically. Each ring is an oval constructed of chains and single crochets that form the open oval ring seen between leaf pairs. You can make the column as a separate long strip and then join leaves later, or you can join-as-you-go by attaching each leaf to its adjacent ring as you make it. The sample was joined-as-you-go for neat alignment.
Round 1 (Ring 1) :
Make a starter slip knot. Ch 18, join with sl st to form a ring (or work a tiny sc round to anchor). Alternatively, leave as a flexible oval: ch 18, start working sc around chain loops: 1 sc in 2nd ch from hook across (16 sc), 3 sc in last ch to form tip curve, 1 sc in each ch back to start, join with sl st to first sc. Total 36 sts around ring (36)
Round 2 (Ring 1 reinforcement) :
Ch 1, sc in each sc around; on the long sides make 1 sc in each st BLO to create a slightly rolled edge; on the short curve make 3 sc in each of the 3 curve sts to strengthen the curve (36)
Round 3 (Ring 2 start) :
Ch 10 to form a connector chain. Join ch with sl st into the ring at the spot opposite where you want the next ring to sit. Ch 18 and form the next ring exactly as for Ring 1 (38 when including connector chains). This method creates a short 10-ch connector column between rings making the open oval spacing seen in the sample.
Info :
Create 12 connector units (12 rings down the column) or as many as needed. Each connector uses a ch-10 vertical bar and a completed oval ring. The spacing (10 ch) can be lengthened or shortened to change the openness of the runner. Record the number of rings you make; keep one long vertical chain of connectors if you prefer to join leaves later.
Round 4 to Round 40 (Repeat for each ring) :
Repeat the ring construction and ch-10 connector sequence: (make ring, reinforcement round, connect with ch-10, make next ring). Make a total of 12 rings for the sample runner's central column. Each ring is finished with a reinforcement sc round so they are sturdy for joining leaves. Each ring assembly sequence counts as 3 micro-steps (make ring, reinforce, connect) and you will repeat these steps down the required length. (per ring sets of rounds repeated)
Info :
When making rings, keep tension even and the ch-10 connectors straight by placing a stitch marker at the start of each connector chain. If joining-as-you-go to leaves, hold a prepared leaf behind the ring and slip-stitch through the leaf's base joining loop at the moment you finish the ring reinforcement round.
— Join-As-You-Go Method (preferred) :
Info :
Joining-as-you-go ensures perfect alignment: after completing the reinforcement round of each ring, position a leaf on that ring's left or right side, align the leaf base loop created on Round 15 of the leaf motif with the ring's side, and slip-stitch together evenly. Alternate sides as you progress down the column to create mirrored leaf pairs.
Round 41 :
At Ring 1 finish: hold first leaf RS oriented outward, slide the leaf's base loop inside the ring opening and work sl st through both the leaf loop and the ring rounds at evenly spaced points—work about 8 sl sts around the leaf base to ring to secure (fasten off leaf tail after weaving in). (Anchor complete)
Info :
Round 42 :
Attach second leaf opposite the first on the other side of the ring using the same method. When attaching, maintain the leaf's ribs pointing outward and ensure the tip is aligned with the ring's outer curve. This will create mirrored leaf pairs at each ring location.
Round 43-80 :
Continue repeating: make connector ch-10, make and reinforce next ring, join a leaf to left, join a leaf to right. Repeat until all rings are made and all leaves are joined. For the sample with 12 rings you will join 24 leaves (2 per ring) and finish at the final ring which will be topped with a single leaf at each extreme to create a pointed end. (Repeat until runner is desired length)
Info :
At the very top and bottom of the column you may wish to add an extra leaf to create a balanced pointed finish. For these end leaves attach them directly to the last ring and add a small additional sc edging row around the ring to visually close the ends.
— Alternate Join (Sewing Leaves to Spine) :
Info :
If you prefer to assemble after making all leaves and the spine, block all leaves and the completed spine flat. Lay the spine down and space leaves evenly, pinning as you go. Using the long tails left on leaves, whip-stitch or mattress-stitch the base of each leaf to the outer edge of the adjacent ring at about 8-10 evenly spaced attachment points per leaf for a secure hold.
— Decorative Edge & Final Finishing :
Round 1 (Edge tidy) :
Once all leaves are attached, work a single crochet tidy edge along the entire outer silhouette: working from one tip to the other, sc around the outermost edge of each leaf with 1 sc per st. At sharp tip points work (sc, ch1, sc) to maintain shape. This creates a cohesive outline. (entire runner)
Info :
When working the outer edge, carry yarn behind the leaves where possible to avoid many ends; when you need to join a new ball, hide tails by threading them under a few sc stitches and knotting inside a leaf seam if necessary.
Round 2 (Blocking & Pressing) :
Block the complete runner gently: pin each leaf out to the desired shape on blocking mats, ensuring mirrored leaves are aligned. Lightly steam with an iron at a distance or use a steam iron on low; do not press directly on cotton yarn. Apply light spray starch if you want a crisper finish. Allow to fully dry before removing pins.
Info :
After blocking, weave in all ends with a yarn needle. Tuck tails neatly along the back of leaves and under column connectors. If a leaf edge is slightly loose, add a few invisible ladder stitches across the seam to stabilize it without changing the look.
— Variations & Size Adjustments :
Info :
To widen leaves make foundation chain 23 or 25 and follow proportionately longer rounds. To lengthen runner, add extra rings; for every additional ring add two leaves (one each side). For a denser runner reduce the connector chain length (e.g., ch 6 instead of ch 10) to place leaves closer together.
Info :
For a two-tone runner change color for every 6 leaves down the column for a subtle striped effect, or work the central spine in a contrasting neutral for a stronger graphic look. Carry unused yarn inside the spine when possible for tidy color transitions.
This leaf-lace table runner stitches together organic form and crisp texture for a piece that feels handmade and refined. Each leaf and loop comes together into a stylish botanical ribbon for your table that invites compliments. Whether you make one for everyday elegance or as a thoughtful gift, the assembly and blocking will reward you with a professional-looking finish. 🧶🌿 Enjoy the rhythmic making and the peaceful look it brings to your home. Happy crafting! ✨