🧢 Beautiful ✨ Detailed πŸ’ Adorable

Linnea Sweater Pattern

Linnea Sweater Pattern
4.2β˜… Rating
5-7 Hours Time Needed
2.0K Made This
βœ‚οΈ

Intermediate Level

Ideal for those with basic crochet experience, featuring slightly more advanced stitches and techniques to expand your skills.

⏱️

Weekend Treat

Takes 5-7 hours, making it an enjoyable project to finish over a couple of days.

πŸ‘•

Casual Chic

Relaxed style with a modern twist, perfect for everyday wear while maintaining that handcrafted uniqueness.

About This Linnea Sweater Pattern

This pattern creates the Linnea sweater: a simple, child-sized pullover with a decorative cabled raglan line. It is worked bottom-up in the round with raglan sleeve shaping and finished with a neat 2x2 rib collar and hems. The pattern includes multiple child sizes and clear instructions for cables and raglan decreases.

Linnea Sweater Pattern crochet pattern - detailed view of completed project

Written for fingering weight yarn with gauge and needle recommendations provided, the design suits both playtime and special occasions. The pattern was translated from Norwegian and lists sample yarns for inspiration.

Why You'll Love This Linnea Sweater Pattern

I absolutely love this pattern because the cabled raglan line adds a timeless, textured detail without making the construction overly complicated. Working this sweater bottom-up keeps the shaping intuitive and lets you try it on as you go. The range of child sizes means you can make it for toddlers through pre-teens, which I find very practical. I also enjoy that the pattern uses fingering weight yarn for a soft, wearable fabric that layers easily and photographs beautifully.

Linnea Sweater Pattern step 1 - construction progress Linnea Sweater Pattern step 2 - assembly progress Linnea Sweater Pattern step 3 - details and accessories Linnea Sweater Pattern step 4 - final assembly and finishing

Switch Things Up

I love experimenting with color when making this sweater; try switching the main body color or purling an accent stripe across the hems for a modern twist.

If you want a chunkier, warmer version I sometimes use a heavier yarn and larger needles and adjust the stitch counts to match my new gauge for a cozy, oversized look.

To make a petite version for a baby or keypiece, use thinner yarn and smaller needles and decrease the number of repeat rounds proportionally.

I often swap the cable pattern for a simple twisted stitch or seed stitch panel to change the overall style while keeping the raglan shaping the same.

Try lengthening the body for a tunic or shortening it for a cropped look; small length adjustments are easy and give the sweater a new personality.

For a more fitted garment, knit tighter or go down a needle size and check your gauge carefully before starting the full sweater.

I sometimes add elbow patches or tiny contrasting cuffs for durability and a charming handmade detail that kids love.

Want to make matching sets? Use the same yarn and a scaled-down stitch count for hats or mittens to create coordinated accessories.

If you enjoy texture, substitute the stockinette body for a subtle allover stitch pattern like broken rib or linen stitch while keeping the raglan decreases and cable lines intact.

I also recommend blocking each finished piece to shape and even out stitches; a gentle steam or wet block will dramatically improve the final look.

Common Mistakes & How to Fix Them

βœ— Casting on the entire hem and accidentally twisting the stitches when joining in the round; before joining, spread the cast-on stitches on the needle and double-check they are not twisted, then join carefully. βœ— Forgetting to place the BOR (beginning of round) marker when joining the cuff; place a marker at the join to keep track of rounds and raglan marker positions so decreases line up correctly. βœ— Not working the increase rounds on the sleeve evenly or missing markers for the cable sections; set and check your markers before each increase round to ensure consistent shaping and cable placement. βœ— Binding off the collar too tightly which distorts the neckline; bind off loosely in pattern and consider using a larger needle for the last round if your bind-off is too tight. βœ— Inconsistent tension when switching between 3 mm and 3.5 mm needles causing gauge variance; check your gauge after switching needles and block the finished sweater to even out stitches. βœ— Skipping the underarm bind-off step and then misplacing sleeve stitches; follow the instructions to bind off the 6 sts for underarms and place the remaining body sts on hold correctly before working sleeves.

Linnea Sweater Pattern

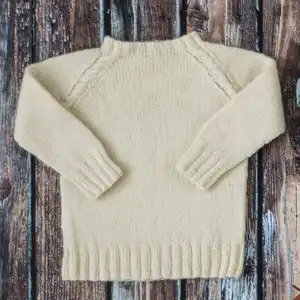
Make a cozy, cabled raglan sweater worked bottom-up with raglan sleeves. This child-size sweater features a decorative cabled raglan line and clean, classic shaping so you can create a special handmade garment for everyday wear. The pattern includes multiple sizes, gauge, needle recommendations, and clear round-by-round instructions to guide you through each step.

Intermediate 5-7 Hours

Materials Needed for Linnea Sweater Pattern

β€” Main Fabric

  • 01
    Fingering weight yarn; 167 m / 183 yards per 50 g skein; (3) 3 (3) 4 (5) 5 (6) 6 skeins depending on size
  • 02
    Sample: Rauma Finull, color 406
  • 03
    Sample: Leine Merino 2 tr, color natur
  • 04
    Sample: Wool4You Capella, color 276

β€” Tools Required

  • 01
    3 mm / US 2.5 circular needles (40 cm / 16 inches and 60 cm / 24 inches) and DPNs for all sizes
  • 02
    3.5 mm / US 4 circular needles (60 cm / 24 inches) and DPNs for smaller sizes
  • 03
    3.5 mm / US 4 circular needles (80 cm / 32 inches) and DPNs for larger sizes
  • 04
    Cable needle (for Cable A and Cable B)
  • 05
    Stitch markers (including a BOR marker)
  • 06
    Tapestry/yarn needle for weaving in ends and sewing
  • 07
    Scissors
  • 08
    Measuring tape for checking lengths
  • 09
    Waste yarn or stitch holders for placing stitches on hold

Progress Tracker

0% Complete

β€” HEM :

Info :

With 3 mm / US 2.5 ndls, cast on (140) 148 (156) 164 (172) 184 (196) 208 sts. Join to knit in the rnd, be mindful not to twist the sts.

Info :

Work 2x2 rib, ie., k2, p2, in the rnd until the work measures 5 cm / 2 inches.

β€” BODY :

Next rnd :

k11 (12) 13 (13) 14 (15) 16 (17), k2tog, k to end of rnd. - 12 sts dec'd

Info :

You should now have (128) 136 (144) 152 (160) 172 (184) 196 sts on your ndl.

Info :

Work in stockinette st in the round until the work measures approx. (24) 26 (28) 31 (33) 36 (39) 42 cm / (9.5) 10.25 (11) 12.25 (13) 14.25 (15.25) 16.5 inches.

Info :

Bind off the first 6 sts, they will become the underarm of the first sleeve.

Info :

Continue knitting (58) 62 (66) 70 (74) 80 (86) 92 sts and bind off the following 6 sts for the other sleeve.

Info :

Knit the rest of the (58) 62 (66) 70 (74) 80 (86) 92 sts and put the work on hold while the sleeves are being worked.

β€” RIBBED CUFF :

Info :

With 3 mm / US 2.5 ndl, cast on (40) 40 (40) 44 (44) 44 (48) 48 sts. Join to work in the rnd. PM at the BOR.

Info :

Work 2x2 rib, ie., k2, p2, in the rnd until the work measures 5 cm / 2 inches.

β€” SLEEVE :

Info :

Switch to 3.5 mm / US 4 ndls and work in stockinette st around.

Info :

Work the following Inc Rnd every 3 cm / 1.25 inches, a total of (4) 5 (7) 7 (9) 11 (11) 12 times.

Inc Rnd :

K1, m1R, k to 1 st before end, m1L, k1. - 2 sts inc'd

Info :

You should now have (48) 50 (54) 58 (62) 66 (70) 72 sts on your ndl.

Info :

Continue working in stockinette st until the work measures approx (20) 24 (28) 31 (33) 36 (39) 42 cm / (8) 9.5 (11) 12.25 (13) 14.25 (15.25) 16.5 inches.

Next Rnd :

Bind off 3 sts, k to 3 sts before end, bind off the remaining sts. - 6 sts dec'd

Info :

Work the other sleeve in the same manner.

β€” JOINING SLEEVES AND BODY :

Info :

Resume knitting from where you left off on the body, with the body and sleeves right side facing each other. Transfer all body sts back onto the ndl, ready to join the sleeves to the body.

Joining Rnd :

With the body sts on your ndl, k3 from sleeve 1, PM, k to 3 sts before end of sleeve 1, PM, k3. K3, PM, k across body sts to 3 sts before the other sleeve, PM, k3. K3 from sleeve 2, PM, k to 3 sts before end of sleeve 2, PM, k3. K3, PM, k across body sts to 3 sts before where you began, PM. This last marker is also the BOR marker.

Info :

You should have a total of (200) 212 (228) 244 (260) 280 (300) 316 sts on your ndl.

Next Rnd :

K to end of rnd.

Next Rnd :

K to 2 sts before end of rnd.

Info :

The pattern continues on the next page.

β€” Cable A :

Info :

Left leaning cable: Slip 3 sts purlwise on to a cable ndl held in front of your work. k3 sts. k3 sts from the cable ndl.

β€” Cable B :

Info :

Right leaning cable: Slip 3 sts purlwise on to a cable ndl held behind your work. k3. k3 sts from the cable ndl.

Info :

The cabled raglan line is worked as follows, slipping all markers as you come across them.

Rnd 1 (dec rnd) :

Starting at 2 sts before the BOR, *ssk, work Cable A, k2tog, k to 2 sts before next marker, ssk, work Cable B, k2tog.* K to 2 sts before next marker, repeat *-* once. K to end of rnd. - 8 sts dec'd

Rnd 2 :

K to 2 sts before end of rnd.

Rnd 3 (dec rnd) :

Starting at 2 sts before the BOR, *ssk, k6, k2tog, k to 2 sts before next marker*. Repeat from *-* 3 times. - 8 sts dec'd

Rnd 4 :

K to 2 sts before end.

Info :

Repeat the Rnds 1-4 until you have worked a total of (16) 17 (18) 19 (21) 23 (25) 27 dec rnds.

Info :

You should now have (72) 76 (84) 92 (92) 96 (100) 100 sts on your ndl.

β€” RIBBED COLLAR :

Info :

Switch to 3 mm / US 2.5 ndls and work 2x2 rib, ie., k2, p2, in the round until the ribbing measures (2) 2 (2.5) 2.5 (3) 3 (3) 3 cm / (0.75) 0.75 (1) 1 (1.25) 1.25 (1.25) 1.25 inches.

Info :

Bind off all sts in pattern loosely.

Info :

Weave in all ends and sew the gaps at the underarms shut.

Assembly Instructions

  • Resume knitting and transfer all body stitches back onto the needle, positioning the body and sleeves with right sides together, then join sleeves to the body using the Joining Rnd instructions, placing markers where indicated.
  • After finishing sleeve shaping, bind off the indicated underarm stitches (6 sts per underarm) and set sleeve stitches aside; when joining, pick up the sleeve stitches and align the 3-stitch joins exactly as described to form the raglan seams.
  • Once the raglan decreasing is complete and you have the total stitches on the needle, work the ribbed collar in 2x2 rib to the specified length, then bind off loosely in pattern to avoid a tight neckline.
  • Weave in all yarn ends securely and sew the gaps at the underarms shut neatly using a yarn needle and mattress stitch or backstitch for an invisible seam.
  • Block the sweater to measurements after finishing to even out stitches and set the shaping, following the gauge measurements for best fit.

Important Notes

  • πŸ’‘Be mindful not to twist the stitches when joining in the round at the hem; lay the cast-on round flat and check before joining.
  • πŸ’‘Place and use markers for the BOR and raglan points to ensure decreases and cable placements line up correctly throughout the raglan shaping.
  • πŸ’‘Work increases on the sleeves and decreases on the raglan rounds consistently and count stitches after each shaping round to stay on track.
  • πŸ’‘Bind off collar stitches loosely in pattern to prevent a tight, uncomfortable neckline and consider using a larger needle for the bind-off if needed.

This Linnea sweater pattern is a delightful combination of classic styling and playful detail, perfect for everyday wear or special outings. The cabled raglan line gives the sweater a charming focal point while keeping construction straightforward and kid-friendly. Make one in a favorite fingering weight yarn and enjoy a cozy handmade garment that will be worn and loved. 🧢🧡

You ask,

we answer.

FAQs

What sizes are included in this pattern?

This pattern includes multiple child sizes: (1 yr) 2 yrs (3 yrs) 4 yrs (6 yrs) 8 yrs (10 yrs) 12 yrs with finished bust circumferences and specific stitch counts listed for each size.

What yarn and needle sizes are recommended?

The pattern recommends fingering weight yarn (167 m / 183 yards per 50 g skein) with 3 mm / US 2.5 and 3.5 mm / US 4 circular needles and DPNs; exact needle lengths (40, 60, 80 cm) are specified for different sizes.

How do I work the cabled raglan line and decreases?

Follow the Cable A and Cable B instructions to hold 3 sts on a cable needle (in front for left-leaning, behind for right-leaning) and work the Rnds 1-4 sequence as written, slipping markers as you come to them and repeating until the specified number of decrease rounds is reached.

Can I change the yarn weight to make a different sized sweater?

Yes, changing yarn weight and needle size will alter the finished measurements and gauge; if you change weight, make a gauge swatch and adjust stitch counts and lengths accordingly to match the desired size.