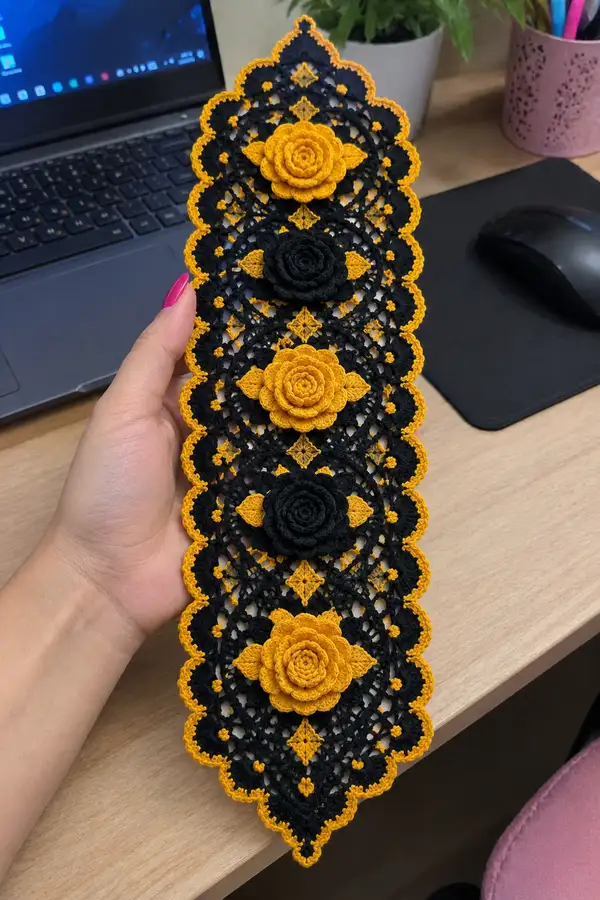
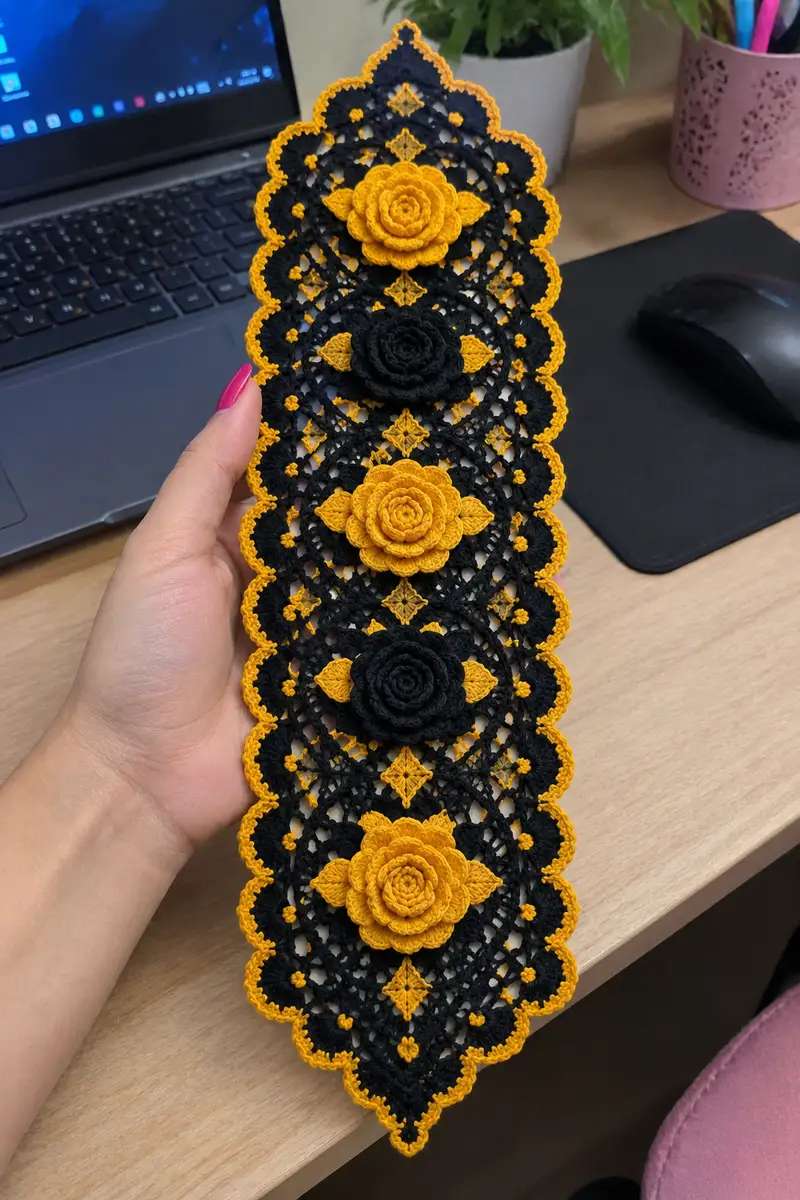
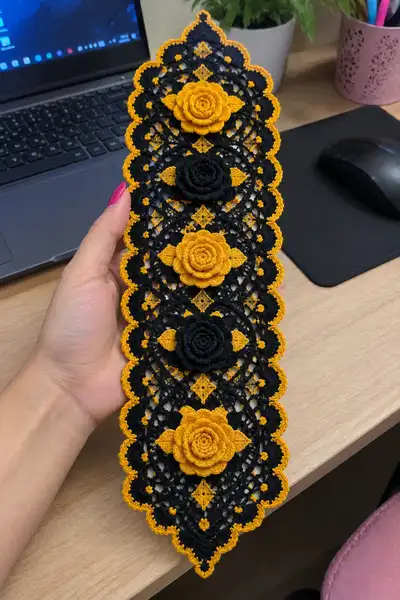
A striking gothic-inspired table runner featuring alternating raised roses in marigold and black set on an open lacy black mesh with marigold edging. This narrow runner shows scalloped edges, diamond connector motifs and delicate picot details for a vintage-lace look. The three-dimensional roses and small leaves are crocheted separately and joined using a join-as-you-go technique for a refined finish. Perfect for an accent on a narrow table, dresser or altar.
Progress Tracker
0% Complete
— Overview & Construction Notes :
Info :
This runner is composed of three identical circular medallion motifs joined end-to-end with diamond connector motifs and finished with a scalloped border. Each circular medallion consists of an internal lacy circle, an outer ring of filled fan pockets, small four-petal clusters, and the 3D rose appliqued to the center. Work all motifs first, block flat then join using join-as-you-go (JAYG) or whip stitch. Pattern written in rounds; stitch counts are checked throughout.
Info :
Gauge and sizing: using size 10 thread and 1.25 mm hook, each full medallion measures approximately 10.5 cm (4.1 in) across. Finished runner (3 medallions plus connectors and edge) measures approximately 36-38 cm (14-15 in) wide at widest scallop and 38-42 cm (15-16.5 in) long including scalloped tips; scale will change with different thread weight and hook sizes.
— Circular Medallion (Make 3) :
Round 1 :
6 sc in magic ring (6)
Round 3 :
(1 sc, inc) x 6 (18)
Round 4 :
(2 sc, inc) x 6 (24)
Round 5 :
(3 sc, inc) x 6 (30)
Info :
Switch to black thread here for medallion body if you worked center in marigold. We recommend a contrasting center for a slightly raised look; the pictured runner uses black for mesh. Carry leftover thread inside ring or fasten off and rejoin.
Round 6 :
(4 sc, inc) x 6 (36)
Round 7 :
(5 sc, inc) x 6 (42)
Round 8 :
1 sc in each st (42)
Round 9 :
*(ch4, skip 1) repeat around to form 14 ch-4 loops; join with sl st to first sc (14 loops)
Info :
Round 9 creates the first airy ring that will host small picot clusters. Count loops to ensure you have 14. Marker each 4-ch loop as reference for following rounds.
Round 10 :
Into each ch-4 loop: (sc, ch3, 3 dc, ch3, sc) in same loop (work in each loop) — creates petal arches (14 arches)
Round 11 :
Between each arch: ch5, sl st into top of adjacent arch to form connecting picot chain (14 ch-5 bridges)
Round 12 :
Working into each arch from Round 10: (sc, 5 dc cluster, sc) — anchor arches into a solid ring (14 clusters) (count 14 anchor sc positions plus cluster stitches)
Info :
Use a stitch marker at a repeat point to avoid losing your place. Keep tension even; these rounds form the decorative mesh that supports the outer fan ring.
Round 13 :
ch3 (counts as dc), 2 dc in same stitch, ch2, skip cluster, *(3 dc in next anchor sc, ch2) repeat around, join (14 groups) — forming an outer dc ring with ch-2 spaces (approximate stitch count 42 dc with 14 ch-2 spaces)
Round 14 :
In each ch-2 space: (sc, ch3, 5 dc, ch3, sc) — 14 outer fans (each fan base counts as 6 sc positions inclusive) (14 fans)
Round 15 :
1 sc in each dc across fan bases, join with sl st — maintain overall count 84 sc (approx) depending on fan stitch totals; if necessary, adjust to keep fan curvature even
Info :
Round 15 evens the fan edge to prepare for decorative filled pockets. If your stitch count is slightly different due to tension, space fans evenly to maintain circular shape.
Round 16 :
Work alternating small filled pockets between fans: *ch6, sl st into base between fans, ch6, sl st into next base* repeat around to form lacy ring (14 pairs of ch-6)
Round 17 :
Into each ch-6 space: (sc, 3 dc cluster, sc) forming filled circular pockets that will read as small rounded discs (28 pockets)
Round 18 :
Work a connecting ring of ch-3 loops around the rim: *(ch3, sl st into next sc) repeat around (total 56 ch-3 loops)
Info :
At this stage confirm the medallion diameter by laying it flat and measuring. Adjust tension if too small or large; this is the structural center where the rose will attach.
Round 19 :
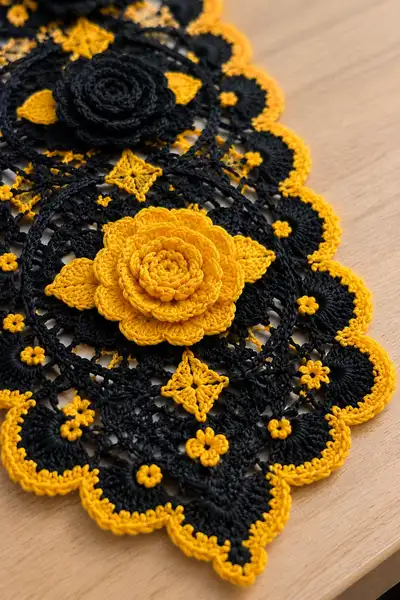
Switch to marigold for small decorative diamonds (see close photograph): ch1, sc into every other ch-3 loop, creating 56 marigold anchors (56 sc)
Round 20 :
At every 4th marigold anchor: (ch4, 3 dc, ch4) into same anchor to form small diamond cluster; on remaining anchors work a single picot (ch3, sl st into base) — creates pattern of diamonds and tiny dots (14 diamonds, 42 dots)
Info :
These marigold points are small motifs that visually echo the outer flowers and help the join-as-you-go alignment. Keep color changes neat by carrying thread along back if preferred.
Round 21 :
Return to black: work 1 sc in each st around to re-establish black outline and prepare for the ring that will hold three decorative leaf anchors (approx 112 sc)
Round 22 :
*(ch5, skip 6 stitches, sc) repeat around forming 14 ch-5 loops for leaf anchors; join (14 ch-5 loops/14 sc anchors)
Round 23 :
Into each ch-5 loop: work a small leaf pocket: (sc, hdc, 3 dc, hdc, sc) — 14 leaf pockets (anchor each leaf with a sl st to base)
Info :
These pockets will sit behind the rose as tiny decorations; when the rose is appliqued, these peek out as small side leaves. Pin rose placement before sewing to determine exact leaf positions.
Round 24 :
Form a narrow decorative ring: 1 sc in each st around including leaf bases, join (approx 140 sc) — keep fabric flat
Round 25 :
Edge stabilization: 1 sc in each st BLO (140) to make a defined edge ridge (counts same)
Round 26 :
Scallop base: *skip 3, (7 dc cluster in next st), skip 3, sl st in next* repeat to create 14 outer rounded scallops (14 scallops)
Round 27 :
Into each scallop: sl st to center, (ch1, 7 sc) in center of scallop, sl st to next scallop (14 groups of 7 sc = 98 sc)
Info :
Finish medallion by blocking flat to open scallops fully. Make three identical medallions. Place them in order as pictured (marigold rose at both ends, black rose centered or alternate color placement as preferred).
— 3D Rose (Make 3; alternate colors) :
Round 1 :
Make a tight center: mr, ch1, 8 sc in mr (8) — leave tail for sewing, do not close fully
Round 2 :
(1 sc, inc) x 4 (12)
Round 3 :
(2 sc, inc) x 4 (16)
Round 4 :
Form base petal ring: ch2, *(dc, ch2, dc) in next st, skip next st* repeat around, join (8 petals formed)
Round 5 :
Working along outer loops of petals: for each petal work (sc, hdc, 3 dc, hdc, sc) to form a full petal; join (8 full first-layer petals)
Info :
Round 5 petals create the first visible layer. Keep petals slightly cupped by using a slightly smaller hook for the rose body if you want pronounced dimensionality.
Round 6 :
To make the spiral that becomes the rose, leave long tail and chain 40, fasten off, then sew the chain in a spiral forming overlapping small loops; alternatively work additional scalloped rounds: (ch3, sl st in base, ch3) around to create a second layer
Round 7 :
Second petal ring: Join to outer edge of first petal layer, work (sc, hdc, 5 dc, hdc, sc) into each petal base (8 larger petals)
Round 8 :
Third petal ring: (sc, hdc, 7 dc, hdc, sc) in each petal base to expand flower (8 largest petals)
Round 9 :
Secure rose: fold and overlap petals into a pleasing open rose form; using the long tail, stitch through the center back to hold shape, weave tail through several stitches to secure
Info :
Two alternative constructions are common: (A) spiral strip rolled and sewn for tight roses, (B) concentric petal rings sewn together and shaped. The pictured roses appear made by concentric petal rings producing a layered effect. Use whichever yields the look you prefer.
Round 10 :
Optional center coil: create a small spiral disc (ch40, work sc back across chain then roll coil and sew) and attach under petals to raise center if desired
Info :
Make 3 roses: two marigold and one black (alternate placement). After roses are completed, lightly steam-block on a padded surface to keep petals shaped but do not flatten the dimension needed for appliqué.
— Small Decorative Diamond Motif (Make 6) :
Round 1 :
mr, ch1, 10 sc in ring (10)
Round 2 :
(1 sc, inc) x 5 (15)
Round 3 :
Work to form diamond shape: ch3, sl st to opposite stitch, repeat to form 4 corners then fill with sc around to stabilize (visual count ~20 sc)
Round 4 :
Turn diamond into 4 pointed star: in each corner work (sc, ch3, sc) to form sharp points (4 points)
Info :
These diamonds are used as connectors between medallions and as accent elements in the center lattice. Make 6 for the runner layout (2 between each medallion).
— Small Four-Petal Clusters (Make 36) :
Round 1 :
ch4, join to make ring, ch1, 8 sc in ring, join (8)
Round 2 :
*(ch2, 3 dc in next st, ch2, sl st in same st) repeat 8 times creating 8 tiny clusters (8 tiny flowers)
Info :
These tiny four-petal clusters are worked in marigold and are attached into the mesh between fans to imitate the raised dots visible in the photos. Make 36 to distribute across three medallions (12 per medallion).
— Leaf (Make 12) :
Round 1 :
ch6, sc in 2nd ch from hook, hdc in next, dc in next, hdc in next, sc in last (5 sts along chain)
Round 2 :
Turn and work along opposite side of chain: sc, hdc, 2 dc, hdc, sc — shape leaf (total ~10 sts)
Round 3 :
Edge picot: sl st to base, *(sc, ch3, sl st in same st) repeat 2 times on each side to create decorative picots — finish and fasten off
Info :
Leaves are small accent leaves placed either side of each rose (two leaves per rose in the pictured runner). Make 6 pairs for three roses = 12 leaves.
— Lace Connector Strips (Make 2 long strips to join medallions) :
Round 1 :
With black thread join to a diamond corner of medallion edge, ch6, sl st to next medallion diamond corner making a connecting bridge; for JAYG work a loop-bridge into the medallion anchor point
Round 2 :
Along each bridge: ch5, sc into bridge base, ch5, sc into next base to create open mesh lattice — repeat to form a strip of alternating ch-5 and sc (length as required between medallions)
Round 3 :
Work 2 rounds of small clusters into this strip: in each ch-5 loop work (sc, 3 dc cluster, sc) to echo the medallion pockets — keep count even across length (approx 12 clusters per strip)
Info :
Make two strips to join the three medallions (one between first and second, one between second and third). Use join-as-you-go to attach to medallion diamond anchors to create a continuous runner.
— Scalloped Border & Final Edge (Work around full joined runner) :
Round 1 :
With black thread and working around entire runner edge: 1 sc in each outer st to even out edges and create a foundation (approx 300-360 sc depending on join variance)
Round 2 :
*skip 4, (7 dc in next st), skip 4, sl st in next* repeat around to form outer scallops (count scallops to match medallion repeats & connector edges; expected 42 scallops)
Round 3 :
Into each scallop center: sl st to center, with marigold yarn join and work (ch1, 9 hdc) or (9 sc for more compact scallop) in center of each scallop, sl st to black edge between scallops — 42 marigold scallop caps (42 x 9 hdc = 378 hdc)
Info :
Switching to marigold for the final scallop caps provides the crisp two-color contrast visible in the photos. Work tidy joins and weave tails neatly on the back so they do not show through the lace.
Round 4 :
Edge finishing: in marigold around each little marigold cap work *(sc, picot, sc) to define each scallop edge; join with sl st — creates raised marigold edging
Round 5 :
Small dot highlights: in black, make tiny 3-dots between scallops by working (ch3, 6 sc in ch-3 loop) anchored with a sl st to black mesh beneath. Space these evenly (42 dots)
Info :
These tiny black dots sit just inside the marigold scallop edging and are visible in the closeup photos. Working them after the marigold scallops allows accurate placement.
Round 6 :
Final border stabilization: work 1 round of sc in marigold across the very edge to tidy and bind all edge stitches (approx 420 sc) — fasten off and weave ends.
Info :
After completing the border, block the entire runner. Pin scallops carefully and either wet-block or use a light steam. Allow to dry overnight for crisp scalloped edges.
— Assembly & Applique :
Round 1 :
Place three medallions in order with connector strips linking them; lay runner flat on blocking board and pin to preserve alignment
Round 2 :
Sew medallions to connector strips using black thread and whip stitch through the back loops only where possible to keep stitches hidden; join at the diamond anchor points
Round 3 :
Attach 3D roses: position each rose centrally on its medallion; tack in place with a few tidy stitches through the rose base and medallion center using matching thread; weave tail through back and secure
Round 4 :
Sew leaves: place two leaves symmetrically under each rose and sew with small invisible stitches. Slightly curve leaves outward for natural look
Info :
Before attaching, experiment with rose orientation on each medallion so the layered petals face the same direction for consistent visual flow. Consider adding a dab of craft glue under the rose base if you prefer an extra-secure hold.
Round 5 :
Sew small diamonds and tiny four petal clusters into the medallion centers and between medallions as pictured. These are largely decorative and may be attached with single-thread whip stitch.
Info :
Weave all loose ends behind the lace, following the path of joins and mesh so they remain invisible. Trim tails close after weaving and use a drop of clear glue if any tail shows through an open space.
— Blocking & Final Finishing :
Round 1 :
Lightly mist runner with water or use steam and pin out to exact dimensions on blocking board; pay attention to scallop symmetry
Round 2 :
Allow to dry completely (overnight). If rigid finish is desired, brush on diluted fabric stiffener to back of runner and lay flat to dry; if flexible finish is desired, leave untreated
Info :
Care instructions: hand wash gently in cool water, reshape while damp, and dry flat. Avoid hot water or heavy agitation that could distort the delicate lace.
Completing this marigold and black rose gothic runner is a satisfying blend of lacework and decorative appliqué! Each medallion, once blocked and joined, creates a dramatic strip perfect as a centerpiece or dresser accent. The raised roses provide luxurious texture while the scalloped marigold edge frames the black lace beautifully. Enjoy the meditative process and the striking finished piece — share photos and bask in compliments! 🧶🌹