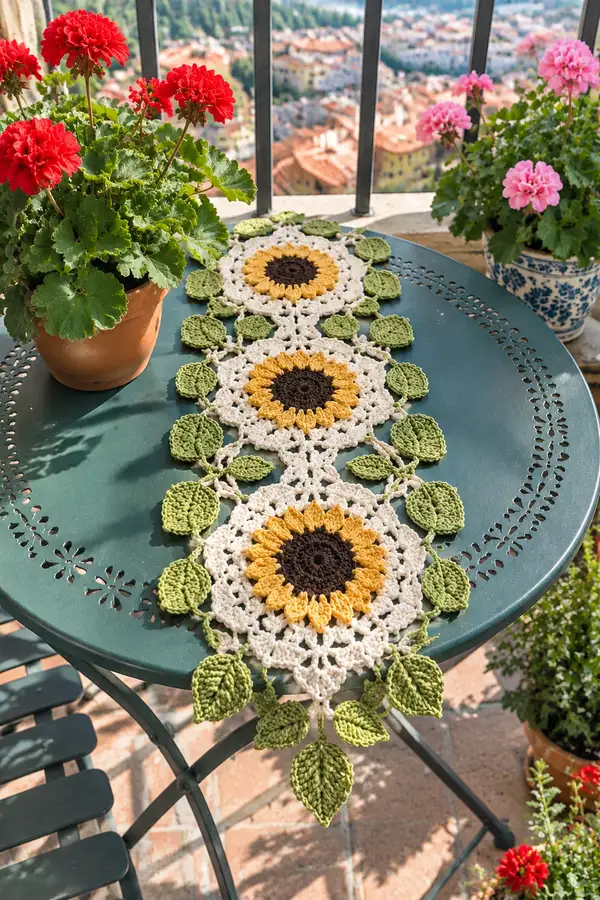
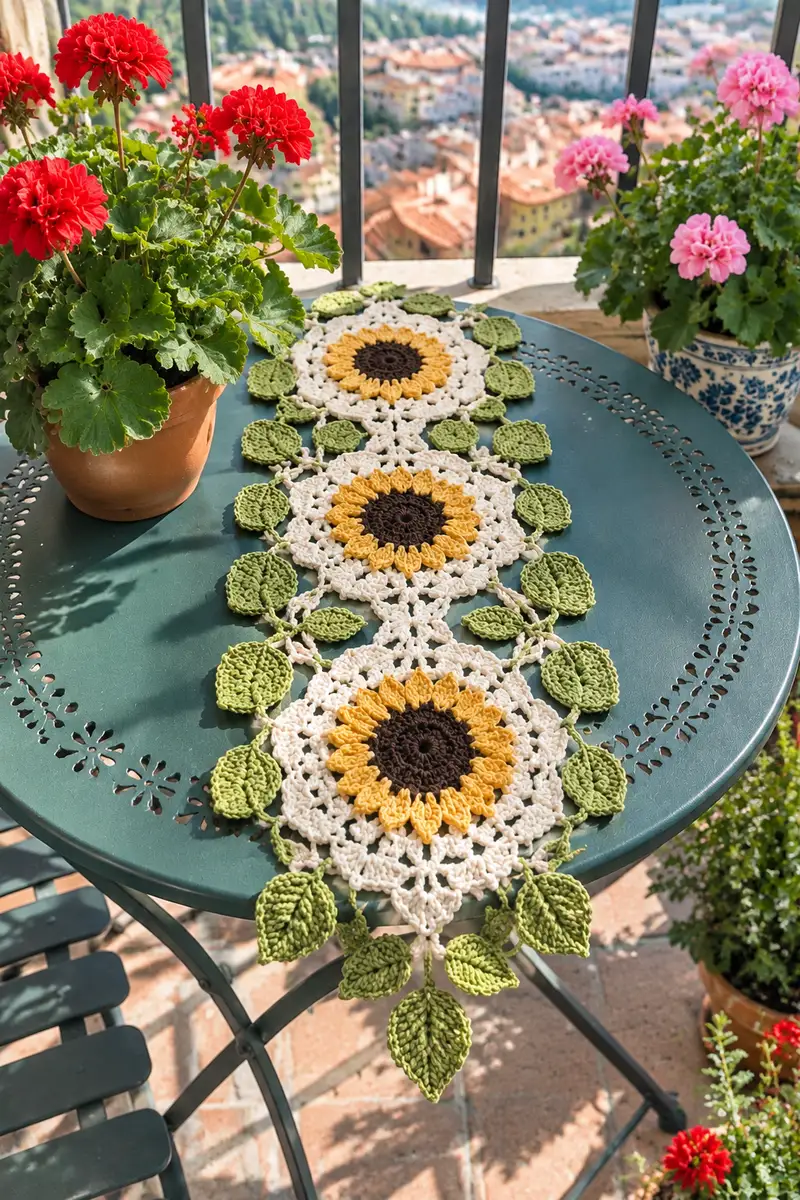
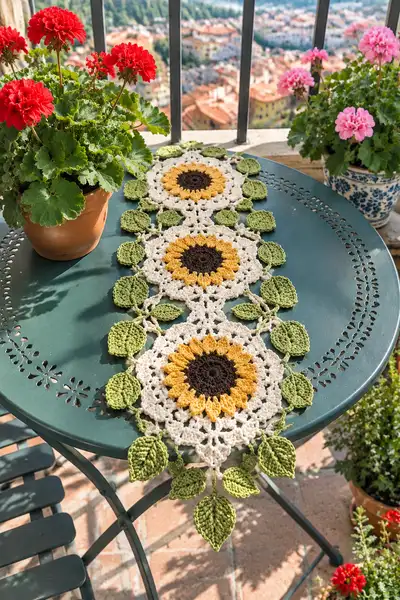
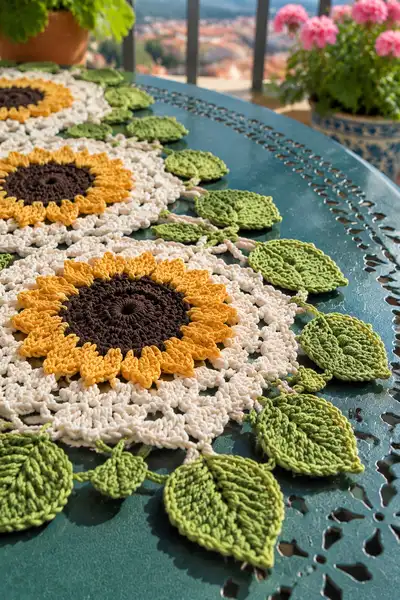
Bring warm summer charm to your table with this sunflower mandala and leaf sprig table runner. Three large sunflower mandalas in brown, golden yellow and cream are linked by delicate pale-cream chain sprigs and edged with layered green leaves. The airy lace motifs and textured petals create a light, decorative runner perfect for centerpieces, patios, or a bright dining table. Worked in smooth cotton for crisp stitch definition, this pattern combines simple rounds and textured petals for an elegant, handmade accent.
Progress Tracker
0% Complete
— Sunflower Mandala (Make 3 identical motifs) :
Round 1 :
With dark brown, 6 sc in magic ring (6)
Round 2 :
Inc in each st around (12)
Round 3 :
(1 sc, inc) x 6 (18)
Round 4 :
(2 sc, inc) x 6 (24)
Round 5 :
(3 sc, inc) x 6 (30)
Round 6 :
(4 sc, inc) x 6 (36)
Info :
These first 6 rounds form the dense sunflower center. Keep tension even and use brown to create a firm, slightly raised disc. Do not stuff — this is flat work.
Round 7 :
1 sc in each st around (36)
Info :
Change to golden yellow for the petal base. Fasten on in a neat location between two sc of the brown center. Round 7 gives a steady base row to build petal clusters.
Round 8 :
*Sc in next 2 sts, ch 3, sk next 2 sts* repeat around (18 sc, 18 ch-3 spaces) (repeats: 36 sts consumed)
Round 9 :
In each ch-3 space: join, (2 dc, tr, 2 dc) to form petal cluster; sl st to next sc between spaces (18 petal clusters; treat each cluster as one petal and 18 join points)
Info :
Petal clusters use taller stitches to create texture. Work each cluster firmly but avoid crowding stitches so petals sit slightly apart. After Round 9 you will have 18 distinct petals arranged evenly around the brown center.
Round 10 :
Change to cream. Ch1, sc in top of each petal cluster and in each sc from previous round: (sc, ch 3) around, placing sc in each cluster top and making ch-3 loops between (36 sc, 18 ch-3 spaces)
Round 11 :
In each ch-3 space: (3 dc, ch1, 3 dc) shell; sl st into next sc (18 shells, 36 dc total across shells)
Round 12 :
Ch2, *sc in next 2 dc of shell, ch4, sc in next 3 dc of same shell* around to create chain arches between shells (18 small arches, 36 sc)
Info :
Use consistent tension on the ch4 and ch3 spaces so the lace rounds remain even. If arches are too loose, reduce chain length by one and re-block later.
Round 13 :
In each ch4 arch: join and work (2 dc, tr, 2 dc) to make a decorative point (18 points)
Round 14 :
Ch1, sc in each st and in top of each point, with *sc, ch2, sc* at the center top of each point to create picot-like loops (54 sc, 18 ch-2 loops)
Round 15 :
Work a round of 1 sc in each st BLO to create a defined ridge (54 sc)
Info :
Working in the BLO creates a subtle ridge and lends visual separation between the flower and the lace border that follows.
Round 16 :
Ch3, *sk 1 st, (dc, ch1, dc) in next st, ch3* repeat around to make alternating shells and arches (27 shells, 27 ch-3 spaces)
Round 17 :
Into each shell: (2 dc, tr, 2 dc); into each ch-3 arch: sl st and ch4 (27 shells, 27 ch-4 spaces)
Round 18 :
Work (sc, ch3, sc) into each ch-4 space to make a delicate lacy fan (54 sc, 27 ch-3 spaces)
Info :
From rounds 16-18 the motif begins to take on a larger, more open lace form. Count shell repeats carefully — you should see symmetry at 27 repeats around.
Round 19 :
Change to cream if not already. *In next ch-3 arch: (3 dc, ch2, 3 dc), ch2 between each large shell* repeat around (27 large shells, 54 ch-2 spaces)
Round 20 :
Sc in each st and work 5-tr chain loops at the four quadrant points: *sc in next 3 sts, ch5, sk 2 sts* repeat to distribute 9 ch-5 loops around (pattern yields 81 sc, 9 ch-5 spaces)
Round 21 :
In each ch-5 space: (3 dc, ch1, 3 dc) to create larger scallops (9 scallops). Continue sc between scallops so total sc around equals 81 sc plus scallop stitches (81 sc anchors)
Info :
Rounds 19-21 form the broader lace 'field' that visually separates each sunflower motif and creates defined points for leaf-sprig attachments. Take care to count repeats so leaves will align later.
Round 22 :
Ch1, sc in each st and in top of each scallop (81 sc)
Round 23 :
*Sc in next 7 sts, ch3, sk 4 sts* repeat around (approx. 9 ch-3 loop groups and 63 sc used — critical: placement of these ch-3 loops will become leaf attachment points)
Round 24 :
Into each ch-3 loop: sl st, ch7 to form a long chain stem for leaf clusters; secure with sl st to next position (9 long stems around)
Info :
These long chain stems are the connection points for the leaf sprigs. Do not fasten off; keep yarn accessible to attach leaf sprigs or you can leave tails for sewing later. Make sure stems are evenly spaced — count carefully.
Round 25 :
Working back into the lace body, sc in each st around to re-anchor the stems and even the edge (81 sc)
Round 26 :
*Sc in next 4 sts, (picot: ch3, sl st to base), sc in next 4 sts, ch1* repeat to create tiny picot accents between larger scallops (81 sc and 9 picots)
Round 27 :
Ch1, sc in each st BLO for a crisp final ridge (81 sc)
Round 28 :
*Sc in next 10 sts, ch5, sl st into center of next scallop* repeat around to form decorative loops for edging and join points (approx. 9 ch-5 loops and 81 sc)
Round 29 :
Into each ch-5 loop: (5 dc, ch2, 5 dc) to form petal-like outer points (9 large outer points)
Round 30 :
Ch1, sc in each st and in each outer point top to stabilize (approx. 135 sc total including outer point tops)
Info :
At the end of Round 30 each sunflower mandala is a flat, ornate medallion with nine outer loop points spaced evenly for leaf attachments. Count stitches across outer points to ensure matching between motifs when joining.
Round 31 :
Ch3, *work (hdc, 2 dc, hdc) into top of outer point, ch4 between points* repeat around to add depth to the edge (9 raised clusters, 9 ch-4 spaces)
Round 32 :
Sc evenly around edge: work 2 sc into each 2-dc group to smooth curve and produce a count of approximately 162 sc around (approx. 162 sc)
Round 33 :
FLO: 1 sc in each st FLO to form a narrow ridge (162 sc)
Round 34 :
Slip-stitch decorative line: *sl st 3, ch2, sl st 3 into next area* repeat around to make delicate loops (pattern repeats 27 times depending on spacing)
Round 35 :
Ch1, sc in each st to secure the loops and prepare for final leaf-attachment round (162 sc)
Round 36 :
Working with cream: at 9 specific evenly-spaced anchors (counted from previous rounds), make a chain of 12; sl st back to anchor to create stout connector loop for leaf-sprigs (9 connector loops)
Info :
Fasten off leaving 12–15 cm tails for weaving in. Make 3 identical mandalas. Label each mandala A, B and C so you can align connectors and leaves consistently when assembling the runner.
— Leaf Motif (Make multiple; refer to layout diagram for number) :
Round 1 :
With medium green, ch 8, sc in 2nd ch from hook, hdc, 3 dc, hdc, sc in last ch; working around opposite side of foundation ch: sc, hdc, 3 dc, hdc, sl st to join (leaf tip shaped; total approx. 14 sts around)
Round 2 :
Ch1, sc in same st, (sc, hdc, 3 dc, hdc, sc) along one side; sl st in center tip; rep along other side to mirror and sl st to base (14 sc/hdc/dc combined to form one fully shaped leaf)
Round 3 :
FLO: 1 sc in each st around to form a fine ridge; place 3 longer sc at the base to form a small stem (14 sc; 3 sc base)
Info :
Work leaves with slightly tighter tension than motifs so they hold shape. Make leaves in two sizes by sharpening or widening the central dc cluster: for a larger leaf use 5 dc in the center cluster instead of 3.
Round 4 :
Using darker green, work surface slip-stitch veins: from tip to base, insert hook and surface sl st down the midline to create a center vein; mirror on reverse if desired (visual only; no stitch count change)
Round 5 :
Ch1, sc in base stitch and make a short chain of 6 to form a tiny stem for attaching; sl st to base to secure. Fasten off leaving 12 cm tail for sewing (leaf complete)
Info :
For the runner pictured, prepare 30 leaves total: 18 medium leaves and 12 larger leaves. Varying leaf sizes gives the sprig a natural look. Keep consistent tail lengths for easy join sewing.
— Leaf Sprig & Connector Chains (Make sprigs to join mandalas) :
Round 1 :
With pale-cream (same as motif body), join to one connector loop on mandala with sl st, ch 10 to form a stem; attach leaf by sewing leaf stem to end of ch-10 with yarn tail (one leaf attached)
Round 2 :
From same connector loop, ch 6, sl st back to motif mid point to create a small loop; repeat ch 10 out to next planned leaf position and attach another leaf; continue to make 3 leaves per connector loop if desired (sprig will have 1-3 leaves depending on placement)
Info :
Sprigs are formed by creating chain stems and sewing pre-made leaf motifs to chain ends. Alternatively, you can crochet leaves directly onto chain ends by working Rounds 1-5 of the leaf pattern around the chain tail.
Round 3 :
For denser clusters, create short side chains of ch4 placed between longer ch10 stems and attach small leaves or tiny round motifs (mini-leaf: ch6, sc around) (no change in main motif stitch count)
Round 4 :
Repeat sprig creation for each of the 9 connector loops on both long sides of all three mandalas. Mirror sprigs on the opposite side for a balanced look.
Info :
Lay your mandalas flat and pin them in place before attaching sprigs; this helps you balance lengths and prevents uneven hanging leaves. Use matching cream thread to make seams invisible.
— Joining Mandalas into Runner & Edging :
Round 1 :
Place mandalas A, B and C in a straight line with outer points overlapping slightly. Using cream, align connector loops of A and B: work sl st into loop from A, ch3, sl st into corresponding loop on B to make a bridge; repeat for all matched connector loops (9 joins between A and B)
Round 2 :
Between B and C repeat the same bridge joins so all three motifs are linked. Confirm spacing is even by measuring the distance between centers — equal spacing produces a balanced runner.
Info :
If you prefer visible join lines, use surface slip-stitch technique: chain a delicate braid and work it across the surface between connector loops so joins become decorative elements.
Round 3 :
Along the long sides of the joined motifs, create a continuous chain arch by working *sl st to motif edge, ch7, sl st to next anchor* around the edges (creates regular arching spaces for leaves). Continue across the full length of the runner.
Round 4 :
In each ch-7 arch work a small star cluster: join, ch1, (sc, ch1) x 6, sl st to close to create decorative knots between leaves (approx. 36 small star clusters across both sides)
Round 5 :
Edge stabilization round: 1 sc in each st around the outer edge of the joined motifs and across the sl st bridges to create a uniform border (approx. 420 sc around runner perimeter including bridges)
Info :
When calculating sc counts for edging, work evenly across the bridges and within arches to maintain a flat runner. If one side puffs, adjust by adding or subtracting a sc every 8–12 sts to compensate.
Round 6 :
Work an ornamental scallop: *sk 3, 5 dc in next, sk 3, sl st into next* around the outer edge to create gentle scallops (approx. 36 scallops)
Round 7 :
Ch1, sc around scallop tops: work 2 sc in each scallop cluster top and 1 sc in the following 4 sts to smooth into the next scallop (counts vary; aim for even division across scallops)
Round 8 :
Make leaf hangers: at every second scallop top, attach a ch-12 stem (using cream) then attach leaves at 3, 6 and 12 stitches along the stem (3 leaves per hanger). Fasten off tails and weave in.
Info :
Check symmetry by counting scallops and hangers on each side. Leaves should mirror each other across the runner center for a polished finished look.
Round 9 :
Work a final decorative line: 1 sc in each st, then work small picot (ch3, sl st to base) every 6 sts to create tiny decorative dots around the edge (final secure round, approx. 420 sc)
Round 10 :
With a final pass in a thin thread matching the cream, block the runner flat by pinning to measurements and lightly spray blocking solution. Smooth leaves and petals into position with gentle fingers.
Info :
Blocking is essential for this runner to lie flat and for leaves and petals to display crisply. Pin each mandala outer point and every leaf tip during blocking. Allow to dry fully before removing pins.
— Finishing Details & Tips :
Info :
Weave all tails on the backside with a yarn needle and secure each join with 3–4 passes of yarn for durability. For outdoor use on a covered patio, spray with fabric protector; avoid direct rain to preserve cotton yarn.
Info :
To change length: add or remove mandalas. To change fullness of leaf border: increase number of leaf hangers or add a double-row of leaves at the ends.
Info :
For a sturdier table runner, line the underside with thin interfacing or lightweight felt sewn in place by hand around outer edge.
Completing this sunflower mandala and leaf sprig table runner is a truly joyful process — each mandala feels like a little celebration as the petals open and the lace grows. The leaves add a playful, organic border that gently dances along the table edge. I hope this pattern brightens your home the way it brightens mine — enjoy the rhythm of the stitches and the lovely floral payoff! 🌻🧶✨