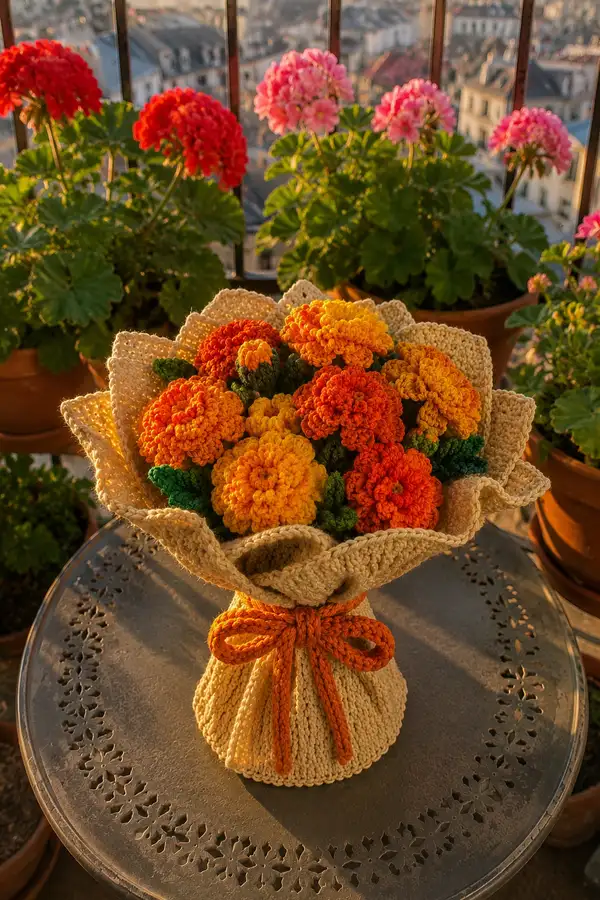
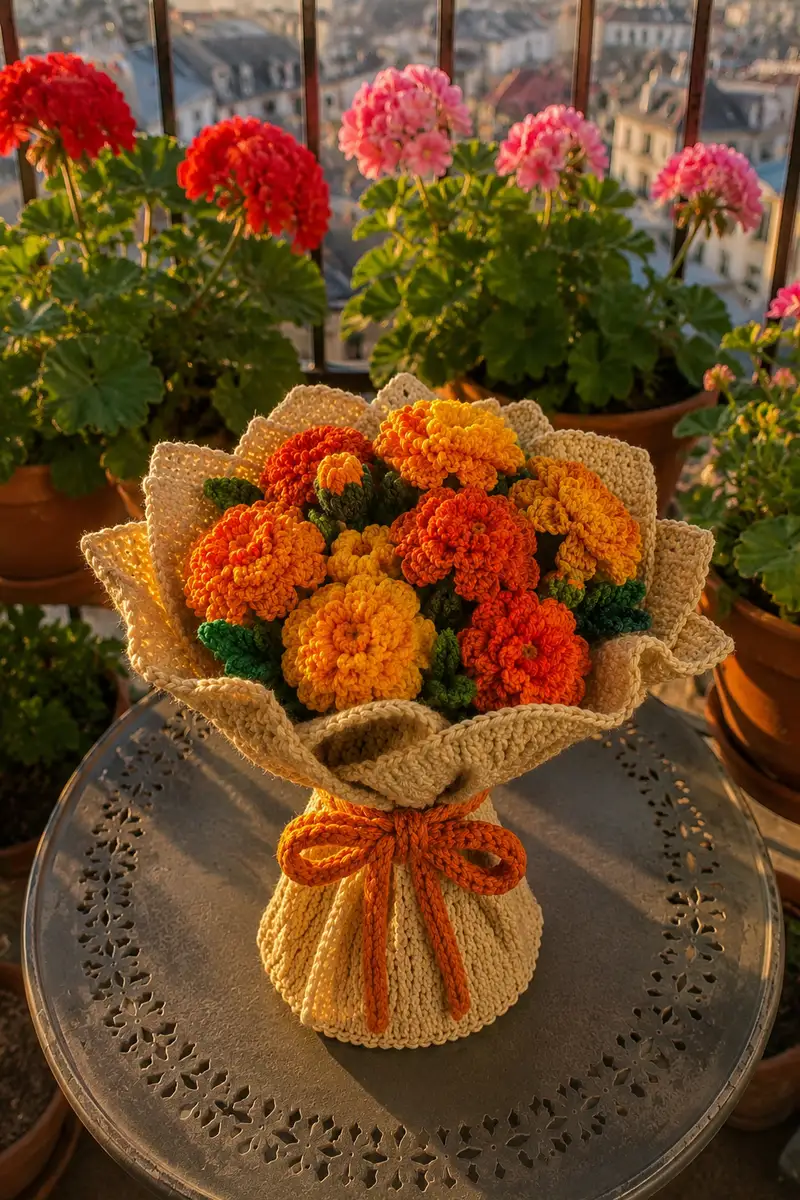
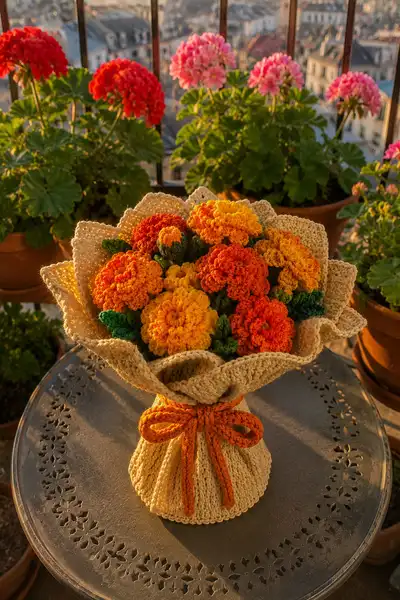
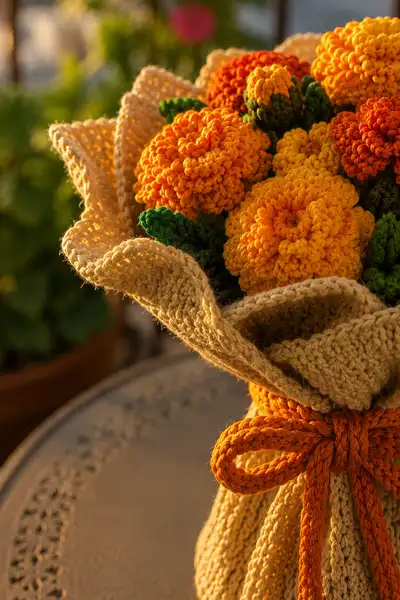
Create a stunning, everlasting bouquet of marigolds in warm oranges and sunny yellows, complete with textured green leaves and a soft beige crochet wrap. This pattern reproduces the dense puffed blooms and layered petals seen in the photo, plus a sculpted wrap and braided bow for a finished gift-ready look. The bouquet is made from multiple small motifs assembled into a full, hand-tied arrangement ideal for home decor or gifting.
Progress Tracker
0% Complete
— Flower (Marigold-style Bloom) :
Info :
Make 9-12 flowers for a full bouquet. This pattern makes one large marigold bloom. Use 3.5mm hook and worsted weight yarn. Work tightly so stuffing does not show. The bloom is constructed with a dense central dome, then two petal layers made with loop/cluster techniques to produce the fluffy marigold texture.
Round 1 :
6 sc in magic ring (6)
Round 3 :
(1 sc, 1 inc) x 6 (18)
Round 4 :
(2 sc, 1 inc) x 6 (24)
Round 5 :
(3 sc, 1 inc) x 6 (30)
Info :
Center dome shaping: work evenly to build a rounded base. Change to a smaller hook in the next round for denser texture if desired.
Round 6 :
(4 sc, 1 inc) x 6 (36)
Round 7 :
(5 sc, 1 inc) x 6 (42)
Round 8 :
(6 sc, 1 inc) x 6 (48)
Round 9 :
1 sc in each st (48)
Round 10 :
1 sc in each st (48)
Info :
Place a marker at the front center of the bloom if you plan to coordinate the orientation of petals. Lightly stuff the center dome now to give shape before adding petal loops.
Round 11 :
*1 sc in next st, lp in next st* rep around (48) (lp = loop stitch: pull yarn up to form a loop approx 6-8mm long, complete sc to secure loop). This round creates the first row of loop petals.
Round 12 :
1 sc in each st (48) working around loops, making sure to tuck loops toward the outside to create a fluffy rim (48)
Round 13 :
*1 sc, lp, 1 sc in same st* rep around (48 lp petals) (48)
Info :
Fluff loops gently with fingers to create petal volume. Use a crochet hook or small scissors to trim very long loops slightly for a uniform bloom surface.
Round 14 :
1 sc in each st (48)
Round 15 :
1 sc in next 3 sts, inc, rep around (12 times) (48)
Round 16 :
1 sc in each st (48)
Round 17 :
*1 sc, bobble in next st* rep around (48) (bobble = yarn over 4 times, insert hook in st, pull through and finish as short bobble according to your preferred bobble technique) (48)
Round 18 :
1 sc in each st (48)
Info :
If you want a two-tone bloom, change to a second color for rounds 17-19 by joining in the new color at the start of the round. Work bobbles or loops in contrast color to mimic natural petal edges.
Round 19 :
(6 sc, 1 inc) x 6 (54)
Round 20 :
1 sc in each st (54)
Round 21 :
1 sc in each st BLO (54)
Round 22 :
*1 sc, ch3, sl st in same st to create a small scalloped petal, skip next st* rep around (27 scallops) (54)
Round 23 :
1 sc in each st (54)
Round 24 :
1 sc in next 4 sts, inc, rep around (9 times) (63)
Round 25 :
1 sc in each st (63)
Round 26 :
*1 sc, lp, 1 sc in same st* rep around (63 lp petals/loops) (63)
Info :
This round builds the outer leafy petal layer. If your bloom looks too big, omit round 24 and proceed with round 25 instead. Check symmetry and redistribute loops.
Round 27 :
1 sc in each st (63)
Round 28 :
(7 sc, 1 inc) x 7 (70)
Round 29 :
1 sc in each st (70)
Round 30 :
Fasten off leaving a long tail for sewing. Lightly stuff under the petals if desired to keep dome fullness. Weave tail through remaining st and close slightly so bloom remains open on top but secured at base.
Info :
Repeat this flower pattern to make multiple blooms. Vary the number of loop stitches per petal and use alternating colors to create a varied, natural-looking cluster. For smaller buds, follow the next Bud section.
— Small Bud (Make several) :
Info :
Small buds are used as filler between larger blooms. Use the golden yellow or deeper orange yarn and a 3.0-3.5mm hook. Make 6-10 small buds for a full arrangement.
Round 1 :
6 sc in magic ring (6)
Round 3 :
(1 sc, 1 inc) x 6 (18)
Round 4 :
1 sc in each st (18)
Round 5 :
*1 sc, lp* rep around (18 lp) (18)
Round 6 :
1 sc in each st (18)
Round 7 :
1 sc in next 2 sts, dec, rep around (13)
Round 8 :
1 sc in each st (13)
Round 9 :
Fasten off leaving 20-30cm tail for sewing to stem. Insert a tiny bit of stuffing if desired; close opening slightly then leave base open to attach to stem.
Info :
Make buds slightly smaller than flowers and vary their placement for a natural bouquet shape.
— Leaf (Make 8-12) :
Info :
Leaves are worked flat with shaping to create pointed marigold leaves. Use green worsted yarn and 3.0-3.5mm hook. Make varied sizes; this pattern makes a medium leaf.
Round 1 :
Ch 7, sc in 2nd ch from hook, sc in next 4, 3 sc in last ch. Continue working on opposite side of chain: sc in next 4, sc in last ch (total 12) (12)
Round 2 :
Ch1, turn, sc in each st across the first side (6), sc in next 3 sts along tip (3), sc in remaining sts back down (6) (15)
Round 3 :
1 sc, hdc, dc, hdc, 1 sc across center to create a raised midrib, then 1 sc in remaining (15)
Round 4 :
1 sc in next st, dec, 1 sc in next, dec, 1 sc in next (shape tip), work back down opposite side mirroring decreases (11)
Round 5 :
1 sc in each st, sl st to finish, fasten off leaving long tail for sewing to stem
Info :
For textured leaves, work last row in BLO to create a visible ridge. Slightly starch or block leaves for better presentation if using cotton yarn.
— Stem (Make same number of stems as blooms/buds) :
Info :
Stems can be worked with a floral wire covered by a crocheted tube or made as a crocheted i-cord/tube with tight single crochet. Using floral wire gives sturdiness and allows arranging. Recommended stem length is 10-12cm for a small bouquet; adjust as desired.
Round 1 :
Make a magic ring, 6 sc in mr (6)
Round 2 :
1 sc in each st (6)
Round 3 :
1 sc in each st (6)
Round 4-20 :
1 sc in each st (6) — continue until stem tube reaches desired length (maintain 6 sts in round for a tight tube). Insert floral wire or pipe cleaner before stuffing; if not using wire, stuff very lightly with fiberfill as you progress.
Info :
To attach flower: leave top of stem open for sewing. You may also create a longer base with 8 sts if you want thicker stems — then rounds would be 8 sc per round.
Round 21 :
Fasten off leaving long tail for sewing into the flower base (do not cut if you plan to cover wire). For wired stems, after covering with crochet, wrap remaining wire end into the base of bloom and secure by stitching.
— Stem tip & assembly nub :
Round 1 :
Small nub: 6 sc in mr (6)
Round 3 :
1 sc in each st (12)
Round 4 :
Fasten off, stuff lightly and leave tail to sew nub into the center base of flower to secure stem. Sew through the base of the bloom to secure the nub and stem, spreading stitches evenly around the base.
Info :
Use small backstitches through the bloom base and tube to anchor the stem; for wired stems fold wire end and tape before covering to prevent poke-through.
— Bouquet Wrap (Large pleated wrapper) :
Info :
Wrap is worked as a wide cone with a scalloped or ruffled edge to mimic paper or fabric. Use beige cotton or cotton-blend worsted yarn for a craft-paper look. The pattern below makes a wrap approx 8-10 inches tall and 6-8 inches across at the opening. Adjust rounds for larger/smaller finishes.
Round 1 :
6 sc in magic ring (6)
Round 3 :
(1 sc, 1 inc) x 6 (18)
Round 4 :
(2 sc, 1 inc) x 6 (24)
Round 5 :
(3 sc, 1 inc) x 6 (30)
Round 6 :
(4 sc, 1 inc) x 6 (36)
Round 7 :
(5 sc, 1 inc) x 6 (42)
Round 8 :
(6 sc, 1 inc) x 6 (48)
Round 9 :
(7 sc, 1 inc) x 6 (54)
Round 10 :
(8 sc, 1 inc) x 6 (60)
Info :
These increases form the cone base. Continue increasing until the wrap opening measures the desired diameter. The example stops at round 10 for a moderate opening — you can continue (9 sc, inc) x 6 for 66 sts etc.
Round 11-16 :
1 sc in each st (60) — work even rounds to build height (6 rounds)
Round 17 :
Change to 3.0mm hook if you want a tighter ribbing for pleats. 1 sc in each st BLO (60)
Round 18 :
1 sc in each st (60)
Round 19 :
1 sc in next 8 sts, inc, rep around (6 times) (66)
Round 20-28 :
1 sc in each st (66) — continue until wrap height reaches approx 12-14 rounds above base (adjust as desired)
Info :
To create a ruffled top edge, work a scallop round next or use increased chains for points. The wrap in the photo has pronounced scalloped ruffles; follow rounds 29-34 to make ruffles.
Round 29 :
Switch to a decorative scallop: *sc in next st, skip 1, (5 dc in next st), skip 1, sc in next st* rep around (66)
Round 30 :
1 sc in each st (66) — if scallops created extra height, even out with this round
Round 31 :
*Ch 6, sl st in 2nd ch from hook to form shallow loop, sl st back to base, skip 2 sts, sc in next st* rep around to create pleated points (22 points, adjust spacing to match stitch count)
Round 32 :
Fasten off leaving a long tail for sewing and gathering. Fold the cone in pleats by gathering the bottom part and sewing a few tacking stitches so the cone holds a flared top when wrapped around flowers.
Info :
For a more structural wrap use a thin cardboard disk at the base inside the cone and sew the cone to the disk to maintain shape; cover disk with extra crochet or felt for a neat finish.
— Internal Base & Filler :
Round 1 :
With same beige yarn, ch 36, join to form a circle (36)
Round 2 :
Ch1, 1 sc in each ch around (36)
Round 3-6 :
1 sc in each st (36) — make a 4-6 round thick ring to sit at wrap base and secure bouquet stems to
Round 7 :
Fasten off leaving long tail for sewing. If you use floral foam or cardboard disk, sew this ring to the disk to hide edges and to create a stable seat for stems.
Info :
If you prefer a flexible base, make this ring slightly taller. For a truly rigid base, glue the ring to craftboard and cover with felt or yarn.
— Bow / Tie Cord :
Info :
The orange bow is made from a braided cord or a crocheted rope. The cord is looped into a bow and stitched to the wrap. This section describes a simple crocheted rope and bow assembly.
Round 1 :
Make a chain of 120 (or desired length for bow loops and tails). Join to work in rounds if you want an i-cord effect, otherwise leave as chain for braided look.
Round 2 :
To create rope: insert 3.5mm hook into 3rd chain from hook, sc across chain, slide hook into back loops for neat finish, continue to end (118 sc) — this creates a flat strap. Fasten off and fold or roll to create cord thickness. Alternatively braid three 40-chains for a braided cord.
Round 3 :
Shape into bow: fold cord into two loops and cross the tails. Whip stitch center area with matching yarn to create bow shape. Secure stitches tightly and weave in ends.
Info :
For a more structured bow, make two cords and layer them. If attaching permanently, tack bow with a few hidden stitches through wrap fabric or use fabric glue on underside to avoid visible glue on the wrap face.
— Final Assembly & Decorative Notes :
Info :
Before final sewing, arrange your flowers, buds, and leaves into the desired composition. Use pins to hold flowers in place and step back to check composition. The goal is a round, slightly domed bouquet with taller blooms toward center and shorter toward edges.
Step :
Trim stem lengths so top of the wrap covers the bottom of blooms; stems should be staggered so flowers sit at slightly different heights (center slightly higher).
Step :
Use the interior ring or a disk to anchor stems: bunch stems and insert into the center of the base ring; sew down through stems and ring to secure. Add hot glue to the base underside for extra hold if desired.
Info :
Arrange leaves interspersed between blooms to mimic real marigold clusters. Fold scalloped wrap top outward to form ruffled petals around cluster. Pin ruffle to hold while sewing a few invisible tacking stitches through the wrap and into the base ring.
Step :
Wrap the cone around the stem cluster and gather at the neck. Tie cord or bow around the neck and make the bow. Sew cord ends to the wrap interior to stop slipping.
Info :
Hide any visible ends by weaving them into the wrap layers and trimming close. Add small decorative stitches or a vintage button to the bow center if you like.
Step :
If desired, make several small filler loops (sprigs) from leftover green yarn and tuck between flowers for added texture.
Info :
For longevity of shape, lightly steam-block the wrap (if yarn allows) and shape scallops by hand. Cotton yarn will accept blocking better than acrylic.
Completing this cozy marigold bouquet pattern leaves you with a bright, everlasting arrangement that warms any room. The layered petals and textured wrap come together to create a gift-ready bouquet full of handcrafted charm. I love how the neutral wrap makes the oranges and yellows sing — it's a satisfying project that looks way more complex than it feels. 🧶🌼 Make one for yourself or a friend and enjoy the glow of handmade flowers. 🎁