About This Mini Sunflower Turtle Amigurumi Pattern
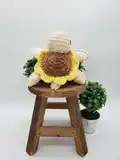
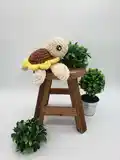
This pattern creates a small, textured sunflower-shelled turtle amigurumi with chenille yarn for a plush finish. You will crochet legs, head, tail, and a sunflower-edged shell and assemble them into a compact, adorable toy. The pattern uses bulky/chenille yarn and demonstrates simple shaping and attachment techniques. Photo placement guides and assembly tips are included to help you finish neatly.

Includes full stitch rounds for each piece and clear instructions for crocheting and attaching parts. A perfect project to practice working in front/back loops, color changes, and crocheting parts directly into the body.
Why You'll Love This Mini Sunflower Turtle Amigurumi Pattern
I absolutely love this pattern because it combines the soft, squishy texture of chenille yarn with playful sunflower details that really make the piece stand out. I enjoy how quickly the bulky yarn works up into a satisfying, plush amigurumi that is still small enough to gift or display. The attachment row that lets you crochet legs and the tail directly into the body is a technique I find neat and efficient — it keeps seams tidy and makes assembly faster. I also love that the pattern includes photos and placement guidance so even when shaping is new to you, you have visual help to get a perfect finish.
Switch Things Up
I love customizing this pattern by swapping yarn colors to create different shell looks; try pastel yellows or deep autumn tones for seasonal variations.
I often change the shell color to a variegated bulky yarn for a marbled effect that adds instant character and texture.
To make a smaller or larger turtle, I change the yarn weight and hook size; a smaller hook and lighter yarn creates a mini keychain, while bulky yarn with a larger hook makes a plush toy.
I sometimes embroider a small smile or add freckles to the head to give each turtle its own personality and expression.
Try substituting the triple crochet shell detail (TC) for taller stitches or even puff stitches to create unique petal shapes on the sunflower edge.
I recommend adding a tiny felt heart or a crocheted bow to the shell for gift-ready personalization that children love.
For sturdiness, I occasionally insert a little cardboard disc inside the shell before sewing down the sunflower edge; this helps the petals sit flatter and hold shape.
If you want posable legs, I add a short piece of floral wire inside the leg before stuffing, then wrap it with yarn to secure for gentle posing.
I like to mix yarn textures—use chenille for the shell and a smooth acrylic for the body—to make the shell stand out visually and texturally.
Don’t be afraid to experiment with eye styles: safety eyes give a professional look, while embroidered eyes make the toy entirely soft and baby-friendly.
Common Mistakes & How to Fix Them
✗ Not using stitch markers when working with fluffy/chenille yarn can cause you to lose track of rounds; place markers at the start of each round and consider marking special stitch positions to keep counts accurate.
✗ Overstuffing the body will distort the shell and legs and make sewing difficult; stuff gradually and stop when the piece is firm but still slightly squeezable to maintain shape.
✗ Forgetting to change colors neatly will leave loose ends and untidy joins; change colors using your preferred method and weave in ends or crochet over tails for a cleaner finish.
✗ Skipping the recommendation to work in the front or back loops can change the shell texture; follow the FLO/BLO instructions and use markers to find the correct loops in subsequent rounds.