🧢 Beautiful ✨ Detailed πŸ’ Adorable

Mini Whale Amigurumi Pattern

Mini Whale Amigurumi Pattern
4.8β˜… Rating
1-2 Hours Time Needed
1.2K Made This
βœ‚οΈ

Beginner Friendly Level

Perfect for those just starting their crochet journey, with clear instructions and simple techniques

⏱️

Quick Make

Complete in under 2 hoursβ€”lightning fast fun for instant gratification and quick gifts.

🎁

Tiny Treasure

Small, sweet, and gift-worthy creations that fit perfectly in the palm of your hand with detailed charm.

About This Mini Whale Amigurumi Pattern

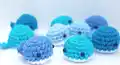
This pattern makes a small, adorable mini whale amigurumi using basic single crochet and simple shaping. You will crochet a rounded body, a separate belly, and a small tail, then stitch them together for a neat finish. It is ideal for using up scrap yarn and making multiple color variations. The finished whale is compact and perfect as a small gift or decoration.

Mini Whale Amigurumi Pattern crochet pattern - detailed view of completed project

Simple increases and rounds make the shaping easy to follow for beginners. Attach safety eyes and stuff lightly for a charming finished piece.

Why You'll Love This Mini Whale Amigurumi Pattern

I absolutely love this pattern because it takes just a few simple stitches to create a little character full of personality. I enjoy how quickly a whale can be completed, making it perfect for gifting or crafting in batches. The pattern is forgiving and easy to customize with different colors and eyes. I also love that it is great for using leftover yarn and practicing basic amigurumi techniques.

Mini Whale Amigurumi Pattern step 1 - construction progress Mini Whale Amigurumi Pattern step 2 - assembly progress Mini Whale Amigurumi Pattern step 3 - details and accessories Mini Whale Amigurumi Pattern step 4 - final assembly and finishing

Switch Things Up

I love customizing these mini whales by changing the color palette; try pastel shades for a soothing look or bright neons for a playful vibe.

I sometimes swap the safety eyes for embroidered eyes to make them baby-safe and give a softer expression.

I will make a keychain version by adding a small chain or split ring to the top of the whale before finishing.

If I want a larger whale, I switch to a thicker yarn and a bigger hook and add a round of increases where needed.

I like to add tiny embroidered smiles or blush using contrasting thread for extra personality on each whale.

For a seaside theme, I add a small crocheted starfish or shell as an accessory and sew it onto the whale or nearby.

I also experiment with textured stitches for the belly to create a subtle contrast between the top and bottom.

To make a set, I change just one element like eye size or tail shape so each whale feels unique while keeping the same overall pattern.

I sometimes stuff the whale slightly firmer to make magnets or slightly softer for plush toys, depending on the intended use.

When gifting, I present a little pod of whales in coordinating colors tied together with a ribbon for a charming handmade present.

Common Mistakes & How to Fix Them

βœ— Placing safety eyes too close together or at the wrong height can make the whale look off-balance; attach eyes between the 5th and 6th rows and space them 4 stitches apart as instructed. βœ— Overstuffing the body can distort the shape and make sewing the belly difficult; stuff gradually and stop when the shape is smooth but still soft. βœ— Skipping stitch counts during increases will change the final size and shape; count stitches after each round to ensure you match the pattern totals. βœ— Leaving very short tails after fastening off makes sewing pieces together fiddly; leave a long tail for sewing the belly and tail securely.

Mini Whale Amigurumi Pattern

Make a collection of tiny, squishy whales with this friendly crochet pattern. You will enjoy quick rounds, simple shaping, and charming details that bring each whale to life. Perfect for gift-giving, keychains, or a cheerful batch of handmade decorations. Follow the step-by-step instructions to finish a delightful mini whale in no time.

Beginner Friendly 1-2 Hours

Materials Needed for Mini Whale Amigurumi Pattern

β€” Main Fabric

  • 01
    Worsted weight yarn (Red Heart Soft Yarn was used for these) - small amounts of main color
  • 02
    One pair of 6mm safety eyes
  • 03
    Polyfil Stuffing

β€” Tools Required

  • 01
    One pair of 6mm safety eyes
  • 02
    Polyfil Stuffing

Progress Tracker

0% Complete

β€” Body :

Round 1 :

Using the color for the body, ch 2. Sc 6 into 2nd ch from hook. (6)

Round 2 :

Inc in each st around. (12)

Round 3 :

*Sc in next st, inc. Repeat from * around. (18)

Round 4 :

Sc in each st around. (18)

Round 5-6 [2 rounds] :

repeat Round 4. F/o, weave in ends.

Info :

*attach safety eyes in between the 5th and 6th rows, 4 st apart.*

β€” Belly :

Round 1 :

Using the color for the belly, ch 2. Sc 6 into 2nd ch from hook. (6)

Round 2 :

Inc in each st around. (12)

Round 3 :

*Sc in next st, inc. Repeat from * around. (18)

Info :

F/o and leave long tail for sewing.

β€” Tail :

Round 1 :

Ch 3. Turn, sc into 2nd ch from hook. Sc in next st. Ch 3, sc in 3rd st from hook, sl st into the side of the next st. Ch 3, sc in 3rd st from hook, and sl st into the next st. Continue making sl st until you reach the bottom of your very first st. F/o and leave tail for sewing.

β€” Assembly :

Info :

Sew the belly to the body, begin stuffing about half-way through. Weave in ends.

Info :

Sew the tail in the 6th row of the body, directly behind the two eyes on the opposite side of the whale.

Info :

Enjoy!

Info :

Follow us on Instagram @crocheting or find our etsy shop "The Crocheting" for more!

Assembly Instructions

  • Attach safety eyes between the 5th and 6th rows of the body, spacing them 4 stitches apart before stuffing.
  • Sew the belly to the body while beginning to stuff the body about half-way through so the belly sits flush with the body's edge.
  • Weave in ends securely after sewing the belly to prevent unraveling and to keep the seam neat.
  • Sew the tail into the 6th row of the body on the opposite side of the whale from the eyes so it sits centered and secure.
  • Finish by adjusting stuffing to smooth the whale's profile and secure all sewn tails with hidden stitches.

Important Notes

  • πŸ’‘Place safety eyes before heavy stuffing to make placement easier and more accurate.
  • πŸ’‘Stuff gradually and check the shape often; overstuffing will change the intended profile of the whale.
  • πŸ’‘Weave in ends and secure seams as you assemble to maintain a tidy finished amigurumi.
  • πŸ’‘Count stitches after each round, especially during increases, to ensure correct stitch totals and shaping.

This mini whale pattern is perfect for quick, joyful makes that brighten any day. Create a whole pod in different blues or mix fun colors for variety. Great for gifts, decorations, or charming little keepsakes. 🐳🧢πŸͺ‘

You ask,

we answer.

FAQs

What size will the finished piece be?

The finished mini whale is small and palm-sized when made with worsted weight yarn and standard hook sizes; exact size will vary with yarn and hook choice.

Can I use different yarn weights for this pattern?

Yes, you can use different yarn weights, but this will change the final size; choose an appropriate hook for your yarn and adjust stuffing accordingly.

Do I need prior crochet experience for this pattern?

This pattern is beginner friendly, so basic knowledge of single crochet and increases is helpful, but complete beginners can follow along with patience.

How long does this project typically take to complete?

Most crocheters can finish a mini whale in about 1-2 hours, depending on experience and how many details or color changes you include.