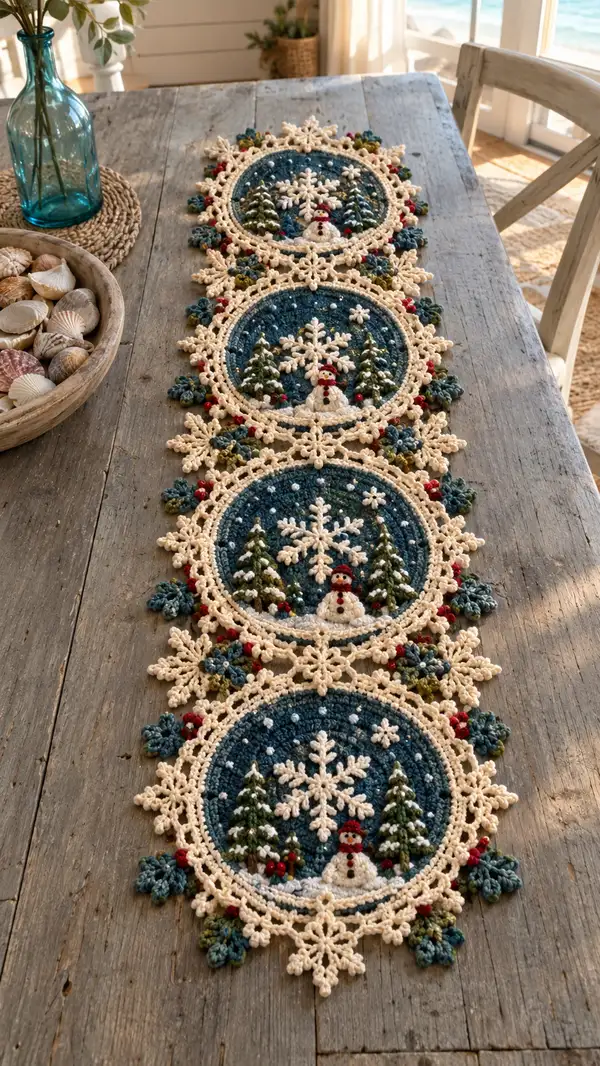
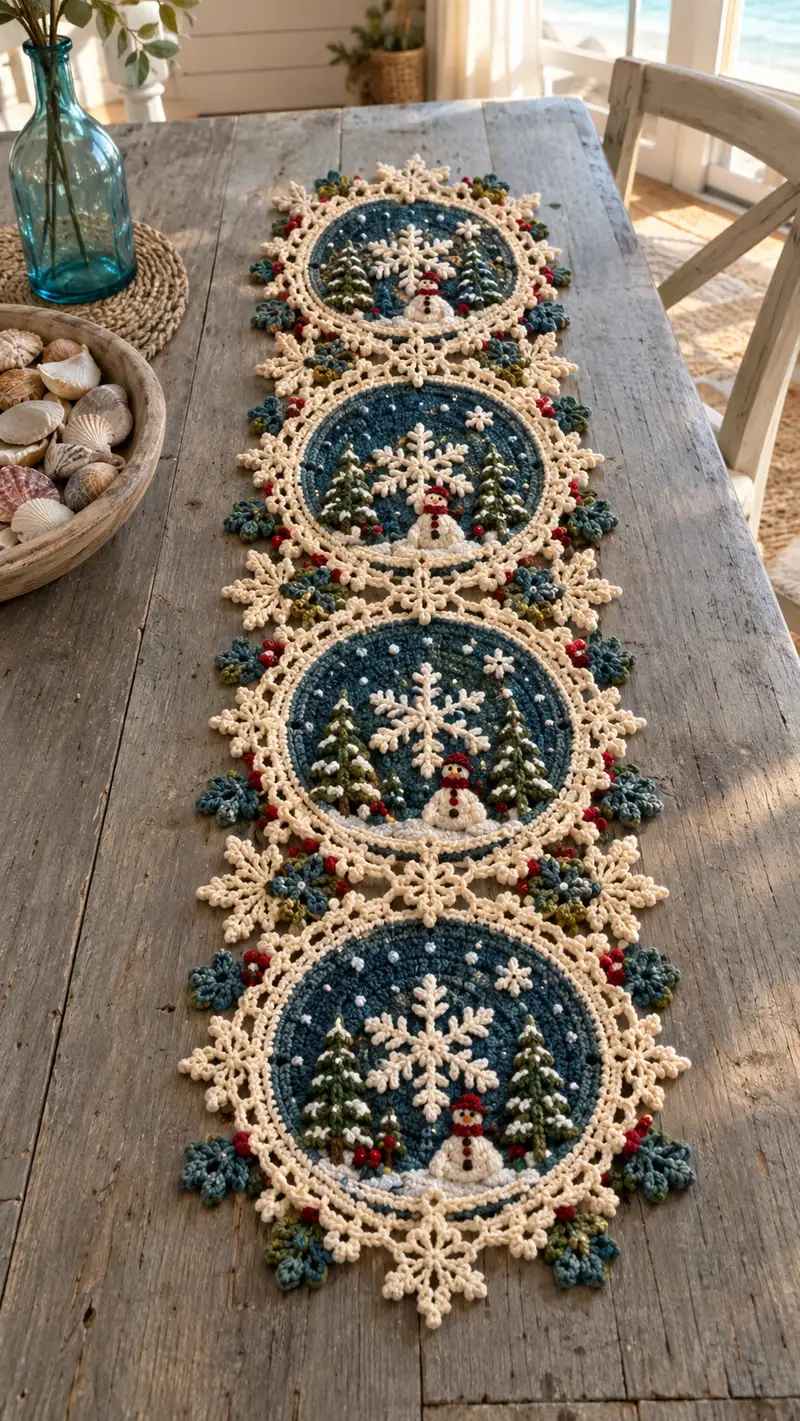
Create a stunning winter table runner made of four connected round medallions featuring navy sky backgrounds, dimensional pine trees, a tiny snowman, delicate snowflakes and lacy ivory edging. This pattern uses textured stitches, puff/bobble accents and layered appliques to build a richly detailed seasonal centerpiece. Perfect for holiday décor or a cozy winter table, each medallion is crocheted and embellished, then joined with floral and snowflake motifs.
Progress Tracker
0% Complete
— Materials & Gauge :
Info :
Gauge is not critical for table runner but recommended to achieve similar motif size: 22 sc x 24 rows = 10 cm in single crochet using 3.5mm hook in worsted yarn. Each round medallion finished diameter approx 8.5-9.5 inches depending on blocking and tension.
— General Notes :
Info :
Work in continuous rounds unless instructed to join. Use stitch marker to mark first stitch of each round. When switching colors, fasten off or carry small floats; Info sections will indicate preferred method. Puff/pop/bobble stitches are worked tightly and anchored firmly to create visible texture. Block each finished medallion flat before assembly.
— Central Round Medallion Base (Make 4) :
Info :
Color A = navy blue. Use 3.5mm hook for body of medallion. Start with magic ring and increase to a stable round of 72 stitches. This section creates the textured winter sky background.
Round 3 :
(1 sc, inc) x 6 (18)
Round 4 :
(2 sc, inc) x 6 (24)
Round 5 :
(3 sc, inc) x 6 (30)
Round 6 :
(4 sc, inc) x 6 (36)
Round 7 :
(5 sc, inc) x 6 (42)
Round 8 :
(6 sc, inc) x 6 (48)
Round 9 :
(7 sc, inc) x 6 (54)
Round 10 :
(8 sc, inc) x 6 (60)
Round 11 :
(9 sc, inc) x 6 (66)
Round 12 :
(10 sc, inc) x 6 (72)
Info :
Stitch count now 72. Insert stitch marker and check for evenness. If your circle is ruffling, add an extra even round to flatten. If cupping, tighten tension or go down one hook size.
Round 13-18 :
1 sc in each st around (72)
Info :
Rounds 13-18 build a tall, stable navy disc for the background. For extra texture, you may elect to do 2 rounds of hdc instead of sc for a slightly loftier look; maintain stitch count.
Round 19 :
*sc 5, puff in next st* rep around (72) (puff stitch counts as 1 st)
Info :
Puff stitch: yarn over, insert hook, pull up loop 5 times (6 loops on hook), yarn over, pull through all loops, ch1 to close puff if desired. Puff stitches here form small snow texture in the sky.
Round 20 :
1 sc in each st around (72)
Round 21 :
(*sc 6, bobble in next st*) x 8, (*sc 6*) repeat to finish (72)
Info :
Bobble stitch: (yoh, insert hook, yoh, draw up loop) x 5 times, yoh pull through all loops and chain 1 to secure. Space bobbles so that they will be visible but not overpower the mid-disc; you can place them roughly every 9 stitches as above to mimic falling snow clusters.
Round 22-24 :
1 sc in each st around (72)
Round 25 :
Work 1 sc BLO in each st around (72)
Info :
Working BLO creates a subtle ridge that helps the inner snow frame sit neatly. Make sure to maintain 72 sts; check count before continuing.
Round 26 :
(3 sc, inc) x 18 (90)
Round 27 :
1 sc in each st around (90)
Round 28 :
(4 sc, inc) x 18 (108)
Info :
These increases form a wider receiving ledge for the ivory inner ring; take care to maintain even tension and smooth curvature for the frame to sit flat.
Round 29 :
Switch to Color B - ivory. Join with sl st to any st to change color, ch1 does not count unless specified.
Round 30 :
Using Color B, 1 sc in each st around (108)
Info :
This ivory round will become the base for the snow edge and inner snowflake placement. We will build a raised snowy ring using puff and bobble stitches next.
— Inner Snow Ring & Raised Snowdrift :
Round 31 :
(*sc 3, puff in next st*) x 27 (108)
Info :
Evenly space puff stitches to create an irregular snowy edge. Puff stitches here are short (3 loops) to look like low snow mounds.
Round 32 :
1 sc in each st around (108)
Round 33 :
(*sc 4, bobble in next st*) x 18 (108)
Info :
Bobble stitches here are slightly taller to form little snow lumps where we will later sew on small red berry accents. Secure all bobbles firmly before moving on.
Round 34 :
1 sc in each st around (108)
Round 35 :
*(sc 2, picot) in next st, sc 3* repeat around as decorative edge above inner ring (108 + picots)
Info :
Picot: ch3, sl st in 3rd ch from hook or alternative single chain picot as preferred. This decorative ring frames the inner scene and provides anchoring points for the large snowflake applique.
— Large Snowflake Applique (Make 1 per medallion) :
Info :
Work this applique separately in Color B (ivory) then sew to the center of the medallion. This snowflake is layered and uses picots, chains and elongated stitches to form 6 points.
Round 1 :
With Color B, mr, ch3 (counts as tr), work 11 tr into mr, sl st to top ch3 to join (12 tr total). Fasten off and pull tight. (12)
Round 2 :
Join to any tr, ch5 (counts as tr+ch2), *tr in next st, ch2* around to make 12 chain loops, sl st to base. (12 ch-2 loops)
Round 3 :
Sl st into first ch-2 loop, ch1, (sc, picot, sc) in loop, sc in next tr, *(sc, picot, sc) in next ch-2 loop, sc in next tr* rep around to create 6 small floret points. Fasten off. (visual shaping)
Round 4 :
Rejoin and create elongated decorative points: join to base, *ch6, sl st to base making a long arm, sl st into next tr* rep to form 6 arms. Fasten off leaving long tail for sewing.
Info :
Attach snowflake centered inside medallion; sew only at center and to select outer tr loops so arms sit slightly raised, giving a shadowed look. Sew securely with several passes.
— Inner Scene: Trees & Snowman Placement Guide :
Info :
The inner scene is built onto the navy disc before attaching the large snowflake. Position trees at left and right lower quadrants and a small snowman at the lower center. Mark placement with pins before stitching appliques.
— Evergreen Tree Applique (Make 2 per medallion - Left & Right) :
Info :
Use Forest Green for branches, Brown for trunk, and a smaller hook (3.0mm) for crisp shaping. Each tree is worked top-down in layered tiers to produce a 3D triangular tree about 1.5-2 inches tall.
Round 1 :
With forest green, ch2, 6 sc in 2nd ch from hook, join to first with sl st (6)
Round 3 :
*(sc 2, inc) x 4* across forming small triangular base (16)
Info :
From here, we will make three tiers of 'boughs' using elongated shell/puff clusters to simulate branches. Each tier is worked as sets of puff stitches in the same round and anchored to create a layered effect.
Round 4 (Tier 1) :
*sc 1, puff in next 3 sts, sc 1* repeat around to form 4 puff clusters (16)
Round 5 :
Sc in each st around (16)
Round 6 (Tier 2) :
*sc 2, puff in next 3 sts, sc 2* repeat around (16)
Round 7 :
Sc in each st around (16)
Round 8 (Tier 3) :
*sc 3, puff in next 4 sts, sc 3* repeat around (16)
Round 9 :
Sc in each st around (16)
Round 10 (Trunk) :
Switch to brown, ch1, sc in next 3 sts; turn and sc 2 rows in same 3 sts to form trunk rectangle approx 6 sc tall. Fasten off leaving tail for sewing.
Info :
Sew tree onto medallion at marked locations. Slightly fold and tack under each tier to create shadowed branches. Add small white embroidery to puff tops for snow if desired.
— Snowman Applique (Make 1 per medallion) :
Info :
Snowman is formed of two small discs (body and head) worked flat, stacked and lightly stuffed with a tiny bit of fiberfill to achieve dimension. Use ivory Color B for body, red accent for scarf and hat, black for eyes/buttons and orange for nose.
Body Round 1 :
With Color B, mr, 6 sc in mr (6)
Body Round 2 :
Inc x6 (12)
Body Round 3 :
(1 sc, inc) x6 (18)
Body Round 4 :
1 sc in each st around (18)
Info :
Fasten off leaving long tail for sewing to head and medallion. Slightly stuff body with a tiny pinch of fiberfill to make it rounded but flat enough to sit on the medallion surface.
Head Round 1 :
With Color B, mr, 6 sc in mr (6)
Head Round 2 :
Inc x6 (12)
Head Round 3 :
1 sc in each st around (12)
Info :
Sew head to top of body with matching yarn using mattress or invisible stitch. Embroider two small black French knots or attach tiny black beads for eyes. Add an embroidered orange carrot nose (few stitches) and tiny black buttons down the body.
Scarf & Hat :
Scarf: With red, ch10, hdc from 2nd ch, fasten off. Wrap around neck and sew ends; add a tiny fringe by knotting short cut yarn ends. Hat: With red, work 6 sc in mr, inc round to about 12 sts, work 2 rounds sc, fasten off leaving tail to sew as beanie. Optional small pom-pom for top.
Info :
Position snowman slightly in front of inner ring lower center and sew through medallion layers to anchor. Keep stuffing minimal so applique lays flat.
— Small Snow & Bead Embellishments :
Round Info :
Use small pearls or tiny white beads sewn across navy background to mimic falling snow. Alternatively, sew small 3-loop picot stars: ch3, sl st to base to create tiny dots in Color B and attach them sporadically across the navy sky before attaching snowflake.
— Outer Lace Frame and Snowflake Points :
Info :
Switch to Color B (ivory). We will build the outer lacy snowflake frame with six large points. This section forms the dramatic ivory edging seen in the image.
Round 36 :
With Color B join at any st, ch1, *sc 4, ch4, skip 4 sts, sc in next 8* rep around to form loop bases (count depends on spacing; keep approx 18-20 loop-bases) - adjust to maintain symmetry.
Info :
This round creates ring bases for the snowflake arms and floral joins. Keep loops even and count carefully. If you had 108 sts earlier, expect approx 18 loop spaces; modify shorthands as needed to maintain even spacing.
Round 37 :
On each ch-4 loop: (sc, ch3, sc) to make small arches. Between arches sc in next 8 base sts. This forms a scallop for attaching larger arms.
Round 38 :
*In next arch work: ch8, dtr in base, ch8, sl st to arch center to form long arm; skip to next arch* rep to make 6 major arms spaced evenly around the medallion.
Info :
When forming long arms, ensure they are spaced at roughly 60-degree intervals (6 arms). Count arches and redistribute if needed for symmetry. Arms will later be decorated with picot points to look like snowflake tips.
Round 39 :
Work into each long arm: *ch5, sl st into arm at 2/3 length, ch5, sl st into outermost point to create a V-shaped point; at tip, sc 5, picot, sc 5; sl st back down to base* rep for each arm.
Round 40 :
Edge entire medallion with sc and small picots: 1 sc in each st around with picot every 6th stitch to create delicate snow-lace edging. Fasten off and weave in ends.
Info :
Block medallion flat using pins, shaping each of the six outer snowflake points to lie flat and symmetric. Blocking is essential to make lace crisp and uniform before joining motifs.
— Floral Clusters and Berry Accents (Make multiple sets per medallion) :
Info :
Between medallions are tiny floral clusters in blue and moss green with red berry bobbles. These are small three-leaf motifs sewn into the lace and used to join adjacent medallions. Work these separately and assemble during joining.
Floret Round 1 :
With blue accent, ch2, 6 sc in 2nd ch from hook, sl st to join (6)
Round 2 :
*(sc, ch2, sc) in same st, sl st in next st* rep 3 times to create three small petals (visual flower)
Round 3 :
Fasten off leaving tail for sewing. Make 4 clusters per medallion positioned between main points.
Berry Cluster :
Using red, make tiny bobble: mr, ch1, 5 sc in mr, pull tight, sew down to medallion or use small red beads. Make 6-8 per medallion around lower border.
Info :
Sew clusters and berries into the junctions between medallions to create continuous garland-like joinery. Space as shown in photo: small clusters adjacent to each large snowflake point and along sides.
— Joining Medallions into Runner :
Info :
Make 4 medallions. Arrange them in a straight row as in the image. Join them with small ivory chain-bridges and floral clusters that sit between large snowflake points. We recommend joining with whip stitch through both picot points, then reinforcing with a crocheted slip-stitch chain join for flexibility.
Joining Step 1 :
Block all medallions flat. Position two medallions with their outer snowflake points touching. Using Color B and yarn needle, sew together at the innermost picot points of the contacting snowflake arms, using small invisible stitches to secure alignment.
Joining Step 2 :
With a 3.0mm hook and Color B, join at the seam with sl st then ch6 and sl st into corresponding loop on adjacent medallion; repeat to create a small chain bridge. Anchor each bridge with a floral cluster (sewn) to hide connection points.
Info :
Spacing between medallions should be tight so that the floral clusters fill the gaps. Make sure all snowflake points align vertically when forming runner for a symmetric appearance.
— Final Outer Snowflake Spurs and Corner Detail :
Round Info :
Once medallions are joined, work additional small snowflake spurs at the long vertical junctions to echo the image's interlocking snowflake motif between designs. Create small 6-point mini snowflakes (see snowflake technique earlier) and sew them centered over each join point for continuity and extra lace detail.
— Finishing Touches & Embellishment :
Info :
Sew on small pearls or seed beads to the navy background to simulate snow, attach red berry bobbles in threes near tree bases, and embroider tiny highlights on tree boughs and on the snowman. Weave in all ends and block again lightly if needed for final shaping.
Final Care :
Hand wash gently in cold water and dry flat to preserve lace shape. Avoid machine washing; store flat or rolled to prevent creasing of delicate points.
Info :
If making a runner longer or shorter, add or remove medallions and repeat joining steps. Individual medallions also work as placemats/coasters when made singly.
Completing this Navy Winter Snowman Motif Table Runner is such a rewarding project — every puff, picot and tiny berry adds personality and charm. The layered textures create a cozy wintry scene that feels handmade and timeless. I love how the navy backgrounds make the ivory lace and red berries pop for a festive, elegant centerpiece. Enjoy the process of blocking, embellishing, and joining each medallion — the finished runner is heirloom-worthy and heartwarming. 🧶❄️