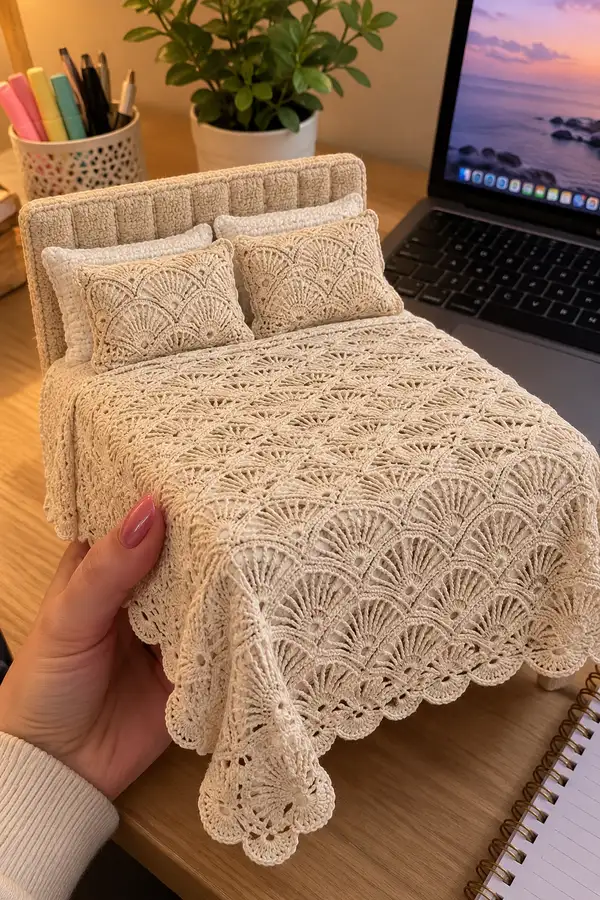
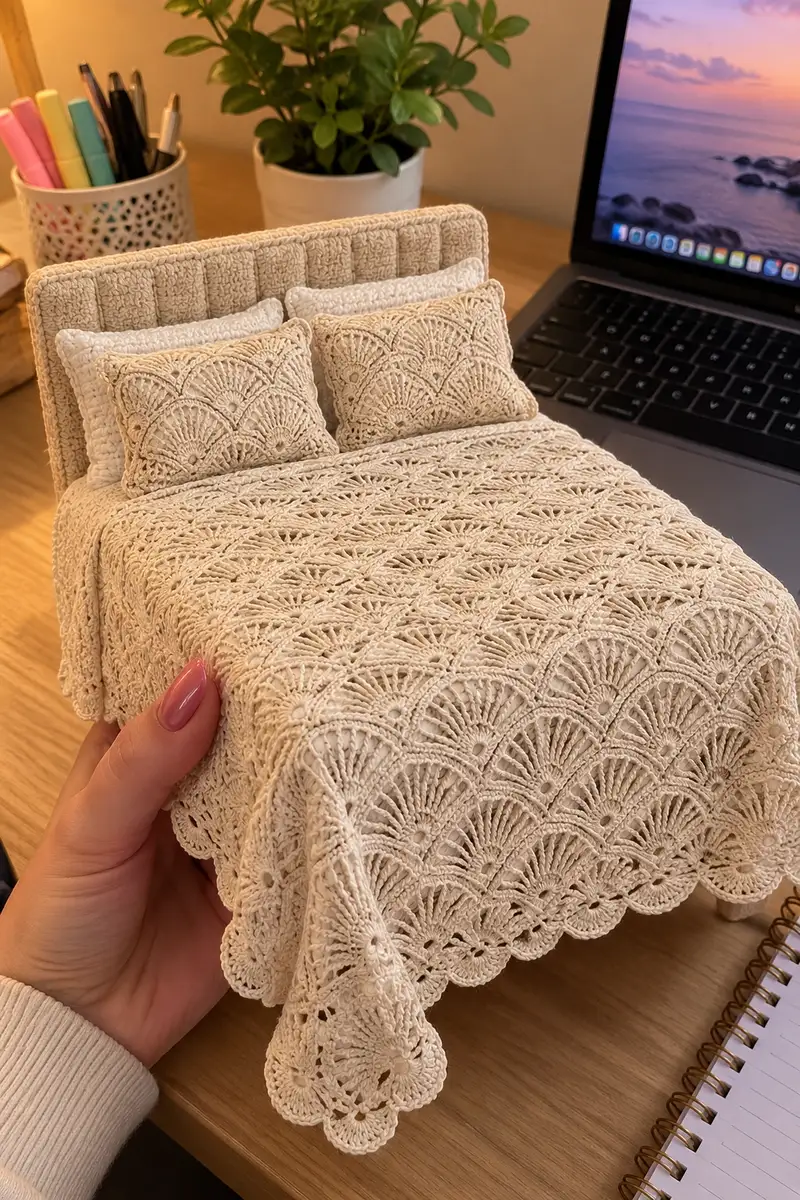
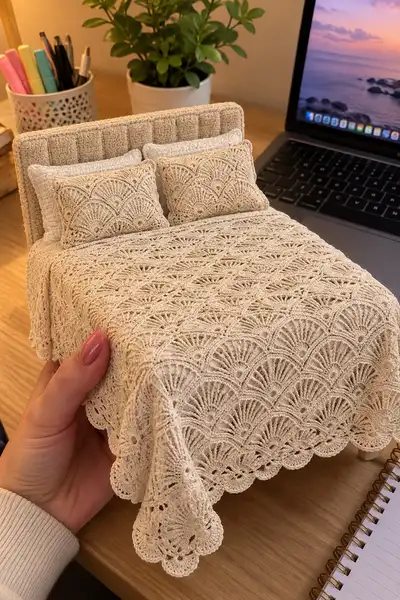
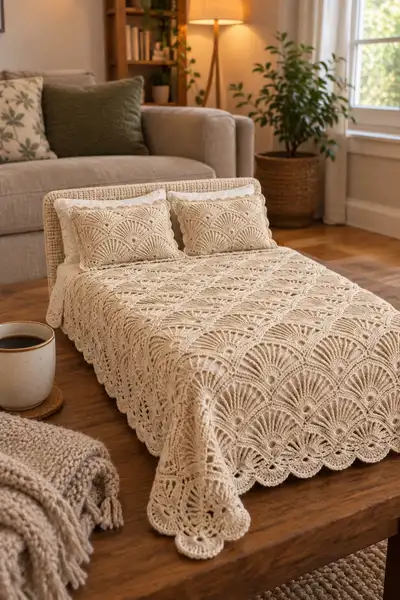
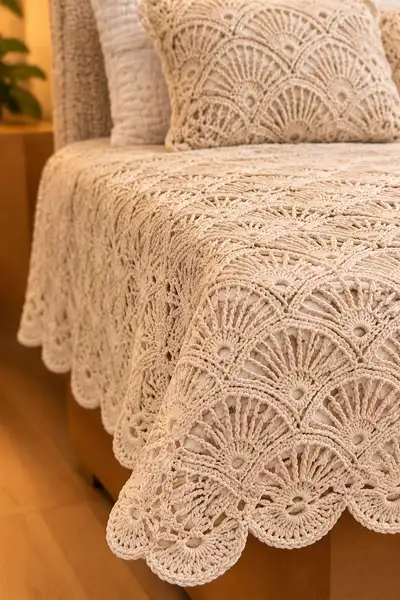
Create a beautiful neutral boho chic bedspread and matching pillows using an elegant fan/arc motif worked in modular blocks. This pattern recreates the scalloped fan panels and lacy joins shown in the photos — soft oatmeal color, textured ribs, and a delicate scalloped edge for a calm, layered bedroom aesthetic. Written for modular assembly, it includes motif creation, joining method, full border, and pillow instructions for a cohesive set.
Progress Tracker
0% Complete
— Notes & Gauge :
Info :
Gauge: One finished motif (after blocking) measures approximately 10.5 cm / 4.125 in square at the center-to-center dimension of the fan. Gauge will vary with yarn and tension; adjust hook size if needed. This pattern is modular — change the number of motifs to fit your bed size. The sample full bedspread in the photography is approximately a queen throw using 90 motifs arranged 9x10 with a 12-round border.
Info :
Terminology: US crochet terms are used throughout. Work in continuous rounds where stated, or join rounds with sl st to the first st when specified. Use a stitch marker to mark the beginning of rounds.
— Fan Motif (Make multiple) :
Round 1 :
Make a magic ring. Ch1, 8 sc in magic ring. Pull tight. (8)
Round 2 :
Inc in each st around (2 sc in each sc). (16)
Round 3 :
(1 sc, inc) x8. (24)
Round 4 :
(2 sc, inc) x8. (32)
Info :
Keep tension even for these expanding rounds. These rounds form the compact center 'eye' of the fan motif. Use your stitch marker and move it each round to the first sc.
Round 5 :
(3 sc, inc) x8. (40)
Round 6 :
(4 sc, inc) x8. (48)
Round 7 :
(5 sc, inc) x8. (56)
Round 8 :
(6 sc, inc) x8. (64)
Info :
At the end of Round 8 you have a flat circular base of 64 sts. We will use eight primary anchor points to create a dramatic shell/fan above this base. Mark every 8th stitch to help identify anchor points for the next rounds (8 markers or count 8 sts between markers).
Round 9 :
Ch1, sc in same st, *ch5, sk next 7 sts, sc in next st*; rep from * to * around returning to starting point, join with sl st to first sc. You will create 8 ch-5 loops (8 loop spaces).
Info :
These ch-5 loops become the foundation arches where the tall fan ribs will be built. Make sure each chain arch sits centered over the marker made previously.
Round 10 :
Join in any ch-5 sp: ch3 (counts as dc), (yo, insert hook in ch-5 sp, pull up a loop) 9 times to make 10 tall loops (10 dc cluster) all in the ch-5 sp; ch2, sl st into same ch-5 sp to form the base of the fan. Move to next ch-5 sp: sl st into it, ch3, make 10 dc cluster in that ch-5 sp, ch2, sl st; rep around to make 8 fans; join with sl st. (8 fan clusters)
Info :
To work the tall fan ribs, you are forming a group of 10 dc worked in the same space; keep loops loose but controlled. These tall clusters create the radial ribs visible in the motif.
Round 11 :
Ch1, sc into the sl st made at base of first fan cluster, *ch3, sc into the center point between fan clusters (the junction created by the ch2 space), ch3, sc at base of next fan cluster*; rep around so each fan has a delicate ch-3 spacer on each side. Join with sl st. (16 ch-3 arches created)
Round 12 :
Working behind the fan: ch1, sc in same st, *fpdc around the first dc of the next fan cluster, (fpdc around next dc) x9, sc in junction st; rep around. This creates raised front-post ribs on each fan rib. Join with sl st. (work covers all 10 posts per fan)
Info :
Front post double crochet (fpdc) around the tall dc gives a raised rib effect. Work each fpdc snugly to lift the rib; maintain stitch count so the round remains consistent. Use markers to mark each fan base if helpful.
Round 13 :
Ch2 (does not count as hdc), hdc around each st and top of each fpdc to unify texture: work 1 hdc into each sc, each ch-3 space (2 hdc across each ch-3), and each fpdc top. Maintain continuous round for even tension. After completing, you should have an approximate count near 160-168 hdc depending on counts across fans; the number will be proportional—focus on consistent stitch placement rather than chasing exact number.
Info :
Round 13 helps flatten and unify the tall ribs so the motif reads as a fan surface. If your hook is large, you may have more stitches; if tight, fewer. Aim for consistent placement rather than absolute count.
Round 14 :
Ch1, sc around making 1 sc in each hdc and placing 3 sc evenly across each fan valley (the small spaces between fan clusters). Work 3 sc in the central valley to begin creating the scallop edge. Count will be variable but keep shape symmetrical.
Round 15 :
Sc in each sc around but where fan peaks sit, work (sc, ch3, sc) into the topmost sc of each fan to create an open picot-like arch at each fan peak. Join with sl st. (8 decorative arches)
Info :
These small arches give the iconic scallop detail visible between motifs when joined. Keep ch-3 loops loose for a gentle lacy look. If you prefer a tighter scallop, use ch2 instead.
Round 16 :
Working into the picot arches: *sl st into ch-3 arch, ch1, (5 dc in arch) to form a small shell, ch1, sl st into same arch*; rep for each of 8 fan peaks. After last shell, sl st to join and finish round. (8 small shells)
Round 17 :
Ch1, sc around placing 2 sc between each small shell and 3 sc over each small shell to smooth the edge. This round begins to square off the motif for joining into a rectangular grid. Maintain a neat count across repeats—each fan repeat should produce the same number of sc between shells.
Info :
Optional blocking: At this point block your motif flat to the measured gauge square (approx. 10.5 cm). Blocking evens the stitches and gives predictable motif dimensions for joining. If you skip blocking now, slightly stretch motifs at joining stage to even out rows.
Round 18 :
Ch1, make 8 small loops along the exterior by *sc, ch4, sk 2 sc* around so that each fan quadrant has an outer loop; this readies the motif edges for join stitch points. Join to first sc.
Round 19 :
Ch1, sc evenly around working 2 sc in each outer loop to create a rounded outer edge; place 4 sc across each small shell area to build out the scallop. Join with sl st.
Info :
After Round 19 the motif edge is built out and squared to allow joining. Count and mark 4 cardinal join points per side (top, bottom, left, right) to align motifs in a grid.
Round 20 :
Make a decorative Picot round: *sc, (ch3, sl st in first ch to form picot), sc* across the top of each scallop curve. This will accentuate the scalloped join when motifs are joined side-by-side.
Round 21 :
Ch1, sc around to secure picots; fasten off leaving a 30 cm / 12 in tail for sewing if you will sew motifs rather than join by crochet. Weave tail into back of work if using slip-join method later. (This completes one motif.)
Info :
Each motif will be used as a full block in the bedspread pattern. Make as many motifs as your layout requires. For the queen spread in photos plan approximately 9 motifs across the width and 10 motifs along the length (9x10 = 90 motifs). For a throw or twin, reduce motif count accordingly.
— Joining Motifs (Join-As-You-Go or Sew Join) :
Info :
Two methods are provided: Join-As-You-Go (JAYG) by crocheting into exposed loops, or whip/seam sew using mattress stitch. JAYG gives a seamless look and builds the join in crochet rounds; sewing provides more control and is recommended if your motifs have been blocked and are uniform in size.
Joining Method A - JAYG Round 1 :
Work motifs in rows. Create first row of motifs in full. For each new motif in subsequent rows, when you reach Round 19 (outer edge) and before completing Round 20, align the motif next to the previously placed motif; when you reach a join-point (the sc corresponding to a cardinal point), sl st through the matching sc on the adjacent motif instead of sk the stitch — this forms a sl st join. Continue around joining at the 4 side join points per side. Finish motif and fasten off. Repeat for the entire row.
Info :
Focus on matching the picot and scallop points; the JAYG join is strongest if you slip stitch at every corresponding sc along the seam for a tighter, less open joint. For cleaner internal rows, join only at the cardinal join points and then add a connecting round over the seam to secure (see Joining Method B enhancement).
Joining Method B - Sew Join :
Block motifs and lay them flat. With right sides together, match motif edges and sew with a yarn needle using whip stitch or mattress stitch through the back loops only for an invisible seam. Use the long tail left from Round 21; secure ends after seam is complete. After sewing rows together sew rows to each other to create the full panel.
Info :
Sew Join gives more control over tension and is preferred for larger spreads to prevent distortion. When sewing, place pins every 4-6 cm to maintain alignment.
— Assembling the Bedspread Grid :
Round 1 :
Plan layout based on motif counts. For a queen-sized arrangement use 9 motifs across (width) x 10 motifs down (length). For a symmetrical layout arrange motifs so scallops align along edges and corners. For a smaller throw use 5x6 or 6x6 layouts depending on desired coverage.
Info :
Work in rows to minimize handling. Assemble each row first (using Method B sewn join recommended for larger spreads), then join rows to form the full panel. Keep a reference photo of layout so directionality of fans is consistent across the spread.
Round 2 :
After all motifs are joined into a single panel, inspect seam tensions. If seams show gaps, work a connecting round: join yarn at any seam point and sc along the seam edges through both motif edges (use 1 sc into each sc across the seam) to flatten and secure joins. Work 1 sc across entire seam length and across the perimeter of the full spread.
Info :
Connecting round evened out the look and reinforces the large bedspread. If using JAYG, this connecting round is also the time to tidy up reverse joins and anchors.
— Main Border (worked on assembled panel) :
Round 1 :
With assembled panel flat and right side up, attach yarn at any corner. Ch1, sc evenly around the whole panel working 1 sc in each visible st along the edge, place 3 sc in each scallop corner to maintain shape. Join with sl st to first sc.
Info :
Work border rounds on the entire bedspread rather than per-motif to ensure continuity of scallop shapes and border symmetry. Keep counts even across sides; add or reduce 1-2 sc in long straight stretches to keep sides flat.
Round 2 :
Ch3 (counts as dc), dc into each sc around, placing (dc, ch2, dc) in each scallop peak to accentuate edges, join with sl st. This creates a tall, even foundation for the decorative scalloped rows to come. (st count variable; maintain consistent placement across each scallop)
Round 3 :
Ch1, sc around working 2 sc into each ch-2 space and 1 sc in each dc. Even out counts along straight edges as necessary to avoid ruffling. Join with sl st.
Round 4 :
Ch1, *skip 2 sc, (5 dc in next sc) for shell, skip 2 sc, sc in next sc*; rep around. This starts forming an exaggerated scallop shell edge. Join with sl st.
Info :
Shells create the dramatic scalloped edge seen in the photos. Adjust number of dc in shell (5 or 7) depending on yarn and desired fullness. If the edge pulls in, use fewer shells or add more sc between shells in previous rounds.
Round 5 :
Ch1, sc around placing 3 sc across each shell curve to flatten shell slightly, join with sl st.
Round 6 :
Ch3, (2 tr, ch2, 3 tr) in each shell apex to create faned scallops; sc between fans to separate. Join with sl st.
Info :
At least 6 border rounds give the bedspread the full scalloped look. Add additional decorative picot or reverse single crochet rounds if you prefer a crisper edge. Finish with two tidy sc rounds for durability.
Round 7 :
Ch1, sc around in back loops only (BLO) for two rounds to make a neat, stable edge that resists stretching. Join and fasten off. Weave in all ends through the back of the border.
— Decorative Raised Ribs (Optional Accent Round) :
Round 1 :
If you want extra texture across the bedspread, join yarn at the center of any motif seam and work a round of fpdc (front post double crochet) along the seam lines across the panel to emphasize row lines. Work 1 fpdc into every 3rd stitch across joins creating subtle ridges. Fasten off and weave ends.
Info :
Raised ribs add depth like those visible in the photographs. Keep spacing consistent for an even textured effect. This accent is optional but recommended for added boho texture.
— Matching Pillow Front (Make 2) :
Round 1 :
Use the same fan motif technique but stop after Round 17 (end of small shell shaping). Create a 2-motif rectangular panel by making 2 motifs joined along their long edge (join either JAYG or sew join). Dimensions: design for 30 x 40 cm pillow (adjust by motif count). Fasten off and weave ends. (Pillow front will be a single rectangle composed of 2 fan motifs side-by-side)
Info :
Pillow fronts in the photo are rectangular and show two fan repeats per face. You can scale to standard pillow sizes by adding more motifs; sew a simple textured back to complete the cushion.
Round 2 :
Edge pillow front by working 3 rounds of neat sc: first sc round evenly in each edge stitch, second round sc in BLO to create a frame, third round *sc, ch3, sc* along the outer edge for a tiny scallop. Fasten off, weave ends.
Info :
Pillow fronts may be lined with muslin or a thin fabric for increased structure before inserting a pillow form; this is especially helpful with open-lacy motifs to prevent the insert from showing through.
— Pillow Backing & Assembly :
Round 1 :
Make a simple textured back panel using dc rows worked flat to match pillow size (for a 30 x 40 cm pillow make a rectangle the same size). Optionally make an envelope back by making two overlapping rectangles allowing easy removal of the pillow insert. Edge both pieces with 1 sc round and attach a decorative picot if desired.
Round 2 :
Sew the pillow front to the back panel along three sides with mattress stitch, leaving one side open for insert. Alternatively, attach using a decorative slip stitch for a crocheted seam. Insert pillow form and close the last side with evenly spaced slip stitches or a zipper sewn into the back for removable covers.
Info :
For a clean finish, place the pillow right side out and pin edges before sewing. Use matching thread or yarn for invisible seams; if adding a zipper, sew it onto the inside of the back piece before joining the front.
— Finishing Touches :
Info :
Block the entire bedspread after assembly. Pin scallops carefully and use a light steam or spray starch to help scallops hold their shape. Allow to dry fully before placing on bed. If using cotton, a small amount of starch will help the scalloped edge sit crisply.
Info :
Weave in all ends at least 5 cm into the fabric, and clip flush. For long-lasting edges, overcast the scallops with a few hidden stitches under the curve to strengthen delicate points.
Info :
Optional: Add a narrow backing fabric to the entire bedspread if you want a lined look or to protect bedding from yarn abrasion. Sew the backing to the crochet around the border, then finish with a neat seam or piping.
This neutral boho fan-bloc set is a beautiful marriage of texture and simplicity — each fan tells a small story of stitches that build into a calming statement piece. As you assemble the motifs and watch the scallops appear, you’ll feel the slow, satisfying progress unique to modular crochet. The finished spread adds immediate warmth and handmade character to a bedroom, while the matching pillows bring everything together. Enjoy every stitch and celebrate the cozy, tactile result! 🧶✨