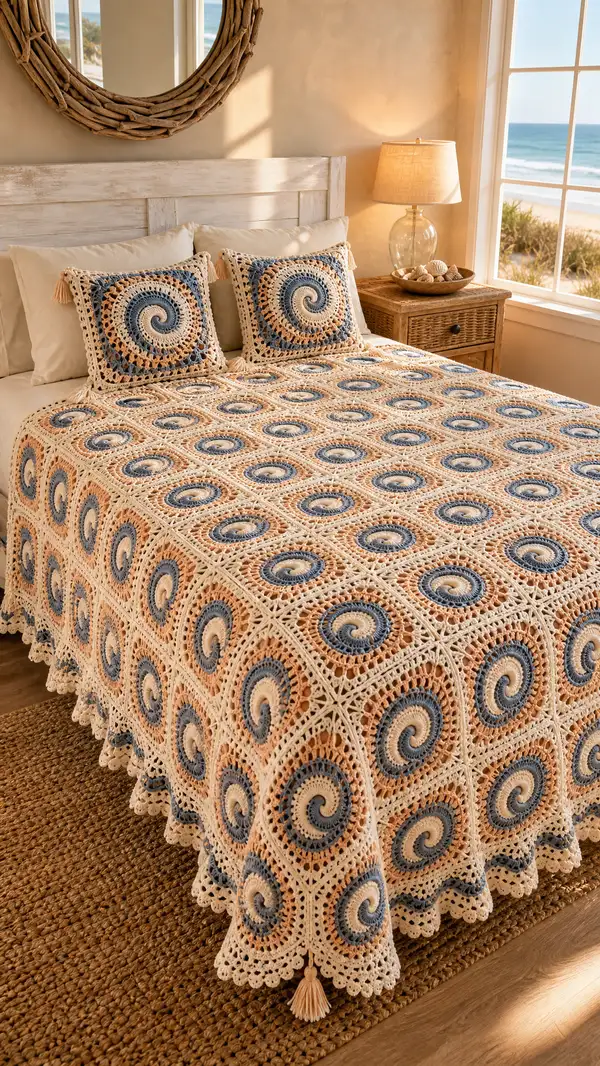
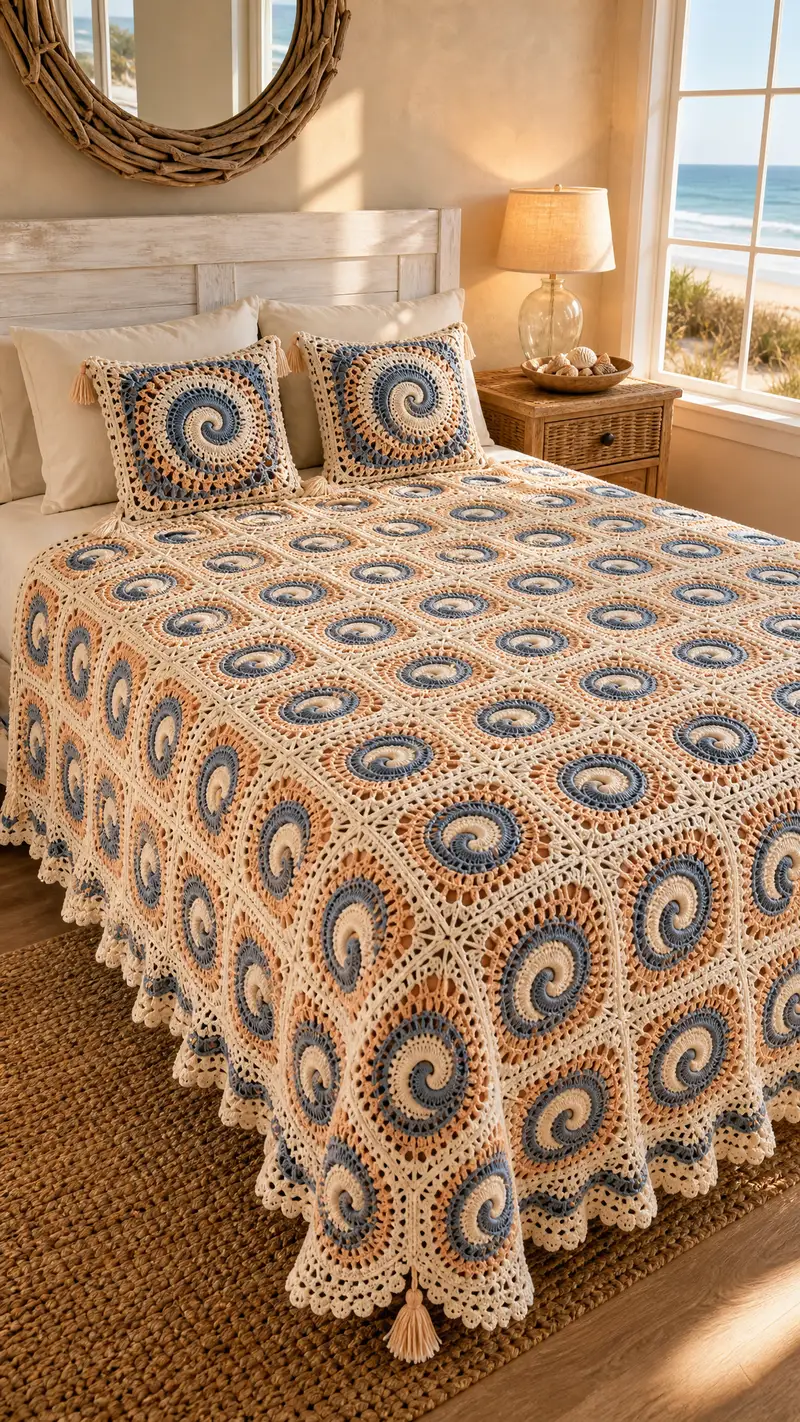
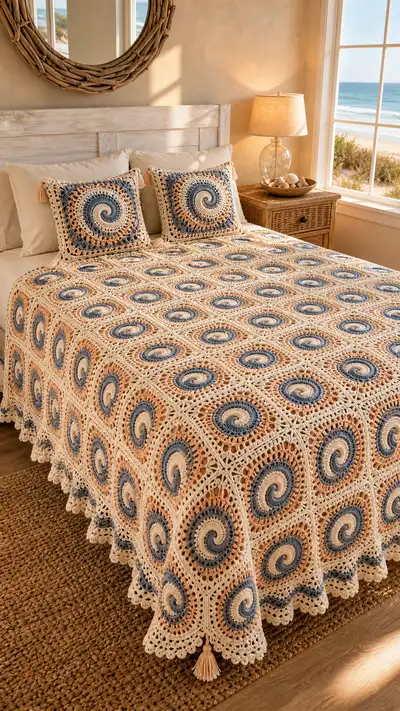
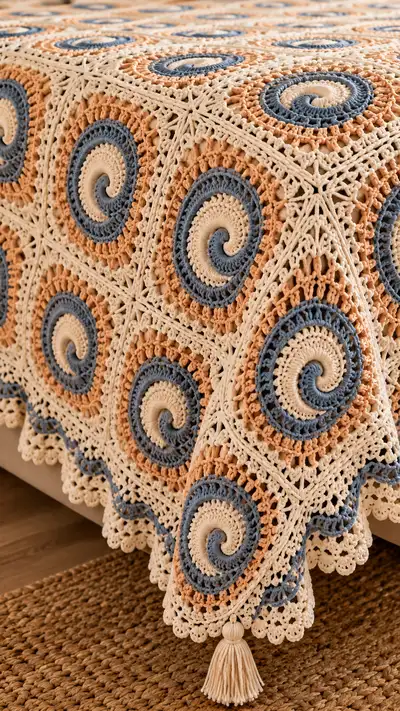
A breezy coastal-inspired bedspread made from spiral granny motifs joined into elegant squares. Soft cream, sandy peach and muted blue form a calming spiral that repeats across the surface. Each square features a textured spiral center, lacy cornerwork and a scalloped shell border finished with tassels at the corners. This pattern includes motif construction, square shaping, join-as-you-go instructions and an ornate scalloped edging for a full bedspread or throw.
Progress Tracker
0% Complete
— Notes & Techniques :
Info :
Gauge and Size: This pattern is modular; gauge will determine final size. Each finished spiral square measures approximately 9.5" - 10.5" (24-27 cm) after blocking when worked with worsted/aran cotton and 4.5mm hook. Adjust hook or yarn to achieve desired block size. The sample bedspread pictured is assembled as 7 squares across x 8 squares down for a generous queen-size bedspread (approx 66" x 96").
Info :
Puff Stitch: Yarn over, insert hook, yarn over, pull up a long loop (repeat yarn over and insert to build 3-4 loops on hook depending on puff size), yarn over and pull through all loops on hook, ch1 to close puff. Counts as 1 stitch unless otherwise specified.
Info :
Working in continuous rounds for the spiral center will create a fluid swirl. When directed to change color, fasten off or carry color as preferred. Always weave in ends securely; cotton may show ends more distinctly.
— Spiral Motif (Make one motif unit) :
Round 1 :
Make a magic ring. Ch1, 6 sc in ring, pull tight (6)
Round 2 :
Inc in each st around - 6 inc (12)
Round 3 :
(1 sc, 1 inc) x 6 (18)
Round 4 :
(2 sc, 1 inc) x 6 (24)
Round 5 :
(3 sc, 1 inc) x 6 (30)
Info :
Begin spiral shaping by working slightly taller stitches in color sequence to create a raised line. Change to Accent Color A (Muted Coastal Blue) at the end of this round if following color placement from the photo.
Round 6 :
Change to Accent Color A. Ch2 (counts as first hdc), hdc in each st around (30)
Round 7 :
Change to Accent Color B (Sandy Peach). Ch2, hdc in each st around (30)
Info :
To form a continuous spiral ridge instead of concentric rings, we will offset increases/tall stitches across a block of stitches and then shift the starting point each round. Work the next several rounds in continuous spiral (do not join) if you prefer a seamless spiral; otherwise join and begin next round with ch2.
Round 8 :
Change to Background Cream. *Fpdc around the next 2 sts, bpdc around the next 4 sts*; rep from * to * until you have worked 30 post-stitches (30). Work evenly so the post stitches create a slight sweeping curve.
Round 9 :
Continue spiral effect in Accent Color A: Ch2, dc in each st around (30)
Round 10 :
Accent Color B: Ch2, dc in each st around (30)
Round 11 :
Working in continuous spiral (do not sl st to join) with Background Cream: *Puff in next st, sk next st*; rep around until 15 puff clusters are placed (15 puffs, 15 skipped sts total 30).
Info :
Spacing puffs every other stitch makes a very textured spiral when combined with the alternating dc rounds. If you prefer a denser spiral, place puffs every stitch (counts will change accordingly).
Round 12 :
Accent Color A: Ch2, dc in each st around, placing 1 extra dc in any puff stitch base to keep counts even (30)
Round 13 :
Accent Color B: Ch2, dc in each st around (30)
Round 14 :
Background Cream: *(1 sc, ch1, sk1) x 2, sc in next 4 sts*; rep around to create subtle chain texture (30 sc, 15 ch-1 spaces counted separately)
Info :
At this stage the spiral center is fully textural and measures roughly 4.5" - 5" across. We're ready to square out the circle using mesh and corner increases.
Round 15 :
Background Cream: (Work into back loops only for a defined ridge) *1 sc BLO in next 2 sts, (2 sc in next st) inc* x10 = (increase executed 10 times across 30 sts) - Mathematical detail: For 30 starting sts we can group into 10 repeats of 3 sts = (2 sc BLO, inc) x10 giving 30 +10 = 40 sts (40)
Round 16 :
Background Cream: 1 sc in each st around (40)
Round 17 :
Background Cream: (2 sc, 1 inc) x10 (50)
Round 18 :
Background Cream: 1 sc in each st around (50)
Info :
The repeated small increases create a gentle enlargement of the round without disturbing the spiral motif. Next rounds will start to make explicit corner spaces to form the square's 4 corners.
Round 19 :
Background Cream: *(5 sc, ch3, 5 sc) in next 12 sts as a corner sequence? No — instead form corner every quarter: Work 1 sc in next 11 sts, (3 dc, ch3, 3 dc) in next st as corner; rep 4 times to place 4 corners.* Calculation: Starting 50 sts divided into 4 sectors ≈ 12-13 sts each. Work 12 sc between corners and use corner clusters to expand. After placing 4 corner clusters (each cluster adds 5 extra sts total) new count = 50 + (4 x 5) = 70 (70)
Round 20 :
Background Cream: Ch3 (counts as dc), dc in each st and dc cluster around working 1 dc into the ch-3 corner space as 3 dc in corner space; resulting total should be 70 dc (70)
Info :
You now have a marked square impression with four corner ch-spaces. Check that your work lies flat—if it ripples, adjust with one more round of even sc; if it cups, block and allow to dry before proceeding.
Round 21 :
Background Cream: (4 dc, dc cluster in corner ch3 space) x4 around; space dc evenly along sides—this round remains (70)
Round 22 :
Background Cream: Work mesh row: *dc, ch2, sk 1* across each side, working 3 dc into each corner ch-3 space to maintain corners. This creates openwork sides for joining. Maintain 70 stitches counted as 70 dc placements across sides (70)
Round 23 :
Background Cream: Work a decorative row in FLO: *(ch3, sc) in each ch-2 space across sides; 3 sc in corner spaces*; this keeps counts consistent (70 sc placements across side spaces and corners combined) (70)
Info :
At the end of Round 23 each motif should measure approximately 9.5" - 10.5" square after blocking. If you want larger squares, continue rounds of even increases: (3 sc, inc) repeat groups of 10 to add 10 sts per round. Otherwise proceed to join-as-you-go assembly.
— Square Finalizing & Surface Detail :
Round 1 :
Background Cream: 1 sc in each st around working 1 sc in each dc and 3 sc in corner clusters to box the motif - total remains 70 (70)
Round 2 :
Background Cream: *(sc in next 4 sts, puff over next st, sc in next 2 sts)* rep across each side and work 3 sc in each corner to maintain structure. Calculation: Puff groups replace single sc but counts remain 70 (70)
Round 3 :
Accent Color B: Decorative raised round — Ch2, dc in each st placing a fpdc around the post of the puff stitch to create a textured ring (70)
Round 4 :
Background Cream: 1 sc in each st around (70)
Info :
We recommend blocking each motif square individually to exact size so joins lay flat. Use pins and a blocking mat; dampen gently and allow to dry completely before joining.
— Join-As-You-Go (JAYG) Method for assembling squares (one square edge at a time) :
Info :
Join-as-you-go attaches each new square to the already-assembled panel along two adjacent sides. Squares are joined on the final lacy side rounds using slip-stitches or single crochet into the chain spaces of adjacent motif.
Round 1 :
Prepare two finished squares: align them right sides together along the first side to join. With Background Cream and starting at the bottom corner, join with a sl st into corner ch-space of Square A and then sl st into corresponding corner space of Square B. Continue across the side: *1 sc in side space of Square A, sl st into corresponding space of Square B*; rep across side. This produces a tidy seam. Count check: if each side had 17 mesh spaces, you will perform 17 joins plus corner joins.
Round 2 :
After joining one side, rotate and join the adjacent side in the same manner to connect the second edge so the square is attached at two sides. Work into corners securely with 3 sc across corner spaces to maintain box corners.
Info :
For a central grid, assemble rows left to right, finishing each row and then joining rows vertically. When joining the second row to the first, join into the open spaces of the assembled row so joins are consistent and seam lines form an X-pattern where corners meet.
Round 3 :
Alternate decorative join: Instead of sl st, work 1 sc in side space of Square A and 1 sc in side space of Square B, connecting with a single yarn-over chain between them to create a visible ladder join for a more handcrafted look. This will not alter the counts of individual squares if one sc is used per side space.
Round 4 :
For a stronger seam, use 2 sc per side space when joining heavy cotton. Expect to double the number of stitches along joined edges; adjust tension to avoid pulling the fabric inwards.
Info :
Always pin or clip squares in place before working the join. Work slowly to keep edges aligned, and check that spiral centers line up the same direction for a uniform look unless you prefer alternating spiral orientations.
— Border & Scalloped Edge (worked after full assembly) :
Round 1 :
With assembled bedspread laid flat, join Background Cream at any corner. Work 1 sc evenly around the entire outer edge, working 3 sc into each outer corner ch-space to keep corners square. Count note: This round will have a large, variable total st count depending on number of squares; work evenly across edges.
Round 2 :
Continue in Background Cream: *ch4 (counts as tr+ch1), sk next 2 sc, tr in next sc* rep around the edge with 3 tr in each corner to transition. This creates a tall mesh foundation for the scallops.
Round 3 :
Switch to Accent Color A: Working into each ch4 arch along edge, work *(sc, hdc, 3 dc, hdc, sc)* to form a medium scallop. At corners work a larger shell: (sc, hdc, 5 dc, hdc, sc). This shell pattern repeats across each arch; counts remain consistent as each arch consumes the ch4 space established in Round 2.
Info :
Spacing of the scallops depends on how many ch4 arches you created. If the scallops seem too dense, skip every other ch4 arch and work shells into alternate arches. For the sample bedspread, scallops were placed on every ch4 arch for a lush border.
Round 4 :
Switch to Background Cream. Work a picot edge into the tip of each scallop: *sl st into top of shell, ch3, sl st into first ch to form picot, sl st to return to shell top*. Repeat at each scallop tip to create a neat demarcation (number of picots equals number of scallops).
Round 5 :
Accent Color B: Decorative deep edging row — *ch5, sk next picot, sl st into next shell base* forming small arch loops between scallop tips. This gives the final lacy flourish. Adjust ch count for desired arch size.
Round 6 :
Background Cream: Final single crochet tidy row: 1 sc in each tr and sc along border, working 3 sc in corner shells to square edges. Fasten off and weave in all ends thoroughly.
Info :
If you want a heavier drape on the edge, add one more repeat of the scallop and picot sequence to create a deeper border. Blocking again after the border will help the scallops sit evenly.
— Bedspread Alternate Deep Border (Optional 12-round extension) :
Round 1 :
Join Accent Color A into the outer edge. *ch3, tr in next st, ch1, sk1* around to create tall arches; work 3 tr in corners. This sets up for deeper shells.
Round 2 :
Accent Color A: Into each arch work (sc, hdc, 7 dc, hdc, sc) for a large scallop. Corner shells: sc, hdc, 9 dc, hdc, sc. This yields a dramatic frill.
Round 3 :
Background Cream: Work a lace row between scallops: *ch5, sl st into center of next scallop* to create connecting loops. Repeat around.
Round 4 :
Accent Color B: Work decorative bobble row: *ch2, puff in loop between scallops, ch2, sl st into center of scallop*; repeat around. This adds more 3D texture.
Round 5 :
Background Cream: Finish with a neat sc row across the tops of scallops, placing 3 sc in each scallop tip. Fasten off and weave in ends. This optional extension creates a heavier, more ornamental border (counts variable).
Info :
For the sample bedspread we added an extra shallow scallop row to echo the lacy joins between squares; this provides visual continuity and a handmade finish that drapes beautifully over the bed.
— Pillow Cover (Make 2) (Use same spiral square but add inner lining) :
Round 1 :
Make a spiral motif as instructed earlier through Spiral Motif Round 23. Finish with a tidy sc round in Background Cream making sure the square measures approximately the size of your pillow insert minus 1/2" for a snug fit. For a 20" pillow, create a 19.5" finished square. Counts will mirror motif counts (approx 70).
Round 2 :
To make the back panel, either make a second identical square or work a solid square to the same size using 1 sc in each st for several even rounds; aim for the same measurements.
Round 3 :
Assembly: Place front and back squares together, wrong sides facing. Join with sl st or whip stitch around three sides leaving one side open for the insert. For a zipper installation, leave the opening and insert zipper before final seam.
Round 4 :
Edge: Work a neat sc round around all edges with Background Cream and fasten off. Add tassels to decorative corners if desired. This gives coordinated accent pieces for the bedspread set.
Info :
Alternatively, make an envelope-style back by creating two back panels overlapping by 6" allowing pillow insertion without closures. This is a handy no-sew option if you want removable covers for washing.
— Tassels & Finishing Tassel Attachment :
Step 1 :
Make tassels approx 3.5" - 4" long using 2-3 strands of Background Cream held together. Wind yarn around a 4" card 30-40 times depending on desired fullness. Secure loop at top with 6-8 wraps of yarn to form head. Cut loops to create strands and trim evenly.
Step 2 :
For a more finished look, add a wooden bead or yarn-wrapped bead above the tassel head as seen in the photo. Thread bead onto the tassel top and secure with a knot and a dab of fabric glue if desired.
Step 3 :
Attach tassels at each corner of the bedspread by threading the tassel loop through the corner ch-space and securing with a double knot inside the bedspread. For heavier tassels, secure further with stitches through the head to the inside of the bedspread.
Info :
Distribute tassel weight evenly—if you add heavy wooden beads consider placing smaller counterbalancing beads along the shorter sides to keep the spread balanced while draping.
— Finishing Tips & Blocking :
Info :
Blocking: Wet-block the assembled bedspread on a large surface or do motif-by-motif blocking. Pin each motif to exact dimensions while damp and allow to dry completely to ensure straight joins and even edging.
Info :
Weave in ends with a yarn needle taking care to hide ends along the post-stitch ridges or inside corner clusters where they are less visible. Double-check all tassel knots for security.
Info :
Care: Hand-wash or machine wash on gentle in cool water with mild detergent. Reshape and dry flat. Cotton bedspreads may shrink slightly on first wash; pre-wash yarn if desired to pre-shrink.
Info :
Customization: Scale the pattern up or down by changing the number of rounds in the square expansion phase or using different hook sizes. Use lighter-weight yarn and smaller hook for a finer, more delicate throw.
This Coastal Spiral Granny Bedspread is a celebration of texture and color, bringing a seaside palette to your bedroom with handmade charm. Working each spiral motif and watching the bedspread grow square by square is such a rewarding, tactile process. The lacy joins and scalloped border make it a beautiful heirloom piece to keep or gift. Enjoy the slow, meditative rhythm of crocheting this bedspread and celebrate each completed motif—then share the cozy results! 🧶🌊