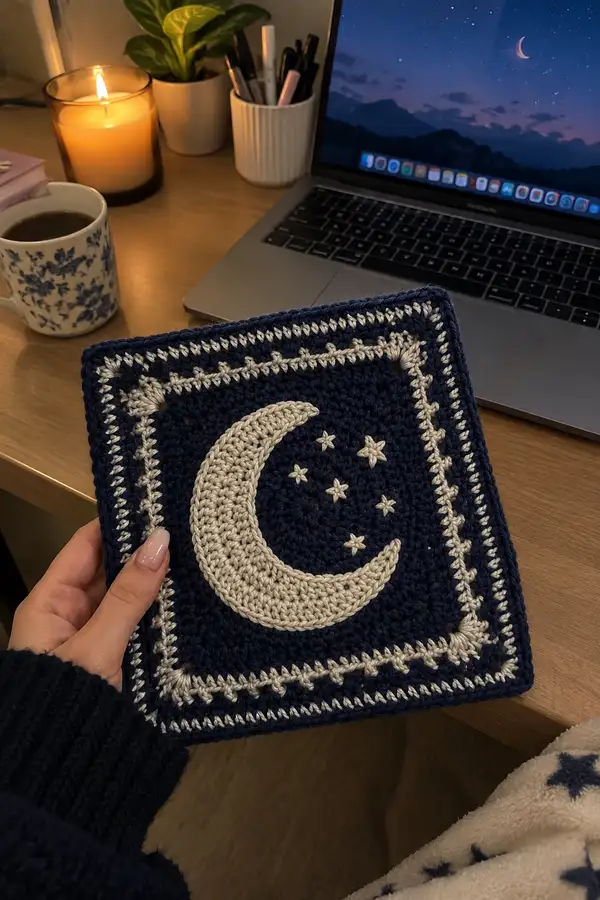
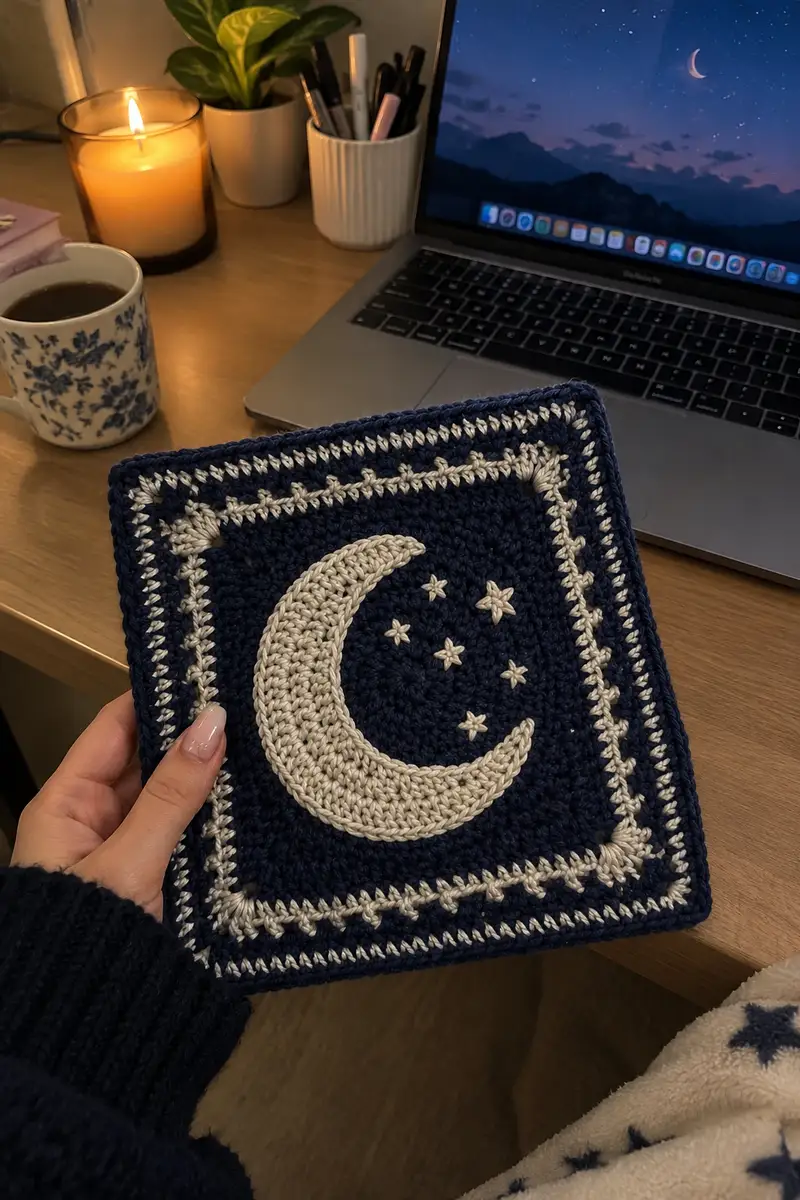
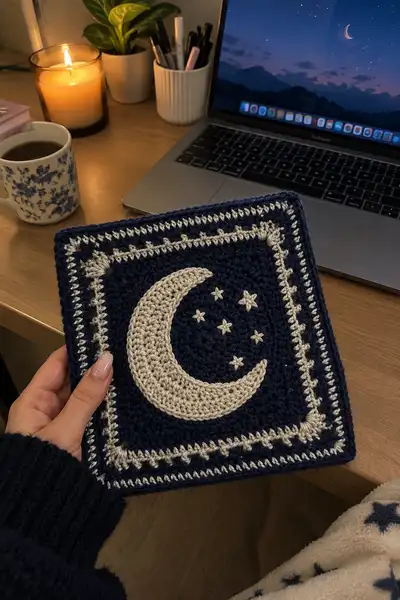
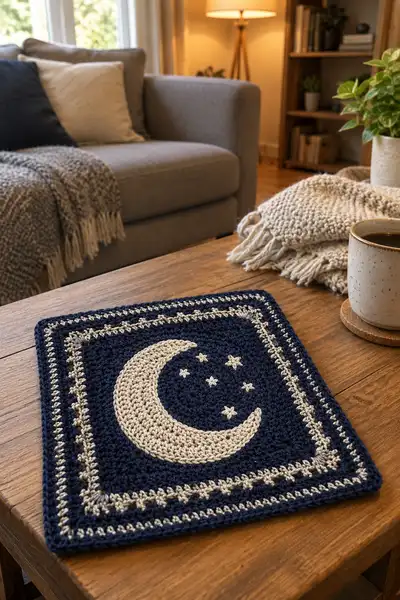
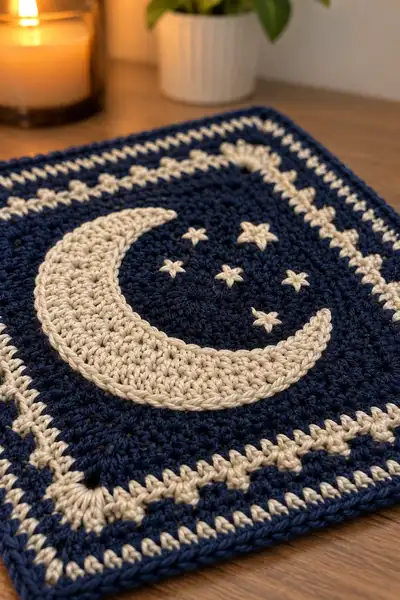
Create a dreamy navy bedspread made from celestial squares featuring raised crescent moons, embroidered stars and constellation panels. This pattern teaches you how to crochet the motif, work the raised appliqued moon, embroider star details, and join dozens of squares into a cozy bedspread. The finished set includes coordinating pillow shams and a decorative border for a polished look.
Progress Tracker
0% Complete
— Crescent Applique (Make 1 per moon square) :
Round 1 :
Start with cream yarn. 6 sc in mr (6)
Round 3 :
(1 sc, inc) x 6 (18)
Round 4 :
(2 sc, inc) x 6 (24)
Info :
This small round base will form the thickest part of the crescent. Keep tension even; do not pull too tight so the applique sits slightly raised on the square.
Round 5 :
(3 sc, inc) x 6 (30)
Round 6 :
Working in FLO, 1 sc in each st (30)
Round 7 :
Switch to 3.5mm hook if you want a bit tighter edge. 1 sc in next 8 sts, dec, 1 sc in next 6, dec, 1 sc in next 8 (26)
Info :
We will begin sculpting the crescent shape by creating decreases on one side and maintaining rounds on the other. The crescent is worked flat-ish and will be slightly oval.
Round 8 :
1 sc in next 7, dec, 1 sc in next 6, dec, 1 sc in next 6 (22)
Round 9 :
1 sc in next 6, dec, 1 sc in next 6, dec, 1 sc in next 4 (18)
Round 10 :
1 sc in next 5, dec, 1 sc in next 4, dec, 1 sc in next 2 (14)
Round 11 :
1 sc in next 4, dec, 1 sc in next 2, dec, 1 sc in next 0 (10)
Info :
Fasten off leaving a 20-25cm tail for sewing. Flatten the applique to check the crescent curve: the side where we kept many stitches will be the thick inner curve of the moon; the decreased side will form the inner hollow.
Round 12 :
Using the tail, seam the outer row gently along the last round where needed to slightly constrict the inner curve. This is not a crocheted round but a shaping stitch applied to the outer edge to refine the crescent profile.
Round 13 :
Optional: With navy contrast, work a surface slip-stitch outline along the outer edge to create a shadow line: join navy at outermost edge, sc in each st around the outside only. Fasten off and weave ends.
Round 14 :
Block flat if desired to set shape. The applique should measure approximately 10-12cm along its longest curve when worked at gauge using worsted yarn and 4.0mm hook.
— Crescent Raised Outline & Surface Texture :
Round 1 :
To add a raised ridge around the crescent, rejoin cream yarn at the outer edge of the applique. Ch1, work 1 hdc evenly around the outside, placing 2 hdc in corners or where curve widens. Join with sl st (approx 30 hdc)
Round 2 :
Work 1 hdc in each st, making sure the ridge is slightly raised; use a tight hook if needed for definition (30)
Info :
This raised ridge makes the moon pop when sewn to the square. Use blocking pins to keep it elevated while attaching to the square so the background stitches nestle under it.
Round 3 :
Optional: Work a small picot border if you like a beaded outline: (sl st, ch2, sl st in 2nd ch from hook) every 3rd stitch. Fasten off and weave ends.
— Small Star Embroidery (Make sets per square) :
Round 1 :
Using cream yarn and tapestry needle, bring yarn up through center point where you want the star. Pull tight so a tiny knot sits at the back.
Round 2 :
Star basic: Push needle down 4mm away, then bring back up 4mm directly opposite to make one long stitch. Repeat at perpendicular angles so you have 4 spokes.
Round 3 :
To form a small 5-point star, after the 4 spokes, bring needle back up between two spokes and stitch a short diagonal; repeat around to create a small star. Secure at back with a small knot.
Info :
Embroider stars flat on the square before assembly. For raised star effect, use 6-strand star stitch: work several short stitches radiating from center and finish with a small French knot of 3 wraps.
Round 4 :
Make 5 small stars per moon square in the arrangement shown in photos: one cluster of three near the moon's upper curve and two smaller ones spaced along the inner area.
Round 5 :
Optional metallic accent: Use a tiny strand of gold carried under stitches and couched with small tacking stitches at star centers for shimmer.
Round 6 :
Secure and weave ends to the back. Trim excess yarn and press lightly with steam if needed to flatten embroidery.
— Night Sky Square (Moon Square, make multiple) :
Round 1 :
With navy yarn, 6 sc in mr (6)
Round 3 :
(1 sc, inc) x 6 (18)
Round 4 :
(2 sc, inc) x 6 (24)
Info :
This center uses sc to create a sturdy textured base for the crescent. Keep rounds tight and consistent. Use a stitch marker for round starts.
Round 5 :
(3 sc, inc) x 6 (30)
Round 6 :
1 sc in each st (30)
Round 7 :
Change to dc for slight texture shift: ch2, dc in same st and around for 30 dc (30)
Round 8 :
(4 sc, inc) x 6 (36)
Round 9 :
1 sc in each st (36)
Info :
At this point your square center is a gentle circle. We will start creating the square corners using increases and clusters.
Round 10 :
(5 sc, inc) x 6 (42)
Round 11 :
Work 1 sc in each st (42)
Round 12 :
To begin squaring, work next round as: [ch3 (counts as dc), 2 dc in same stitch, *dc in next 7 sts, (2 dc, ch2, 2 dc) in next st (corner), repeat from * 2 more times, dc in remaining sts, join] — adjust to keep corner spaces even. Approx count will be 4 clusters per side separated by dc groups.
Round 13 :
1 dc in each dc and in corner ch-2 space work (2 dc, ch2, 2 dc) to maintain square (count varies by gauge; this will create 4 corner ch-2 spaces)
Info :
Measure after Round 13 — when your center measures about 12cm across you are on track for an approx 18-20cm square before outer rounds. Adjust hook if necessary.
Round 14 :
Change to sc for contrasting texture: 1 sc in each st and in each ch-2 corner work (sc, ch2, sc)
Round 15 :
Work a crab stitch round (reverse sc) in navy to create a neat turned edge: sc in each st working left-handed across. This adds definition to the center (same stitch count)
Round 16 :
Switch to cream for inner border accent. Join cream in one corner ch-2 space: (sc, ch2, sc) in corner space, 1 sc in each st across, *in each side between corners place a small star cluster: skip next st, (dc, ch1, dc) into following st, then continue sc; repeat for symmetry*; join. (Count will vary; aim for even distribution)
Info :
Place your crescent applique now: pin the crescent centered across the circle portion using the visual cues from photos—crescent tip pointing diagonally toward one corner. Use your long tail to tack the center and then whipstitch around outer edge to secure.
Round 17 :
After applique is sewn, work a round of navy sc around the entire square including over joins: 1 sc in each st. When encountering applique edge, work 1 sc into the outermost loops of the applique to anchor. (st count will be larger; aim approx 80-100 sts depending on gauge)
Round 18 :
Texture row: 1 sc in next 3, *hdc in next 2, dc in next 1, hdc in next 2, 1 sc in next 3; repeat around to create a subtle ribbed texture*
Round 19 :
Working in navy, establish a 2-round motif repeat where every 5th stitch is a tiny pop of cream: *4 sc navy, join cream and sl st, pull through and fasten back to navy; continue* — this creates a dotted inner frame (count unchanged)
Info :
Embroider the additional stars on the navy background while the square is flat—refer to Small Star Embroidery section for technique. Space stars in a crescent cluster to echo the moon shape.
Round 20 :
Work a round in navy sc ensuring edges are even. If corners feel pointy, add 1 sc more in corner rounds: (sc, ch2, sc) in corner spaces.
Round 21 :
Switch to a faux popcorn edge: *skip next st, 5 dc in next st, sl st in skipped st, sc in next 4* — this creates a textured inner border. (Work carefully so the square remains flat)
Round 22 :
Return to navy and work 1 sc in each st around to stabilize the popcorn texture. Join and fasten off if desired.
Round 23 :
Optional extra depth: add a round of surface slip stitch in cream around the moon perimeter to emphasize the shape; do this by bringing cream yarn along back and sl st through front loops only, making a neat outline.
Round 24 :
Work an even round of sc in navy to square up the edges, measuring your square to ensure consistent size (aim for 18-20cm at this stage for blanket with many squares).
Round 25 :
Decorative corner: In each corner ch-2 space work: (sc, ch1, sc, ch1, sc) to create a small notch and add extra stitch that will help for blocking and joining later.
Round 26 :
Work a round in cream: 1 sc in each st across the sides, and (2 sc, ch2, 2 sc) in corner spaces. This sets a contrasting frame for the square.
Info :
Block the square flat at this point to get perfect corners. Use pins to stretch to exact measurements before working outer rounds.
Round 27 :
Outer embellishment: Join navy in any side. *Ch1, sc in next 3, ch3, skip 2, sc in next 4; repeat across side and in corners work sc, ch2, sc* — this creates small lacy chain motifs in the border.
Round 28 :
Round of sc in navy to stabilize opens: 1 sc in each st, working into chain spaces with 2 sc each to keep edge even.
Round 29 :
Final square edge: work crab stitch (reverse sc) around in navy for a neat, slightly raised outer edge. Fasten off and weave ends. Square complete.
Round 30 :
Repeat these steps to make the required number of moon squares. For a queen-size bedspread shown, plan approx 7 x 8 = 56 squares (mixture of moon and constellation squares) — adjust for size preferences.
— Constellation Square (Alternate square) :
Round 1 :
With navy, 6 sc in mr (6)
Round 3 :
(1 sc, inc) x 6 (18)
Round 4 :
(2 sc, inc) x 6 (24)
Round 5 :
(3 sc, inc) x 6 (30)
Round 6 :
1 sc in each st (30)
Round 7 :
Change to dc: ch2, dc across to widen (30 dc)
Info :
We will create a few rounds identical to the moon square to achieve the same overall size. Constellation detail will be embroidered after these base rounds.
Round 8 :
(4 sc, inc) x 6 (36)
Round 9 :
1 sc each st (36)
Round 10 :
Work corners: (2 dc, ch2, 2 dc) in each corner space; dc elsewhere — this sets square shape.
Round 11 :
1 sc in each st. Join cream yarn for outer starline decoration: sc in next 3, *ch1, skip 1, sc in next 3* repeat around to create subtle dotted border.
Round 12 :
Embroider constellation: using cream and tapestry needle, mark three to five star points per square arranging them to represent simple constellations. Connect select stars with a thin line: couch a short strand of cream with tiny tacking stitches to form the constellation line.
Round 13 :
Make a slightly raised star at key constellation points with the star stitch described earlier. Use a small French knot center for shine if desired.
Info :
Vary constellation arrangements so the blanket reads nicely from a distance — some squares with single small clusters, others with a longer connecting line.
Round 14 :
Finish with a round of navy sc then a cream contrast round: 1 sc in each st, and (2 sc, ch2, 2 sc) in corners. Fasten off and block flat.
Round 15 :
Create as many constellation squares as you need to alternate with moon squares. For visual balance use roughly the same number of each type or a repeating pattern across rows.
— Joining Squares & Blanket Assembly :
Round 1 :
Lay out squares in your chosen layout. Suggested layout for queen: 7 columns x 8 rows for 56 squares. Alternate moon and constellation squares in a checkerboard or diagonal motif.
Round 2 :
Joining method option A (Whipstitch invisible): With right sides up, place two squares together and whipstitch through back loops only of both pieces using navy yarn for a nearly invisible seam. Important for a flat join.
Round 3 :
Joining method option B (Slip stitch join): Hold squares with right sides up and using 4.0mm hook join yarn at a corner; sl st through both loops of first st of each square across side. This makes a decorative ridge and is faster.
Info :
Always pin squares before joining to avoid skewed rows. Work across each row then seam rows together to complete blanket. Weave ends as you go to avoid a huge finishing session.
Round 4 :
For stability, at every 5th junction (where four squares meet) go back and reinforce with an extra pass of sl st or a small hidden cross stitch to prevent popping if the bedspread will be washed frequently.
Round 5 :
After all squares are joined, check the overall measurement and block the entire blanket gently using spray-blocking and pins to square up corners and make the blanket lay flat.
Round 6 :
Trim any long tails and tidy joins. If your joins look loose, consider a narrow row of sc along the entire perimeter to lock joins and create a base for the final border.
— Blanket Outer Border (All-Over Border) :
Round 1 :
With navy, join in any side stitch and work 1 sc in every 2 sts around to create a foundation round for the border. Work (sc, ch2, sc) in corners. Fasten off and change color.
Round 2 :
Join cream in same corner: (sc, ch1, skip 1, sc) across the edge to form a dotted frame; work 2 sc in each corner ch-2 space for evenness. Join.
Round 3 :
Work a round of raised shells in navy: *skip 1, 5 dc in next st, skip 1, sl st in next* across. At corners work shells centered across the corner with a small ch-2 space each side.
Info :
Try this border on a sample of joined squares first to ensure the shell size is proportional to your blanket. Modify counts to keep the blanket flat.
Round 4 :
Stabilize with sc round in navy: 1 sc in each st and in each shell center place 3 sc to maintain flatness. Join and fasten off.
Round 5 :
Final edge: Work crab stitch (reverse sc) in cream around the perimeter for a neat finished edge. This gives a slight raised frame and professional look. Fasten off and weave ends thoroughly.
Round 6 :
Optional blanket fringe: Attach navy tassels every 6-8 sts along the bottom edge only if desired. For a bedspread this is decorative but may add weight when washed.
— Pillow Sham (Make 2 matching to squares) :
Round 1 :
Work one moon square as described earlier but increase center rounds to produce larger square for pillow—add 4 additional rounds of sc evenly to reach approximately 45-48cm square depending on pillow insert size.
Round 2 :
After square front is complete and blocked, make a back panel of 2 plain navy squares each slightly overlapping the front to create an envelope closure. Each back panel should be 1/2 width plus 2cm overlap on each side.
Round 3 :
Join front and back panels using sl st or whipstitch on 3 sides leaving top open. Fold and overlap back panels to create envelope closure and secure edges with a neat row of crab stitch in cream for contrast.
Round 4 :
Insert pillow and check fit. Add a final decorative row of navy sc around the sham to tidy seam allowances.
Info :
Pillow shams can also be zipped using a hidden zipper sewn into one side before final joining for a cleaner finish if you prefer not to have an envelope back.
Round 5 :
Make two shams to match bedspread and embroider small constellations or add a smaller crescent on the pillow corners for design continuity.
Round 6 :
Block shams flat; avoid over-dampening to protect stuffing during assembly.
— Finishing Touches & Care :
Round 1 :
Weave in all tails and trim close. Use a yarn needle to tuck ends into nearest rows to avoid snags.
Round 2 :
Gently steam block the whole blanket if desired—do not press steam too hot if using acrylic yarn. For natural fibers a light wet block is recommended to set square edges.
Round 3 :
Spot clean any embroidery with mild soap. If washing full blanket, use gentle cycle and cool water, reshape while damp and dry flat.
Info :
Store folded with acid-free tissue between layers if keeping for long term. The raised crescent applique benefits from careful handling to avoid flattening.
Round 4 :
Optional add-on: sew a lightweight cotton backing to the whole blanket for extra drape and to hide joins on the reverse side. Baste and sew by machine with a 1cm seam allowance.
Round 5 :
Enjoy your Night Sky Magic Bedspread. Photograph in soft evening light to show the raised moons and star embroidery to full advantage.
You did it! Bringing together dozens of starry squares into a cohesive bedspread is such a satisfying process. Each crescent moon and embroidered star adds personality and handmade charm to your bedroom. Wrap yourself in the calming night-sky palette and savor every cozy evening under your creation. 🌙✨🧶