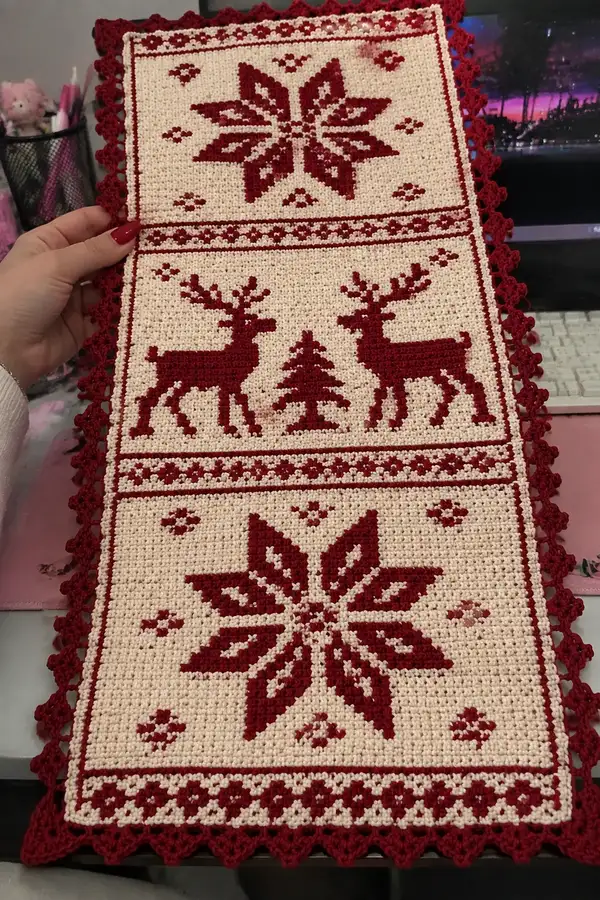
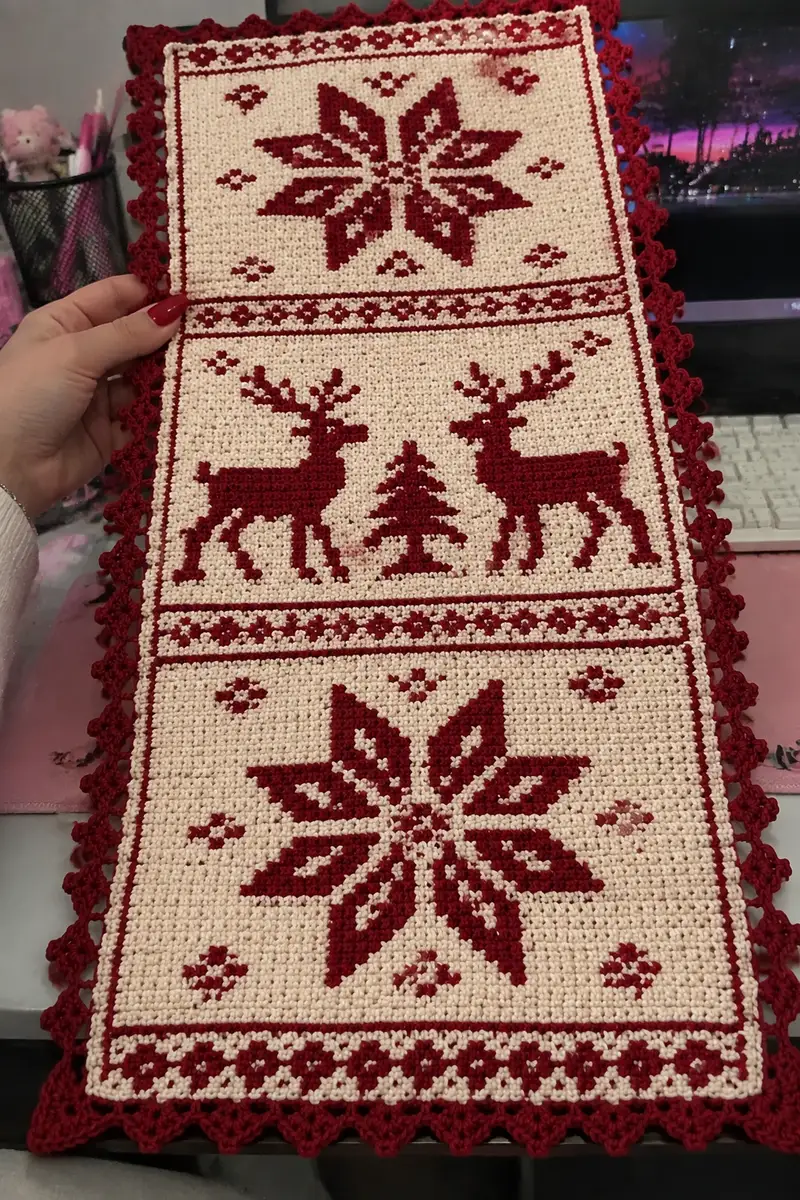
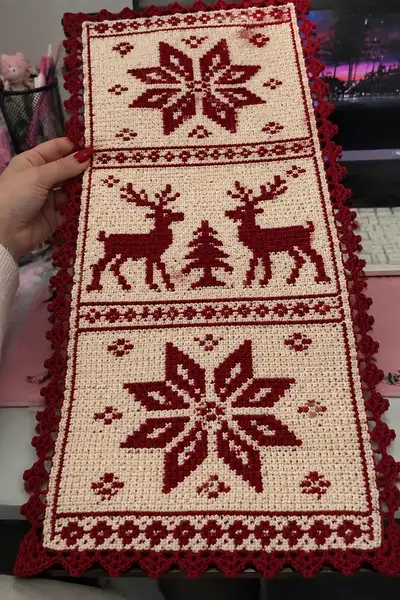
A classic Nordic-inspired table runner worked in two contrasting colors — warm cream and deep berry red — featuring large snowflake blocks, a central reindeer scene, and a delicate scalloped edge. This rectangular runner is worked in single crochet colorwork (tapestry-style) for a firm, dense fabric perfect for festive tabletops. The pattern includes full row-by-row color instructions, border details, and a lacy scallop edging to finish.
Progress Tracker
0% Complete
— Notes & Gauge :
Info :
This runner is worked flat in rows using single crochet tapestry colorwork: change colors each stitch as directed and carry the unused color along the top of the previous row, catching it every 6-8 sts to avoid long floats. Gauge: 18 sc and 20 rows = 10 cm (4 in) in single crochet with 3.5mm hook; adjust if you want a larger or smaller runner.
Info :
Abbreviations A = Cream (background), B = Berry Red (motif). Width of piece is 60 sc across throughout; all rows total 60 stitches. The piece is rectangular and made in the order: foundation row, lower border, lower star panel, divider border, reindeer panel, divider border, upper star panel, upper border, then scalloped edging in B.
— Foundation & Lower Border :
Round 1 :
Chain 61. 1 sc in 2nd ch from hook and in each ch across (60).
Info :
Keep a loose first chain to allow the edge to lie flat; place a stitch marker in the final stitch to mark the row end until you get used to counting.
Round 2 :
Turn. Ch 1. 1 sc in each st across in A (60).
Round 3 :
Turn. Ch 1. 1 sc in each st across in A (60).
Round 4 :
Turn. Ch 1. 1 sc in each st across in B (60).
Info :
We begin with a framed lower border. Rounds 2-3 in A create a tidy ground; the B row will set the contrast foundation that mirrors the thin frame seen on the finished runner.
Round 5 :
Turn. Ch 1. 1 sc in each st across in A (60).
Round 6 :
Turn. Ch 1. 1 sc in each st across in A (60).
Info :
Lower framed border complete. Check width and straighten edges by gently blocking at this stage if desired before starting the lower star panel.
— Lower Star Panel (36 rows total) :
Round 7 :
Turn. Ch 1. 1 sc in each st across in A (60).
Round 8 :
Turn. Ch 1. 1 sc in each st across in A (60).
Info :
These first two rows in the panel keep a clean background before the star begins. Keep tension even; when you change colors, pull the new color through on the last yarn over of the previous stitch to keep edges neat.
Round 9 :
Turn. Ch 1. 1 sc in each st across in A (60).
Round 10 :
Turn. Ch 1. 1 sc in each st across in A (60).
Round 11 :
Turn. Ch 1. Work: A x 29, B x 2, A x 29 (60).
Info :
Row 11 begins the star. The pair of B stitches sits centered on the fabric. When changing color per stitch, carry the unused yarn behind the work and catch it every 6-8 stitches.
Round 12 :
Turn. Ch 1. Work: A x 28, B x 4, A x 28 (60).
Round 13 :
Turn. Ch 1. Work: A x 27, B x 6, A x 27 (60).
Round 14 :
Turn. Ch 1. Work: A x 24, B x 12, A x 24 (60).
Info :
As the B block widens to form the star arm, pay attention to the center alignment; every row is symmetric about the center stitch so that motifs remain balanced.
Round 15 :
Turn. Ch 1. Work: A x 21, B x 18, A x 21 (60).
Round 16 :
Turn. Ch 1. Work: A x 18, B x 24, A x 18 (60).
Round 17 :
Turn. Ch 1. Work: A x 15, B x 30, A x 15 (60).
Info :
Rows 11–17 form the lower half of the central star; from here we will build the peak and then narrow back down. Keep the floats neat and tuck in stray loops with a blunt yarn needle once a small section is complete if needed.
Round 18 :
Turn. Ch 1. Work: A x 12, B x 36, A x 12 (60).
Round 19 :
Turn. Ch 1. Work: A x 9, B x 42, A x 9 (60).
Round 20 :
Turn. Ch 1. Work: A x 12, B x 36, A x 12 (60).
Info :
Row 19 is the widest B band for the star center. If you prefer a more open-looking star, substitute some B stitches for short A-B-A clusters to create negative-space points; the written pattern uses solid blocks for clarity.
Round 21 :
Turn. Ch 1. Work: A x 15, B x 30, A x 15 (60).
Round 22 :
Turn. Ch 1. Work: A x 18, B x 24, A x 18 (60).
Round 23 :
Turn. Ch 1. Work: A x 21, B x 18, A x 21 (60).
Round 24 :
Turn. Ch 1. Work: A x 24, B x 12, A x 24 (60).
Info :
These narrowing rows form the upper shaping of the star. Check the bottom edge alignment with the opposite star later on to ensure the overall runner balance.
Round 25 :
Turn. Ch 1. Work: A x 27, B x 6, A x 27 (60).
Round 26 :
Turn. Ch 1. Work: A x 28, B x 4, A x 28 (60).
Round 27 :
Turn. Ch 1. Work: A x 29, B x 2, A x 29 (60).
Round 28 :
Turn. Ch 1. 1 sc in each st across in A (60).
Round 29 :
Turn. Ch 1. 1 sc in each st across in A (60).
Info :
Add small B accent clusters in four corner positions of the star block if desired: work tiny B x 3 clusters at rows 13 and 25 positioned 6 sts in from edges to replicate the small diamond motifs in the photo; these are optional for visual interest.
Round 30 :
Turn. Ch 1. 1 sc in each st across in A (60).
Round 31 :
Turn. Ch 1. 1 sc in each st across in A (60).
Round 32 :
Turn. Ch 1. 1 sc in each st across in A (60).
Info :
Panel complete. Use a blunt tapestry needle to tidy any long floats behind the work and then continue to the divider border.
Round 33 :
Turn. Ch 1. 1 sc in each st across in B (60).
Round 34 :
Turn. Ch 1. 1 sc in each st across in A (60).
Round 35 :
Turn. Ch 1. 1 sc in each st across in B (60).
Round 36 :
Turn. Ch 1. 1 sc in each st across in A (60).
Info :
These two-color rows create a thin divider band above the star panel that mirrors the decorative banding seen in the sample. Maintain clean color joins by changing color on the last yarn over of the previous stitch.
— Divider Border (6 rows) :
Round 37 :
Turn. Ch 1. Work: (A x 3, B x 3) rep across starting with A to finish (60).
Round 38 :
Turn. Ch 1. Work: (B x 3, A x 3) rep across starting with B to finish (60).
Info :
These small notch rows form a checker stripe motif in the divider. Keep the pattern even by counting repeats; each repeat block is 6 stitches wide and there are 10 repeats across (6 x 10 = 60).
Round 39 :
Turn. Ch 1. 1 sc in each st across in A (60).
Round 40 :
Turn. Ch 1. 1 sc in each st across in B (60).
Round 41 :
Turn. Ch 1. 1 sc in each st across in A (60).
Info :
Divider complete; check motif alignment by folding the runner in half lengthwise to ensure balanced placement of the center reindeer panel.
— Reindeer Panel (36 rows total) :
Round 42 :
Turn. Ch 1. 1 sc in each st across in A (60).
Round 43 :
Turn. Ch 1. 1 sc in each st across in A (60).
Info :
Start of the central panel that contains two mirrored reindeer with a small tree in the center. The reindeer silhouettes are placed roughly between columns 8–24 (left) and 36–52 (right) with the tree centered on columns 29–32. Each row below specifies exact stitch counts for A and B across the 60-st width.
Round 44 :
Turn. Ch 1. Work: A x 7, B x 2, A x 11, B x 2, A x 6, B x 2, A x 5, B x 2, A x 7, B x 2, A x 14 (60).
Round 45 :
Turn. Ch 1. Work: A x 6, B x 4, A x 10, B x 4, A x 6, B x 4, A x 6, B x 4, A x 16 (60).
Info :
Rows 44–45 begin shaping the antler and neck area: multiple short B segments create the outline of antler points and body edges. Read each row left to right as you work across the piece. If you prefer working from charts, you can plot 60 columns per row and color in the B stitches.
Round 46 :
Turn. Ch 1. Work: A x 5, B x 6, A x 8, B x 6, A x 6, B x 6, A x 5, B x 6, A x 12 (60).
Round 47 :
Turn. Ch 1. Work: A x 4, B x 8, A x 6, B x 8, A x 6, B x 8, A x 4, B x 8, A x 8 (60).
Round 48 :
Turn. Ch 1. Work: A x 3, B x 10, A x 6, B x 10, A x 3, B x 10, A x 3, B x 10, A x 5 (60).
Info :
These rows expand B areas to form the shoulders, chest, and beginning of body blocks for the deer; the repeated B clusters represent filled silhouette regions. Use a spare bobbin or small balls of yarn when color changes are frequent to avoid twisting long continuous floats.
Round 49 :
Turn. Ch 1. Work: A x 2, B x 12, A x 4, B x 12, A x 2, B x 12, A x 2, B x 12, A x 0 (60).
Round 50 :
Turn. Ch 1. Work: B x 14, A x 2, B x 14, A x 2, B x 14, A x 14 (60).
Info :
Rows with large continuous B bands are the widest body sections of the deer. If your tension tightens with large color blocks, occasionally relax your grip and redo the row to keep fabric flat. Ensure the tree center area keeps a narrow A column where specified in later rows.
Round 51 :
Turn. Ch 1. Work: A x 3, B x 10, A x 6, B x 10, A x 3, B x 10, A x 8 (60).
Round 52 :
Turn. Ch 1. Work: A x 4, B x 8, A x 8, B x 8, A x 4, B x 8, A x 12 (60).
Round 53 :
Turn. Ch 1. Work: A x 5, B x 6, A x 10, B x 6, A x 5, B x 6, A x 16 (60).
Info :
These rows start to shape the deer legs and the small tree trunk in the center. The tiny central tree uses a combination of B and A to create a triangular tree shape over a few rows; the pattern gives a simplified tree between the two deer.
Round 54 :
Turn. Ch 1. Work: A x 6, B x 4, A x 12, B x 4, A x 6, B x 4, A x 24 (60).
Round 55 :
Turn. Ch 1. Work: A x 7, B x 2, A x 14, B x 2, A x 7, B x 2, A x 26 (60).
Round 56 :
Turn. Ch 1. Work: A x 8, B x 2, A x 16, B x 2, A x 8, B x 2, A x 22 (60).
Info :
These rows narrow the motif to shape the legs and lower silhouette. Leg details are achieved by short vertical columns of B stitches; use careful counting to ensure legs line up across rows for a solid silhouette.
Round 57 :
Turn. Ch 1. 1 sc in each st across in A (60).
Round 58 :
Turn. Ch 1. 1 sc in each st across in A (60).
Info :
Two plain background rows separate the reindeer motif from the next divider, exactly as in the reference. They also help the silhouettes read clearly by giving visual contrast.
Round 59 :
Turn. Ch 1. 1 sc in each st across in B (60).
Round 60 :
Turn. Ch 1. 1 sc in each st across in A (60).
Round 61 :
Turn. Ch 1. 1 sc in each st across in B (60).
Info :
Reindeer panel complete. Trim any long floats and weave in ends on the wrong side. Check motif balance and symmetry before moving to the next divider and upper star panel.
— Upper Divider & Upper Star Panel (Repeat of earlier star; 42 rows) :
Round 62 :
Turn. Ch 1. Work: (A x 3, B x 3) rep across (60).
Round 63 :
Turn. Ch 1. Work: (B x 3, A x 3) rep across (60).
Round 64 :
Turn. Ch 1. 1 sc in each st across in A (60).
Round 65 :
Turn. Ch 1. 1 sc in each st across in B (60).
Info :
This divider mirrors the lower divider. Take a short break if needed — you are entering the final star block that mirrors the first one and will bring the runner into symmetry.
Round 66 :
Turn. Ch 1. 1 sc in each st across in A (60).
Round 67 :
Turn. Ch 1. 1 sc in each st across in A (60).
Round 68 :
Turn. Ch 1. 1 sc in each st across in A (60).
Round 69 :
Turn. Ch 1. Work: A x 29, B x 2, A x 29 (60).
Round 70 :
Turn. Ch 1. Work: A x 28, B x 4, A x 28 (60).
Round 71 :
Turn. Ch 1. Work: A x 27, B x 6, A x 27 (60).
Round 72 :
Turn. Ch 1. Work: A x 24, B x 12, A x 24 (60).
Info :
This upper star block repeats the lower star shaping for a symmetrical runner. If you want a different motif on one of the panels, substitute your chart here, maintaining the 60-st width.
Round 73 :
Turn. Ch 1. Work: A x 21, B x 18, A x 21 (60).
Round 74 :
Turn. Ch 1. Work: A x 18, B x 24, A x 18 (60).
Round 75 :
Turn. Ch 1. Work: A x 15, B x 30, A x 15 (60).
Round 76 :
Turn. Ch 1. Work: A x 12, B x 36, A x 12 (60).
Info :
Take care particularly at the widest B rows (like row 76) to keep floats neat on the wrong side. If floats become too long, cut and rejoin yarn with small tails woven in to the back.
Round 77 :
Turn. Ch 1. Work: A x 9, B x 42, A x 9 (60).
Round 78 :
Turn. Ch 1. Work: A x 12, B x 36, A x 12 (60).
Round 79 :
Turn. Ch 1. Work: A x 15, B x 30, A x 15 (60).
Round 80 :
Turn. Ch 1. Work: A x 18, B x 24, A x 18 (60).
Info :
We are now closing the top star in mirror to the bottom. This gives the runner the classic stacked-block look with motifs framed by narrow dividers.
Round 81 :
Turn. Ch 1. Work: A x 21, B x 18, A x 21 (60).
Round 82 :
Turn. Ch 1. Work: A x 24, B x 12, A x 24 (60).
Round 83 :
Turn. Ch 1. Work: A x 27, B x 6, A x 27 (60).
Round 84 :
Turn. Ch 1. Work: A x 28, B x 4, A x 28 (60).
Round 85 :
Turn. Ch 1. Work: A x 29, B x 2, A x 29 (60).
Round 86 :
Turn. Ch 1. 1 sc in each st across in A (60).
Info :
Upper star block finished. Work two plain background rows to mirror the lower edge and prepare for final framing border.
Round 87 :
Turn. Ch 1. 1 sc in each st across in A (60).
Round 88 :
Turn. Ch 1. 1 sc in each st across in B (60).
Round 89 :
Turn. Ch 1. 1 sc in each st across in A (60).
Info :
Runner body complete. We now work the framed outer border and then the decorative scalloped edge in B for a finished look.
— Final Outer Border (6 rows) :
Round 90 :
Turn. Ch 1. Work: 1 sc in each st across in B (60).
Round 91 :
Turn. Ch 1. Work: 1 sc in each st across in A (60).
Round 92 :
Turn. Ch 1. Work: 1 sc in each st across in B (60).
Round 93 :
Turn. Ch 1. Work: 1 sc in each st across in A (60).
Round 94 :
Turn. Ch 1. Work: 1 sc in each st across in B (60).
Round 95 :
Turn. Ch 1. Work: 1 sc in each st across in A (60).
Info :
These alternating rows create a framed look around the entire runner. Fasten off A at the end of Round 95 leaving a long tail to join at the side for edging; we will work the scallops into the side stitches in B.
— Scalloped Edging in B (worked along the two long sides and short ends) :
Round 96 :
With B and 3.25mm hook, join with a sl st to the corner stitch at the right side of the runner. Ch 1, sc in same st, *ch 3, skip 2 sts, sc in next st; rep from * across to next corner, ending with sc in corner stitch. (Working across 60 sts)
Info :
This creates small open arches for the scallops to sit into. Tension here will determine scallop size; if arches are too tight, use 3.5mm hook instead for edging.
Round 97 :
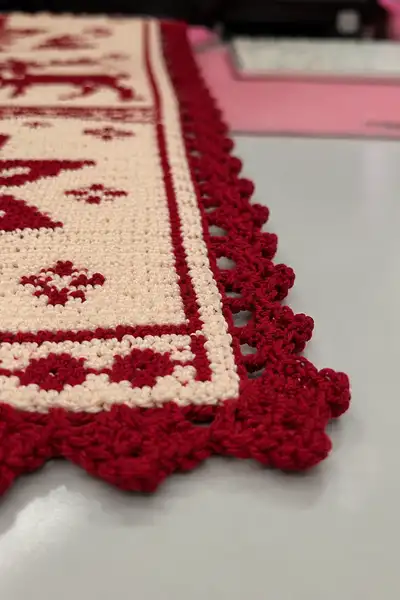
Turn. Ch 1. *Into each ch-3 arch: (sc, hdc, 3 dc, hdc, sc) all in same arch; skip to next arch and rep across; sl st into corner to turn on short side.* Repeat this scallop around corners and across all sides evenly; you will form 20 scallops per long side approximately depending on spacing.
Round 98 :
Turn. Ch 1. If desired for extra depth, work a second round of shells into the top of each scallop: *sl st to center dc of scallop, ch 1, (sc, 2 dc, sc) in center dc; rep across scallops; sl st into final corner.*
Info :
The picture shows a fairly full scalloped edge: two-shell scallops replicate that look. If you like a flatter runner, do only Round 97. Use small slip knots to start and weave tails through the scallop ridge to secure.
Round 99 :
Finishing: Break yarn leaving an 8–10 cm tail. Use tapestry needle to weave in tail through the backside of scallops and runner body, trimming ends flush.
Info :
Block your runner flat: pin out to rectangular shape on a blocking board and mist with water, or use a light steam from an iron held a few inches above the fabric. Allow to dry completely before removing pins to keep the scallops neat.
This Nordic table runner brings warm holiday charm to any table with its classic snowflakes, reindeer vignette, and crisp two-color palette. Each row of colorwork builds the story, and finishing with a scalloped edge gives the piece a hand-finished elegance. I hope this pattern becomes a seasonal favorite you enjoy making year after year — happy crocheting and joyful decorating! 🎄🧶