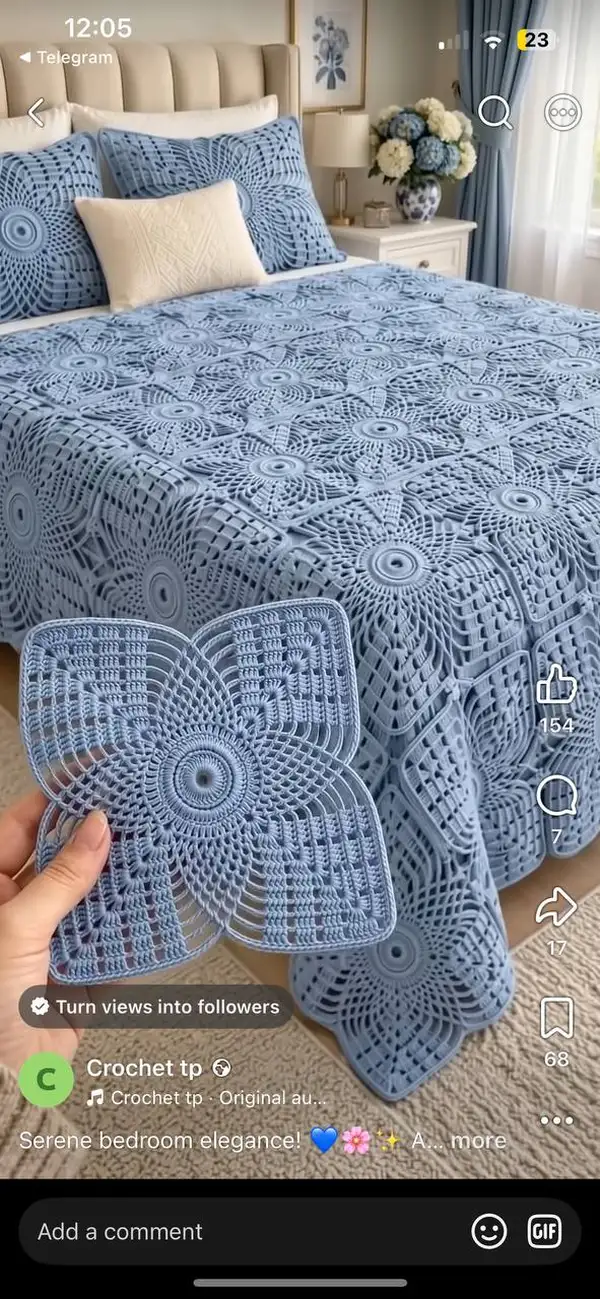
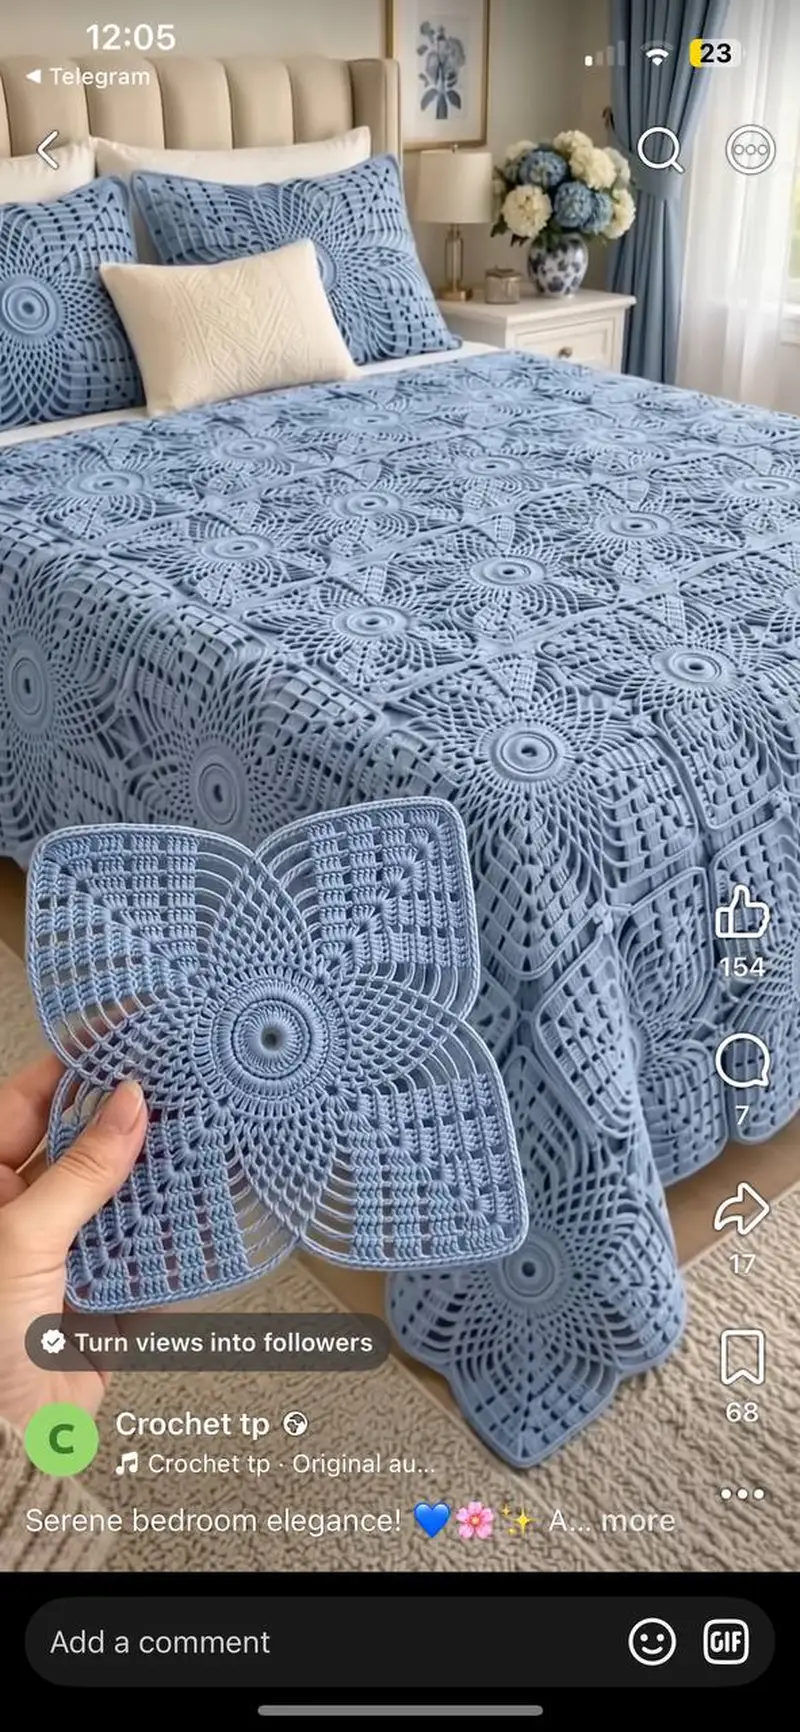
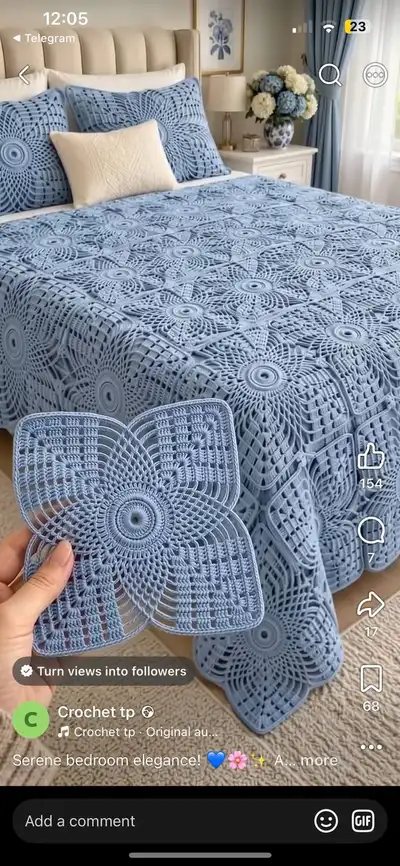
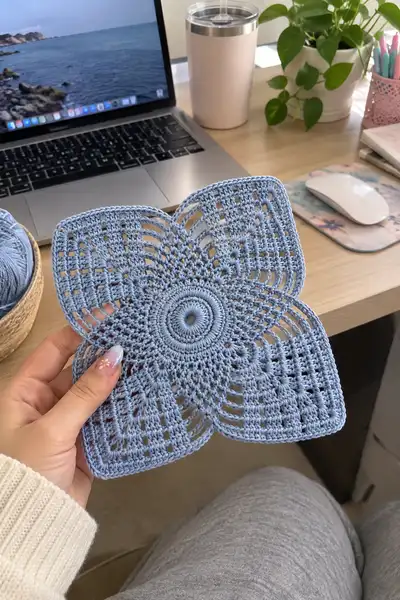
Create an elegant Starburst Lace Bedspread made from individual flower-square motifs joined to form a dreamy, airy coverlet. This pattern guides you through each motif round, join-as-you-go options, pillow sham variations and a graceful scalloped border — all in a soft dusty-blue lace look as shown. Detailed stitch counts, placement notes and blocking guidance are included to help you make a full bedspread with linen-like drape and beautiful openwork.
Progress Tracker
0% Complete
— Motif (single starburst square) :
Round 1 :
Start with a magic ring. Ch1, work 6 sc into ring. Pull tight (6)
Round 2 :
Inc in each st around (2 sc in each st) — 6 inc (12)
Round 3 :
(1 sc, inc) x 6 (18)
Round 4 :
(2 sc, inc) x 6 (24)
Round 5 :
(3 sc, inc) x 6 (30)
Info :
Keep tension even. These first rounds form a compact center; use stitch marker to mark round start so you keep circular alignment consistent for the starburst ribs
Round 6 :
(4 sc, inc) x 6 (36)
Round 7 :
(5 sc, inc) x 6 (42)
Round 8 :
(6 sc, inc) x 6 (48)
Round 9 :
1 sc in each st around (48)
Round 10 :
1 sc in each st around (48)
Info :
Placement note: the center rounds should be compact and slightly domed; if your center flattens, tighten your tension or use a slightly smaller hook for R1-R8
Round 11 :
To begin star ribs: *[ch6, sk3, sl st into next st, 1 sc in following 3 sts] repeat across the round producing 8 rib base points. Work 8 repeats total so that evenly spaced chain ribs form (48 base points still referenced by spacing)
Round 12 :
Working into the chain ribs and base rounds to create tall ribs: Join yarn at a rib base. *(sc in base st, ch5, (tr)5 in ch-6 loop to form a tall cluster, ch5, sc in next base st) repeat around to form 4 long petal ribs separated by small sc groups (48 sc and 4 cluster sections)
Round 13 :
Around each petal rib work: Join at the base of a rib, ch3 (counts as first dc), 2 dc in same space, (ch3, sk next small sc group) then along rib work (2 dc, ch3, 2 dc) into the tall cluster spaces to build fan petals. Repeat for 4 petals. After completing petals, end with sl st to first dc (stitch count varies due to chain spaces — pattern forms 4 wide fan petals)
Info :
These rounds create the raised petal ribs. Take care to anchor fan groups securely into the small sc groups between ribs; keep clusters even in height so petals match when blocked
Round 14 :
Transition to square shaping: After finishing fan sections, work 1 sc evenly around the whole motif to stabilize clusters. Where long chains occur, replace with 1 sc into the ch-spaces to hold the shape (approx 48 sc equivalent)
Round 15 :
Working in front of petals to begin corner formation: *Work [1 sc, ch3, (3 dc, ch3, 3 dc) in next large petal gap, ch3, 1 sc] — repeat for each petal to create 4 corner arches. This introduces larger clusters at four compass points (equivalent to 4 corner groups)
Round 16 :
Secure the corner arches: Into each arch work: sl st, ch1, 12 dc spaced across arch (12 dc per corner arch, 48 overall dc counted as grouped areas)
Info :
Count your dc in each corner to ensure cupboards of 12dc. If your arch is slightly bigger or smaller due to tension, adjust by +/-1 dc per corner to keep square symmetry
Round 17 :
To begin side panels: Working from the tip of the corner dc groups, ch5, sk 1 dc, sc into next dc along corner, then *(ch5, sc into center of next corner cluster) across each side. You will create 4 long chain arches forming the future square sides (4 arches per side across 4 sides)
Round 18 :
Work back into chain arches to make mesh sides: Into each ch-5 space work [1 sc, ch3, 1 sc]. Repeat across all arches forming an even filet mesh that will be squared out. This round stabilizes side meshes (counts measured as 4 sections of repeated filet blocks)
Round 19 :
Filet round: *Working across one side: (ch3, sk 2, 3 dc in next cluster, ch3, sk 2) repeat across each mesh side to begin filling the side face with vertical ribs. Repeat for all 4 sides. The visual effect is a ladder/rafter grid contributing to square straightening
Round 20 :
Work 1 sc evenly into all real stitches and spaces around to join the filet and petals into one cohesive round — treat each ch-3 space as a working point to maintain even tension (approx equivalent to 48 points of engagement)
Info :
At this stage motifs still read circular; the next rounds are critical for forcing the motif into a square by building outward corner foundation blocks. Reserve a stitch marker to mark the corner tips for reference in subsequent rounds.
Round 21 :
Corner foundation: At each corner tip work: (ch3, 3 dc, ch3, 3 dc, ch3, 1 sc) to build a robust right-angle corner. Between corners work straight filet panels of (1 sc, ch5, 1 sc) repeated across each side to maintain flatness. After working all 4 corners the motif has 4 defined square points.
Round 22 :
Across each side work: *(2 dc in next sc, ch3, skip next ch-space, 2 dc in next sc) repeat across side. At corners, work (2 dc, ch4, 2 dc) to maintain corner fullness. This creates a repeating rib-and-space structure that builds the square edge (counts vary by side but symmetrical due to repeats)
Round 23 :
Mesh reinforcement round: 1 sc in each visible st around, placing sc in ch-spaces where necessary to flatten the panel (this provides a countable anchor before more decorative rounds)
Info :
At this point block one motif to confirm measurements: an unblocked motif should measure roughly 22-26cm across depending on yarn/hook. Blocking evens the mesh and sets the square. Make a note of your motif size for bedspread layout calculations.
Round 24 :
Decorative tall stitches round: Into each side section work (ch3, tr3 cluster in next filet gap, ch3, sc in following sc) across sides. At corners: (sc, ch5, sc) to accentuate corner squares. This round creates tall vertical ribs that will register visually across the bedspread.
Round 25 :
Open lace row: *Ch7, sk 4 stitches along side, sl st into next sc to create open arches across each side. Repeat for all sides, using the corner ch5 as anchor points (total of 4 sets of arches, one for each side)
Round 26 :
Work back into arches: into each ch-7 arch: (sc, ch3, 5 dc evenly spaced, ch3, sc). This fills the large arches creating petal-lace texture stretching toward square corners (counts measured as sets of dc per arch)
Info :
These arch-fill rounds are what create the airy mesh seen in the motif photo; keep your dc counts even in each arch. If an arch looks too loose, reduce to 4 dc; if too tight, add one dc — but keep symmetry on each side
Round 27 :
Edge filler round: 1 sc in each st and in each ch-3 space around (this evens out the arch edges and prepares the motif edge for final square shaping). Aim to end with a consistent number of foundation points around each side (approx 36 engagement points per side including corner structures)
Round 28 :
Square outline: *Working into the top of the arch groups, create a rectangular grid across each side by (ch3, sk 1, 1 dc) repeated across the side. At corners join with sl st into corner sc. This introduces straight vertical bars to visually square the motif (counts vary per side but repeat pattern is consistent)
Round 29 :
Reinforce side bars: Work 1 sc in each visible st; where chain bars exist work 1 sc into top of ch-3. This locks bars into place and produces a stable frame around the motif (total sc equivalents ~144 measured as 36 per side including corners)
Round 30 :
Corner smoothing round: Into each corner sc, work (ch3, 3 dc, ch3) and join with 1 sc into the first side sc to maintain right angles. Between corners (across each side) work (1 sc, ch5, 1 sc) to keep the mesh open but neat. This creates small boxed windows along each side.
Info :
Every 4-6 rounds check your motif against a straight edge or quilting ruler; if one side looks smaller, add one extra sc into a non-corner side to equalize the four sides before continuing.
Round 31 :
Outer petal braid: Working around motif, in each side-box work (2 dc, ch2, 2 dc) across each side-window. On corners work (3 dc, ch3, 3 dc) to solidify the corner point. This adds a decorative raised outer braid around the motif (st count recorded per corner group as 6 dc and per side as repeated 4-dc groups)
Round 32 :
Stabilizing sc round: 1 sc in each st and in each ch-2/ch-3 space around to tidy the braid and prepare for final outer mesh (approximately a total of 160 engagement points across the motif depending on yarn/hook)
Round 33 :
Final open mesh: *(ch5, sk 2 stitches, 1 sc) across each side repeating evenly. At corners work a locking sc into the corner chain to round off edges. This produces the square open-lace look seen in the motif photo with consistent laddering across the sides
Round 34 :
Border finishing rounds - round 1: 1 hdc in each st around, placing hdc evenly in ch-5 spaces as needed to produce a tidy, semi-firm perimeter (use 2.75–3.25mm hook if you want a slightly firmer edge)
Round 35 :
Border finishing rounds - round 2: *Sl st into next st, ch3, sl st into same stitch to form a small picot-like bump for texture; repeat around to give a subtle dotted edge. Fasten off and weave ends neatly.
Info :
Block each motif flat with pins and steam or wet-block gently. Square the corners using a ruler to achieve consistent motif size before joining. Label motifs to keep track of join orientation (corner-to-corner or side-to-side).
— Joining & Layout (join-as-you-go and seamed options) :
Info :
Plan your bedspread layout based on motif size. For a queen bed using motifs measuring ~24cm blocked, you'll need approximately 9 motifs across by 11 motifs down (99 motifs) depending on overhang and drape. Always make a sample section to calculate exact motif count.
Round J1 :
If using Join-As-You-Go (JAYG): Make the first motif completely and block. Make the second motif up to Round 33 and lay it on top of the blocked first motif with right sides facing (edges aligned). At one side only, join by working slip stitches through the back loop of the prepared motif and the front loop of the adjacent motif across the side. Join along one full side using sl st in each matching stitch (approx 36 sl st for a side depending on your motif)
Round J2 :
Continue to add motifs one side at a time: Always align motifs with corners matching. For corner joins (where two existing motifs meet) join with sl st into both adjacent motifs at the corner intersection then continue sl st across the side. Use matching stitch counts when joining to avoid gapping.
Info :
When joining, keep tension loose enough for neat joins but firm enough to avoid sagging. Pin motifs together before working the join row if you prefer more control. Alternate joining method: whip stitch through both motif backs for an invisible seam.
Round J3 :
Seamed option (if not JAYG): Block all motifs, then position them on a flat surface in your planned grid. Using tapestry needle and yarn (same or slightly thinner), sew them together using mattress stitch or ladder stitch along edges, matching chain spaces to chain spaces. Work corner junctions with extra passes for security.
Round J4 :
For a more decorative join: Use a crochet join row after seaming: With RS facing, work a round of sc around joined seams inserting hook through both motifs and making sc loops across the seam to create a subtle raised join. Work 1 sc in each join position along each seam for a reinforced border.
Info :
Count the number of engagement stitches along a motif side after blocking — use that number to calculate consistent seam sl st counts. If sides have different numbers, redistribute sc/spaces evenly across join by spacing your sl st evenly across the side to avoid localized puckering.
Round J5 :
As you assemble the bedspread, occasionally measure across the assembled row to ensure straightness. Add minor adjustments by adding 1 extra sc into select side spaces where rows look slightly smaller to maintain a rectangular spread.
Round J6 :
When joining three or more motifs at a corner (a 4-motif intersection), secure the middle point with an extra sl st through all 4 motif intersections then continue the side joins. This reinforces the center of motif grids and prevents corner flaring.
Info :
Lay your bedspread flat on the bed while assembling for final adjustments to overhang. Slight asymmetry can be corrected by an extra row of edging later, but it's easier to keep motif counts uniform from the start.
— Bedspread Assembly Rounds (after all motifs joined into a single fabric) :
Round A1 :
With the joined bedspread flat and seams secure, prepare to work a unifying outer border. Choose an outermost motif edge to begin. Attach yarn at a corner and work 1 sc in each exposed st around the entire spread to create a baseline edge (approx total stitches ~ motifs_per_row * motif_side_stitches * rows — measure and count on your assembled piece before beginning; we will work repeats rather than absolute numbers)
Round A2 :
Work 1 hdc in each st around to create a slightly raised perimeter (this rounds off minor irregularities). If your bedspread is very large, break yarn and join again rather than carrying for tidy joins.
Info :
Take time to smooth the entire fabric before working decorative large rounds; a pinned light steam improves stitch memory and keeps the edge even while you crochet the heavier final border rounds.
Round A3 :
Open shell round: *(ch3, skip 1, 5 dc in next st, ch3, skip 1, sl st in next) repeat around. At corners you will land on corner chain spaces — work 7 dc in the corner space to maintain curve if needed. This round introduces a big scalloped shell look around the whole bedspread.
Round A4 :
Work into shell peaks: *(sl st into center of next 5-dc shell, ch5, back post dc around the shell center to create raised ridges, then sl st to next shell center) repeat around. This adds depth and a textured rippled border.
Info :
Use a slightly larger hook (3.75–4.0mm) for the scalloped rounds if you want a looser, more drapey shell. Use the same hook if you prefer a firm scallop that holds shape.
Round A5 :
Scallop finish rounds: 1 sc in each st and in each ch-space around the spread to stabilize scallops. Then work a final decorative picot row: *sc, ch3, sl st into same stitch (picot) across the edge for a dotted outline. Fasten off and weave in ends.
Round A6 :
Optional double-scallop: If you desire a double scalloped finish, after A5 block the bedspread again and work an outermost shell of (7 dc, sl st to next shell center) spaced across the existing scallops. This creates a larger, lacy finished frame for the bedspread.
Info :
When working large borders, work in sections and pin as you go. Allow the spread to rest pinned overnight to let the border settle before wet blocking or applying steam for final set.
— Pillow Shams & Accent Squares :
Round P1 :
Work motifs identical to the main motif through Round 33 as instructed in Motif section. Block motifs to match motif size on the bedspread. For each sham you will need a grid of 3x3 motifs for a standard square sham (adjust to desired size).
Round P2 :
Join motifs for sham using JAYG or mattress stitch. After joining, work the same edging as the central bedspread but scale down: 1 sc round, 1 hdc round, then a single scallop round (5 dc shells) followed by a stabilizing sc round.
Info :
For pillow shams, add a backing fabric or crocheted lining to protect the reverse and provide durability. Sew backing fabric to the wrong side with ladder stitch keeping joins neat and secure. Insert pillow form and close.
Round P3 :
Optional sham flange: After finishing the scallop, work a 4–5cm wide shell flange by repeating shell rows 2–3 times to create an elegant frill.
Info :
Keep the sham flange proportionate to the pillow size — typically 3–5 cm flange looks elegant without overwhelming the sham.
— Alternate Join Methods & Decorative Inset Rows :
Round X1 :
Invisible whip join: Place motifs RS together, thread tapestry needle with 3-ply yarn, and whip stitch through both motif backs aligning ch-spaces. Pull gently to keep seam flat. This is a strong join recommended for bedspreads that will be handled often.
Round X2 :
Crochet connecting chain: With motifs blocked, lay them RS up and insert hook through both motif edges, ch1, and sc through both layers to create a visible decorative raised seam. Work 1 sc in each aligned edge point for a grid effect.
Info :
Decorative inset rows can be added by working narrow bands of contrasting color across selected seams — pick a thin yarn or use the main yarn held double for subtle contrast. Work 2–4 rows of sc or hdc across seams for stabilizing effect and design interest.
— Blocking, Finishing & Care :
Info :
Wet block each motif and the finished spread carefully. Use blocking boards and rust-free pins. Square each motif by measuring diagonals and sides. Allow to dry fully before removing pins. For best crispness use a light starch spray if desired and gentle steam to set stitches.
Round F1 :
Trim and weave ends: After all joining and edging are complete, weave in all ends with a yarn needle across 5–6 sts in the back of the work, then trim close. Double-check seam security especially at corners and motif intersections.
Round F2 :
Final pressing: For cotton yarns, a gentle press with steam and a pressing cloth will flatten any minor lumps and give the bedspread a refined finish. Hang or lay flat to store, avoiding sharp folds to maintain the lace memory.
Info :
Care instructions: Hand wash or machine wash on gentle/cold in a mesh bag, reshape while damp, and lay flat to dry. Avoid chlorine bleach which can weaken cotton fibers.
— Special Techniques & Tips :
Info :
Tips: Keep a small notebook to track motif counts and layout rows as you assemble. Use matching spares of yarn for repairs. If using a different yarn weight, make a motif gauge swatch of at least 3 motifs to calculate motif count required for your bed size.
Info :
Coloring: The motif is especially effective in a single color to show off texture. If you choose stripes, change color between motifs rather than within motifs to avoid complex color weaving.
Info :
Final note: The step-by-step motif rounds are intentionally descriptive to allow slight adjustments for tension. If you find a round tighter or looser, adjust next round stitch counts slightly to keep symmetry. Aim for consistent blocked motif measurements for assembly.
Completing the Starburst Lace Bedspread is a wonderfully rewarding project that transforms dozens of delicate motifs into a stunning heirloom. Each motif blooms with petal ribs and openwork that play beautifully across the bed when blocked and joined. The repetitive crafting rhythm makes progress relaxing, and the final blocking is pure magic as the bedspread expands into its full, graceful form. 🧶 Take your time, enjoy the process, and know that every stitch adds to a piece you'll treasure. ✨