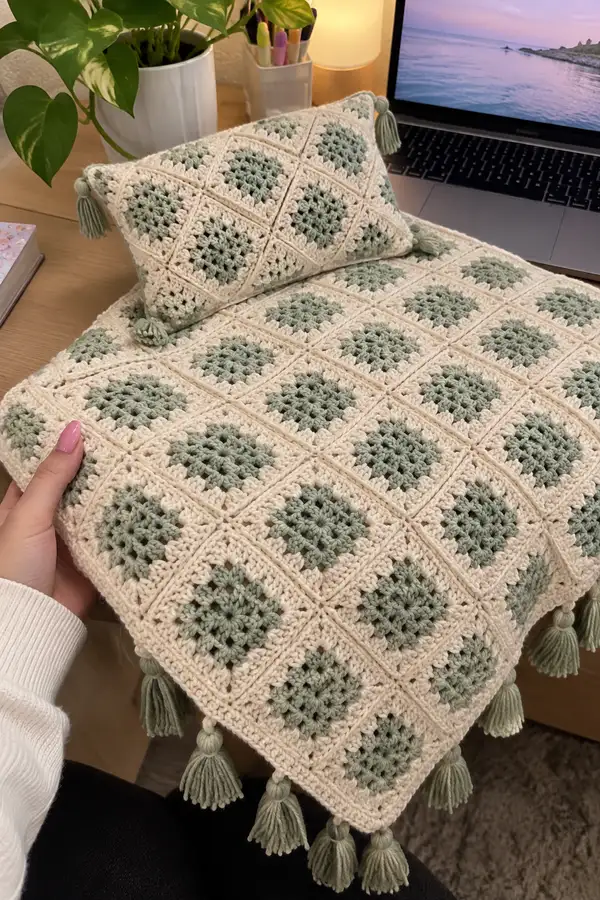
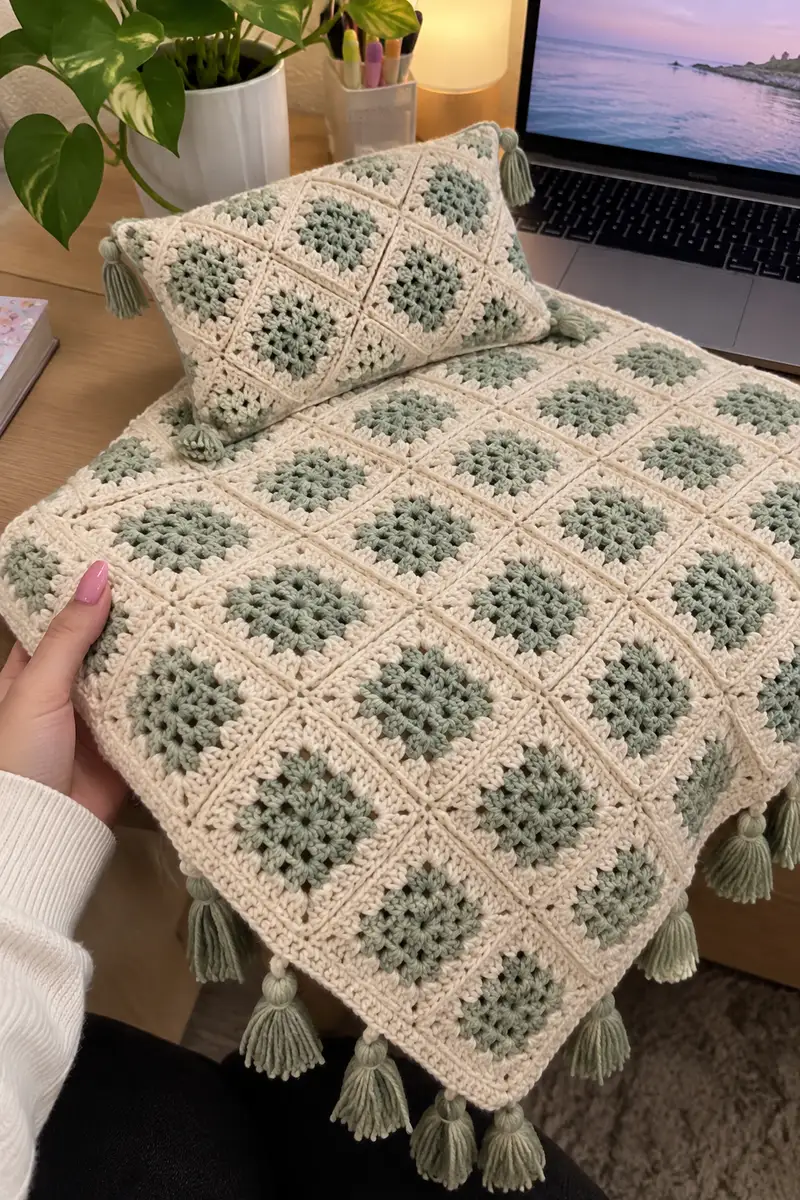
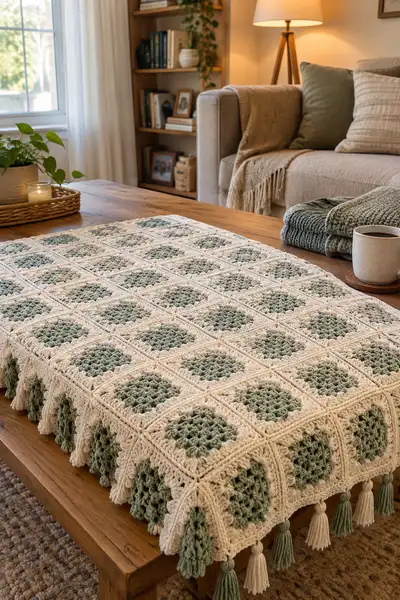
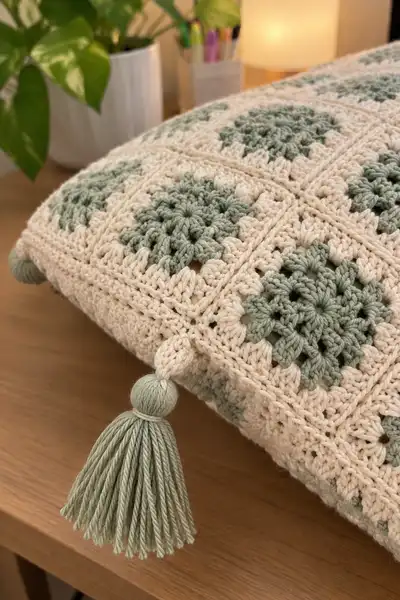
Create a serene boho bedspread made from textured two-color granny squares and a soft, chunky border. This pattern features sage-green center clusters, warm cream joining rounds, and playful tassels on the edges. The result is a cozy, earthy bedspread or throw with a clean, modern boho aesthetic — perfect for bedrooms, sofas, or as a decorative throw.
Progress Tracker
0% Complete
— Overview :
Info :
This pattern is modular. Make individual granny squares (shown here as 12 rounds per square), join them into a grid, then work layered joined rounds to form a thick framed border. The sample bedspread shown uses a 9 x 10 grid of squares (9 across by 10 down) to make a large bedspread approx 90" x 100" depending on gauge. Adjust grid size to make a smaller throw. Use worsted weight yarn and a 5.5mm hook to get the pictured scale. Measure one completed blocked square to determine final dimensions before committing to full grid.
— Notes on sizing and gauge :
Info :
Gauge: 1 finished square blocked = approximately 6.5" (16.5 cm) across when worked with worsted yarn and 5.5mm hook. If your square measures larger or smaller, adjust the number of squares to suit your desired finished size. The sample bedspread uses 90 squares (9x10). To make a throw, try a 5x7 or 6x8 grid.
— Color scheme :
Info :
Color A = Sage Green (center rounds). Color B = Cream / Off-white (outer rounds, joining, border). Carry unused yarn inside square if comfortable, or fasten off and rejoin when changing colors for cleaner joins.
— Granny Square (make as many as required for your grid) :
Round 1 :
With Color A, make magic ring. Ch 3 (counts as dc), work 7 dc into ring. Join with sl st to top of ch3. (8 dc)
Round 2 :
Ch 3, inc in same st (work 2 dc in same stitch), *1 dc in next st, 2 dc in next st* repeat around. Join with sl st to top of ch3. (16 dc)
Round 3 :
Ch 3, dc in same st, *dc in next 2 sts, 2 dc in next st* repeat around. Join. (24 dc)
Round 4 :
Ch 3, dc in same st, *dc in next 3 sts, 2 dc in next st* repeat around. Join. (32 dc)
Info :
Rounds 1-4 build a solid circular-ish center using increasing rounds in Color A. These rounds create the raised, clustered center. Puff or cluster stitches may be substituted on Rounds 2-4 for extra texture: replace a cluster of 3 dc with 3-loop puff made yarn over, pull through loops 3 times, draw through and ch1 between clusters if you desire. If substituting puffs, keep counts consistent by working the same number of cluster placements as the dc positions.
Round 5 :
Change to Color B. Ch 3, dc in same st, *dc in next 4 sts, 2 dc in next st* repeat around. Join. (40 dc)
Round 6 :
Ch 3, dc in same st, *dc in next 5 sts, 2 dc in next st* repeat around. Join. (48 dc)
Round 7 :
Ch 3, dc in same st, *dc in next 6 sts, 2 dc in next st* repeat around. Join. (56 dc)
Info :
Changing to Color B here frames the green center with cream. If you prefer an all-sage blanket, continue in Color A instead. Carry the color not being used along the back of the work or fasten off and weave in ends.
Round 8 :
Ch 2 (does not count as st for this round), hdc in same st, *hdc in next 7 sts, 2 hdc in next st* repeat around. Join. (64 hdc)
Round 9 :
Ch 1, sc in same st, *sc in next 15 sts, (sc, ch 2, sc) in next st to form corner* repeat 3 more times, sc in remaining sts to finish. Join. (This round transitions from circle to square: you will create 4 ch-2 corner spaces. Stitch total will remain consistent with the stitch pattern and will be approx 64 sc distributed into 4 sides.)
Info :
Round 9 splits the round into four sides using ch-2 corners so later rounds can grow the square evenly. Count stitches per side after the round; each side should have approximately the same number of sc between corner spaces. If one side has an extra or missing stitch, redistribute by moving one sc to even the sides before proceeding.
Round 10 :
Ch 3, (counts as dc), work (2 dc, ch 2, 3 dc) into each corner ch-2 space. Along each side work 3 dc clusters into each sc-space until you reach the next corner. Join with sl st. After working all four corners and side clusters, you will have a clear square shape. (Number of dc clusters: 12 clusters; approximate total dc 72 depending on cluster spacing)
Round 11 :
Ch 3, into each corner (3 dc, ch 2, 3 dc). In each side space between corner clusters work 3 dc. Join. (Square continues to expand; total stitches will increase by 12 dc clusters per round.)
Info :
If you want a puff-textured center: on Round 11 replace each 3-dc side cluster with a 3-loop puff cluster (yarn over, insert hook, pull up loop, repeat 3 times in same space, yarn over, pull through all loops, ch1 to close puff). Maintain the same number of clusters as described to preserve stitch counts.
Round 12 :
Switch to Color B if you haven’t already. Ch 1, sc evenly around each dc and cluster, working (sc, ch1, sc) in each corner ch-2 space to make a neat boxed frame. Join and fasten off or continue to join squares. This round creates a square frame of cream that will form the grid lines when squares are assembled. (Stitch totals will vary depending on cluster counts but sc should be worked evenly across edges.)
Info :
Fasten off leaving a long tail (approx 20-30cm) if you plan to use the continuous join-as-you-go method. Alternatively, weave all tails in later after blocking. Block each square now: damp-block to desired dimensions and pin flat to keep edges straight for accurate joining.
— Making a full grid (example 9 x 10) :
Info :
To make the pictured full bedspread, make 9 squares across and 10 squares down (90 squares). Make an extra 2-4 squares to allow for practice or correction. Block all squares before joining to ensure consistent edge length. Arrange squares on a flat surface in the order you want the color centers to appear — the pictured layout uses alternating centers in neat rows to create a subtle repeating pattern.
— Joining squares (frame-join technique, round-by-round) :
Round 1 :
Lay two squares right sides together. With Color B and a 5.0mm hook, join yarn at corner, ch1, sc through both loops of the corner st of both squares, *sc through next sc of both squares across edge, sl st through corresponding sc of main square and second square as required* continue to work sc through both squares across until you reach the next corner. Join with sl st and fasten off. This creates a neat flat join. (Work sc in each sc across edge — stitch count equals sc count of edge.)
Info :
For a grid, join squares row-by-row first, creating long strips. Then join strips together. Use pins to keep corners aligned while joining. When joining through sc only, keep tension loose enough to allow the fabric to lie flat without pulling corners inwards.
Round 2 :
After all squares are joined into the full grid, work a round of sc around the entire assembled grid with Color B: ch 1, sc evenly around each outside edge, working (sc, ch 2, sc) in each corner to keep the final edge square. Join and fasten off. (Stitch count = perimeter sc; be sure to work sc evenly so border lies flat.)
Info :
At this stage you have a thin framed grid. The next rounds build up a chunky, framed ridge that gives the look of separate boxed squares when viewed from the top. Work the following rounds concentrically around the whole bedspread.
— Layered frame/border rounds (build width and texture) :
Round 1 :
Join Color B. Ch 2 (counts as hdc), hdc in same st, *hdc in next 3 sts, 2 hdc in next st* repeat around. Join. (Increases will create a slightly wider border; stitch count increase depends on perimeter.)
Round 2 :
Ch 3 (counts as dc), dc in same st, *dc in next 4 sts, front post dc (fpdc) around the post of the next st to create a raised ridge, dc in next 4 sts, dc2 (increase) at corners as needed* repeat around. Join. (This round introduces fpdc texture to emphasize the framed grid lines.)
Info :
Use FLO or BLO selectively on this round to create subtle ridges. For the pictured thick frame, use front post double crochet on the rows adjacent to the join lines to make the cream frames stand out from the sage centers.
Round 3 :
Ch 2, hdc in same st, *hdc BLO in next 6 sts, 2 hdc in next st* repeat around. Join. (Using BLO here helps create a step-down look at the frame edges.)
Round 4 :
Ch 3, dc in same st, *dc in next 6 sts, fpdc around the frame join post for texture, dc in next 6 sts, dc2 in corner spaces* repeat around. Join.
Info :
Repeat rounds 2-4 as necessary to build a border width you like. Each repetition adds substantial width; the pictured bedspread has about 6-8 additional layering rounds beyond the joining round to create a prominent frame effect. Keep track of rounds so both long sides and short sides get the same number of repeats.
Round 5 :
Work one round of sc in each st all around to even out the edge. Join.
Round 6 :
Switch to a decorative round: ch 1, *sc in next 3 sts, picot (ch3, sl st into first ch to make picot) in next st* repeat around to add a delicate textured trim. Join.
Info :
Picot is optional. For a simpler clean edge, do an extra round of hdc or sc instead. Ensure corners are enlarged slightly (sc, ch2, sc) to preserve shape during the final edging and tassel attachment.
— Final finishing round (for tassel placement) :
Round 1 :
Ch 1, sc evenly around, making note of every Nth stitch (for the sample bedspread we attach a tassel under each square corner and one per short edge grid column — mark placements at even intervals). Work (sc, ch2, sc) in corners. Join and fasten off leaving long tail for weaving. Block whole bedspread lightly to relax finishes.
Info :
Measure the outermost corners of each visible square and plan tassel placement uniformly. In the pictured version tassels are placed at each corner of the outermost squares, alternating cream/sage colored tassels to match the center/outer palette.
— Tassels (make as many as required) :
Round 1 :
Cut 40-60 strands of yarn (approx 8-10"/20-25cm long for a 3.5"/9cm tassel) for each tassel. Fold strands in half and slip fold loop through the marked edge stitch, then pull ends through the loop and tighten (lark’s head knot). Trim ends evenly.
Round 2 :
Wrap a small length of yarn tightly around the top of the tassel to form a head. Make a second wrap beneath to form a neck if desired. Secure with a knot, weave the tail through a tapestry needle and hide it inside the tassel head and into the border fabric. Trim tassel ends to length and comb strands for a neat finish.
Info :
For a chunkier tassel like in the photos, use doubled or tripled stranded yarn when making tassels. Alternate cream and sage tassels along the perimeter for the pictured look. Attach tassels after final blocking to avoid distortion while working.
— Matching pillow (rectangle or square) :
Info :
Make a pillow front using 3 x 5 squares (or 4 x 6 for larger inserts). Join squares using the same frame-join method used for the bedspread. Back the pillow with single-color fabric or crocheted panels (hdc rows) sewn on. Leave an opening, insert pillow form, and seam closed or use an invisible zipper.
Round 1 :
Make 15 granny squares as described (or as many as needed for your pillow size). Block each square. Join squares row by row, then join rows together. Work two rounds of sc around the assembled pillow front to tidy edges.
Round 2 :
For the pillow back: With Color B, ch to width of pillow, work hdc rows until back measures the same height as front, turn and fasten off. Pin back to front, matching seams, and sew using whip stitch or sc around to close leaving a small opening for the insert if desired. Insert pillow and finish seam. Add tassels to each pillow corner using the same method as the bedspread tassels.
Info :
To make an enclosed pillow cover, work two matching panels (front and back) then seam three sides, insert pillow, then close final side. Alternatively sew a zipper into one side for a removable cover.
— Edge reinforcement and extra decorative rounds :
Round 1 :
After attaching tassels, work an additional two rounds of sc or hdc around the entire perimeter to secure tassel anchors and create a firmer edge that holds shape in use. Use Color B for a unified edge color.
Round 2 :
Optional decorative rope: Make a chain of length equal to the perimeter using a 5.5mm hook with two strands of yarn held together, then sew this rope to the edge using mattress stitch for added sculptural detail.
Info :
Make sure tassel attachments are reinforced—whipstitch the tassel head to the border through the wrapped neck 3-5 times to prevent snagging and loss of tassels during washing or use.
— Blocking and care :
Info :
Block squares individually using pins until dry to ensure straight edges. After joining, lightly steam-block the entire spread to relax joins. Care: hand wash or machine wash gentle cold inside a laundry mesh bag, lay flat to dry. Avoid hot drying which can shrink and distort stitches. If using cotton yarn, normal washing is possible but check manufacturer's recommendations.
— Troubleshooting and tips :
Info :
If a corner puffs or pulls: remove a few stitches and rework the border round to redistribute tension. Ensure you always make slightly larger corners (sc, ch 2, sc) to maintain square shape. Keep yarn tails long enough to weave in at least 4-6cm to prevent slippage over time.
Info :
To change the blanket size: add or subtract whole squares in the grid. Add more border rounds for a bedspread-length finish or fewer rounds for a throw. When altering square counts, keep the pattern symmetrical for the best visual balance.
Finishing this boho bedspread is pure satisfaction — watching one square connect to the next and seeing the framed grid emerge is so rewarding. The textured sage centers peek from the cream grid and the tassel fringe adds playful movement and charm. Whether you make a throw for a couch or a full bedcover, this pattern gives a warm, handmade look to any room. 🧶✨ Add your personal touches and enjoy every stitch of the cozy process! 😊