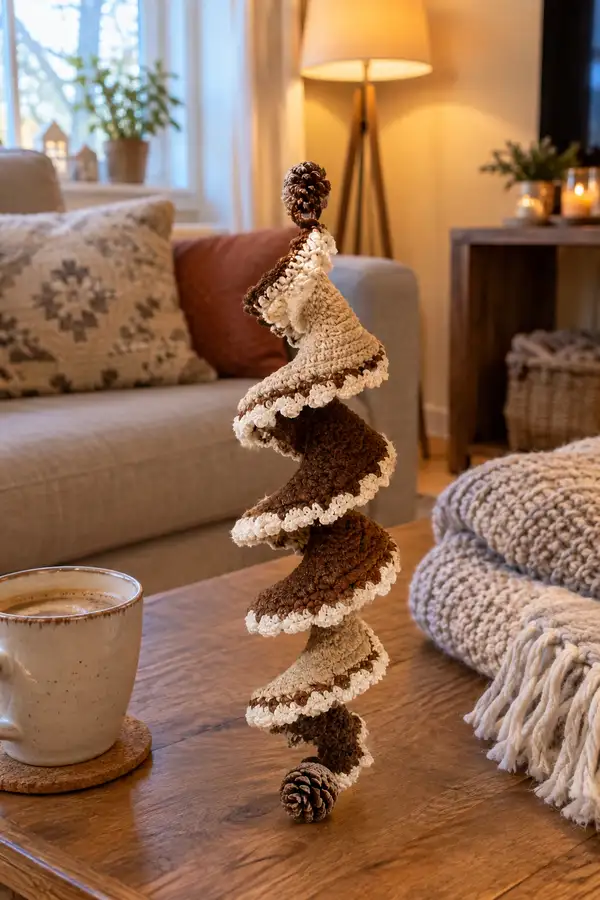
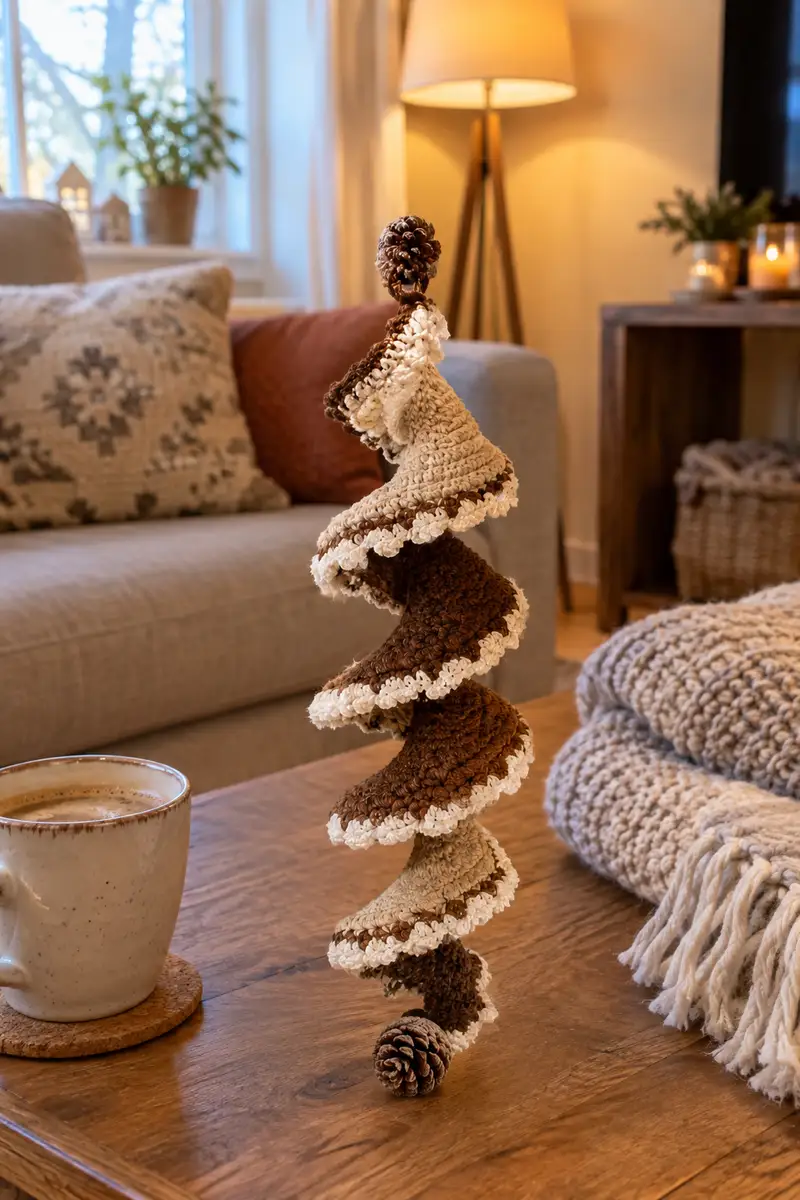
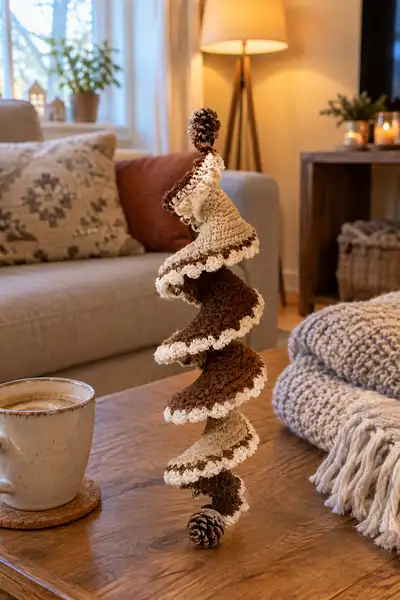
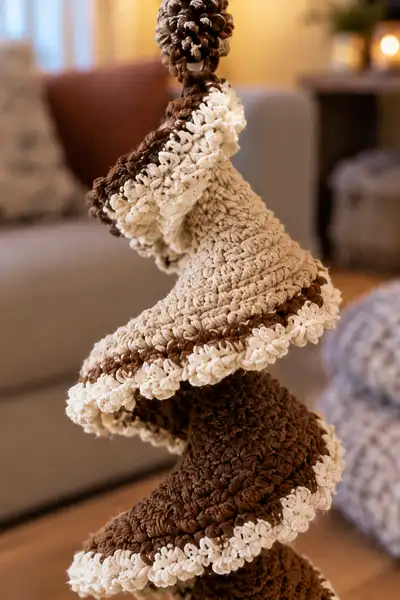
Create a whimsical spiral garland that looks like a cascading mini Christmas tree, finished with real pinecones and scalloped ruffled edges. This rustic ornament features alternating chocolate-brown and cream bands, rich texture from puff stitches, and a firm internal spine so it stands and spirals naturally. The finished piece is lightweight, portable, and perfect for table decor, mantel displays, or a unique tree ornament.
Progress Tracker
0% Complete
— Tools & Special Stitches :
Info :
Special stitches used in this pattern: puff stitch (yarn over, insert hook, pull up loop 5 times, yarn over and pull through all loops, ch 1 to close puff). Use consistent tension for puffs. Scant hdc (hdc worked slightly tighter) helps body maintain shape. Many sections are worked in continuous rounds (spiral) unless specified to join with sl st.
— Central Core (Tube) :
Round 3 :
(1 sc, 1 inc) x 6 (18)
Round 4 :
(2 sc, 1 inc) x 6 (24)
Round 5 :
1 sc in each st (24)
Round 6 :
1 sc in each st BLO (24)
Info :
This central tube will be the spine that the spiral tiers attach to. Work a tight tube so the wire or dowel can be slid in later. If you plan to use a thicker wire, increase rounds 2-4 to reach ~28-30 sts instead of 24.
Round 7-10 :
1 sc in each st (24)
Info :
At the end of Round 10, leave a 20–30cm tail. Fold a length of floral wire lengthwise if extra stiffness is needed. Insert wire into tube now by sliding through the center. If the wire does not slide easily, make a small loop of scrap yarn and pull it through to act as a drawstring to thread the wire.
Round 11 :
1 sc in each st BLO (24)
Round 12 :
1 sc in each st (24)
Info :
Stuff the tube lightly with a small amount of fiberfill so it keeps a gentle, flexible shape but still allows it to bend into the spiral. The tube should be firm but not rigid; you will bend it as you assemble tiers.
— Spiral Tier 1 (Base Cone) : (Chocolate Brown)
Round 3 :
(1 sc, 1 inc) x 6 (18)
Round 4 :
(2 sc, 1 inc) x 6 (24)
Round 5 :
(3 sc, 1 inc) x 6 (30)
Round 6 :
(4 sc, 1 inc) x 6 (36)
Round 7 :
(5 sc, 1 inc) x 6 (42)
Round 8 :
(6 sc, 1 inc) x 6 (48)
Round 9 :
(7 sc, 1 inc) x 6 (54)
Round 10 :
(8 sc, 1 inc) x 6 (60)
Info :
These increases create a shallow cone. Round 10 will be the widest point for Tier 1. Keep tension consistent. Place a stitch marker at the first stitch of round 11 to mark the start for future reference when attaching to the core tube.
Round 11-14 :
1 sc in each st (60)
Info :
Work even for height and to create a slightly cupped tier. Use BLO on the next round if you prefer to create a decorative ridge where the ruffle will attach.
Round 15 :
1 sc in each st BLO (60)
Round 16-18 :
1 sc in each st (60)
Info :
Before finishing Tier 1, slip the base tier gently over the central core and pin it at the desired angle. Pull the core so Tier 1 sits tilted slightly; this tilt initiates the spiral motion. Once satisfied, sew the inner 10–12 stitches of Tier 1 to the tube with whip stitch to anchor it. Fasten off and weave ends.
— Ruffle Edge for Tier 1 (Cream) :
Info :
Change to Cream yarn. Ruffle uses puff clusters spaced every 2–3 sts for a pronounced scallop. You can switch to 3.25mm hook for tighter scallops.
Round 1 :
Join cream in any st. *(ch1, skip 1 st, puff in next st, ch1, sl st in skipped st)* repeat around. Adjust repeats to create 30–32 puff scallops (approx.).
Round 2 :
In each puff: sl st in top of puff, ch2, (3 dc in same space) to increase shell fullness. sl st to join each shell. (Number of shells equals number of puffs from previous round.)
Round 3 :
*ch1, sc in next dc, ch1, sl st into center of puff* repeat to emphasize a neat picot-like border. Fasten off and weave ends.
Info :
If scallops feel floppy, place a tiny bit of fiberfill just under the scallop and sew closed for stability. Alternatively, use a small drop of fabric glue to anchor each scallop underside.
— Spiral Tier 2 (Cream Narrow Band then Brown Body) :
Info :
Tier 2 begins with a narrow cream band to visually separate tiers, then increases again in Chocolate Brown. Before beginning Tier 2, slide Tier 1 up the core slightly so Tier 1 overlaps the edge of Tier 2 by 8–12 stitches when assembled; this overlap creates the layered spiral effect.
Round 1 (Cream band) :
Join cream to core tube top where Tier 2 will attach. 12 sc around the tube to create a 12-st anchor band (12)
Info :
Sew this anchor band to the tube through each stitch to secure Tier 2's starting point. The band will remain hidden under the inner edge of Tier 2.
Round 1 (Brown Tier start) :
Join Chocolate Brown to band. 6 sc in mr (6)
Round 3 :
(1 sc, 1 inc) x 6 (18)
Round 4 :
(2 sc, 1 inc) x 6 (24)
Round 5 :
(3 sc, 1 inc) x 6 (30)
Round 6 :
(4 sc, 1 inc) x 6 (36)
Round 7 :
(5 sc, 1 inc) x 6 (42)
Round 8 :
(6 sc, 1 inc) x 6 (48)
Round 9-12 :
1 sc in each st (48)
Info :
Tier 2 is slightly narrower than Tier 1; position it above Tier 1 so that Tier 1's outer ruffle peeks beneath Tier 2's edge. Anchor the inner 8–10 stitches to the core tube with small whip stitches, pulling Tier 2 slightly forward to create the spiral offset.
— Ruffle Edge for Tier 2 (Cream) :
Round 1 :
Join cream to outermost st. *(puff in next st, ch1, sl st in next st)* around creating scallops spaced every 2 stitches. Aim for 24–26 scallops - adjust by adding an extra puff every few stitches as needed.
Round 2 :
*sl st into top of puff, ch2, 3 dc into same space, sl st into next ch space* repeat around. Fasten off and weave ends.
Info :
Work these ruffle rounds with a slightly smaller hook if you want tighter scallops. Pin the ruffle after making it to shape while the yarn is still warm and flexible.
— Spiral Tier 3 (Chocolate Brown - Slightly Larger) :
Round 1 :
Join brown. 6 sc in mr (6)
Round 3 :
(1 sc, 1 inc) x 6 (18)
Round 4 :
(2 sc, 1 inc) x 6 (24)
Round 5 :
(3 sc, 1 inc) x 6 (30)
Round 6 :
(4 sc, 1 inc) x 6 (36)
Round 7 :
(5 sc, 1 inc) x 6 (42)
Round 8 :
(6 sc, 1 inc) x 6 (48)
Round 9 :
(7 sc, 1 inc) x 6 (54)
Round 10-13 :
1 sc in each st (54)
Info :
Tier 3 is intentionally larger to accent the spiral. When attaching, rotate the tier along the core slightly so its outer edge sits between the scallops of the tier below; this increases the visual spiral flow.
Round 14 :
1 sc in each st BLO (54)
Round 15 :
1 sc in each st (54)
Info :
Sew inner 10 stitches of Tier 3 to the tube, anchoring while angling it slightly outward. Secure with small backstitches to prevent shifting. Fasten off and weave ends inside the core tube.
— Ruffle Edge for Tier 3 (Cream with Chocolate Trim) :
Round 1 :
Join cream. *(puff in next st, ch1, sl st in next st)* around creating well-spaced scallops (approx 27-28 puffs).
Round 2 :
Switch to brown: sl st into top of each puff, ch1, sc in next ch space to create a thin brown trim line across the base of scallops. Fasten off brown and rejoin cream if desired for an extra picot row.
Info :
Color change tip: carry the unused color along the inside of the scallop row and crochet over the carried yarn for a tidy underside. Clip floats every 6-8 inches if the carried yarn span is long.
— Spiral Tier 4 (Chocolate Brown - Medium) :
Round 1 :
Join brown. 6 sc in mr (6)
Round 3 :
(1 sc, 1 inc) x 6 (18)
Round 4 :
(2 sc, 1 inc) x 6 (24)
Round 5 :
(3 sc, 1 inc) x 6 (30)
Round 6 :
(4 sc, 1 inc) x 6 (36)
Round 7-10 :
1 sc in each st (36)
Info :
Place Tier 4 so that its outer ruffle will tuck under the ruffle of Tier 3 when assembled, adding depth. Anchor inner 8–10 stitches to the tube with small stitches. Keep the tier angled slightly opposite Tier 3 to accentuate the spiral curve.
Round 11 :
1 sc in each st BLO (36)
Round 12 :
1 sc in each st (36)
Info :
Fasten off leaving a long tail for sewing. When sewing, use ladder stitch to pull the tier to the tube tightly and invisibly.
— Ruffle Edge for Tier 4 (Cream) :
Round 1 :
Join cream. *(puff in next st, ch2, skip 1 st, sl st in next st)* around to create spaced scallops. Aim for 18–20 scallops.
Round 2 :
*sl st into top of puff, ch2, (4 dc) into the puff base to bulk up shell* repeat around. Fasten off and weave ends.
Info :
Block ruffle gently by pinning it in a semi-rounded shape until it dries, if yarn allows. This helps keep a crisp scallop profile.
— Spiral Tier 5 (Final Small Tip - Cream then Brown Trim) :
Round 1 (Cream) :
Join cream. 6 sc in mr (6)
Round 3 :
(1 sc, 1 inc) x 6 (18)
Round 4-6 :
1 sc in each st (18)
Info :
This small top tier finishes the spiral and creates a place to attach the top pinecone. Do not fasten off; instead prepare to create a loop for the pinecone to attach to by chaining forward from the top.
Round 7 (Loop) :
ch 10, sl st into the center top st to form a hanging loop. Secure with 3 sc around the loop base. Fasten off and weave ends. Trim any excess if necessary.
Info :
If you prefer a sturdier hanging loop, thread the chain through a small length of wire before joining and wrap the chain around it for extra hold.
— Optional Decorative Mid-Tier Bands (If You Want Extra Contrast) :
Info :
For a banded look like the sample photo, insert a 1-2 round contrast stripe between any two tiers. Use sc in BLO to create a crisp ridge before adding a ruffle. Example: after a brown tier, change to cream and work 1 round sc around the outer edge, then switch back to brown and continue.
— Pinecone Top & Bottom Attachment :
Info :
Top and bottom pinecones are used as natural anchors. If your pinecones already have a short stem, insert the tube wire into the stem and secure with hot glue. If not, create a small crochet cup to fit the pinecone base to sew around and glue into place.
Top Pinecone Cup Round 1 :
Using brown, make 6 sc in mr (6)
Round 3 :
(1 sc, 1 inc) x 6 (18)
Round 4 :
1 sc in each st (18)
Info :
Place the pinecone in the cup and pull the top tier loop through any natural gap in the pinecone scale. Glue the inside rim of the cup to the pinecone base and sew the cup to the loop base for a secure hold. Fasten off and weave ends.
Bottom Pinecone Cup :
Repeat the cup pattern for the bottom. Sew or glue the bottom cup to the bottom end of the central tube or wire. If you used wire, fold the end of the wire, tuck into the cup, then glue and stitch to hold.
Info :
For added durability, wrap a few wraps of brown yarn around the pinecone base and glue, then stitch the crochet cup over that wrap.
— Final Shaping & Finishing Touches :
Info :
Once all tiers are attached, bend the internal core gently to achieve a pleasing spiral. The angle of each tier relative to the core controls how tight the spiral will be. Pin each tier during shaping and let it rest for 12–24 hours to stabilize the yarn memory. Use a bit of fabric starch spray (sparingly) on the ruffle edges for a firmer scallop if desired.
Edge Trim (Optional) :
To mimic the picture's fine cream edging over brown bands, you can add a tiny slip-stitch trim in cream along the very outermost brown rings: join cream and sc in each outermost brown stitch to create a fine contrasting line.
Info :
Weave in all ends, hide tails within the core tube, and clip any visible stray fibers. If any tiers wobble, add additional anchoring stitches from the inner 10 stitches of that tier to the core tube until firm.
— Troubleshooting and Shaping FAQ (Embedded Info) :
Info :
If your spiral wants to collapse flat, make sure inner attachment stitches are secure and add a small bit of fiberfill under each ruffle base to push the outer ruffle outwards. If the ruffles are too tight, use a slightly larger hook on the ruffle rounds to loosen them. If scallops droop, block and pin them into shape and allow to dry with a light starch or fabric stiffener.
— Project Variations :
Info :
Make multiple small spirals and string them as a garland. Replace pinecones with small wooden beads for indoor-only use. Try seasonal colors like red and green or pastel versions for year-round decor.
This spiral pinecone garland brings together crochet texture, natural accents, and a sculptural twist for cozy holiday decor. Each ruffle and puff stitch echoes the look of snow-tipped cones while the alternating brown and cream bands create a warm, nostalgic palette. I love how the assembly rewards patience with a display-ready ornament that feels both rustic and refined. 🎄🧶✨