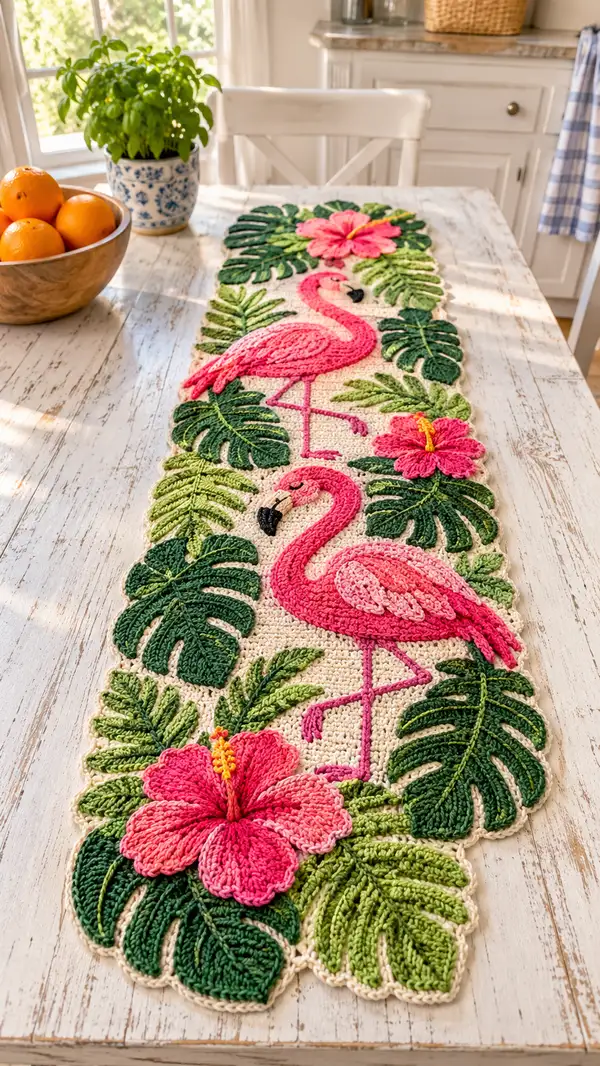
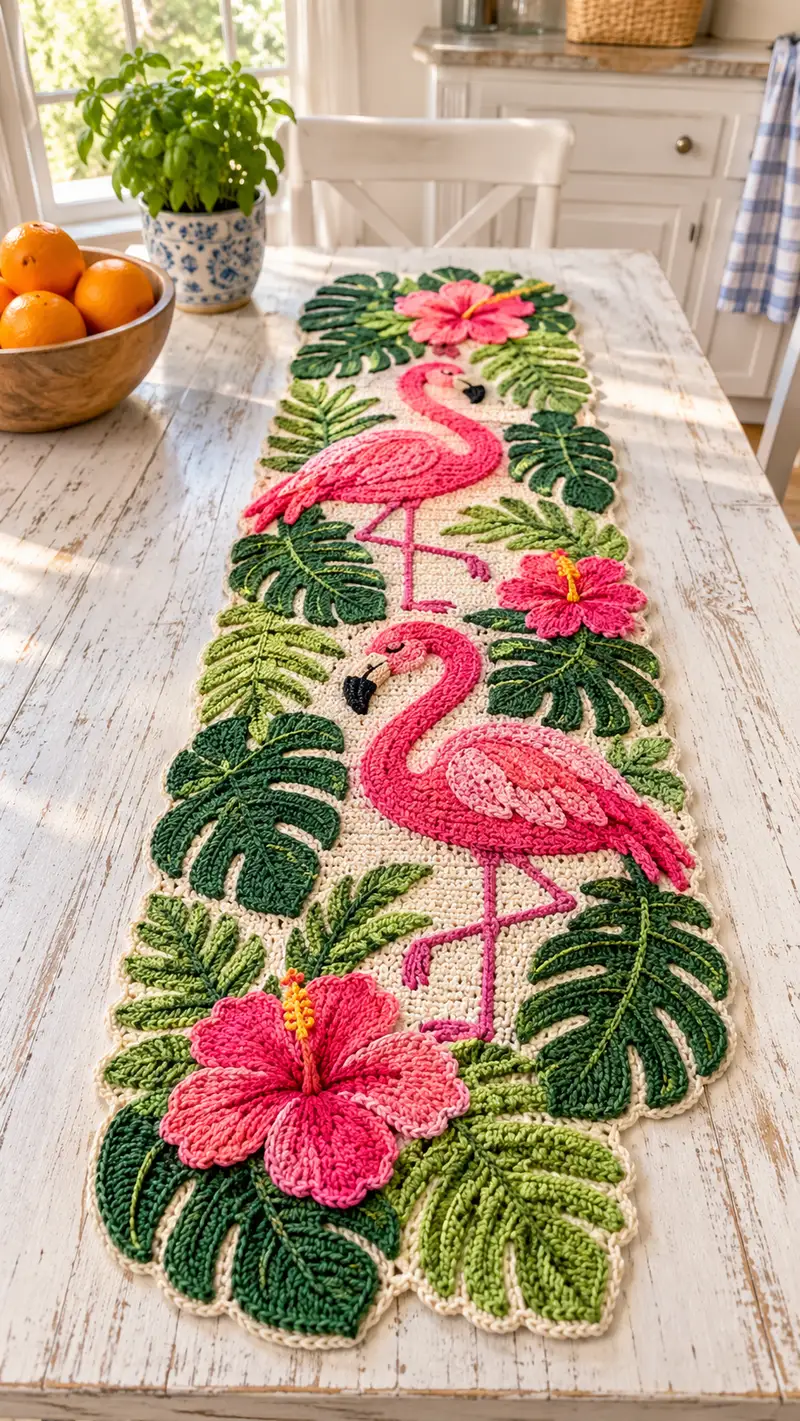
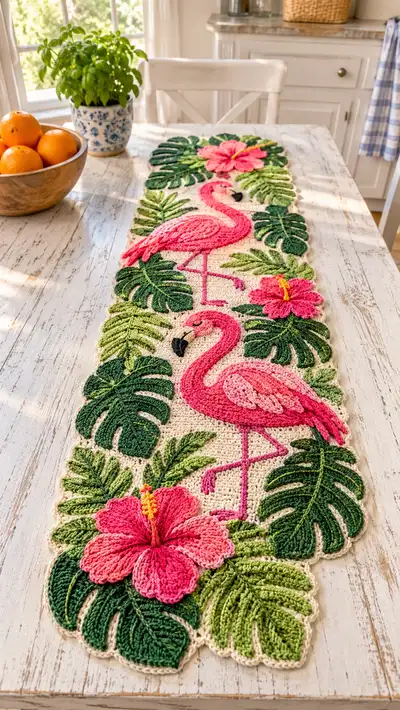
A bright, hand-crocheted table runner featuring two elegant pink flamingos framed by layered monstera leaves, fern fronds and bold hibiscus blossoms. The runner uses appliqued motifs sewn onto a neutral cream background to create a lush, dimensional tropical scene. Perfect for summertime tables, garden parties, or as a colorful centerpiece to brighten any dining area.
Progress Tracker
0% Complete
— Notes & Gauge :
Info :
Gauge is not critical for motif placement but consistent tension is essential. Using 3.5mm hook with worsted weight yarn expect approximately 14 sc and 16 rows = 4 inches in single crochet worked in rows. Block motifs flat after completion for best join and alignment.
— Base Runner Panel :
Round 1 :
Chain 120 (foundation chain). Turn to begin Row 1.
Round 2 :
Row 1: 1 sc in 2nd ch from hook and in each ch across (119 sc). Ch 1, turn.
Round 3-6 :
Row 2-5: 1 sc in each st across (119 sc). Ch 1, turn. Work flat rows until panel measures approximately 46 inches in length or desired runner length. Adjust number of rows to reach final size; sample uses 80 rows total for background.
Info :
Work tightly in sc to produce a sturdy base. Use stitch markers to mark every 10th stitch along the first row to help align applique placement later.
Round 7-20 :
Continue working even in sc maintaining 119 sc per row. After 80 rows the panel size in this pattern is approximately 12 x 48 inches. If you changed hook or yarn, measure and adjust rows to match desired size.
Info :
Finish off leaving a long tail for mattress stitch seaming if you plan to edge or join with a special border later. Block the panel flat to ensure a neat field for applique.
— Flamingo Body (Make 2: one large, one medium) :
Round 1 :
mr, 6 sc in mr (6)
Round 3 :
(1 sc, inc) x 6 (18)
Round 4 :
(2 sc, inc) x 6 (24)
Round 5 :
(3 sc, inc) x 6 (30)
Info :
These first rounds set the center oval. For the larger flamingo make 8 rounds before moving to even shaping to create a fuller body; for the medium flamingo stop at round 6 before even rounds. Keep counts in mind—every 'x 6' increases the stitch count by 6.
Round 6 :
1 sc in each st around (30) — large continue to Round 8 for a broader body
Round 7 :
For large: (4 sc, inc) x 6 (36)
Round 8 :
For large: (5 sc, inc) x 6 (42)
Round 9-16 :
Shape: 1 sc in each st around for 8 rounds to create the main oval body. Maintain stitch count (30 for medium or 42 for large) depending on which size you're making.
Info :
Working in continuous rounds without joining keeps a smoother edge for applique. Place a marker at the first stitch and move it each round. Flatten and lightly stuff the center of body with a tiny bit of fiberfill if you want a raised applique; usually leave flat for sewing on base.
Round 17 :
Begin outer shaping for back curve: (2 sc, dec) x 10 for medium (20) OR (3 sc, dec) x 6 then (4 sc, dec) x 6 for large to start tapering the front (calculate carefully to balance sides)
Round 18 :
Work 1 sc in each st around maintaining new stitch count. For medium expected 20, for large expected 36 depending on reductions used.
Round 19 :
Work 1 sc in each st around but on the back half of the body begin adding short rows to create the rear curve: mark the beginning and end of the back half and work 2 extra sc rows in that section only before completing the round.
Info :
Use short-row shaping to create the subtle three-dimensional curve of the flamingo back. Short rows are worked by stopping mid-round, ch 1, turn and sc back across those stitches, then resume the round—this gives a lifted panel ready for wing placement.
Round 20-28 :
Refine: alternate rounds of even sc and gentle decreases on the tummy side to create a slightly teardrop silhouette. Typical sequence: Round 20: (3 sc, dec) x N; Round 21: 1 sc around; Round 22: (2 sc, dec) x N; Round 23: 1 sc around; Round 24: (1 sc, dec) x N; Round 25: 1 sc around. Final stitch counts should taper to a smooth neck base where you will attach the neck. Fasten off leaving long tail for sewing.
Info :
Do not overstuff—most flamingo bodies are flat appliques. If you want a tad of relief, add a thin layer of stuffing in the center (no more than a teaspoon). Block flat after finishing to maintain consistent shape for sew-on.
— Flamingo Wing (Make 2 wings per flamingo) :
Round 1 :
mr, 6 sc in mr (6)
Round 3 :
(1 sc, inc) x 6 (18)
Round 4 :
(2 sc, inc) x 6 (24)
Round 5 :
(3 sc, inc) x 6 (30)
Round 6-8 :
Work 1 sc in each st around (30). On Round 8 begin shaping feather points by alternating sc and sl st in same stitch to create scalloped feather edge: (sc, sl st) x around.
Info :
After Round 8 switch to a lighter shade of pink to create the layered feather look. Attach color using invisible join at the start of a round and work in FLO for a subtle ridge if desired.
Round 9 :
Switch to light pink: (2 sc, inc) x 10 (40) — increase to broaden base of feather for layering
Round 10-12 :
Work 1 sc in each st for 3 rounds (40) then shape edge with shell points: *skip 2 sts, 5 dc in next st, skip 2 sts, sl st* around to create fingered feathers (adjust last shell to fit).
Info :
Make a second wing slightly smaller for the inner layered feather, using two fewer increase rounds so the inner wing nests under the outer wing attractively. Sew wings to body using tails, overlapping and staggering feather points.
— Flamingo Neck & Head :
Round 1 :
With bright pink: ch 18 (or desired neck length). Turn, working across ch: 1 sc in 2nd ch from hook and each ch across (17 sc). Ch 1, turn.
Round 2-24 :
Work even in sc across to build neck tube. For a thicker neck, work each row in BLO for 4 rows then switch to regular sc to create a subtle ridge. Continue until piece measures approximately 6-7 inches (or proportionally to body size). Fasten off leaving long tail for sewing.
Info :
Neck is worked as a flat strip and then folded and whip-stitched closed along the long edge to form a narrow tube. Fold so RS are out and use matching yarn to sew seam through both layers. Stuff very lightly or leave flat depending on desired curvature.
Round 25 :
Head: mr, 6 sc in mr (6)
Round 27 :
(1 sc, inc) x 6 (18)
Round 28 :
(2 sc, inc) x 6 (24)
Round 29-33 :
1 sc around for 5 rounds (24) to create a rounded head. Round 34: (2 sc, dec) x 6 (18) Round 35: (1 sc, dec) x 6 (12). Fasten off leaving long tail for sewing to neck.
Info :
Place head at top of neck and sew using the long tail. If you prefer a slight tilt, stuff head very lightly and sew with a few mattress stitches securing to the neck base so head sits at a small angle.
— Flamingo Beak :
Round 1 :
With black for tip: mr, 5 sc in mr (5)
Round 3 :
1 sc in each st around (10)
Round 4 :
Switch to cream or very pale pink for the base of the beak: (1 sc, inc) x 3 then 4 sc across remaining sts to create tapered shape (13)
Round 5 :
Fold gently and sew the beak closed along bottom seam so it creates a slightly curved beak shape. Fasten off leaving tail to attach to head.
Info :
Sew the beak to the lower front of the head using ladder stitch for an invisible seam. Embroider a small nostril with black yarn if desired.
— Flamingo Legs (Make 4: two per bird; thin embroidered legs alternative) :
Round 1 :
For thin embroidered legs: Use a strand of bright pink yarn and a tapestry needle to couch chain stitch directly onto base panel in the desired leg curve. For crocheted tubular legs: ch 20, join with sl st to form loop, then sc around for 6 rounds to create a narrow tube (20 sts).
Round 2-8 :
Work 1 sc in each st around for 6 rounds to build thickness then finish with a short ch to create the foot: ch 4, sl st back along chain to form a small toe. Fasten off leaving long tail for sewing.
Info :
Legs on the pictured runner are mostly embroidered as single stranded surface slip stitch for a delicate linear look. Consider couching a chain or using Tunisian simple stitch for a flat, slightly raised leg that is easier to sew down than a tube.
— Large Monstera Leaf (Make 6) :
Round 1 :
mr, 6 sc in mr (6)
Round 3 :
(1 sc, inc) x 6 (18)
Round 4 :
(2 sc, inc) x 6 (24)
Round 5 :
(3 sc, inc) x 6 (30)
Info :
From Round 6 onwards we'll begin sculpting into a wide flat teardrop with deep slits to mimic monstera cuts. Increase across center rows and then work short rows to create lobed edges.
Round 6 :
1 sc in each st around (30)
Round 7 :
Start shaping: sc in next 6 sts, ch 6, skip 6 sts, sc in next 12 sts, ch 6, skip 6 sts, join (30) — this creates two deep cut spaces
Round 8 :
Working into remaining rounds, create rounded lobes at top and bottom by making short rows: in top lobe area 2 rows of 1 sc in each st, then edge with (sc, hdc, dc, hdc, sc) to build a thick rim.
Round 9-12 :
Continue shaping edges, adding a single chain-spoke in each slitted space to define cutouts: surface slip-stitch a vein across the center and add small dc clusters around the edges for raised texture. Final stitch count remains near 30-36 depending on shell edging additions.
Info :
Work the leaf mostly flat; do not stuff. Use dark green for the main leaf and a lighter green carried or surface embroidered on top for veins. Wet-block each leaf flat and pin into shape so the cutouts sit open and crisp.
— Palm Frond (Medium, Make 8) :
Round 1 :
ch 20 for frond length. Row 1: 1 sc in 2nd ch from hook and across (19 sc). Ch 1, turn.
Round 2-3 :
Work 1 sc across for 2 rows to build width (19 sc). On Row 4 create leaflets by working in alternating short rows: *sc 6, leave next 3 sts unworked, turn*, repeat working back across to make opposite side leaflets. Final frond is shaped with elongated leaflets along both sides.
Info :
Use medium green for the frond body and add lighter green surface stitches down the center for a midrib. Make both left- and right-leaning fronds to vary layout.
Round 4-10 :
Refine leaflets and edge with a slip-stitch border to prevent curling. Block flat before sewing to base panel.
— Small Fern Frond (Make 10) :
Round 1 :
ch 12, Row 1: sc in 2nd ch from hook and across (11 sc).
Round 2 :
Create tiny leaflets by working *ch 4, sl st into same base stitch* along one side of the strip to form fingers; flip and repeat on the other side. Fasten off and block.
Info :
These small fronds are ideal for filling space and tucking under larger leaves; no stuffing required. Use a lighter green to contrast with monstera pieces.
— Hibiscus Flower (Make 3) :
Round 1 :
mr, 6 sc in mr (6)
Round 3 :
(1 sc, inc) x 6 (18)
Round 4 :
Switch to brighter pink: (2 sc, inc) x 6 (24)
Round 5 :
Form petals: *ch 8, sl st into same base stitch*, rep across 5 base points to make 5 long loops. Fasten off.
Round 6 :
Petal finishing: For each loop work 6 dc into loop, remove hook and pull through to shape petal, seam the base of each petal slightly to give curvature. Add a small amount of fiberfill inside each petal if you want raised petals.
Round 7 :
Stamen: using yellow, churn out a little cord of ch 12 then work 1 sc in each ch back to create a tube. Bunch several tiny french knots using yellow yarn at the tip of the stamen for pollen. Sew stamen into the center of flower and secure on wrong side.
Info :
Work petals slightly overlapping and use a small dab of glue or a few tight stitches at the petal bases to keep them in position. Block petals to shape before final sewing to the base panel.
— Small Wing Detail Feathers and Inner Petals :
Round 1 :
ch 8, 1 sc in 2nd ch and next 5 ch (6 sc). Fasten off.
Round 2 :
Edge with 1 sl st around and stitch several onto the wing surface overlapping about 1-2 sts for a feathery layered look. Use gradient pinks to mimic tonal variation.
Info :
Create many small feathers of different lengths and layer them from the wing root outwards. Sew securely with hidden stitches so decorative pieces hold through handling.
— Surface Embroidery: Veins, Stems & Details :
Round 1 :
Using a tapestry needle and medium green yarn, couch a length of chain stitch for the main runner vine from one end of the panel to the other following the composition seen (central vine under flamingo necks). Anchor at both ends and every 2-3 inches with small whip stitches.
Round 2 :
For leaf veins use contrasting light green and embroider long straight stitches radiating from center to leaf margins. For monstera slits, use surface sl st in a slightly darker green to emphasize cut edges.
Info :
Work surface embroidery after all motifs are pinned but before final sewing to the base so you can align veins across the sewn edges. Take photos of layout as you pin so you can reproduce symmetry easily when sewing.
— Border & Edging :
Round 1 :
Once all motifs are sewn into place, work a neat sc border around the entire panel: join cream yarn at one corner and work 1 sc evenly around, making 3 sc in each corner to maintain square corners.
Round 2 :
Second round: work 1 sc in each sc, and along the edges where leaves extend beyond the panel work a scalloped shell every 6 sc: 5 dc, sl st in next st to create a decorative edge that follows leaf outlines.
Round 3 :
Final decorative round: using a slightly larger hook (4.0mm) and cream yarn sl st around to smooth edges and unify the runner's silhouette. Fasten off and weave ends through several stitches on the backside.
Info :
Where leaves and flowers sit at the edge, work the border so it nests neatly around shapes rather than over them. You may prefer to trim edges of the base panel to follow the appliqued outline and then single crochet around the cut edge to finish for a botanical silhouette runner.
— Assembly & Finishing Touches :
Round 1 :
Block all pieces flat. Pin the base panel onto a blocking surface and pin each leaf, frond, and flower on top according to the composition. Leave about 1/2 - 1 inch of overlap between motifs for secure sewing.
Round 2 :
Sew each motif using the long tails left when fastening off. Use small, even whip or ladder stitches and hide the knots on the wrong side. Work veins and small embroidered details after main placement to tie elements together visually.
Info :
When sewing on heavier motifs like hibiscus, secure with 6-8 passes around the base to keep them sitting flat. Tie off and weave tails at least 3 inches into the wrong side of the panel to prevent pulls.
Round 3 :
Once everything is attached, lightly steam-block the completed runner to set the stitches and soften the yarn slightly. Press gently to avoid flattening the raised features too much.
Info :
Optional: Add tiny beads or French knot pollen in the hibiscus centers for extra dimension. Avoid heavy additions if runner will be laundered frequently—hand wash gently and air dry flat.
Finishing this Pink Flamingo Tropical Leaf Runner is incredibly rewarding — the layered appliques and surface embroidery turn simple crochet stitches into a lush tabletop landscape. Each small stitch contributes to a vibrant focal piece that will brighten any room. I hope you enjoy the slow, creative process and love the final botanical look as much as I do! 🧶🌺