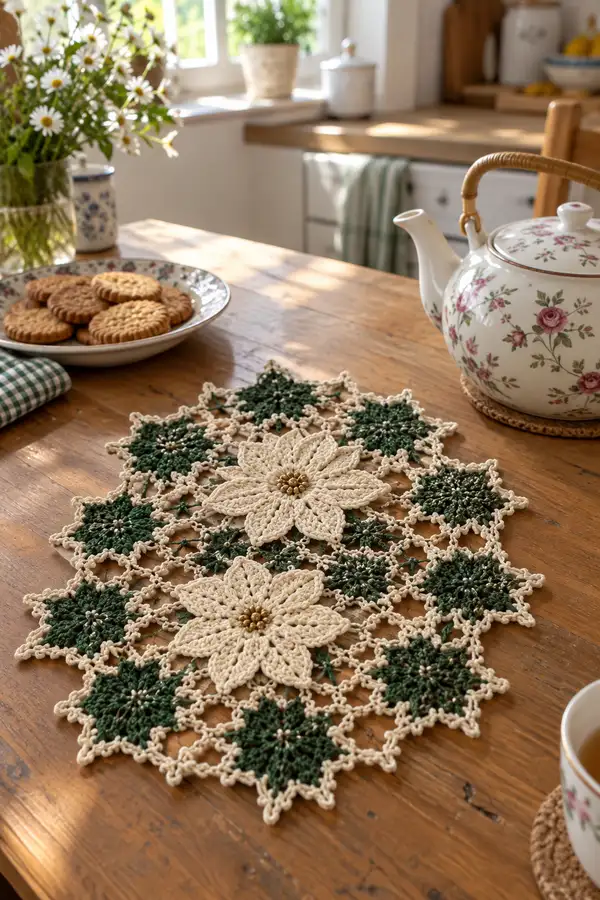
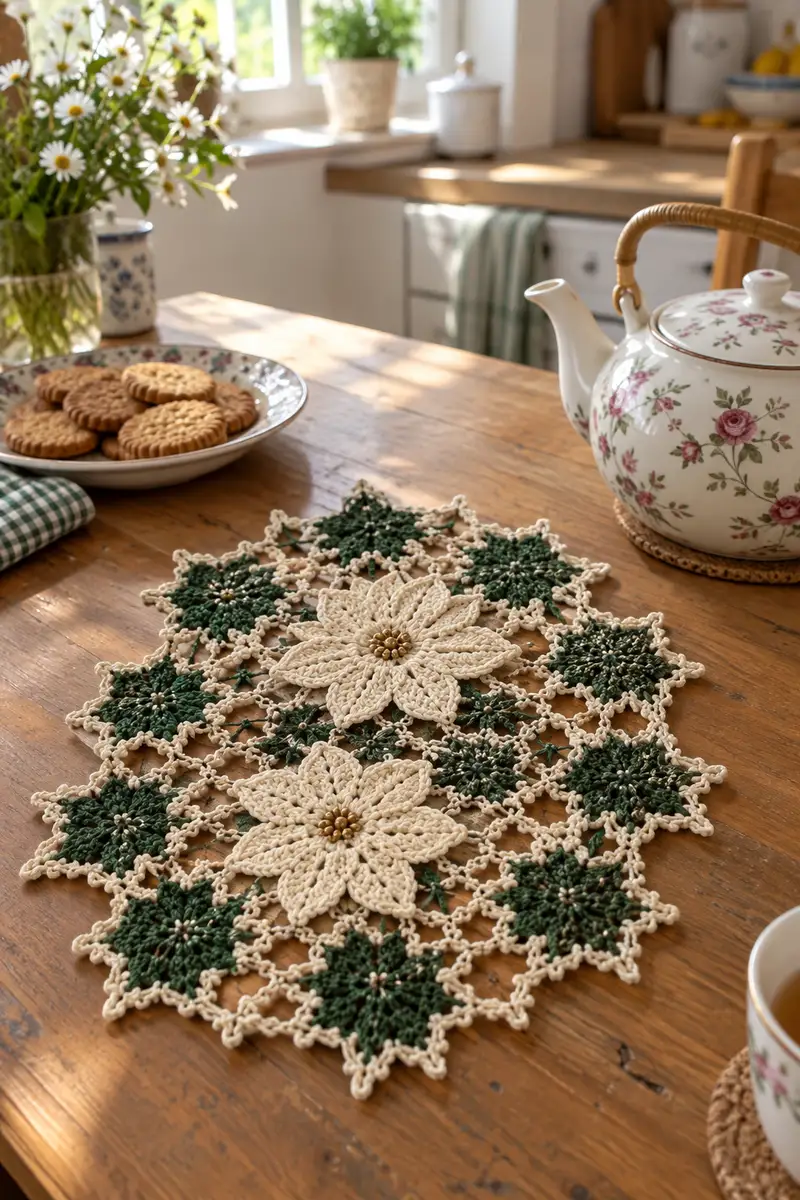
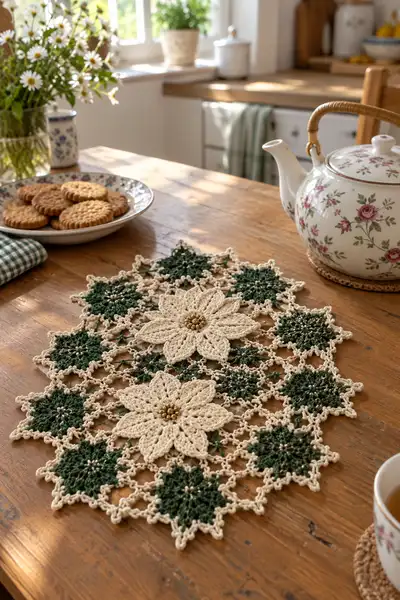
Create an elegant poinsettia and star motif table runner worked in mercerized cotton with delicate chain-lace joins and beaded centers. This pattern uses two contrasting colors (cream and deep green) to recreate the layered flowers and star motifs pictured, with clear step-by-step rounds and lots of assembly guidance. Perfect for the holiday table or a year-round vintage-inspired centerpiece.
Progress Tracker
0% Complete
— Notes & Gauge :
Info :
Gauge is approximate because this is a lace motif runner. For reference, one large cream flower motif (finished and blocked) should measure approximately 14-16 cm (5.5-6.5 in) across the petal tips; small green star motifs will measure about 7-8 cm (2.75-3.25 in). Use a smaller hook if your motifs measure larger than these dimensions.
Info :
Pattern is written in US terms. Work motifs flat in rounds where stated and finish off each motif. Join motifs using chain-lace joins over two final rounds. Block all motifs lightly before final assembly for neat joins. The pattern below gives one complete large flower motif, one complete small star motif, the joining rounds, edging rounds and beading/finishing instructions.
— Large Poinsettia Flower Motif (Make 2) :
Round 1 :
Work 6 sc into a magic ring. (6)
Round 2 :
Inc in each st around. (12)
Round 3 :
(1 sc, inc) x 6. (18)
Round 4 :
(2 sc, inc) x 6. (24)
Round 5 :
(3 sc, inc) x 6. (30)
Round 6 :
(4 sc, inc) x 6. (36)
Info :
We are building a round base with a stitch count that divides evenly by 8 so we can place 8 symmetrical petals later. If your stitch counts differ, adjust so the round count is a multiple of 8 (48, 56, etc.).
Round 7 :
(5 sc, inc) x 6. (42)
Round 8 :
(6 sc, inc) x 6. (48)
Round 9 :
1 sc in each st around. (48)
Round 10-11 :
1 sc in each st (48)
Info :
Place 8 evenly spaced stitch markers on Round 11 to mark the center point for each petal. Because 48 / 8 = 6, place a marker, skip 6 stitches, place the next marker, and so on. These markers will guide petal placement.
Round 12 :
*Ch 3 (counts as a dc), 1 dc in same st, ch 3, sk 5, sl st in next st (marker st). Repeat from * for 8 petals total. After final sl st, sl st to top of starting ch-3 to close round. (This round creates 8 chain arches anchoring petals.)
Info :
Round 12 creates arch spaces for each petal. Each arch corresponds to a petal worked in next rounds. Ensure you align each arch with a marker and remove the markers as you join the arches if you prefer.
Round 13 :
*Into each chain-3 arch: (sl st, ch 2, 3 dc, ch 2, sl st) — this forms a petite fan foundation. Repeat around to make 8 fan foundations.* Fasten off and change to smaller hook if you prefer tighter petals. (8 fans)
Round 14 :
Join new round at the base of first fan. (Working each petal individually) For Petal 1: Join with a sl st, ch 1, sc into base, ch 2, (hdc, dc, tr, dtr) into the arch center to make elongated post (use 4 increasing height stitches), then (tr, dc, hdc) back across the opposite side of arch, ch 2, sc into base, sl st to join. Repeat for each of the remaining 7 petals. After last petal, sl st to starting joining point to close. (8 petals completed)
Info :
Technique :
Work the tall post stitches (tr and dtr) into the arch center to raise the petals off the base. If your yarn is very soft, work these posts slightly tighter by using a smaller hook for this round; this makes petals stand up more.
Round 15 :
For each petal: At the tip of petal, ch 1, work 5 sc across the tip ridge (created by the tall post), then sl st down the opposite ridge to the base. Repeat for all 8 petals. (You will not be changing overall stitch count of the base; this round embroideres petal edges and secures tips.)
Round 16 :
Edging to define petals: Work around entire motif: *ch 3, sc into next base stitch* repeat across, placing one ch-3 loop between each underlying base st and 2 ch-3 loops across petal tips where needed to keep spacing even. This will create picot-like loops visible between petals for later joining. (Work evenly to maintain spacing)
Round 17 :
Petal surface ridges: With hook inserted into petal mid-row, work 1 sc in base at left petal root, then work 8 sc across the petal front (working around posts and into the front of the petal to create a raised ridge), sl st into base root to close petal ridge. Repeat for each petal. After finishing last petal, finish off and weave in end. (This round creates visible raised petal texture.)
Info :
At this stage block each large flower motif gently: pin to shape on a blocking mat and mist lightly with water, then allow to dry. Blocking evens out the petal shapes and opens the lace spaces for joining later.
Round 18 :
Decorative inner round: Re-join yarn in the center disk (small holes between petals), ch 1, sc in each center st around working 2 sc into every 3rd st to bring the center to a slight dome. (Approx 54 sts depending on how you worked petal joins.)
Round 19 :
Center bead foundation: Ch 1, (sc in next 2 sts, ch 2) around to create small chain loops encircling the center, for a total of 18 chain loops. Fasten off. These loops will be where we sew bead clusters later.
Info :
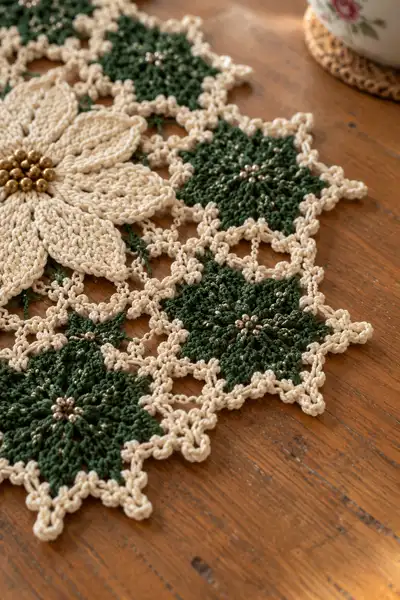
Thread your beading needle with a short length of matching thread or thin yarn and sew a tight cluster of 7 beads into the center loops: one center bead and 6 around it. Use strong sewing knots and conceal ends under the center disk.
Round 20 :
Trim and weave ends. Block again if necessary. Each finished large flower motif should be identical in size and shape before you proceed to joining.
— Small Star Motif (Make 12) :
Round 1 :
mr, 6 sc into ring. (6)
Round 2 :
Inc in each st around. (12)
Round 3 :
(1 sc, inc) x 6. (18)
Round 4 :
(2 sc, inc) x 6. (24)
Round 5 :
1 sc in each st (24)
Info :
We will make a star with 8 points, so ensure counts in subsequent shaping align with 8 points. If you want a tighter star, change to a 2.5 mm hook for the point rounds.
Round 6 :
*(ch 4, sk 2, sl st in next st) x 8 to form 8 chain arches around the base.* Join with sl st. (This creates 8 arches — count carefully to verify you have 8)
Round 7 :
Into each chain-4 arch: sl st, ch 3 (counts as dc), 2 dc, ch 2, 3 dc, sl st into same arch to form an open petal point. Repeat for all 8 arches. (8 star points)
Round 8 :
For each star point: ch 1, (sc, hdc, dc, tr, dc, hdc, sc) across the point to create a fuller, layered point shape; sl st into base to close. Repeat 8 times. Fasten off. (Star points finished)
Round 9 :
Re-join at center back and work one round of sc around the star base to tidy edges, placing 1 sc in each base st and 2 sc where necessary to keep shape even. (24-28 sc depending on small adjustments)
Info :
Attach 5 small beads at the very center of each star with sewing needle and thread: one central bead and 4 surrounding in a small cross to echo the runner's photographed sparkle. Secure knots and hide under the center stitches.
Round 10 :
Edge trimming: With cream contrast, join with sl st into any base space and work a round of *ch 3, sl st* around the star, placing ch-3 loops at the outer points. These loops will be used to connect to large motifs with chain-lace. Fasten off and weave ends.
Info :
Ensure all small stars are blocked lightly; the ch-3 loops should sit flat and be consistent in size to make joining straightforward.
— Joining Motifs: Chain-Lace Connector & Layout :
Info :
Layout pictured: Two large cream flowers are offset along the runner center with small green stars forming a lace edge and filling gaps. You will need to make enough small stars to surround each flower and create the overall length — pattern photos show 12 small stars arranged in 3 columns around the two large flowers. Adjust number of stars to lengthen or shorten the runner.
Round 1 :
With cream yarn, pick two adjacent motifs (one large flower and one small star) and attach yarn to a ch-3 loop on the star border. Ch 6, sl st into the matching ch-3 loop on the flower motif to make a 6-chain connector. Repeat this process around the motif perimeter to attach one star to one flower in the correct positions for a snug join. (Each join uses chain connectors of length 4-8 ch depending on spacing; adjust to match your blocking size.)
Info :
When joining, pin both motifs flat on blocking surface in the exact final layout. Work joins with moderate tension — not too tight (which puckers motifs) and not too loose (which leaves large gaps).
Round 2 :
Between three motifs meeting at a point (star-star-flower intersection), join with a small picot spider join: From motif A ch 5, sl st into motif B ch-loop, ch 3, picot (ch 3, sl st back into third chain), sl st into motif C loop. This creates decorative triangular joins and stabilizes the mesh. Repeat at every triple junction.
Round 3 :
Work a tidy round of sl st around each motif perimeter where joins were made to secure tails and tidy connection points. If a connector appears too long, adjust on subsequent joins; you can remove and rejoin a connector by cutting and rejoining a new chain segment to keep the lattice uniform.
Info :
Keep a note of which chain lengths you used between motifs so you can repeat identical spacing for the entire runner. Use stitch markers temporarily in connector loops to keep tension consistent while working neighboring joins.
Round 4 :
Once all small stars are attached to large flowers and neighboring stars, work a second pass of chain-lace over each connector: into each connector chain, *sk 1 ch, 1 sc, ch 3, 1 sc* to create small loop chains that visually read as a secondary lace. This reinforces the join and gives the open mesh seen in the photographs.
Info :
If your runner is longer than pictured, add additional rows of small stars connected with the same chain-lace repeat. Keep symmetry: mirror left and right joins around the center line for a balanced look.
— Outer Scalloped Edge (Edging) :
Round 1 :
With cream yarn, join at any outermost ch-loop on the assembled runner. Ch 1, sc into same loop, *ch 4, 3 sc in next outer loop, ch 4, sc in next loop* around to create a scalloped picot edging. Adjust ch-4 length to match the spacing on your assembled motifs. Fasten off at end. (This creates the outer scallop points visible on the photos.)
Round 2 :
For each scallop point (the outward tip), work: join with sl st, ch 1, sc, hdc, 3 dc, hdc, sc, sl st to the base to make pointed petals around the outermost edge. Repeat around each star tip and flower outer edge to mirror the photograph's star-like border.
Info :
Work this edging evenly; sometimes adding a single extra sc in a wider base area is necessary to keep the scallops evenly spaced. Pin and block after edging to set the scallop shapes.
Round 3 :
Final picot trimming: Work a round of small picots across every ch-4 loop: *sl st, ch 3, sl st* into same loop for a tiny beaded look. This gives the knobbly border effect seen in close-ups. Fasten off and weave all ends into the back of the work.
— Beading & Center Embellishment :
Info :
String your beads onto a beading thread or fine yarn before you begin the final center attachment. For each large flower center, thread 7 beads: one center bead and six surrounding. For each small star, thread 5 small beads to form a tight center cluster.
Round 1 :
Using your darning needle, sew the cluster of beads into the central loop you made previously on the large flower. Pass the thread through the base ring multiple times to anchor beads snugly: sew through the center loop, add bead, sew out through adjacent loop, add bead, and repeat. Knot securely on the back and bury ends under stitches.
Round 2 :
For small stars, sew a single bead cluster of 5 beads into the center loops. Use a tiny stitch to avoid visible thread across the motif surface. Trim and weave ends to back. Ensure beads are positioned slightly proud of the fabric so they catch light after blocking.
Info :
If you want to avoid sewing beads, use beaded yarn when creating the center rounds and work beads into the final sc loops using a crochet hook to pull beads into position. However, sewing ensures precise placement and stronger anchoring for a heavily used runner.
— Optional Surface Crochet for Petal Veins :
Round 1 :
With contrast cream or slightly darker shade, use a tapestry needle and yarn to couch surface slip-stitch lines from the base to the tip of each petal: start at center base, run a line up each petal through the middle and secure at the tip. This mimics the lightly corded veins visible in the photo and increases definition.
Info :
Keep stitches small and even; surface couching should follow petal curves. Use this step sparingly if you prefer a softer look without linear definition.
— Blocking & Final Finishing :
Round 1 :
Pin the fully assembled runner on blocking mats to your desired final shape. Ensure petals are spread and star points are flat. Spray lightly with water and allow to dry fully (overnight) to set shape. If using mercerized cotton, steam blocking works well for crisp edges.
Round 2 :
After drying, check all bead attachments and reinforce any loose beads with an extra pass of thread. Trim all tails and weave ends securely into the back of the lace to prevent snags.
Info :
To keep the runner flat during use, consider adding a thin felt backing on the underside or use washable fabric glue at very small points to secure joins that feel fragile. Do not glue the visible surface; only use backing if the runner will be placed on high-use surfaces.
— Cutting Down or Expanding the Runner :
Info :
The modular motif system means you can add more small star motifs between the two large flowers to lengthen, or remove motifs to shorten. Keep the chain-lace repeat identical for each additional column to maintain a regular pattern. When changing overall size, make extra small stars in multiples of two to preserve symmetry.
Round 1 :
If you want a runner half the size, make one large flower and surround it with 6 small stars instead of 12 — follow the same joining diagram but stop after forming a single panel. For a table centerpiece, a single large flower with 6 surrounding stars is a charming option and uses far fewer motifs.
Info :
Save pattern notes as you make your first runner: record exact chain lengths used for each join and the number of picots and scallops. This makes repeated panels identical when you want a perfectly symmetrical table set.
Finishing this runner is such a joyful reward — the crisp cream petals, deep green stars, and tiny metallic beads combine into a vintage-inspired centerpiece you can be proud of. Each stitch builds texture and charm, and once blocked the motifs sit beautifully on any table. 🧶✨ Share it as a handmade holiday gift or a year-round accent that invites compliments. Happy stitching and enjoy every delicate join! 🎁