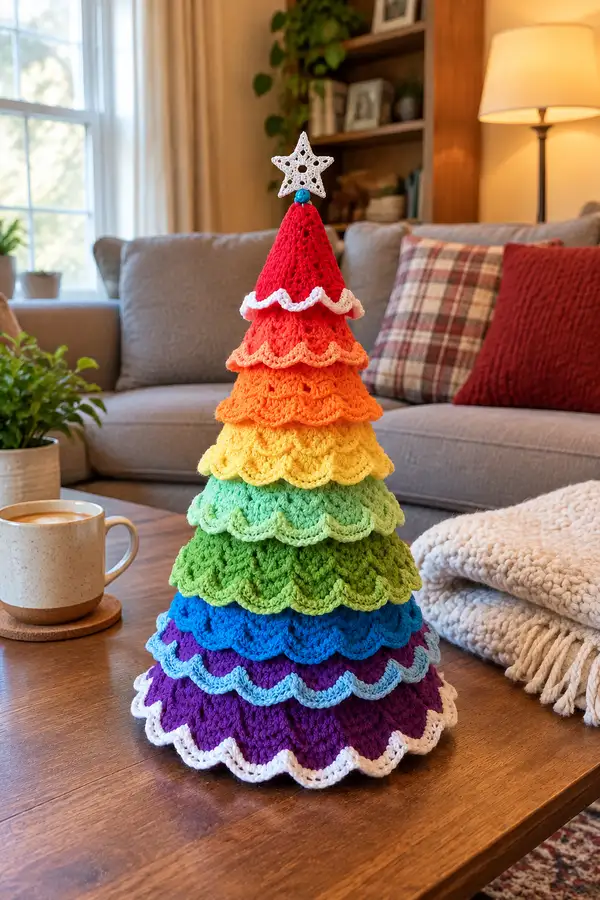
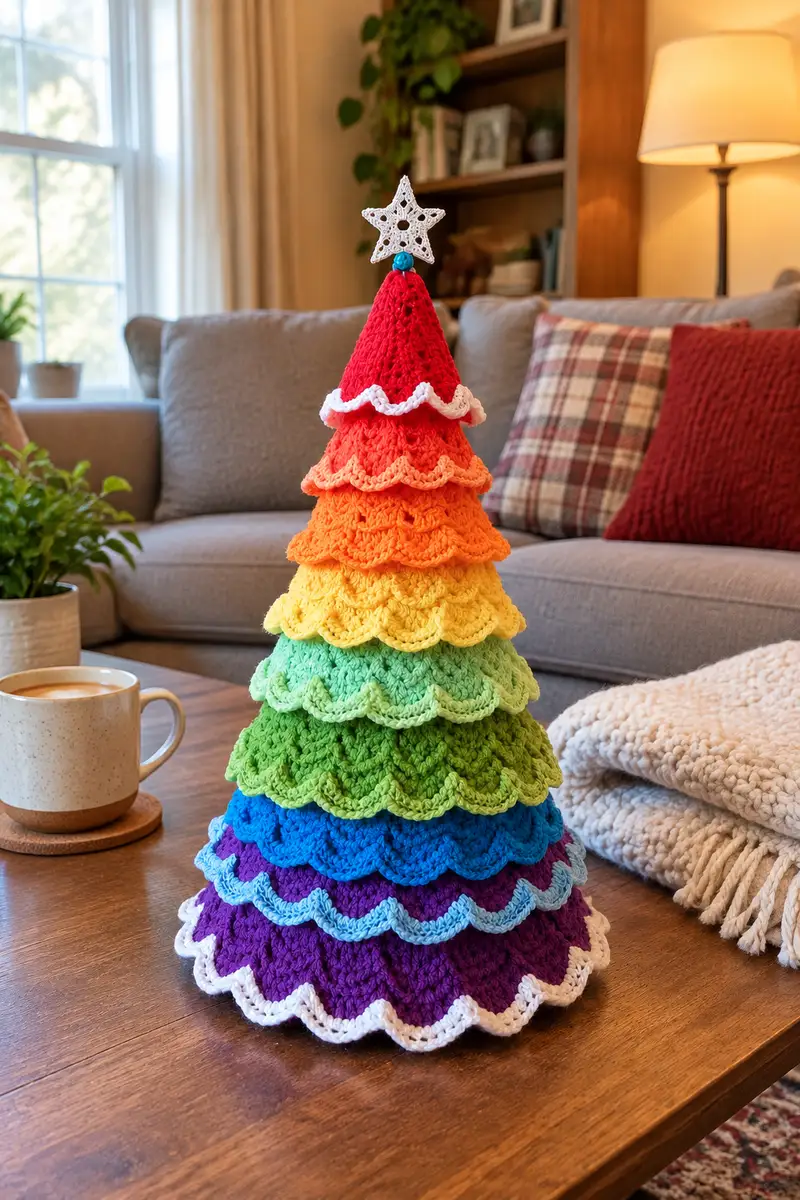
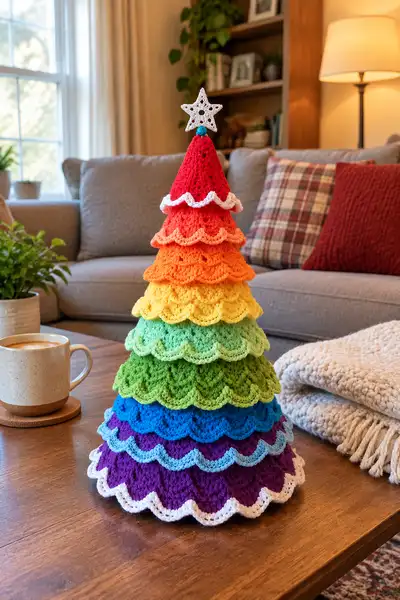
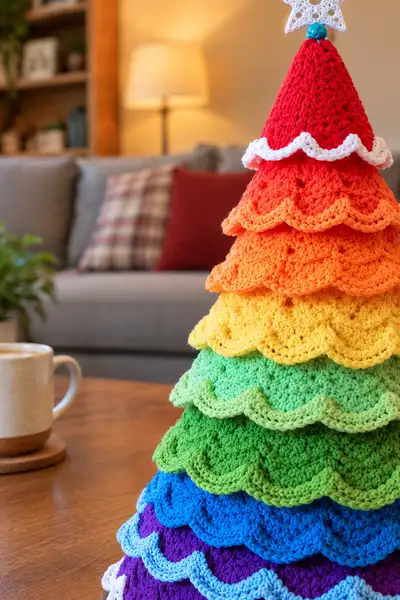
This cheerful Rainbow Ombre Ripple Christmas Tree is a layered, scalloped tabletop decoration worked in bright, transitioning colors. The pattern builds a sturdy internal cone and attaches eight scalloped ripple tiers in rainbow order from violet to red, finished with a delicate crocheted star topper. Each tier shows a defined scallop edge and subtle texture, making this a playful, modern holiday accent for any cozy room.
Progress Tracker
0% Complete
— Cone Core (internal support) :
Round 1 :
6 sc in magic ring (6)
Round 3 :
(1 sc, inc) x 6 (18)
Round 4 :
(2 sc, inc) x 6 (24)
Round 5 :
(3 sc, inc) x 6 (30)
Round 6 :
(4 sc, inc) x 6 (36)
Round 7 :
(5 sc, inc) x 6 (42)
Round 8 :
(6 sc, inc) x 6 (48)
Round 9 :
(7 sc, inc) x 6 (54)
Info :
We are building a cone narrow at the top that will be covered by tiers. Maintain tight tension so stuffing does not show. Place a stitch marker in the first st of each round to track rounds easily.
Round 10 :
(8 sc, inc) x 6 (60)
Round 11 :
(9 sc, inc) x 6 (66)
Round 12 :
(10 sc, inc) x 6 (72)
Round 13 :
(11 sc, inc) x 6 (78)
Round 14 :
(12 sc, inc) x 6 (84)
Info :
Round 14 reaches the lower mid section of the cone. If you are planning a slightly wider tree, you can add one extra increase round here to increase final circumference by 6 sts; keep proportions consistent for tiers to fit.
Round 15 :
(13 sc, inc) x 6 (90)
Round 16 :
(14 sc, inc) x 6 (96)
Round 17 :
(15 sc, inc) x 6 (102)
Round 18 :
(16 sc, inc) x 6 (108)
Round 19 :
(17 sc, inc) x 6 (114)
Round 20 :
(18 sc, inc) x 6 (120)
Info :
Round 20 yields a 120-stitch circumference — this size is used to accept the largest bottom tier (purple). If you followed the optional increase earlier, ensure bottom tier stitch counts align or reduce some attachment stitches when sewing.
Round 21 :
1 sc in each st (120)
Round 22 :
1 sc in each st (120)
Round 23 :
1 sc in each st (120)
Round 24 :
1 sc in each st (120)
Info :
These even rounds build the cone height that sits under the tier layers. Stuff minimally in these lower rounds so the cone remains stable but not rock-hard. If you prefer a hollow cone, insert a cardboard funnel or stiff cone form now.
Round 25 :
(18 sc, dec) x 6 (114)
Round 26 :
(17 sc, dec) x 6 (108)
Round 27 :
(16 sc, dec) x 6 (102)
Info :
Begin tapering the cone toward the top to form the red cone tip area. Start stuffing from this point upward so the top is firm. Use small amounts of fiberfill and shape with your fingers.
Round 28 :
(15 sc, dec) x 6 (96)
Round 29 :
(14 sc, dec) x 6 (90)
Round 30 :
(13 sc, dec) x 6 (84)
Round 31 :
(12 sc, dec) x 6 (78)
Round 32 :
(11 sc, dec) x 6 (72)
Info :
At round 32 you reach the upper cone flare that will sit beneath the red top tier and be partly visible. Keep even stuffing; the cone should taper without buckling.
Round 33 :
(10 sc, dec) x 6 (66)
Round 34 :
(9 sc, dec) x 6 (60)
Round 35 :
(8 sc, dec) x 6 (54)
Round 36 :
(7 sc, dec) x 6 (48)
Round 37 :
(6 sc, dec) x 6 (42)
Round 38 :
(5 sc, dec) x 6 (36)
Info :
Fasten off leaving a long tail for sewing or for attaching the topper assembly. If you want a hollow top to insert a dowel for a star, stop stuffing with a small cavity left for the dowel base.
— Tier: Purple (Bottom Tier) :
Round 1 :
6 sc in magic ring (6)
Round 3 :
(1 sc, inc) x 6 (18)
Round 4 :
(2 sc, inc) x 6 (24)
Round 5 :
(3 sc, inc) x 6 (30)
Info :
This tier will be the widest (120 sts) after you work increases to reach the circumference of the cone base. You'll expand more past round 5—keep counting increases.
Round 6 :
(4 sc, inc) x 6 (36)
Round 7 :
(5 sc, inc) x 6 (42)
Round 8 :
(6 sc, inc) x 6 (48)
Round 9 :
(7 sc, inc) x 6 (54)
Round 10 :
(8 sc, inc) x 6 (60)
Round 11 :
(9 sc, inc) x 6 (66)
Round 12 :
(10 sc, inc) x 6 (72)
Round 13 :
(11 sc, inc) x 6 (78)
Round 14 :
(12 sc, inc) x 6 (84)
Info :
If your goal circumference is 120 sts for the largest tier, continue increases similarly until you reach 120. The following rounds continue the increase pattern to growth for a large flat tier.
Round 15 :
(13 sc, inc) x 6 (90)
Round 16 :
(14 sc, inc) x 6 (96)
Round 17 :
(15 sc, inc) x 6 (102)
Round 18 :
(16 sc, inc) x 6 (108)
Round 19 :
(17 sc, inc) x 6 (114)
Round 20 :
(18 sc, inc) x 6 (120)
Round 21 :
1 sc in each st (120)
Round 22 :
1 sc in each st (120)
Round 23 :
1 sc in each st (120)
Round 24 :
1 sc in each st (120)
Info :
These rounds flatten the tier slightly and allow the scallop edge to sit on a wider base. Your scallop repeat will need to divide evenly into 120; we will do 20 scallops across the round (120/20 = 6 sts per repeat).
Round 25 :
(Scallop foundation) *ch 1, sc in next st, ch 1, skip 1, repeat across to prepare spacing (120)
Round 26 :
Scallop round: *(skip 1, 5 dc in next st, skip 1, sl st in next st) repeat across to form 20 scallops (each scallop occupies 6 sts) — total scallops 20; maintain base stitch count when placing shells
Info :
Place stitch markers at the center of each scallop (for sewing later) every 6 stitches to help align tiers to cone attachment points. Fasten off and weave in tail, leaving a long tail for sewing if desired.
— Tier: Royal Blue :
Round 1 :
6 sc in magic ring (6)
Round 3 :
(1 sc, inc) x 6 (18)
Round 4 :
(2 sc, inc) x 6 (24)
Round 5 :
(3 sc, inc) x 6 (30)
Round 6 :
(4 sc, inc) x 6 (36)
Round 7 :
(5 sc, inc) x 6 (42)
Round 8 :
(6 sc, inc) x 6 (48)
Round 9 :
(7 sc, inc) x 6 (54)
Round 10 :
(8 sc, inc) x 6 (60)
Round 11 :
(9 sc, inc) x 6 (66)
Round 12 :
(10 sc, inc) x 6 (72)
Round 13 :
(11 sc, inc) x 6 (78)
Round 14 :
(12 sc, inc) x 6 (84)
Round 15 :
(13 sc, inc) x 6 (90)
Round 16 :
(14 sc, inc) x 6 (96)
Round 17 :
1 sc in each st (96)
Round 18 :
1 sc in each st (96)
Round 19 :
Scallop foundation round: ch1, sc in each st across (96)
Round 20 :
Scallop edge: *(skip 1, 5 dc in next st, skip 1, sl st in next st) repeat across to form 16 scallops (96/6 = 16); fasten off leaving long tail for sewing
Info :
Work each tier slightly smaller as you ascend so tiers stack nicely. Stagger scallop placement slightly when sewing so scallop peaks of the tier above sit halfway between peaks of the tier below for visual balance.
— Tier: Sky Blue :
Round 1 :
6 sc in magic ring (6)
Round 3 :
(1 sc, inc) x 6 (18)
Round 4 :
(2 sc, inc) x 6 (24)
Round 5 :
(3 sc, inc) x 6 (30)
Round 6 :
(4 sc, inc) x 6 (36)
Round 7 :
(5 sc, inc) x 6 (42)
Round 8 :
(6 sc, inc) x 6 (48)
Round 9 :
(7 sc, inc) x 6 (54)
Round 10 :
(8 sc, inc) x 6 (60)
Round 11 :
(9 sc, inc) x 6 (66)
Round 12 :
1 sc in each st (66)
Round 13 :
Scallop foundation: ch1, sc in each st across (66)
Round 14 :
Scallop edge: *(skip 1, 5 dc in next st, skip 1, sl st in next st) repeat across making 11 scallops (66/6 = 11); fasten off leaving long tail
Info :
Smaller tiers have fewer scallops; calculate scallops by dividing final st count by 6 so each scallop sits over 6 stitches. Adjust if you want tighter scallops; using 4 dc shells will change the repeat.
— Tier: Kelly Green :
Round 1 :
6 sc in magic ring (6)
Round 3 :
(1 sc, inc) x 6 (18)
Round 4 :
(2 sc, inc) x 6 (24)
Round 5 :
(3 sc, inc) x 6 (30)
Round 6 :
(4 sc, inc) x 6 (36)
Round 7 :
(5 sc, inc) x 6 (42)
Round 8 :
(6 sc, inc) x 6 (48)
Round 9 :
(7 sc, inc) x 6 (54)
Round 10 :
(8 sc, inc) x 6 (60)
Round 11 :
(9 sc, inc) x 6 (66)
Round 12 :
1 sc in each st (66)
Round 13 :
Scallop foundation: ch1, sc in each st across (66)
Round 14 :
Scallop edge: *(skip 1, 5 dc in next st, skip 1, sl st in next st) repeat across making 11 scallops (66/6 = 11); fasten off leaving long tail
Info :
For a slight ridge at the top edge of each tier, work the final even round in BLO; this creates a narrow ridge the next tier can sit against without sliding.
— Tier: Mint Green :
Round 1 :
6 sc in magic ring (6)
Round 3 :
(1 sc, inc) x 6 (18)
Round 4 :
(2 sc, inc) x 6 (24)
Round 5 :
(3 sc, inc) x 6 (30)
Round 6 :
(4 sc, inc) x 6 (36)
Round 7 :
(5 sc, inc) x 6 (42)
Round 8 :
(6 sc, inc) x 6 (48)
Round 9 :
(7 sc, inc) x 6 (54)
Round 10 :
(8 sc, inc) x 6 (60)
Round 11 :
1 sc in each st (60)
Round 12 :
Scallop foundation: ch1, sc in each st across (60)
Round 13 :
Scallop edge: *(skip 1, 5 dc in next st, skip 1, sl st in next st) repeat across making 10 scallops (60/6 = 10); fasten off leaving long tail
Info :
Tiers higher on the tree are narrower; stitch counts above reflect that progression. Use the long tail to baste the scallop centers to the cone so the scallops flare outward.
— Tier: Yellow :
Round 1 :
6 sc in magic ring (6)
Round 3 :
(1 sc, inc) x 6 (18)
Round 4 :
(2 sc, inc) x 6 (24)
Round 5 :
(3 sc, inc) x 6 (30)
Round 6 :
(4 sc, inc) x 6 (36)
Round 7 :
(5 sc, inc) x 6 (42)
Round 8 :
(6 sc, inc) x 6 (48)
Round 9 :
(7 sc, inc) x 6 (54)
Round 10 :
1 sc in each st (54)
Round 11 :
Scallop foundation: ch1, sc in each st across (54)
Round 12 :
Scallop edge: *(skip 1, 5 dc in next st, skip 1, sl st in next st) repeat across making 9 scallops (54/6 = 9); fasten off leaving long tail
Info :
For a tighter scallop, use 4 dc shells instead of 5 dc and adjust counts so the scallop count fits the stitch count by changing the repeat spacing.
— Tier: Orange :
Round 1 :
6 sc in magic ring (6)
Round 3 :
(1 sc, inc) x 6 (18)
Round 4 :
(2 sc, inc) x 6 (24)
Round 5 :
(3 sc, inc) x 6 (30)
Round 6 :
(4 sc, inc) x 6 (36)
Round 7 :
(5 sc, inc) x 6 (42)
Round 8 :
(6 sc, inc) x 6 (48)
Round 9 :
1 sc in each st (48)
Round 10 :
Scallop foundation: ch1, sc in each st across (48)
Round 11 :
Scallop edge: *(skip 1, 5 dc in next st, skip 1, sl st in next st) repeat across making 8 scallops (48/6 = 8); fasten off leaving long tail
Info :
Fold each scallop so the shell peaks point outward and baste with the long tail to the cone making sure shell centers line up with the stitch markers you placed on the cone. Use small running stitches through the cone for a secure hold.
— Tier: Red (Top Tier/Cap) :
Round 1 :
6 sc in magic ring (6)
Round 3 :
(1 sc, inc) x 6 (18)
Round 4 :
(2 sc, inc) x 6 (24)
Round 5 :
(3 sc, inc) x 6 (30)
Round 6 :
(4 sc, inc) x 6 (36)
Round 7 :
(5 sc, inc) x 6 (42)
Round 8 :
1 sc in each st (42)
Round 9 :
1 sc in each st (42)
Info :
The red cap will snugly fit over the top tapered cone area. If you made the cone with the decreases to 36 sts at round 38, this 42-stitch cap will easily overlap the cone for a tidy seam. Adjust counts if your cone final top count differs.
Round 10 :
For ruffle at cap edge: ch1, *(skip 1, 5 dc in next st, skip 1, sl st) repeat around to form a decorative frill that echoes the larger scallops; fasten off leaving long tail
Info :
Sew the red cap to the cone top starting at the back seam and moving around; keep joining invisible by sewing through the back loops of the cap and the adjacent cone stitches.
— Scallop Contrast Edgings (White) :
Round 1 :
Using white yarn, join at edge of each tier's scallop foundation (or at any scallop peak), ch 1, sc in next st to anchor (counts vary by tier)
Round 2 :
Scallop highlight: *(ch1, sl st in center of scallop shell from scallop round, ch1, sc in the st after shell) repeat across to make a neat white outline; see notes for exact anchor points per tier
Info :
White contrast edge is optional but creates a crisp ripple outline. Work this round loosely so the scallop edge sits light and airy. For consistency, use the same number of white outline stitches per scallop (usually 3-5 small stitches).
— Star Topper (Lace Star) :
Round 1 :
Using white sport or DK weight yarn and a 3.5mm hook, ch 5, sl st to first ch to form ring, ch 1
Round 2 :
(sc, ch 3, sc) into ring six times to form six petals (12 sc total separated by ch 3 loops)
Round 3 :
Work lace points: *into ch-3 loop, (sc, hdc, 2 dc, hdc, sc), sl st to next ch-3 loop; repeat around to form 6 pointed lace tips
Round 4 :
Refine edges: in front loops of the star, sc around adding picot points: *(sc, ch 3, sl st into same st) at the tip of each lace point; repeat for each point; fasten off and block star flat
Info :
Blocking the star on a small towel will help it sit flat as a topper. You can stiffen it lightly with diluted craft glue or starch if desired. Sew star to the very top of the red cap using matching white thread and secure bead below it for a polished look.
— Topper Bead & Assembly Post :
Round 1 :
Make a small covered bead: using leftover accent yarn, sc around a small wooden or plastic bead to cover it. Start with 6 sc in a mr around bead cap (6)
Round 2 :
Continue rounds to cover bead: inc rounds until bead circumference is covered comfortably (12-18 sts depending on bead size). Fasten off leaving tail.
Info :
Sew the bead to the very top center of the red cap. If you used a cone form, you may want to insert a short dowel or thick toothpick into the cone top and glue the bead and star to the dowel for extra stability.
— Final Assembly & Layering :
Info :
Before sewing, block each tier lightly so scallops flatten and fall evenly. Place the cone upright and plan tier placement starting from the bottom (purple) up. Each tier will overlap slightly over the tier below so scallops cascade naturally.
Step :
Position purple tier over the widest part of the cone (cone rounds 18-22 area approximate). Pin in 6-8 spots around to check alignment. Using the long tail, baste the scallop centers to the cone with small stitches through cone rounds designated by your earlier markers.
Step :
Attach the royal blue tier slightly above the purple scallops such that the royal blue scallop peaks sit halfway between the purple peaks. Baste with a few stitches, then secure permanently with a whipstitch through the scallop centers and cone.
Step :
Repeat for sky blue, green, mint, yellow, orange, aligning each using the cone stitch markers placed every 6 sts. The red cap is sewn last; overlap its lower edge over the tapered cone top and secure.
Info :
Use small, hidden stitches through the back loop of the tier and one or two cone stitches to hide joins. Keep tension even so tiers do not pull the cone out of shape.
Step :
Sew the covered bead to cone top, then sew the blocked star centered above the bead. For extra security, add a dab of hot glue (optional) behind the bead-star junction, but only after you are satisfied with placement.
Info :
Weave in all long tails through the underside of each tier and secure firmly. Trim ends close to the work. Give the tree a final light steam block (careful with acrylic blends) to freshen the scallops and even edges.
— Optional: Weighted Base Insert :
Info :
If your tree needs extra stability, cut a circle of stiff cardboard or plastic the diameter of the bottom tier and glue or stitch it to the underside of the lowest tier. Alternatively, add small washers/weights inside the bottom cone rounds and cover with a felt circle to avoid scratching surfaces.
Step :
To make a removable base, stitch a felt disk to the underside of the purple tier using whipstitch and hide stitches within scallop pattern so base is neat.
Info :
Final adjustments: gently pull scallop points into shape, and if desired, add small lightweight ornaments or tiny pompoms sewed onto scallop peaks for extra festivity.
This Rainbow Ombre Ripple Christmas Tree is a joyful project that adds modern color to your holiday decor. Each scalloped tier stacks into a playful layered silhouette that invites customization and creativity. The detailed instructions make it easy to plan color placement, and the separate tier construction allows you to make one tier at a time. 🧶🎄 Enjoy making this bright, textured piece and display it proudly on a table or mantel — it’s a small, handmade celebration in yarn form! ✨