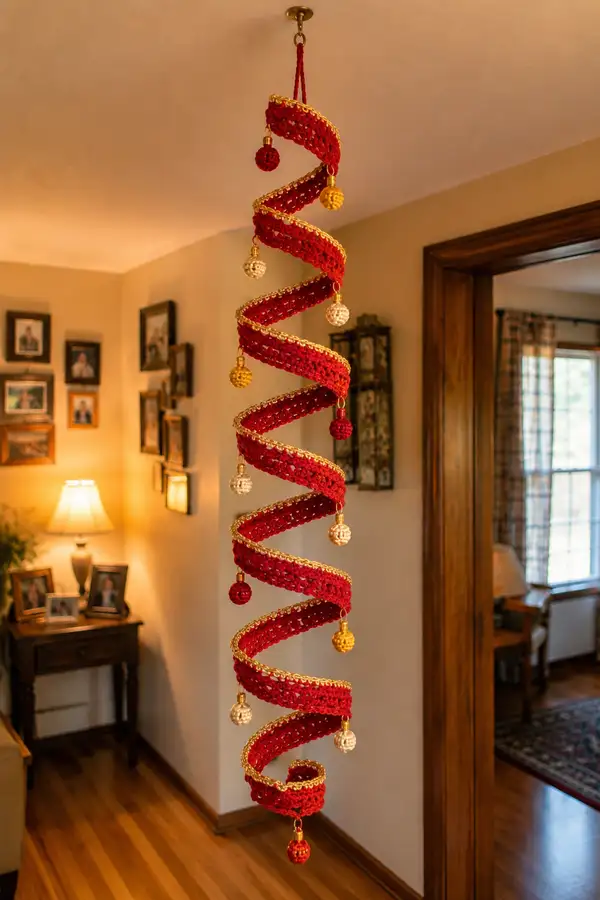
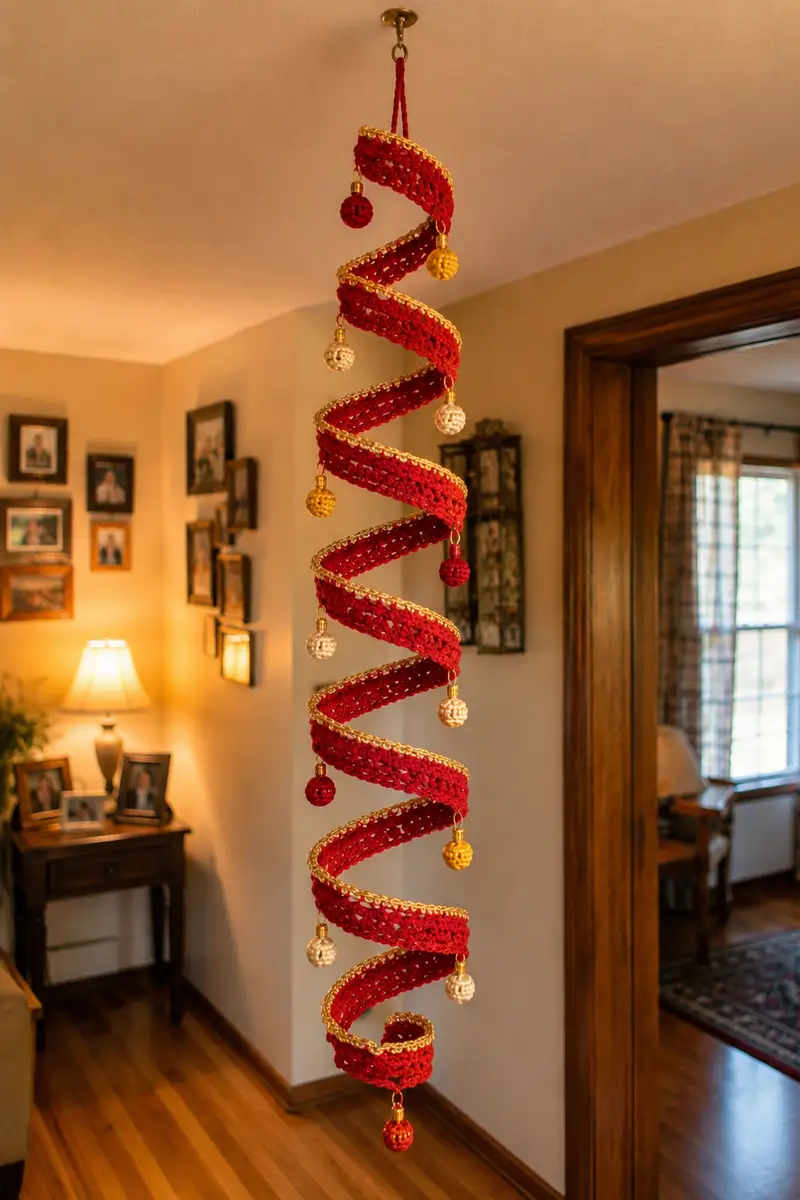
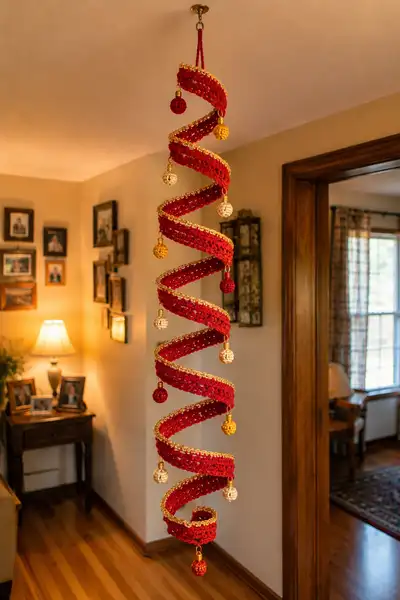
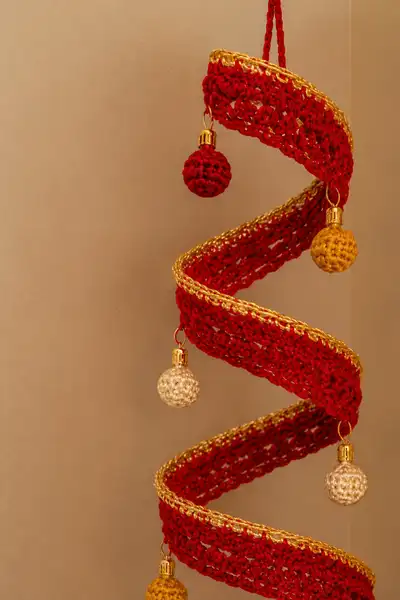
Make a festive red spiral garland trimmed in metallic gold with tiny crocheted baubles that dance as it hangs. This decorative hanging works beautifully as a ceiling spiral or doorway accent. The pattern builds a long fabric ribbon that is edged, lightly shaped and finished with small crocheted baubles and ornament caps for a polished holiday look. Suitable for an intermediate crocheter who enjoys construction and assembly.
Progress Tracker
0% Complete
— Project Overview :
Info :
This pattern describes how to make one long flat spiral strip (the red band), add a metallic gold edging on both long sides, create small crocheted baubles in three colors and assemble everything into a vertical hanging. Instructions include an optional internal wire or cord for shape retention. Finished hanging shown is approximately 85-95 cm (33-37 in) long from top loop to bottom bauble and the band width is about 5-6 cm (2-2.5 in). Adjust chain length and number of rows to change final length.
— Notes on Gauge and Size :
Info :
Gauge is not critical but affects finished size. With worsted yarn and a 3.5mm hook, a 10 cm (4 in) swatch in sc rows measures approximately 16 stitches by 18 rows. The sample strip in the photo was worked with a foundation chain of 120 and 60 rows to reach a height near 90 cm when spiraled. If you want a longer spiral increase foundation chain length proportionally.
— Spiral Band (Main Red Strip) :
Row 1 :
Foundation chain 120 (or ch to desired length; multiple of 4 recommended). Turn, sc in 2nd ch from hook and in each ch across — 119 sc (119)
Info :
If you want a slightly narrower band, start with ch 100; for wider, ch 140. The sample uses ch120. Place a marker in the first stitch of each return row to count rows in sets of 10.
Row 2 :
Ch1, turn, sc in each st across (119)
Row 3 :
Ch2 (counts as hdc), turn, hdc in each st across (119 hdc)
Row 4 :
Ch1, turn, sc in each st across (119)
Row 5 :
Ch3 (counts as dc), turn, dc in next st, *sk next st, dc in next 2 sts; rep from * across, ending last repeat as needed — creates subtle openwork rows (approx 80-90 dc depending on pattern repeat)
Info :
Rows 3-5 create a slightly lacy texture so the spiral has visual interest; keep tension consistent and check the band lies flat. If your chain causes a curve, adjust hook size or block before edging.
Row 6 :
Ch1, turn, sc in each st across (119)
Row 7 :
Ch2, turn, hdc in each st across (119)
Row 8 :
Ch1, turn, sc in each st across (119)
Row 9 :
Repeat Row 5 lace pattern: Ch3, turn, dc, *sk1, dc2* across (approx 80-90 dc depending on counting) (use consistent repeat)
Info :
At this point check band width: you should have approx 8-10 rows that create a band about 5-6 cm wide. If you prefer a wider band increase the number of row sets before continuing the long straight runs.
Row 10 :
Ch1, turn, sc in each st across (119)
Row 11 :
Ch2, turn, hdc in each st across (119)
Info :
Now work long straight rows to build the length of the spiral. The number of rows determines the hanging length — the sample was worked to 60 total rows; adapt to taste. Maintain the stitch pattern sequence for a tidy edge: alternate sc/head dc rows for consistent appearance.
Row 12 :
Ch1, turn, sc in each st across (119)
Row 13 :
Ch3, turn, dc pattern row as Row 5 (maintain lace repeat)
Row 14 :
Ch1, turn, sc in each st across (119)
Row 15 :
Ch2, turn, hdc in each st across (119)
Info :
From Rows 12-59 continue alternating these three row types (sc row, hdc row, lace dc row) keeping stitch counts steady at 119 stitches per row. Use a row counter or place a marker every 10 rows to track progress accurately.
Row 16-59 :
Repeat Rows 12-15 twelve times (48 rows) then repeat Row12-Row15 as needed until you reach a total of 60 rows or your desired length (119)
Row 60 :
Finish with one sc row: Ch1, turn, sc in each st across (119). Fasten off and weave in ends long enough to sew if needed (119)
Info :
Block the entire strip very lightly to flatten and square the edges. Pin to a towel and spray block; allow to dry. Blocking helps the gold edging sit neatly and reduces curling when spiraled.
— Joining the Strip into a Spiral Tube or Helix :
Info :
Decide how tight you want spirals to stack. The example spiral alternated wide loops with a deep visual gap, so the strip was spiraled loosely around an invisible center line. Two methods are recommended: A) Coil the flat strip around a lightly wound flexible wire spine, or B) Sew the strip in a helical spiral by coiling and attaching at regular intervals to a central cord. Method A (wire spine) is recommended for a more defined corkscrew shape.
Method A - Prepare Wire Spine :
Cut a length of flexible floral wire or coated steel wire equal to finished hanging height plus 30 cm (allow extra for attaching top loop). Fold in half for strength and twist the top 10 cm into a small loop for hanging.
Info :
Wrap the wire in matching yarn or ribbon if the wire will be visible through openwork. If you prefer not to use wire, skip to Method B below and use a cotton cord that will allow a softer spiral with less hold.
Method A - Attaching Strip to Wire :
Starting at the top loop, coil the flat strip around the wire so the strip forms one turn (approx 12-14 cm circumference per coil in sample). Use small whip stitches every 3-4 cm to secure the strip edge to the wire (use matching red yarn and a tapestry needle). Continue coiling and stitching until the entire strip is attached and you reach the bottom. Space your stitches evenly to keep a uniform spiral pitch.
Info :
Keep the top loop free and ensure the twisted wire remains narrow enough to pass through bauble caps where necessary. Pin the strip on a blocking board at the desired helix pitch before sewing to get consistent spacing.
— Gold Edging (Both Long Sides) :
Info :
Work edging after coiling and/or before attaching baubles. Edging can be crocheted directly onto the long sides while the strip lies flat, or later onto the coiled spiral edge. The sample uses a shiny metallic gold yarn crocheted as a neat chain-like trim combined with slip stitch loops to catch light.
Round 1 :
Join metallic gold yarn at one end of a long side: ch1, evenly work sc along long edge catching each row end with approx 60-70 sc depending on strip length (approx equal to row count). Move to the opposite side later and repeat. Keep stitches evenly spaced to avoid puckering (approx 60-70 sc per side).
Round 2 :
Ch1, *sl st in next st, ch2, sl st around the previous sl st to create small loops along edge; rep across entire side (creates decorative chain effect)
Info :
If you prefer a simpler look, work a single row of sc followed by 1 sl st in each sc for a clean border. For a fancier look, carry a second metallic thread held together for extra sheen.
Round 3 :
Work a decorative picot variation: *sc in next st, ch3, sl st in 3rd ch from hook to form a small picot; rep across to create tiny raised dots (approx same st count as Round 1)
Info :
When adding edging on both sides, work the first side completely, then block and attach the strip into its spiral shape; then add the second side while coil is held in shape. This prevents distortion caused by working both sides flat then coiling.
Round 4 :
Fasten off gold yarn and weave in ends, or continue to add a second metallic accent line by slip stitching a thin chain of gold across the very edge to create a raised rope effect.
— Small Crocheted Baubles (Make 10 total in assorted colors) :
Info :
Baubles are small spherical ornaments crocheted around a tiny styrofoam ball or worked as closed amigurumi spheres then fitted into small ornament caps. The pattern below makes two sizes. Use a smaller 3.0mm hook for tighter fabric so the filling or styrofoam does not show through.
Small Bauble - Size A (approx 2.5 cm) :
Use 3.0mm hook, mr with chosen color
Round 3 :
(1 sc, inc) x6 (18)
Round 4 :
(2 sc, inc) x6 (24)
Round 5 :
1 sc in each st around (24)
Info :
If using a tiny styrofoam bead, now glue the bead inside the crocheted cover. If crocheting a closed ball, stuff very lightly with fiberfill to keep the sphere smooth. Place a small metal ornament cap onto the sphere opening now to test fit before closing.
Round 6 :
(2 sc, dec) x6 (18)
Round 7 :
(1 sc, dec) x6 (12)
Round 9 :
Fasten off leaving long tail for closing. Use yarn needle to pull opening closed securely and weave in end. Attach jump ring or thread through top to attach ornament cap (6)
Info :
Work 6-8 baubles in Size A in mixed colors (red, cream, gold). For a tighter finish, use a smaller hook by 0.5 mm if stitches show filling. Attach a small jump ring through the top stitch for later hanging with an ornament cap.
Medium Bauble - Size B (approx 3.5 cm) :
Use 3.0mm hook
Round 3 :
(1 sc, inc) x6 (18)
Round 4 :
(2 sc, inc) x6 (24)
Round 5 :
(3 sc, inc) x6 (30)
Round 6 :
1 sc in each st around (30)
Round 7 :
(3 sc, dec) x6 (24)
Round 8 :
(2 sc, dec) x6 (18)
Round 9 :
(1 sc, dec) x6 (12)
Round 11 :
Fasten off leaving long tail, close opening and weave in end. Attach ornament cap or a jump ring for hanging (6)
Info :
Work 4 medium baubles in cream/gold to repeat the pattern shown. If you want larger baubles, add one more increase round (4 sc, inc) x6 to reach 36 sts then shape accordingly. Always test fit into caps before final closing.
— Bauble Caps and Hardware :
Info :
Slip small jump rings through the top stitch of each bauble and attach each jump ring to a small ornament cap or bead cap. You can also glue the cap onto a styrofoam-covered bauble for extra security. Use gold-toned hardware to match the edging. Ensure rings are closed tightly with small pliers.
— Top Hanging Loop and Braid :
Round 1 :
Ch 30, slip stitch to form a hanging loop or ch 20 and braid three strands of yarn for a thicker cord (30 or braided cord)
Round 2 :
If you made a chain loop: fold loop and wrap yarn around base of loop to create a neat top cap. If braided: tie with a small knot and wrap a short piece of gold thread at the top to secure.
Info :
Attach the top loop to the spiral's wire loop by feeding the chain through the wire loop or sewing the braid securely. For a clean finish, stitch the braid/chain to the topmost coil with matching yarn.
— Assembly (Placing Baubles along Spiral) :
Info :
Decide even spacing before permanently attaching baubles — the sample positions baubles at each helix turn mid-point, alternating left and right sides so the baubles hang freely between coils. Mark positions with pins while the coil lies flat or hung temporarily.
Assembly Step 1 :
Using small jump rings, attach baubles to the bottom edge of the strip or attach to a small loop of yarn sewn through the strip edge. Make sure the cap faces outward so the round part hangs below the coil.
Assembly Step 2 :
Use two or three stitches of red yarn through the strip edge to anchor the jump ring or sew a small loop of yarn through the top stitch and pass the jump ring through it for stability. Tie and weave ends into the strip.
Info :
Attach alternating colors along the spiral to create visual rhythm. The sample alternates red, gold and cream and places eight to ten baubles along the full length depending on spacing preference.
— Final Shaping and Finishing :
Info :
Hang the spiral temporarily from a ceiling hook to check pitch and spacing. If coils are too loose, reduce spacing between secured stitches on the wire. If they are too tight, reposition the stitches so coils sit more open. Once satisfied, add final securing stitches at the top and bottom 2-3 attachment points to lock the shape permanently.
Finishing Step :
Weave in all ends firmly, trim close. If desired, add a small weight (a wrapped washer or metal button) inside the bottom-most bauble or sew a small weight within the bottom coil to straighten the hanging and keep tension.
Info :
Double check all metal jump rings and caps are tightly closed; use pliers to flatten and secure. If using glue, use a tiny amount to avoid visible residue. Finally, steam-block lightly if your yarn tolerates steam to even the appearance and add sheen to the metallic yarn edging.
— Optional Variations and Decorative Tips :
Info :
- Make a pair of spirals for a doorway. - Use different color sequences or add small bells for sound. - Replace metallic yarn with a ribbon threaded along the edge for a different look. - For outdoor use, choose acrylic yarns and seal hardware against moisture.
This melodic red-and-gold spiral transforms simple yarn and a little hardware into an heirloom-feel decoration. The rhythmic coils and tiny crocheted baubles bring understated elegance and holiday sparkle to any doorframe or ceiling. Each stitch contributes to a flowing, handcrafted statement perfect for gifting or seasonal décor. Hang it, sway it, and enjoy the gentle movement and light-catching gold every time you pass by. 🎄✨