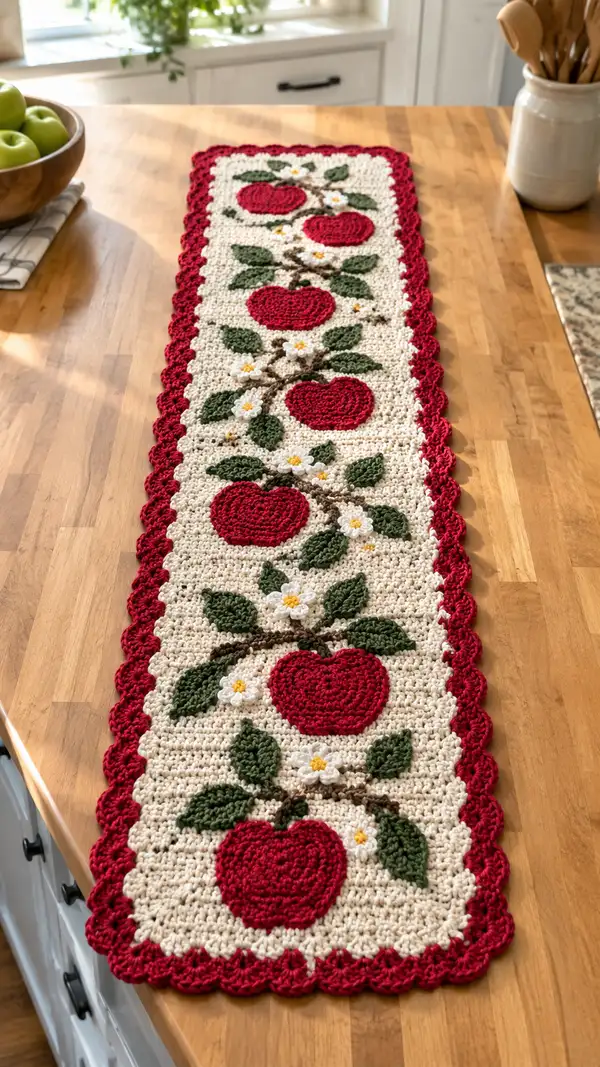
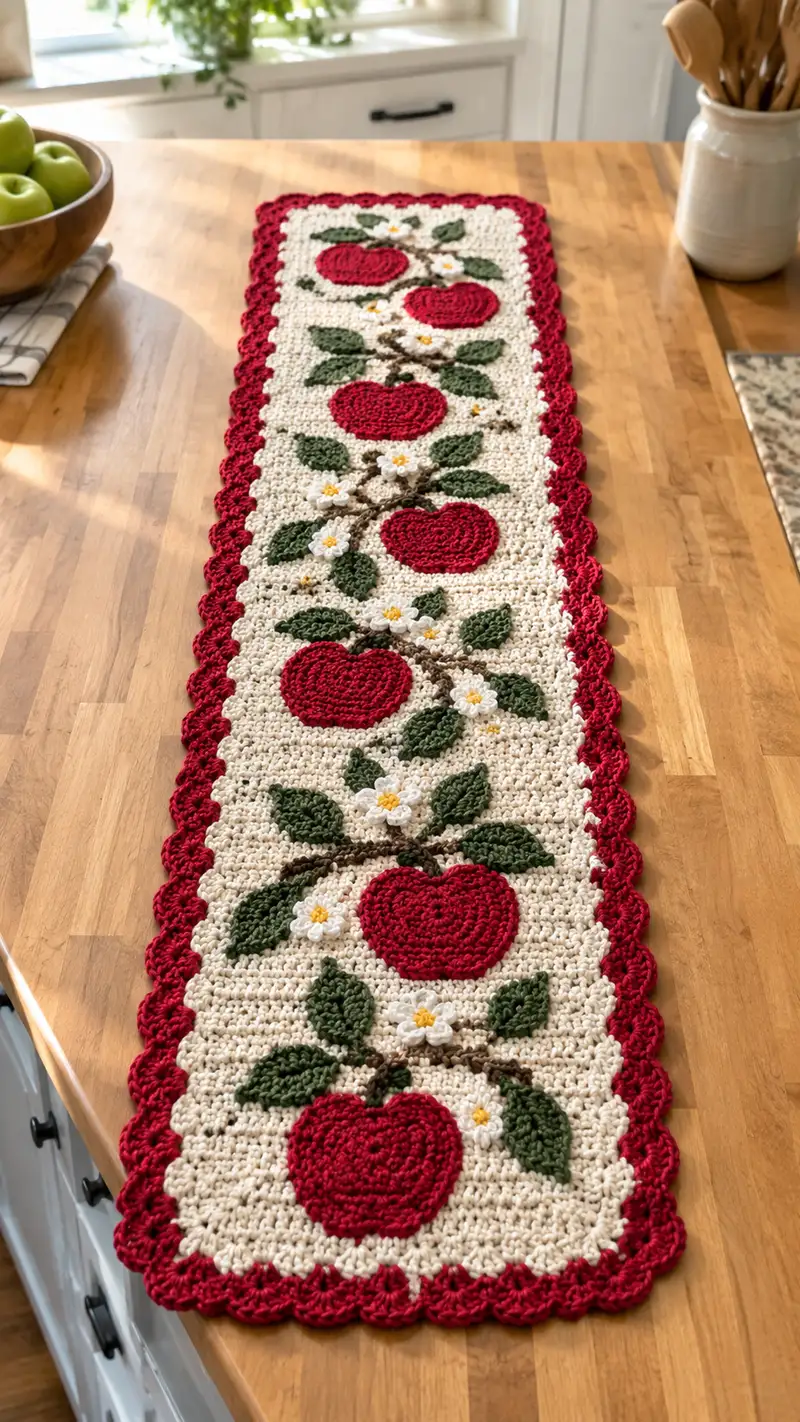
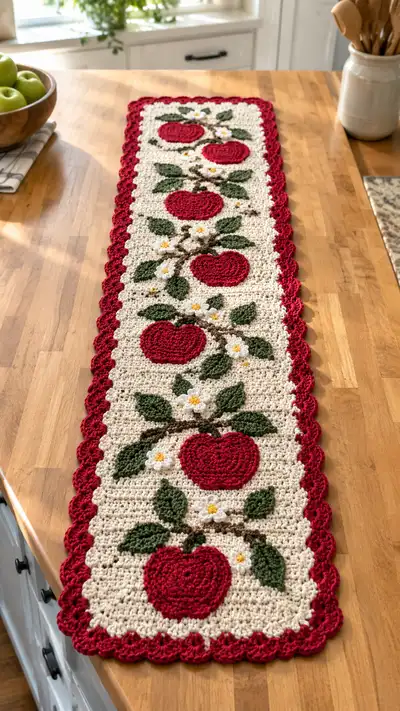
Bright, farmhouse-style table runner featuring a row of plump red apple appliques, leafy branches and delicate white blossoms on a warm cream background. Worked in worsted weight yarn with a textured background and a scalloped red border, this runner brings cozy autumn charm to any table. The pattern uses appliques sewn onto a rectangular panel for a polished, layered look. Perfect as a kitchen centerpiece, gift, or seasonal accent.
Progress Tracker
0% Complete
— Materials & Gauge :
Info :
Gauge: 14 sc x 16 rows = 4 inches in single crochet using worsted weight yarn and 4.0 mm hook. Runner shown measures approximately 36" x 7.5" (92 cm x 19 cm) after blocking. Gauge is not critical for applique placement but important for overall proportions and border fit.
— Runner Base Panel (worked flat in rows) :
Info :
We work a long rectangular panel in the cream main color using a textured cluster/seed combination to create the subtle pebble texture visible in the photo. The panel is worked flat in rows. Chain foundation length determines final width; the sample uses foundation chain 132 for a finished width of ~7.5" after blocking. Adjust chain multiple of 2 for pattern repeats.
Round 1 :
Foundation chain 132 (or desired width). Turn. (132)
Round 2 :
Row 1: Working into second ch from hook, sc across entire chain (132). Ch 1, turn. (132)
Round 3 :
Row 2: *sc in next st, hdc in next st; rep from * across to last st, sc in last st. Ch 1, turn. (132)
Round 4 :
Row 3: *hdc in next st, sc in next st; rep from * across to last st, sc in last st. Ch 1, turn. (132)
Info :
These first textured rows set the background. Maintain an even edge by placing last sc into the top of the turning chain if needed. Use a stitch marker in first stitch of every 10th row to keep track of stages for applique placement.
Round 5 :
Row 4: Repeat Row 2 pattern (sc, hdc alternation) across. Ch 1, turn. (132)
Round 6 :
Row 5: Repeat Row 3 pattern (hdc, sc alternation) across. Ch 1, turn. (132)
Round 7-10 :
Work 4 more rows repeating Rows 2 and 3 alternation to establish base texture (quilted pebble look). Ch 1, turn each row. (132)
Info :
Measure from the bottom edge now to determine spacing for appliques. The sample spaces apple centers at roughly every 6.25" (16 cm) along the length; mark center points with pins or removable markers on RS for later applique sewing.
Round 11-58 :
Continue working the alternating sc/hdc texture pattern (Rows 2 and 3 repeated) until the panel measures the full desired length. In the pictured sample we worked until the panel measured approximately 36" long which resulted in a total of 58 rows including the first sc row. Maintain 132 sts across each row. (132)
Info :
Place markers where the apple centers will sit on the right side: starting 2.5" (6.5 cm) from one short end, mark every 5.75-6.25" (14.5-16 cm) depending on how many apples you want. The sample has six apples evenly spaced. Mark both left and right edges for symmetry.
Round 59 :
Row 57: Work one final even textured row (hdc/sc alternation) to reach the end length. Fasten off and weave in ends or leave long tail for seam if you plan to add border as you go. (132)
Info :
Optional: If you prefer to add the scalloped border as you go, do not fasten off. Instead continue with border rounds in red directly from the edge to avoid visible seam joins. The pattern below shows border worked after appliques to make placement easier.
— Apple Applique (Make 6) :
Info :
Apples in the sample are textured circular appliques shaped lightly into an apple/heart silhouette using increases, then two shallow decreases and side shaping to create a slight heart dip at the top. Worked in cherry red, 12 rounds each, finishing at about 3.75" (9.5 cm) diameter flattened.
Round 1 :
6 sc in magic ring (6)
Round 3 :
(1 sc, inc) x 6 (18)
Round 4 :
(2 sc, inc) x 6 (24)
Round 5 :
(3 sc, inc) x 6 (30)
Round 6 :
(4 sc, inc) x 6 (36)
Info :
At Round 6 you have a flat disc. To begin forming the apple shape, we'll add texture rows and controlled shaping rather than continuing full increases.
Round 7 :
1 sc in each st around (36)
Round 8 :
1 sc in next 4 sts, inc, repeat around (42)
Round 9 :
1 sc in each st around (42)
Info :
To create the top dip of the apple, work two small lobes on the next round: these are worked as two partial rounds across adjacent stitches on opposite sides to create a small heart indentation.
Round 10 :
Shape round: *sc in next 6, (dec over next 2 sts), sc in next 6, (2 sc together over next 2 sts to form a slight inward curve)* repeat once more completing round (40)
Round 11 :
Work even around in sc to smooth shape (40)
Round 12 :
Shallow finish: (5 sc, dec) x 5 (35)
Round 13 :
(4 sc, dec) x 5 (30)
Info :
If you prefer a slightly softer apple, stop after Round 11. For the runner apples, we leave appliques mostly flat; do not stuff. Fasten off leaving 16-20" tail for sewing. Block lightly by pinning to a circular template to encourage even shape.
— Apple Top Indent and Stem (worked directly on apple, repeat for each applique) :
Round 1 :
Attach brown yarn at the top middle of apple with sl st. Ch 1, sc in same st, sc in next 2 sts. Finish a short stem: ch 4, sl st back into the first ch, fasten off leaving tail to sew the base flush with apple. Optionally embroider a short yarn line for a twig effect. (3 sc on base)
Info :
Position the stem over the slight heart indent created earlier. Use the long tail to whip stitch the stem base to the apple so it sits flat and natural. For a thicker twig, use 2 strands of brown plied together.
— Leaf Applique (Make 12-16) :
Info :
Leaves are worked flat in forest green to create the pairs around each apple branch. Each apple typically has 2-3 leaves. Leaves measure about 2.5-3" long in the sample.
Round 1 :
Ch 9. Row 1: sc in 2nd ch from hook, sc across to end (8). Ch 1, turn. (8)
Round 2 :
Row 2: sc in first st, hdc in next, dc in next 2, hdc in next, sc in last 2. Ch 1, turn. (8)
Round 3 :
Row 3: Work along opposite side of starting chain: sc in first 2, hdc in next, dc2tog over next 2 (center tip), hdc in next, sc in last 2. Sl st to join at starting point, finish off leaving long tail for sewing. (8)
Info :
For a more dimensional leaf, use BLO on Row 3 to create a ridge down the center. Pin the leaf with slight curve and starch or steam lightly to set shape before sewing to runner.
— Blossom (5-Petal) Applique (Make 12-15) :
Info :
Small five-petal flowers are worked in white with a tiny yellow French knot center (or a small embroidered puff). Each flower is roughly 1" across and is placed near apples as pictured.
Round 1 :
Make 5 ch and join with sl st to form ring. Work 5 sc into ring. Sl st to first sc. (5)
Round 2 :
*Ch 3, sl st into next sc (petal); rep from * around for 5 petals. Fasten off leaving tail. Embroider center with small yellow yarn knot or use a small yellow French knot (about 6-8 wraps) and secure. (5 petals)
Info :
Alternatively: work (sc, hdc, 2 dc, hdc, sc) into each sc of Round 1 for fuller petals. Leave long tails for sewing so the flower sits slightly raised on pads of stitches for realistic dimension.
— Branch Surface Crochet (worked directly on RS of runner) :
Info :
Branches are worked with brown yarn as surface slip stitch lines connecting apple clusters. You will use the placement marks you made earlier. This technique is surface slip stitch/chain embroidery along the texture of the panel to create a continuous vine/branch across the runner.
Round 1 :
Thread brown yarn onto a yarn needle or use crochet hook for surface slip stitch. From the first apple position, work a chain of surface slip stitches following RS markers to the next apple position, making slight forks for leaf attachment points. Work across entire runner connecting apple centers in a flowing vine. Secure ends on WS and weave long tails. (variable)
Info :
Work slowly: use pins to hold a thread path if needed. Surface slip stitch sits flat and is visible as a thin raised line. For a chunkier branch, use a row of sc worked directly into the background stitches around the path, placing 1-2 sc per background stitch to build thickness.
— Assembly & Placement of Appliques :
Info :
Layout all appliques on RS of runner according to the markers placed earlier. Position apples centered on marks; arrange leaves in pairs flanking the apples and place blossoms clustered around the branch intersection for natural balance. Use pins to secure pieces firmly and step back to check overall balance before sewing.
Round 1 :
Using long tails from each applique and a yarn needle, sew each apple onto the panel using a whip stitch or mattress stitch, working through both apple and panel loops to create invisible joins. Start sewing at top curve and work around, keeping tension consistent so applique lies flat. Secure and weave ends into panel.
Round 2 :
Sew leaves onto the branch: attach the leaf bases to the brown surface branch with small hidden stitches. Angle leaves slightly outwards. Add 2-3 leaves per apple as pictured: usually one pair near the top and one single lower leaf depending on spacing. (variable)
Round 3 :
Sew blossoms onto runner, positioning them near leaves and at branch forks. Use small stitches to lift the flower slightly off the surface for dimension. Stitch secure centers with several passes of yellow yarn or use small yellow felt/embroidered pips for a finished look. (variable)
Info :
Work on a flat non-slip surface while sewing to keep panel from shifting. Use T-pins to hold elements while you make final passes. For extremely secure attachment, sew around each applique twice with short stitches.
— Inner Decorative Edge (Optional Picot Row) :
Info :
Before scalloped border, some makers like to add a narrow reverse-single-crochet or picot row in cream to neaten the outer edge of the panel. This is optional and not required for the scalloped finish but results in a crisp junction.
Round 1 :
With cream on RS, attach at corner. Work reverse sc (crab stitch) around entire panel evenly: sc in each st across edges and 3 sc in each corner. Join and fasten off. (counts variable by side)
Round 2 :
Optional picot row: ch 3, sl st into same st, skip 2 sts, sl st into next st; repeat around to create a subtle dotted row between panel and scallop. Fasten off. (variable)
— Scalloped Border in Cherry Red :
Info :
Scalloped shell border frames the runner and matches the apples. Shells are created with 5 dc shells placed every 3 sts with 1 sc spacing. For even scallops, count stitches along each edge and adjust placement to have shells end centered on corners.
Round 1 :
Attach red yarn at any corner on RS. Ch 1, sc in same st. Continue sc evenly across the edge with 1 sc per row end stitch, placing 3 sc in corners to maintain neat turning. Work completely around. Join with sl st to first sc. (variable by side)
Round 2 :
*Skip 2 sts, 5 dc in next st (shell), skip 2 sts, sc in next st; rep from * around each straight edge. At corners work (5 dc, sc, 5 dc) into corner sc cluster to create rounded corner. Join and fasten off. (number of shells depends on panel length)
Info :
For a deeper scallop like in the photo, use 7 dc for shells on longer edges and 5 dc on short edges. Adjust shell size so scallops remain proportional to apple size. Block scallops to open shells nicely.
— Final Finishing Touches :
Round 1 :
Weave in all remaining ends on WS using yarn needle. Trim tails close to stitches. Use steam blocking or wet block to lay runner flat: pin to exact rectangular measurements and allow to dry completely. This will flatten the textured background and open the scallop shells.
Round 2 :
Using a blunt-ended embroidery needle and brown yarn, add tiny extra twig textures or small knot accents at branch forks for extra realism. Work sparingly to avoid cluttering the clean design. (optional)
Info :
If any appliques lift after first wash/use, reinforce with additional hidden stitches. For machine-washability, use superwash yarns where possible and avoid glued embellishments. Hand wash cold and dry flat for best longevity.
— Alternate Construction Notes (Joining Squares Approach) :
Info :
If you prefer working in modular squares: make panels 6-apples long as separate rectangular strips and join with whip stitch or slip stitch join. Ensure matching row counts so joins lie flat. Add border after joining all strips into final length.
— Sizing Variations & Color Swap Tips :
Info :
To size up: use bulkier yarn and increase foundation chain (maintain stitch multiple for texture pattern). To size down: switch to DK weight and smaller hook. For seasonal versions, swap apple red for orange and blossom white for cream for a warm autumn palette.
Info :
For a denser, more table-heavy runner, work base panel in sc only rather than hdc alternation; this will make the panel firmer and show appliques slightly more raised.
This Red Apple Orchard table runner combines classic country charm with modern, layered applique technique — perfect for brightening a kitchen table or giving as a thoughtful handmade gift. Each apple, leaf and blossom brings a little bit of orchard magic to your home, and the scalloped red border finishes it with a cheerful frame. Take your time placing each applique and enjoy the meditative process of assembly — the result is a warm, homey centerpiece you�ll be proud to display. 🧶🍎✨