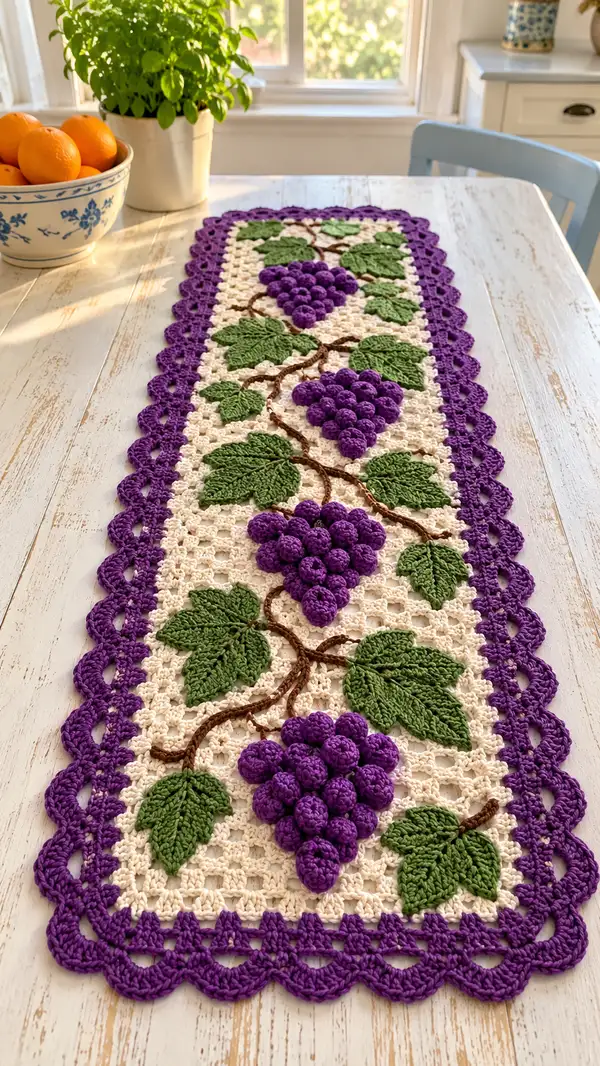
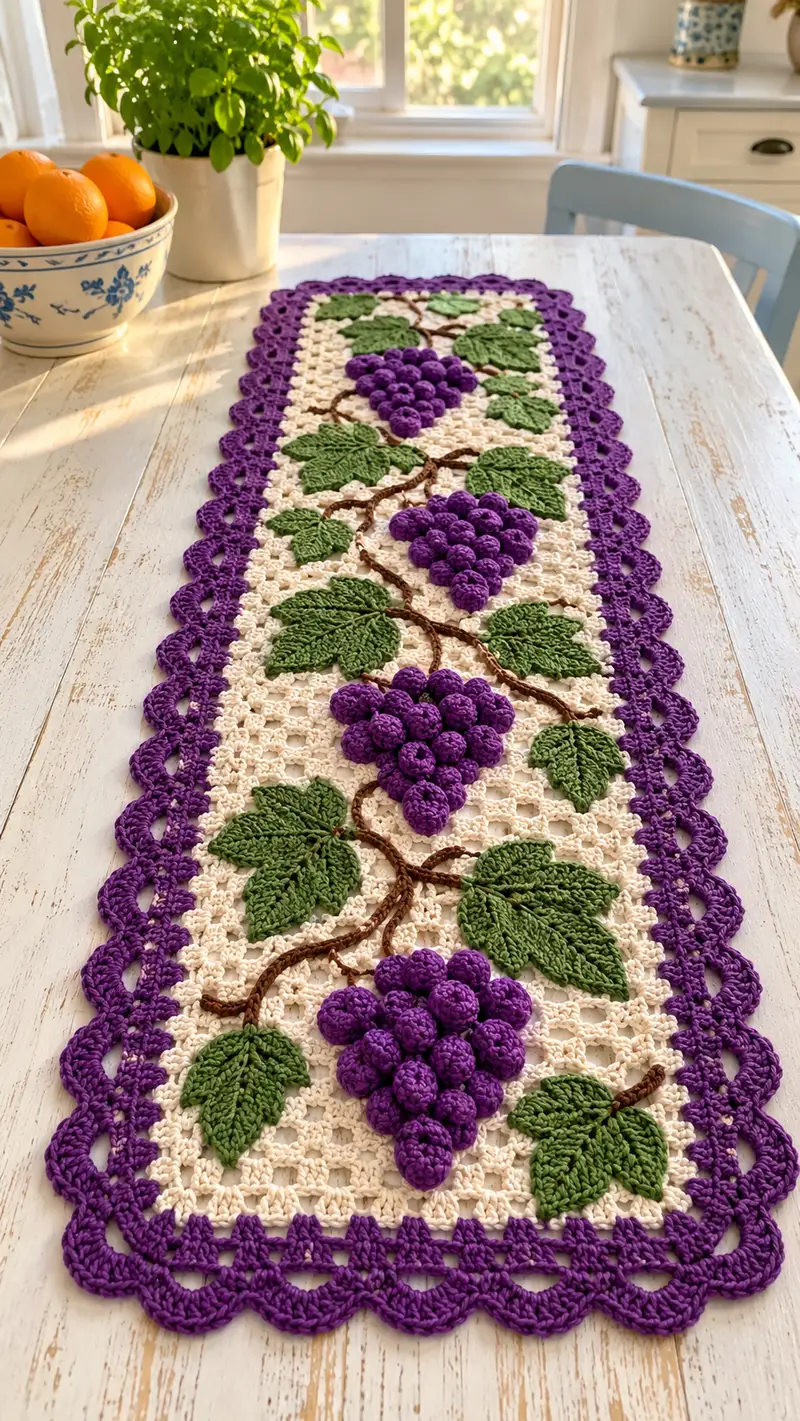
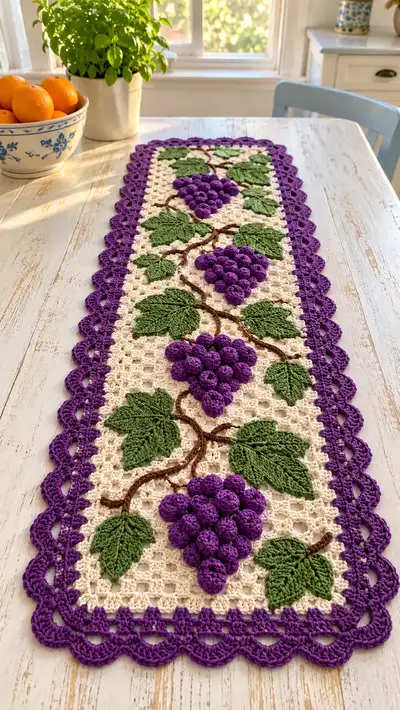
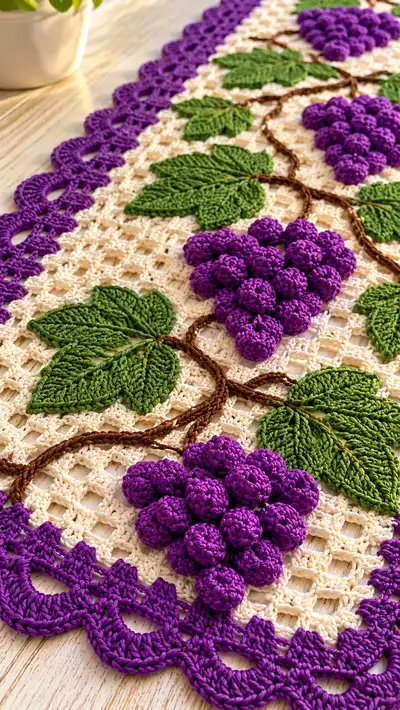
This elegant Purple Grape Vineyard Table Runner features textured 3D grape clusters, detailed leaf appliques and a delicate scalloped purple border on a soft cream filet mesh background. The runner's rich purple grapes, verdant leaves and twisted brown vine bring a vineyard-inspired centerpiece to any table. Worked in cotton yarn for a crisp finish, the layered surface detail creates beautiful shadow and texture perfect for dining or seasonal decor.
Progress Tracker
0% Complete
— Materials & Gauge :
Info :
Gauge provided for reference: 10 cm/4 inches square = approximately 12 dc x 6 rows in worsted cotton using 3.5 mm hook (tension will affect final size). Finished runner shown is approximately 10" wide x 40" long. Adjust foundation chain to change width, and add or subtract panel row repeats to change length.
— Abbreviations & Notes :
Info :
All rows are worked back and forth unless otherwise noted. Turning chain counts as first dc where specified. Use stitch markers to mark the first stitch of each row if you prefer. Block the main panel flat before attaching appliques for best results.
— Main Panel (Filet Mesh Background) :
Round 1 (Foundation) :
Chain 101 (this is the foundation chain width for a runner approximately 10" wide; adjust by multiples of 2 for your desired width). Turn.
Round 2 :
Dc in 4th ch from hook (counts as dc and ch-2 space), *ch 2, skip 2 ch, dc in next ch; rep from * across until 3 ch remain, dc in last ch. (Total dc placements: 25 open squares across with 26 vertical dc columns; whole-row repeats maintain 101 foundation alignment)
Round 3 :
Ch 3 (counts as dc), turn. Dc in the ch-2 spaces across to form a mesh: *dc in the ch-2 sp, ch 2, dc in next ch-2 sp; rep across; end with dc in top of turning ch. (Total dc placements remain consistent across the row)
Round 4-56 :
Repeat Round 3 for rows 4 through 56 to create a rectangular mesh panel approximately 40 rows tall in the photographed runner. Each row maintains the established mesh and the stitch count across remains consistent because chains and dc placements align. (56 rows total including the starting mesh rows.)
Info :
Every 8-10 rows, check that the panel lies flat. If edges begin to ripple, block lightly or adjust tension. Place markers at even intervals along the top edge to help map applique positioning later.
— Edge Stabilization Row :
Round 57 :
With cream yarn, ch 1, turn. Work 1 sc in each dc and ch-2 space across the top and bottom edges (101 sc). This creates a solid perimeter base for the scalloped border to join to. Fasten off and weave ends.
Info :
Block main panel flat on a blocking board to exact finished dimensions now. Pin square and shape edges so scalloped border sits evenly when worked on the blocked panel.
— Scalloped Purple Border :
Round 58 (Attach Border) :
With purple yarn and 3.5 mm hook, join with a sl st to any corner sc. Ch 3 (counts as first dc), work 1 dc in same stitch, *skip 2 sc, (5 dc in next sc) - shell made, skip 2 sc, 1 dc in each of next 2 sc; rep across side to side. At corners work (3 dc, ch 2, 3 dc) in corner st to turn neatly. Continue around entire perimeter to the beginning. Join with sl st to top of ch 3. (Count shells to ensure they are evenly spaced; the blocked base helps ensure this.)
Round 59 :
Ch 1, sl st into the center dc of each 5-dc shell to create small picot-like anchoring; in each corner tr shell, work 3 sc across the corner chain-2 space. Fasten off and weave ends. The scallop depth is created by the 5-dc shells which lie flat on the blocked panel.
Info :
If you prefer a more delicate edge, substitute (3 dc shell) for 5-dc shells in Round 58 and adjust Round 59 accordingly. The purple border color provides a frame and matches the grape color.
— Grape Bobble (Individual Berry) — Make Many :
Info :
Each grape cluster is made of individual small, stuffed bobbles (mini spherical beads) crocheted in the round. Use 3.0 mm hook for tighter fabric so stuffing does not show. Each bobble is worked in continuous rounds and closed securely. You will make multiple identical bobbles and sew them into grape clusters.
Round 60 (Grape Bobble - Round 1) :
With purple yarn and 3.0 mm hook, make a MR. 6 sc in MR. (6)
Round 61 (Grape Bobble - Round 2) :
Increase in each st: 6 inc (12)
Round 62 (Grape Bobble - Round 3) :
(1 sc, 1 inc) x 6 (18)
Round 63 (Grape Bobble - Round 4) :
1 sc in each st around (18)
Round 64 (Grape Bobble - Round 5) :
(2 sc, 1 dec) x 6 (12)
Round 65 (Grape Bobble - Round 6) :
(1 sc, 1 dec) x 4 (8)
Round 66 (Grape Bobble - Closing) :
Make 4 dec (4). Fasten off leaving 8-10" tail for sewing. Lightly stuff each bobble with polyester fiberfill until firm but not overstuffed. Use tail to close fully and weave end inside the bobble. Make 12 bobbles to form one medium grape cluster. Repeat to make 5 clusters (total 60 bobbles) or adjust cluster counts to your design.
Info :
Consistency: make all bobbles to the same tension and fill density for uniform clusters. If you prefer raised but unstuffed bobbles, omit stuffing and close more tightly; they will be flatter but still three-dimensional.
— Grape Cluster Assembly (Cluster 1) :
Round 67 :
Lay out 12 bobbles in triangular cluster: base row of 5, middle rows of 4 and 3 above, or arrange as desired for a natural grape shape. Use a tapestry needle and purple yarn tail from each bobble to stitch each bobble to its neighbors with small whip stitches through the base of the bobble, catching a few mesh stitches of the panel beneath to anchor the cluster. Secure edges of cluster with additional sew-throughs so the cluster is stable.
Round 68 :
Stitch the entire cluster to the cream mesh so cluster sits flush; sew through the bottom bobble bases into several mesh intersections to prevent flipping. Weave in all ends. Repeat cluster assembly for remaining clusters (Clusters 2-5). Place clusters approximately centered in the mesh panel vertically so three clusters fit evenly along runner length, leaving space for leaves and vine between them. For the photographed layout use five clusters spaced evenly along the runner length.
Info :
Placement Tip :
Use pins to temporarily fix each cluster in place on the blocked panel. Step back and ensure spacing is visually even before sewing. If necessary, rearrange for symmetry.
— Leaf Applique (Medium Leaf) — Make 10 :
Round 69 (Leaf - Foundation) :
With leaf green and 3.0 mm hook, ch 10. Work 1 sc in 2nd ch from hook, 1 sc in next 2 ch, hdc in next 2 ch, dc in next 2 ch, tr in next ch (center tip), then work symmetrical decreases down the other side: dc in next ch, dc in next ch (or tr if you prefer more point), hdc in next 2 ch, sc in next 2 ch. Slip stitch to starting sc to close the leaf base. (Approximate stitches per leaf row vary with gauge; this creates a tapered leaf.)
Round 70 (Leaf - Edge & Vein Row) :
Work 1 sc evenly around the leaf edge to create a neat outline (approx. 18 sc total). In the center of the leaf ch 1, insert tapestry needle and embroider a central vein with brown or darker green yarn using series of sl st or backstitch from base to tip. Fasten off and weave ends.
Round 71 (Leaf - Detail Rows) :
Use leaf green to add raised veins by working 3 surface slip stitches branching from the center vein towards edges; use slightly thinner yarn to avoid bulk. Block each leaf lightly to flatten and shape the edges before sewing to panel.
Info :
Make 8-10 medium leaves and several smaller leaves for variety. Leaves can be varied by adding one extra chain in the foundation chain to make them slightly longer.
— Small Leaf Variation — Make 6 :
Round 72 :
Ch 7, sc in 2nd ch from hook, hdc in next 2 ch, dc in next 2 ch, hdc in next ch, sc in last ch. Work 1 sc around edge for tidy finish. Add embroidered vein as above. Make 6 small leaves to add filler around clusters.
Info :
Mix small and medium leaves around each grape cluster to simulate natural vine foliage. Block leaves flat and press lightly if needed before attaching.
— Twisted Vine (Braided Cord) :
Round 73 (Vine - Make Cord) :
With brown yarn, make a long chain roughly equal to the length needed to connect clusters in your layout (for the photographed runner chain approx 180-220 ch). Fasten off. Make three equal-length chains and braid them together to create a rope-like vine. Alternatively, work an I-cord or 3-strand crochet braid for a cleaner look.
Round 74 :
Secure one end at the top-most grape cluster base and twist/braid the vine between clusters, pinning into position. Use small invisible stitches with brown yarn to sew the braid to the mesh panel at frequent intervals (every 1/2" or at mesh intersections) to prevent shifting.
Info :
To create natural curvature, loop the braid into soft S-shapes between clusters and tie small overhand knots in the braid at vine junctions to mimic tendrils. Secure extra yarn tails by tucking under sewn stitches and trimming.
— Assembling Leaves and Vine with Clusters (Detailed Steps) :
Round 75 :
Pin the grape clusters to the panel in the desired positions. Pin larger leaves adjacent to the clusters so they overlap slightly. Work from center clusters outward, sewing leaves into place using small whip stitches from the leaf base to the mesh panel. Use matching green tails to finish securely.
Round 76 :
Attach smaller leaves around the clusters to fill gaps and provide visual balance. For leaves that cross the vine, sew the vine first then layer leaves so some stitches anchor both vine and leaf at the same time for security.
Info :
Sewing tip: when stitching leaf bases and grape bases, take care to avoid visible stitch lines on the right side by sewing from the underside of the panel. Pass the needle through a few times to lock applique in place.
— Decorative Embroidery Details :
Round 77 :
With thin brown or darker green yarn, embroider tertiary vines and tendrils using a basic backstitch or chain stitch on top of the braid for delicate branching. Add small tendril curls by wrapping yarn into tiny chain loops and securing with a stitch at the base.
Round 78 :
Use a slightly darker green yarn to embroider a few leaf veins if desired. Stitch sparingly to add depth without making the applique too heavy.
Info :
Embroidered veins should be subtle; work small stitches and check the front frequently to maintain a natural look.
— Additional Smaller Grape Cluster Assemblies (Clusters 2-5) :
Round 79 (Cluster 2 - Bobble 1) :
Repeat Rounds 60-66 to make bobble. Make 9-12 bobbles for Cluster 2. For the photographed runner Cluster 2 contains 10 bobbles arranged as 4-3-2-1 triangular layering.
Round 80 (Cluster 2 - Bobble 2) :
Repeat Rounds 60-66 to make second bobble.
Round 81 (Cluster 2 - Bobble 3) :
Repeat Rounds 60-66 to make third bobble.
Round 82 :
Continue to make required bobbles for Cluster 2 until you have the full complement (approx 10-12 bobbles). Assemble as per cluster assembly instructions, pinning layout, sewing each bobble to its neighbors and anchoring to the mesh panel.
Round 83 (Cluster 3) :
Repeat the bobble creation and assembly sequence for Cluster 3; place roughly one third of the way down the runner for balanced spacing.
Round 84 (Cluster 4) :
Repeat bobble creation and assembly for Cluster 4; place mid-runner between Cluster 3 and Cluster 5 for natural vine flow.
Round 85 (Cluster 5) :
Repeat bobble creation and assembly for Cluster 5; place near the opposite end of the runner from Cluster 1 to create repeating rhythm down the length.
Info :
When assembling additional clusters, vary the number of bobbles slightly (9-12) to avoid overly uniform clusters — small natural variation looks more like grapes.
— Leaf Placement and Finishing Touches :
Round 86 :
Pin medium leaves so that they overlap cluster edges slightly and the vine passes behind leaves in places to increase depth. Sew leaves by catching a few mesh intersections and a few stitches of adjacent bobbles where applicable to stabilize both elements.
Round 87 :
Fill small gaps with small leaves and tiny embroidered tendrils. Add a couple of tiny bobble grapes (3-4 bobbles) where you want accent pieces or a sense of grapelet scatter around main clusters.
Info :
Trim all yarn tails and weave them through a few stitches on the underside to hide them. Use matching color threads for invisible finishes.
— Final Blocking & Pressing :
Round 88 :
After all appliques and vines are attached, re-block the entire runner. Use pins to shape the scalloped border, flatten leaf edges and ensure grape clusters sit nicely. Lightly steam-block if yarn permits (check the yarn fiber care instructions). Allow to dry completely before use.
Info :
Blocking is essential to make the open mesh uniform and ensure that the scalloped border lies flat and even. Use a damp cloth and a low-heat iron for mercerized cotton, or steam block cautiously if yarn recommends.
— Care Instructions :
Round 89 :
Spot clean the runner as needed, hand wash in cool water with mild detergent if necessary and re-block while damp. Avoid harsh agitation which can distort appliques. Dry flat away from direct sun to preserve colors.
Info :
Because the runner has three-dimensional ornamentation, avoid machine washing or tumble drying. Store flat or rolled to protect grape clusters and leaves.
— Optional Variations & Adjustments :
Round 90 :
To make a longer runner, add more mesh row repeats in the Main Panel (each additional 10 rows adds approximately 6-8" length depending on gauge). To make a narrower runner, reduce the foundation chain by multiples of 2 and adjust the number of border shells so they remain evenly spaced.
Round 91 :
If you prefer flat grapes instead of stuffed bobbles, use popcorn stitch clusters worked directly onto the mesh panel. Substitute 3-dc popcorns worked in one stitch then anchored with sl st for each grapelet and assemble into cluster shapes.
Info :
Popcorn grapes save time and reduce bulk but will sit flatter; choose according to your aesthetic and storage preferences.
This Purple Grape Vineyard Table Runner brings a joyful, handcrafted centerpiece to your table with rich purple grapes, textured green leaves, and a graceful braided vine. The layered appliques and scalloped edge create depth and charm that guests will admire. Working this runner is a rewarding project—mixing mesh crochet, three-dimensional bobbles, and applique sewing to create a beautiful finished piece. 🧶🍇 Display it proudly or give it as a heartfelt handmade gift! 🌿