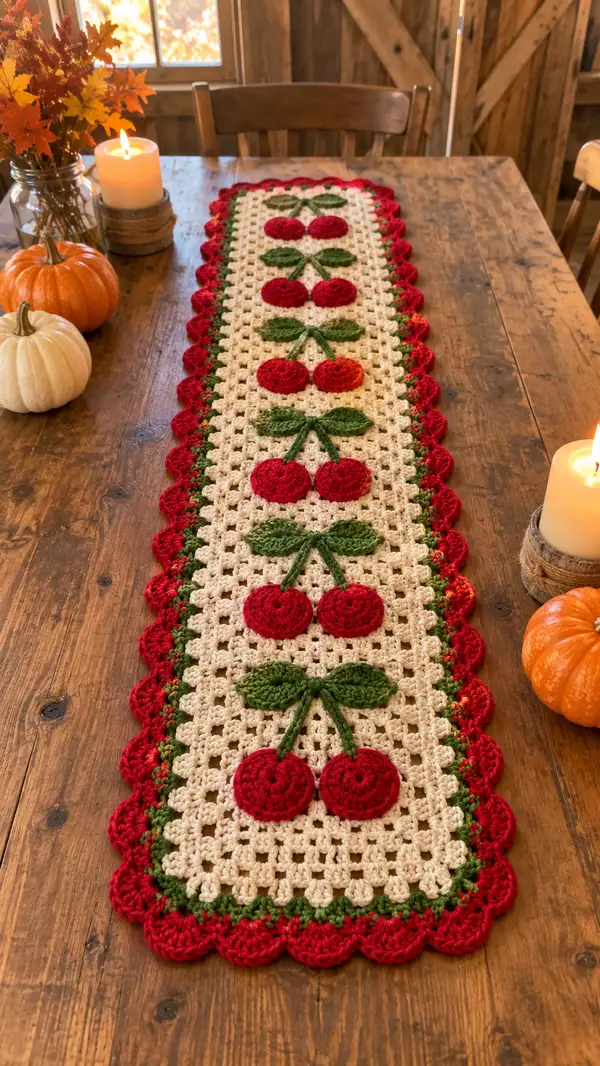
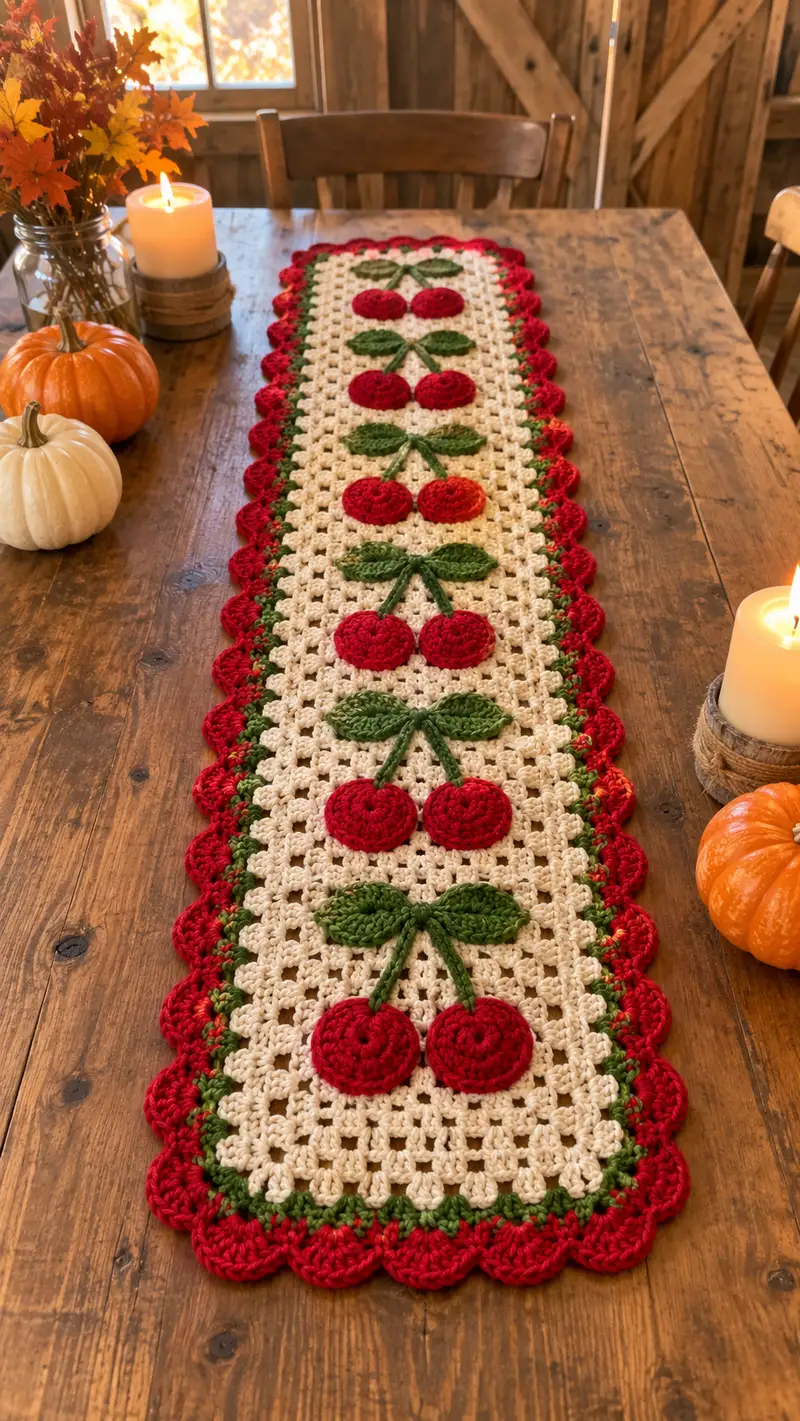
A warm, vintage-inspired table runner featuring rows of bright red crochet cherries, sculpted green leaves, and a scalloped red edge on a creamy mesh background. This long, narrow runner is perfect for autumn or holiday tables and adds hand-made charm to farmhouse, rustic, or country-style decor. The pattern uses simple repeated granny-style mesh for the center panel and worked-applique cherries and leaves sewn on top for bold, dimensional detail. Clear step-by-step instructions and generous assembly tips make this an enjoyable project.
Progress Tracker
0% Complete
— Center Mesh Panel (work foundation and mesh rows) :
Round 1 :
Chain 111. This will set the width of the runner; 111 is chosen as a multiple of 3 to create 37 cluster groups across. (Chain 111)
Round 2 :
Dc in 4th chain from hook (counts as first dc). *Ch1, skip next chain, 3 dc in next chain.* Repeat from * to * across to last 3 chains, ch1, skip next chain, dc in last chain. You should have 37 shell groups (each 3-dc cluster) separated by ch-1 spaces. (Approx cluster repeat count: 37 clusters)
Round 3 :
Ch3 (counts as first dc), turn. Dc in top of first cluster, *ch1, 3 dc in next ch-1 sp.* Repeat across, ending with dc in top of last cluster. Maintain 37 cluster positions across. (37 clusters)
Round 4-6 :
Repeat Round 3. Keep stitch count and cluster positions consistent. Work these rows flat to establish a smooth even mesh. (37 clusters each row)
Info :
Place a stitch marker in the first turn chain of each row to mark the beginning of the row; this keeps the mesh aligned and helps with counting for applique placement later.
Round 7-12 :
Continue repeating Round 3 for 6 more rows to build length. Check periodically with a tape measure for desired runner length. (37 clusters each row)
Info :
If you want a narrower runner, reduce the starting chain in multiples of 3; if wider, add multiples of 3. Maintain even clusters across rows to keep straight sides.
Round 13-24 :
Work 12 more rows of the same granny-style cluster: ch3, turn, dc in top of first cluster, *ch1, 3 dc in next ch-1 sp.* Repeat to end. By the end of Round 24 you will have 24 rows of mesh plus the foundation row—this creates the central background area where appliques will be positioned. (37 clusters each row)
Info :
Count rows from the bottom to determine placement for cherry rows. Typical spacing in the pictured runner uses 8–9 mesh rows between each cherry pair; plan placement before sewing to ensure even spacing.
Round 25-36 :
Work 12 additional rows of the same mesh cluster. This will extend the runner and allow placement of multiple cherry rows. Keep edges straight by working the final dc into the top of the last cluster each row. (37 clusters each row)
Info :
If your runner looks to be ruffling at the ends, block the panel by pinning lightly to dimensions while damp; the mesh responds well to gentle blocking.
Round 37-48 :
Work final 12 rows of mesh, bringing the total mesh rows to 48 (plus the starting dc row). At this point the runner body should be the desired length; add or remove sets of 6 rows as needed to customize length. (37 clusters each row)
Info :
Fasten off background yarn leaving a 12" tail for later weaving or to join border. Lay the mesh panel flat on your table to estimate appliques placement — in the sample there are five cherry-pair sections placed evenly down the length with about 8–10 mesh rows separating them.
— Cherry Appliques (make 12 cherries; two per set, 6 sets) :
Round 1 :
With Cherry Red yarn, make a magic ring. 6 sc in magic ring. (6)
Round 2 :
(1 sc, inc) x 6 → 9 sc. Work 1 sc in first st, then increase in next stitch alternately to shape a slightly oval disk. (9)
Round 3 :
(2 sc, inc) x 3 then (2 sc) x 3 → This is an alternative shaping round to maintain a tidy small circle. For clarity: Make 3 repeats of (2 sc, inc) around, producing a total of 12 sc. (12)
Round 4 :
(3 sc, inc) x 3 → Work around to reach 15 sc total. This remains a small, slightly domed circle. (15)
Info :
If you prefer a flatter cherry, stop at Round 3. For a slightly puffed cherry, round 4 gives more height—stuffing is optional for a subtle puff, use a tiny pinch of fiberfill if desired.
Round 5 :
Sl st into next stitch and finish with an even join; do not fasten off if you wish to add a bordering sc round for sewing stability. Alternatively, fasten off leaving a 6–8" tail for sewing to runner. (15)
Round 6 :
(Optional) With smaller hook (3.5mm) work 1 sc in each st around to create a tighter edge for sewing; place 15 sc around the disk and fasten off with a long tail. (15)
Info :
Make 12 of these cherry disks (two per cherry set). Vary a couple by using a slightly orange-tinted red on one side to mimic the photo's subtle shading if desired.
— Leaves (make 12 leaves or 6 double-leaf sets) :
Round 1 :
With Leaf Green yarn, ch 6. In 2nd ch from hook: sc, hdc, dc, hdc, sc (finish forming leaf foundation). This chain + worked stitches create a narrow leaf. (5 worked sts)
Round 2 :
Ch1, turn to work along other side of foundation chain: sc in first worked sc, hdc in next, 2 dc in center, hdc, sc. Sl st to first sc at base to close the leaf. You will have a pointed leaf shape with a visible center. (Approx 7–8 stitches around)
Round 3 :
Ch1, rotate and work 1 sc in base, sc around the outer edge to create a tidy border: sc in each of the outer stitches (approx 8–10 sc). Fasten off with a tail for sewing. (8–10)
Info :
For a fuller leaf, repeat Round 2 to add a second ridge: ch1, work another round of hdc and dc increases along the center, then sc around. Make 12 leaves total to form 6 leaf pairs.
Round 4 :
(Optional shaping) Using surface slip stitch in contrasting green, lay a center vein: starting at base of leaf, sl st along center with a few elongated stitches to mimic the photo’s raised vein. Fasten off and weave tail. (no stitch count)
Info :
Leaf size in sample measures approx 2–2.5 inches long; adjust chain foundation length to match scale of your cherries and mesh. Make leaves slightly wider than the stem to create the full, layered look.
— Stems and Branches (make 6 stems for 6 cherry sets) :
Round 1 :
With Leaf Green yarn, ch 40 (for each stem; length can be shortened/lengthened to match spacing). This creates the angled stem between two cherries and attaches leaves. (ch 40)
Round 2 :
Sl st in 2nd ch from hook and each chain across to form a sturdy cord-like stem. Fasten off leaving long tail for sewing. The slip-stitch cord will be relatively flat but strong for sewing onto the mesh panel. (approx 39 slip stitches)
Info :
Alternatively, make a chain and use a thin cord or wire covered in yarn for additional firmness if you want stems to be slightly raised. If using wire, wrap wire with yarn and then topstitch over the wrapped wire for safety.
— Assembly Prep (placement planning) :
Info :
On the mesh panel note the row numbers: choose to place the bottom cherry pair so that its bottom edge falls approximately 4 rows up from the edge to let the scallop border frame it. In the pictured sample there are 6 cherry-pair clusters spaced roughly every 8 rows. Mark the center column across the width (middle cluster of the 37) as the vertical centerline for each pair.
Info :
Lay the cherries in pairs so two disks sit side-by-side, their edges almost touching (about 1–2 stitches apart). Place a stem between them; leaves attach above the pair forming a 'V' or bow shape. Pin everything with T-pins or stitch markers before sewing to be sure spacing is even.
— Sewing Cherries, Leaves and Stems to Panel :
Round 1 :
With long tail from cherry disks, position the first cherry disk centered on the chosen mesh row. Using whipstitch or mattress stitch with the yarn tail, sew through the cherry edge into the dc cluster tops and ch-1 spaces to anchor it securely. Use 6–8 evenly spaced stitches around. Repeat for the paired cherry. (no stitch count)
Round 2 :
Position trimmed stem between the cherries so the stem meets top center of disks. Using the stem tail, sew the stem to the mesh along its length with small backstitches to hold it flat against the mesh and slightly raised. Fasten off and weave tails inside the mesh to the WS. (no stitch count)
Round 3 :
Place two leaves above the stem on either side forming a V. Sew leaves by the base only into the mesh and the stem so they sit slightly overlapped with the cherries below. Anchor leaves with a few tight stitches at their bases and along the mid vein if used. Repeat for all 6 sets along the length. (no stitch count)
Info :
For best results sew from the wrong side using a yarn needle and matching yarn so knots and tails are hidden behind the mesh. Keep stitches small so they don't show on the right side near the decorative cherries.
— Narrow Green Border (rounds to prepare for scalloped red edge) :
Round 1 :
With Leaf Green yarn, reattach yarn at a corner of the mesh on the WS by sl st through the turning chain post. Ch1, sc evenly into each turning chain and into each row-end space along the long side (work 1 sc into the top of each dc cluster and into the ch-1 spaces across the width and length). Keep tension even; work extra sc into corner spaces (3 sc) to keep corners square. Continue all around the panel. (sc count will equal approx perimeter spacing — roughly calculated as 2*(number of rows + chain groups) — keep stitches even)
Round 2 :
Turn to RS; work 1 sc in each sc around, placing 3 sc in each corner stitch to maintain shape. Fasten off and weave ends. This green ridge acts as a frame to anchor the scallops. (same sc count as previous round)
Info :
The green row should sit just above the mesh edge and make a narrow contrast line. If your green sc round pulls the edge in too much, switch to a 4.5mm hook for the border rounds to relax the tension slightly.
— Scalloped Red Border (scallops across long sides and short ends) :
Round 1 :
With Cherry Red yarn, join with a sl st to the first sc of the green ridge. Ch3 (counts as first dc), *skip 2 sc, 7 dc in next sc (shell), skip 2 sc, dc in next sc.* Repeat from * to * around the long edges creating evenly spaced shells. On short ends make sure shells are centered; work extra/smaller shells in end spaces as needed to avoid distortion. Sl st to top of starting ch3 to join. (shell count will be approx 12–14 shells per long side depending on perimeter; adjust spacing evenly)
Info :
Space shells evenly. If you find you have a few leftover sc near the corner, add an extra dc or a ch1 gap to even out spacing—tiny adjustments won't be noticeable in the scallop border.
Round 2 :
Ch1, turn. Work sc in dc and sc in the tops of shells to anchor the scallops: *sc across the 7-dc shell tops placing 7 sc, chain 1 and sc in next gap.* Alternatively, make a decorative picot in the shell tops by working (sc, ch3, sl st back into first ch) in every other shell for a lacy edge. Fasten off and weave in ends. (counts vary with shell count)
Info :
The pictured runner shows pronounced red scallops. For a fuller scallop, work (7 dc) or (9 dc) shells depending on how deep you want the curve. Keep shells consistent around to maintain symmetry.
— Final Finishing Rows and Touches :
Round 1 :
Inspect the runner for any loose ends from appliques; weave all tails to the WS using a yarn needle. Trim extra yarn close to the weave. Smooth the runner with a gentle steam or light spray and pin to a blocking board if the mesh looks uneven. (no stitch count)
Round 2 :
Optional: Use a contrasting red embroidery yarn to add a tiny center knot or French knot highlight to the center of each cherry for a realistic gleam. Use an embroidery needle to make 1–2 knots per cherry and secure on the WS. (no stitch count)
Info :
If you prefer a reversible runner, consider making the cherries and leaves as slightly flatter motifs and sewing them through both layers with uniform stitches; otherwise this runner is intended to be shown RS up only.
Round 3 :
Final blocking: Pin the runner to the dimensions you want (sample approx 10" wide by 48" long) and steam lightly or spritz with water. Let fully dry before unpinning to set shape. (no stitch count)
Info :
Measure your runner and adjust mesh rows or number of cherry sets before adding the scalloped border if you want a custom length. The mesh is modular so you can easily add or subtract sets of 6 rows to alter length without disturbing applique placement guidelines.
This cherry table runner blends cozy vintage charm with playful, dimensional appliques—perfect for holiday or farmhouse tables. Each cherry pair and sculpted leaf is a tiny burst of color against the creamy mesh, while the scalloped red border gives the piece a handmade flourish that everyone will notice. Enjoy the rhythmic, calming repetition of the mesh rows and the satisfying finishing work of sewing down the cherries; the result is a show-stopping table accent you'll be proud to display. 🧶🍒