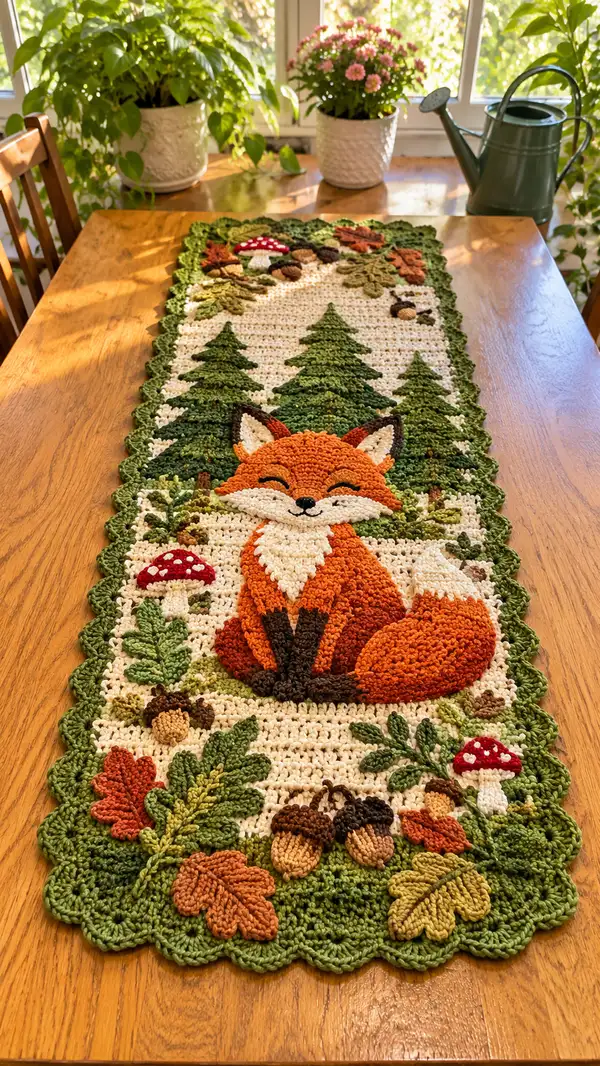
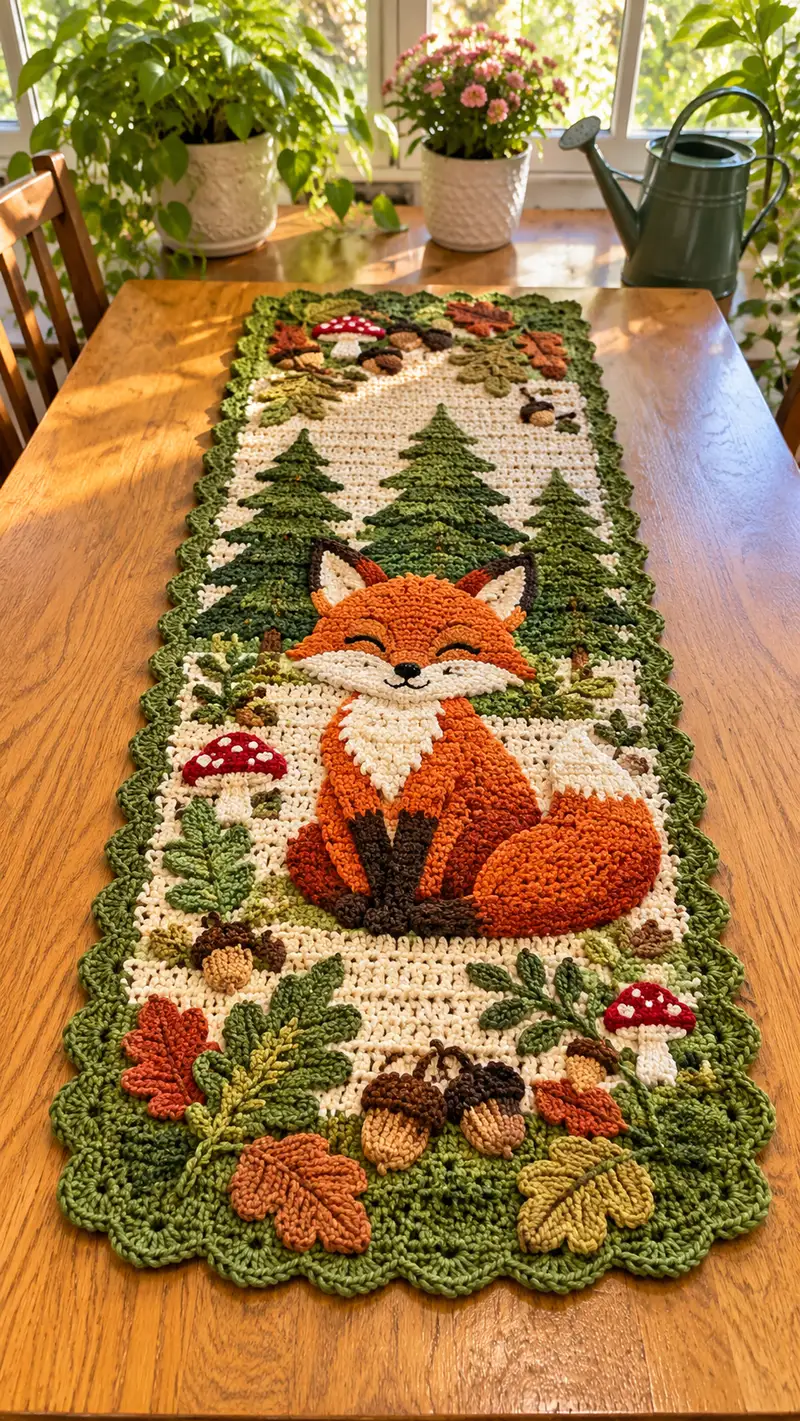
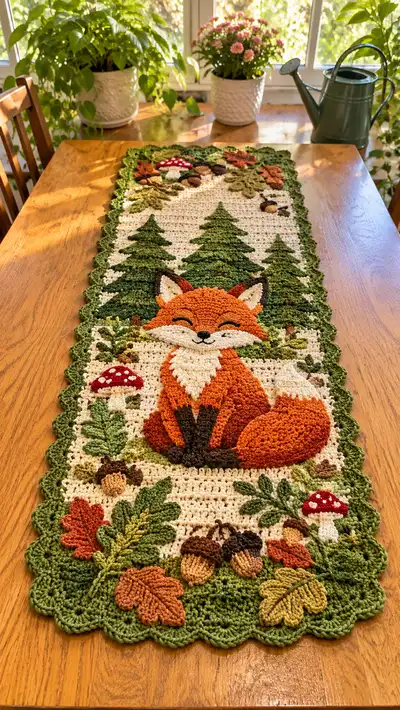
A warm woodland table runner featuring a cuddly red fox sitting in a forest clearing, surrounded by pine trees, mushrooms, acorns and autumn leaves. Worked as a flat panel with layered applique9 pieces and a scalloped leafy border, this pattern uses colorwork, textured stitches and surface embroidery for charming detail. Perfect as a seasonal centerpiece, it combines tapestry-style background work with separate crocheted motifs sewn on top for a dimensional look. Detailed instructions, placement guides and finishing tips included.
Progress Tracker
0% Complete
— Background Panel :
Info :
This table runner background is worked flat in rows in cream (ivory) yarn. Use 3.5mm hook for a firm dense fabric. Final dimensions for the sample are approximately 14" wide x 42" long; adjust foundation chain length for different size. The panel contains tapestry colorwork placeholders for tree trunk anchors only; most motifs are worked separately and sewn on.
Round 1 :
Foundation chain 120 (or desired width multiple of 4 plus 4 for turning). Ch 1, turn.
Round 2 :
Row 1: 1 sc in 2nd ch from hook and in each ch across (119 sc). Ch 1, turn.
Round 3 :
Row 2: 1 sc in each st across (119 sc). Ch 1, turn.
Round 4-10 :
Repeat Row 2 for a total of 10 rows worked (including row 2), keeping tension even. These first rows form the lower border area where fox and nearest motifs will attach.
Info :
Mark the center stitch of the foundation chain with a removable stitch marker to help later with centering the fox. Count from either end to verify symmetry before placing applique9.
Round 11-40 :
Continue working 1 sc in each st in rows, building the central field. Rows 11-40 will form the field where trees and fox are placed. Keep panel flat by turning at the end of each row and maintaining the same stitch count (119).
Info :
Every 10 rows, check that the panel is not cupping by laying flat; if the row edges begin to curve, block the panel or slightly loosen tension. Use tapestry crochet for subtle tree trunk colorwork if desired by switching to dark brown for individual stitches where trunks will be anchored (see placement diagram).
Round 41-70 :
Work another 30 rows of 1 sc in each st to achieve the top area for applique9 placement. Total rows should be approximately 70 for sample size; adjust to desired runner length by adding or subtracting even number of rows.
Info :
Fasten off leaving a long tail if you will crochet the scalloped border directly from the panel; otherwise fasten off and block the panel completely before edging. Blocking will flatten the panel and make placement and sewing of applique9 easier.
— Fox Applique9 - Head :
Info :
Fox head is worked in joined rounds (flat-textured oval) using orange for outer face and cream for muzzle. Work with 3.0mm hook to produce a slightly smaller tighter fabric than the background so applique9 sits raised. Start in magic ring.
Round 3 :
(1 sc, 1 inc) x 6 (18)
Round 4 :
(2 sc, 1 inc) x 6 (24)
Round 5 :
(3 sc, 1 inc) x 6 (30)
Round 6 :
(4 sc, 1 inc) x 6 (36)
Round 7 :
(5 sc, 1 inc) x 6 (42)
Round 8 :
(6 sc, 1 inc) x 6 (48)
Info :
At this point the head is a circular dome; to make a slightly oval / flattened face, work 2 rows even and then begin shaping on two opposite sides by adding a few extra increases in center-front area.
Round 9 :
Even round: 1 sc in each st (48)
Round 10 :
Even round: 1 sc in each st (48)
Round 11 :
(6 sc, inc) x 6 with inc in front-center area twice to lengthen nose area overall (54)
Round 12 :
Even round: 1 sc in each st (54)
Info :
Note eye placement: for this sewn-on head, do not use removable safety eyes; instead embroider closed eye curves later. Mark two points on round 12 approximately 8 sts apart for the eyes; measure from lower edge of head (the nose) about 10 rows up on the panel when positioning.
Round 13 :
(7 sc, inc) x 6 (60)
Round 14-16 :
Work 3 even rounds (60) to finish outer head shape
Round 17 :
(7 sc, dec) x 6 (54)
Round 18 :
(6 sc, dec) x 6 (48)
Info :
Begin flattening the back of the head to create a flat seam for sewing to background: fold the last three rounds flat and work a round of slip stitches through both loops across the back to make a stable flat rear edge if desired.
Round 19 :
(5 sc, dec) x 6 (42)
Round 20 :
(4 sc, dec) x 6 (36)
Round 21 :
Fasten off leaving long tail for sewing; do not stuff (this is flat applique9). Weave in inside but leave tail for attaching to panel.
Info :
Surface embroidery: using black or dark brown yarn and a fine tapestry needle, embroider two closed curved eyes on the head using chain stitch or backstitch after sewing in place. Embroider a small nose on separate small oval (see muzzle section) and sew to head center.
— Fox Applique9 - Muzzle and Chest :
Info :
Muzzle and chest are worked in cream. Muzzle is a small oval; chest is a larger V-shaped applique sewn under the head.
Round 1 :
For muzzle: mr, 6 sc in mr (6)
Round 3 :
(1 sc, inc) x 6 (18)
Round 4 :
(2 sc, inc) x 6 (24)
Round 5 :
Even round 24 sc; flatten slightly and fasten off leaving long tail for placement under head
Info :
Sew muzzle to lower center of head, then embroider small nose with black yarn: use satin stitch to fill a 5-stitch-wide oval. Add a tiny vertical nose-to-mouth stitch and two curved mouth lines curling up at the ends.
Round 6 :
For chest: ch 1, 6 sc in mr (6). Round 2: 6 inc (12). Round 3: (1 sc, inc) x 6 (18). Round 4: (2 sc, inc) x 6 (24). Round 5: (3 sc, inc) x 6 (30). Round 6: (4 sc, inc) x 6 (36). Work 2 even rounds (36) then shape into a V by decreasing on outer sides (see shaping below).
Round 7 :
(4 sc, dec) x 6 (30)
Round 8 :
(3 sc, dec) x 6 (24)
Round 9 :
Flatten into a V by stitching a line of slip stitches along a marked centerline and shaping the sides slightly; fasten off with long tail for sewing under the head overlapping the body applique top edge.
Info :
Pin chest to background first, then place head on top so chest forms a visible white triangle between the head and body. Sew around perimeter and add a couple of anchor stitches to the background to keep it flat.
— Fox Applique9 - Body and Legs :
Info :
Body is worked in joined rounds to achieve slightly raised cushions for the fox. Two front legs are small elongated ovals in dark brown that will be sewn onto the front bottom of the body. The body joins the panel and sits directly on top of background.
Round 1 :
Body base: mr, 6 sc in mr (6)
Round 3 :
(1 sc, inc) x 6 (18)
Round 4 :
(2 sc, inc) x 6 (24)
Round 5 :
(3 sc, inc) x 6 (30)
Round 6-8 :
Even rounds: 1 sc in each st for 3 rounds (30)
Round 9 :
(3 sc, inc) x 6 (36) - this begins the width for plump belly area
Round 10-14 :
Work 5 even rounds (36) to form body height
Info :
At round 14, position two front leg applique9s on the lower front edge before adding further depth. These legs will be small ovals in dark brown worked flat and sewn on top.
Round 15 :
(3 sc, dec) x 6 (30)
Round 16 :
(2 sc, dec) x 6 (24)
Round 17 :
(1 sc, dec) x 6 (18)
Round 18 :
Fasten off leaving long tail for sewing to the panel and for attaching tail piece later. Do not stuff; this is a flat raised applique9. Add surface texture by working a round of front-post sc around body perimeter with orange for a defined edge if desired.
Info :
Sew the body directly onto the background panel with long tail; align head/chest so composition looks centered on the lower third of the runner. Use mattress stitch around the edges and a few interior anchor stitches to secure center to background.
Round 19-25 :
Front leg (make 2): mr, 6 sc (6); Round 2: inc x6 (12); Round 3: (1 sc, inc) x6 (18); Round 4-6: even rounds (18) making an elongated oval; Round 7: (1 sc, dec) x6 (12); Round 8: 6 dec (6). Fasten off, leaving tail for sewing. Sew each leg to front lower edge of body with slight gap between them for natural sitting pose.
— Fox Applique9 - Tail :
Info :
Tail is made in two color zones: orange and cream tip. Work the tail in joined rounds producing a crescent shape. Make tail slightly stuffed for 3D effect and sew to right-hand side of fox body as seen in photo.
Round 3 :
(1 sc, inc) x6 (18)
Round 4 :
(2 sc, inc) x6 (24)
Round 5-8 :
Work 4 even rounds (24) to create the rounded fullness
Round 9 :
Switch to rust/darker orange for inner tail shading using Info technique below
Info :
Change to rust/darker orange in last yarn-over of round 8. Carry color neatly or fasten off and join color for a clean stripe. If stuffing, insert small amount of fiberfill as you develop shape—tail should be lightly stuffed, not firm.
Round 10 :
(3 sc, dec) x6 (18)
Round 11 :
(1 sc, dec) x6 (12)
Round 12 :
Join cream: (2 sc, inc) x3 with cream on outside edge to create tip flare (15). Round 13: work 1 sc in each st around (15). Fasten off leaving long tail for sewing. Shape tip edge by curving and stitching to body so the white tip sits visible.
Info :
Sew tail to the right back side of body aligning base to round 18-20 area of body applique. Add a few anchoring stitches through background to secure weight.
— Fox Applique9 - Ears (Make 2) :
Round 1 :
mr, 5 sc in mr (5)
Round 3 :
(1 sc, inc) x5 (15)
Round 4 :
Even round 15 sc. Change to cream for inner ear: work front inner ear by working 1 sc in the next 7 sts in cream and sl st back to base forming a cup. Fasten off leaving tails. Sew ears to top of head, angling slightly forward. Edging in dark brown around outer ear will give definition.
Info :
When sewing ears, place them on round 8 area of head spaced about 14 stitches apart (mark positions before sewing) and secure with multiple small whip stitches.
— Pine Trees (Make 3 - Large, Medium, Small) :
Info :
Trees are worked flat in rows using textured shell/cluster stitches to suggest pine boughs. Use 3.0mm for denser texture. Each tree is worked as a vertical triangle of staggered shells sewn to the background in a stacked manner so they appear layered behind the fox.
Large Tree - Round 1 :
Ch 3, Row 1: 2 dc in 3rd ch from hook (2 dc). Ch 2, turn.
Round 2 :
Shell: (3 dc, ch 1, 3 dc) into base st, ch 2, turn. Place shells every row to increase width.
Round 3-12 :
Work repeating shell rows, increasing at row ends by adding an extra dc at each end every other row to create triangular wedge. By row 12 shell count should be approx 11 shells wide spanning ~22-24 stitches. Fasten off, leaving long tail for sewing.
Info :
For texture vary greens between rows (light, medium, dark) to create depth. Securely sew large tree to background aligning trunk base around row 38 of the panel so trees sit behind the fox body.
Medium Tree - Round 1-9 :
Work as for large tree but for 9 rows resulting in about 8 shells width. Fasten off and sew slightly overlapping the large tree to the left or right to achieve layered forest look.
Small Tree - Round 1-6 :
Work 6 rows of shells for a narrow tree ~5 shell width. Sew behind fox and slightly offset for perspective.
Info :
Trunks: work small rectangle trunk for each tree in brown: ch 6, work 8 rows of sc (5 sts wide) to desired length, fasten off and sew under tree base to panel. Use tapestry stitch to anchor trunk top to the tree body for stability.
— Mushroom Motifs (Make 3) :
Info :
Mushrooms consist of a small cap and stem. Caps are worked in red with white embroidered spots; stems in cream and slightly stuffed for 3D effect. Place mushrooms near lower corners and near fox tail as accents.
Round 1 :
Cap: mr, 6 sc (6)
Round 3 :
(1 sc, inc) x6 (18)
Round 4 :
(2 sc, inc) x6 (24)
Round 5 :
Even 24 sc round, flatten cap as slight dome and fasten off leaving tail for sewing. Embroider white spots using small detached chain knots or French knots with cream/white yarn.
Round 6 :
Stem: mr, 6 sc (6); Round 2-5: 1 sc in each st (6) for 4 rows, lightly stuff with fiberfill, then flatten top and sew to underside of cap. Fasten off and sew mushroom in place on panel.
Info :
Vary cap sizes slightly for visual interest. For a taller stem, work two additional sc rounds. Securely stitch mushroom base to panel and add a few surface stitches around base to anchor.
— Oak Leaves & Ferns (Multiple Leaves) :
Info :
Leaves are worked flat and in the round for layered texture. Use a combination of light, medium and dark greens, plus a few orange and rust leaves for autumn contrast. Several shapes are used: oak lobed leaves and long fern-like leaves made from chain-and-single crochet ribs.
Oak Leaf - Round 1 :
Ch 8, Row 1: 1 sc in 2nd ch from hook, hdc, 3 dc, hdc, sc in last ch (counts produce a lobed bar). Turn and work back along opposite chain with mirrored stitches to create a symmetric leaf. Fasten off and shape with a line of slip stitch down center to form a ridge.
Oak Leaf - Round 2 :
For larger oak leaves increase initial chain to 12 and add additional dc groupings in center. Work BLO on final round to create a raised vein when stitched to panel.
Fern Leaf - Round 1 :
Ch 20, Row 1: sc in 2nd ch from hook, sk 1 ch, (2 sc in next ch, sk 1 ch) across to end to create feathery lobes. Fasten off and curve into a leaf; sew centerline using contrasting yarn for vein effect.
Info :
Make a variety of oak leaves in autumn colors (orange, rust) and greens; cluster them near the scalloped edges and near acorns. Sew a mix of overlapping leaves to create natural piles.
— Acorns (Make 4-6) :
Info :
Acorns are small two-part pieces: a bottom rounded nut in tan and a textured cap in dark brown worked in puff or bobble stitch to mimic the cap texture. Stuff acorn nut lightly and sew cap over top securing to background.
Round 1 :
Nut: mr, 6 sc (6)
Round 3-5 :
Even rounds (12) working a small oval. Round 6: (1 sc, dec) x4 (8). Lightly stuff and close with 4 sc dec (4). Fasten off leaving tail for sewing.
Round 6 :
Cap: Join dark brown to top edge; Round 1: sc around nut top edge in cap color then work a round of bobble/puff stitches into alternating sts to create textured cap approx 8-10 puffs. Fasten off leaving tail for sewing. Sew cap over nut and add tiny stem by embroidering a short vertical stitch in brown.
Info :
Sew acorns into clusters at runner corners and near leaves for natural composition; anchor each acorn with 3-4 small stitches through the background to prevent snagging.
— Surface Embroidery & Small Detailing :
Info :
After sewing major applique9 pieces, add surface slip stitch or chain stitch embroidery for small twigs, berries and additional texture. Use a surface slip stitch in a dark brown to draw tiny twig lines and small French knots for berry clusters in red.
Round 1 :
Embroider veins on leaves using a running stitch in contrasting green, and add small highlight stitches on trees using lighter green. Use black or dark brown to add subtle shadows under fox and mushrooms: a few whip stitches on the background will suggest ground shadow.
Info :
Take care not to over-embroider; the goal is subtle definition. Use matching yarns and a fine tapestry needle for neat control. Knot yarn ends on the WS and bury tails under applique9 pieces.
— Scalloped Leaf Border :
Info :
The scalloped border works directly around the panel edge using medium green. Work a round of sc around the entire panel, then scalloped rows composed of shells and chain loops to create a leafy scallop. Attach leaves and oak motifs on top of the scallop as final embellishments.
Round 1 :
With cream RS facing, join medium green at a corner. Work 1 sc evenly around panel edge placing 3 sc in each row-end to maintain flat corners. Join with sl st to first sc.
Round 2 :
'Scallop round': *(ch 3, 5 dc in next st, ch 3, sl st in next st)* repeat around to create scallops. Work 3-4 stitches between scallops to keep ripple even. Adjust by adding extra sc between scallops if needed to avoid ruffling.
Round 3 :
Leaf edging: Into each scallop, work sc, hdc, dc, tr, dc, hdc, sc to create leaf-shaped arches. Fasten off and weave in ends. Add small applique9 leaves sewn on top of scallops for layered look.
Info :
Block the finished runner flat after border is completed. Pin scallops carefully to shape and lightly steam or wet-block to open stitches and flatten motifs.
— Final Finishing :
Round 1 :
Weave in all ends on the WS. Go back to all applique9 edges and add a line of small whip stitches every 6-8 stitches for extra hold. Add extra interior anchor stitches at high-traffic placement points like where the tail contacts table or mushrooms attach to panel.
Round 2 :
Use a few short surface slip stitches in dark brown to emphasize shadows under motifs. Add tiny French knots to mushroom caps using white to create spots if not crocheted separately.
Info :
Final blocking: pin the runner to exact rectangular dimensions, steam gently to set shape. Allow to dry fully overnight before unpinning. Optionally press with a damp cloth on low heat if needed for extra flatness.
Round 3 :
Inspect for loose ends, reinforce any weak attachment points, and trim stray fibers. Your Red Fox in the Forest runner is complete and ready to display!
This Red Fox in the Forest runner is a labor of love that rewards with a charming centerpiece full of texture and personality. Each applique9 adds depth and life—especially the smiling fox and layered pine trees. The scalloped leafy border finishes the piece with seasonal flair and makes it a perfect autumn display. 🧶🍂 Share your finished runner and enjoy the cozy handmade atmosphere it brings to your table!