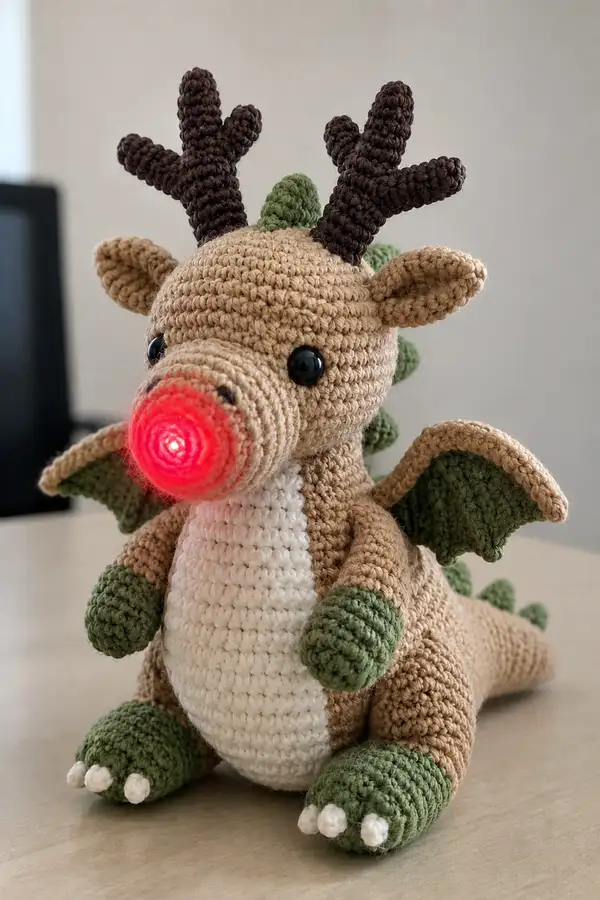
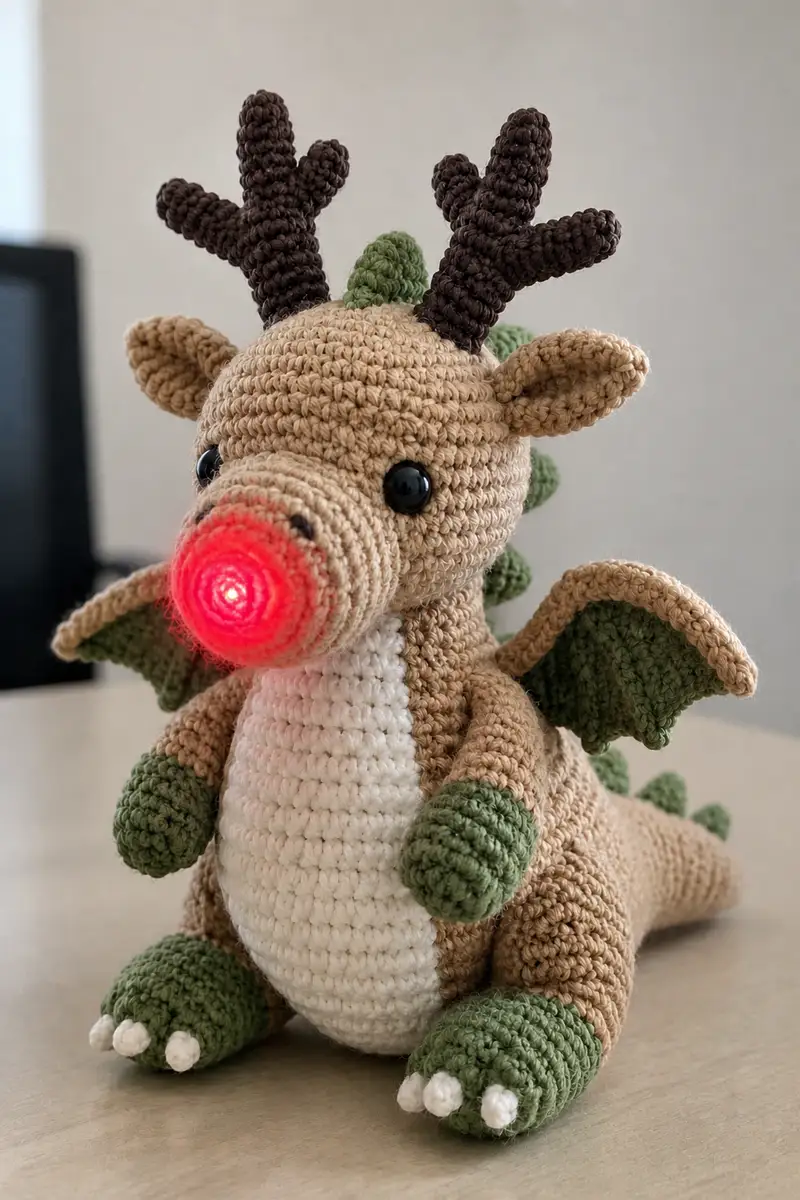
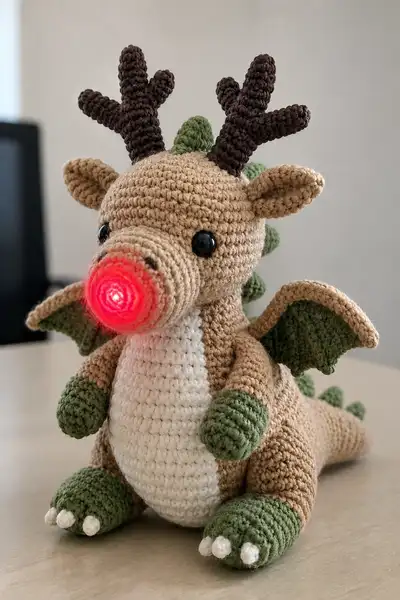
Make a whimsical Reindeer Dragon amigurumi with reindeer-style antlers, leafy green dragon spikes and wings, cream belly, and a glowing red LED nose. This plush sits cuddly and wide with detailed paws, layered ears, and textured antlers. The pattern uses simple amigurumi construction with clear round-by-round instructions, LED nose guidance, and lots of assembly tips to help you finish a polished, gift-ready friend.
Progress Tracker
0% Complete
— Head :
Round 1 :
6 sc in magic ring (6)
Round 3 :
(1 sc, inc) x 6 (18)
Round 4 :
(2 sc, inc) x 6 (24)
Round 5 :
(3 sc, inc) x 6 (30)
Round 6 :
(4 sc, inc) x 6 (36)
Round 7 :
(5 sc, inc) x 6 (42)
Round 8 :
(6 sc, inc) x 6 (48)
Info :
This builds a roomy head base. Keep rounds tight; place a stitch marker at the first stitch of every round. Switch to 3.0mm hook if you prefer a firmer fabric for facial shaping.
Round 9-13 :
1 sc in each st (48)
Info :
Insert 12mm safety eyes between rounds 14 and 15 later. Mark positions roughly 9-11 stitches apart center-to-center depending on desired expression. Do not secure eyes yet until snout placement is finalized.
Round 14-16 :
1 sc in each st (48)
Round 17 :
(6 sc, dec) x 6 (42)
Round 18 :
(5 sc, dec) x 6 (36)
Info :
Begin gently stuffing the head at round 17. Use small amounts of fiberfill and press evenly to avoid hard lumps. Leave the face area slightly less stuffed until the snout is attached to get a seamless join.
Round 19 :
(4 sc, dec) x 6 (30)
Round 20 :
(3 sc, dec) x 6 (24)
Round 21 :
(2 sc, dec) x 6 (18)
Info :
At rounds 20-21 check positioning for ears and antlers: mark the top of head center and measure 8-9 stitches to either side for ear placement and antler bases slightly behind the ears.
Round 22 :
(1 sc, dec) x 6 (12)
Info :
Fasten off leaving a long tail for sewing to the neck opening on the body. Finish stuffing so head is firm but still squeezable. Use ladder stitch to close the small hole if desired after attaching to body for cleaner neck seam.
— Snout and Nose Housing (LED) :
Info :
The snout is worked in tan as a spiral tube with a flat round nose plate that houses the LED. Plan for a 12-14 mm LED module. If using an LED with separate battery pack, make a small slit in the back of the snout base to route wiring or to attach the battery pack to the inside of the head later.
Round 1 :
6 sc in magic ring (6)
Round 3 :
(1 sc, inc) x 6 (18)
Round 4 :
(2 sc, inc) x 6 (24)
Round 5 :
(3 sc, inc) x 6 (30)
Round 6-9 :
1 sc in each st (30)
Info :
These rounds form the nose plate. Check the diameter at round 9 against your LED module — the LED should sit snug inside or just under this round. If your LED is slightly larger, continue one extra even round before shaping the tube of the snout.
Round 10 :
(3 sc, dec) x 6 (24)
Round 11 :
1 sc in next 24 sts (24) - start working in continuous spiral toward the snout tube
Round 12 :
(3 sc, inc) x 6 (30)
Round 13-16 :
1 sc in each st (30)
Round 17 :
(4 sc, inc) x 6 (36)
Round 18-21 :
1 sc in each st (36)
Round 22 :
(4 sc, dec) x 6 (30)
Round 23 :
(3 sc, dec) x 6 (24)
Round 24 :
(2 sc, dec) x 6 (18)
Round 25 :
(1 sc, dec) x 6 (12)
Info :
Leave a long tail and fasten off. Stuff the front portion of the snout lightly, but leave space behind the nose plate to tuck the LED module. Sew snout to head using the tail: position so nose is centered between eyes and slightly forward. Place LED inside the nose plate and secure with a few stitches; if your LED needs a battery pack, route it into the head cavity or sew the pack to the inside back of the head. Test LED before final closing.
— Body (includes tail shaping) :
Round 1 :
6 sc in magic ring (6)
Round 3 :
(1 sc, inc) x 6 (18)
Round 4 :
(2 sc, inc) x 6 (24)
Round 5 :
(3 sc, inc) x 6 (30)
Round 6 :
(4 sc, inc) x 6 (36)
Round 7 :
(5 sc, inc) x 6 (42)
Round 8 :
(6 sc, inc) x 6 (48)
Round 9-12 :
1 sc in each st (48)
Info :
At rounds 9-12 the body reaches full girth. Mark the first stitch of each round. Attach the belly panel later starting at round 11 area. Begin planning leg attachment positions: legs attach at rounds 6-10 of the body circumference depending on desired seating position.
Round 13 :
(6 sc, dec) x 6 (42)
Round 14-18 :
1 sc in each st (42)
Info :
These rounds form the chest and shoulder area where head will be sewn. Stuff body moderately starting at round 14 inward; keep stuffing fairly firm but leave some flexibility for leg seam shaping.
Round 19 :
(5 sc, dec) x 6 (36)
Round 20 :
(4 sc, dec) x 6 (30)
Round 21 :
(3 sc, dec) x 6 (24)
Round 22 :
(2 sc, dec) x 6 (18)
Info :
Start the tail taper at round 19 progressively. Keep stuffing firmer toward the rear for stable sitting. If adding a wire inside tail for shaping, insert it now before the opening narrows too much.
Round 23 :
(1 sc, dec) x 6 (12)
Round 25 :
Fasten off and leave a long tail for closing or attach tail fin if you made a separate tail piece. If you prefer the body to transition into a longer tail, continue rounds with decreasing pattern gradually to reach desired tail length (work additional 10-18 rounds decreasing very slightly every 4-6 rounds to lengthen).
Info :
If you plan to create separate spikes along the back, leave exposed bumps or stitch markers every 6-8 stitches along the top center line of rounds 8-18 to position spikes later.
— Belly Panel (Make 1) :
Round 1 :
6 sc in magic ring (6)
Round 3 :
(1 sc, inc) x 6 (18)
Round 4 :
(2 sc, inc) x 6 (24)
Round 5 :
(3 sc, inc) x 6 (30)
Round 6-12 :
1 sc in each st (30)
Info :
Belly panel is an oval when attached: keep it flat. Adjust rounds to match the length of the body chest area. Sew the panel to the front of the body starting at round 11 where the chest sits, using whip stitch and matching yarn for a neat finish.
— Arms (Make 2) :
Round 1 :
6 sc in magic ring with green yarn (6)
Round 3 :
(1 sc, inc) x 6 (18)
Round 4 :
1 sc in each st (18)
Info :
These rounds form the mitten paw. Stuff the paw firmly now. Change to tan yarn for the upper arm at the join for a seamless color transition by sl st into next stitch and fastening off green leaving a small tail to weave in.
Round 5 :
Join tan yarn. 1 sc in each st (18)
Round 6-9 :
1 sc in each st (18)
Round 10 :
(2 sc, inc) x 6 (24)
Round 11-14 :
1 sc in each st (24)
Round 15 :
(2 sc, dec) x 6 (18)
Round 16 :
1 sc in each st (18)
Round 17 :
(1 sc, dec) x 6 (12)
Round 18 :
6 dec (6) - fasten off leaving a long tail for sewing
Info :
Stuff upper arm lightly so the arm remains flexible. Sew arms to sides of body roughly at body rounds 14-16, spacing them evenly from the center front seam and slightly forward so the paws rest on the belly when seated.
— Legs and Feet (Make 2) :
Round 1 :
6 sc in magic ring with green yarn (6)
Round 3 :
(1 sc, inc) x 6 (18)
Round 4 :
1 sc in each st (18)
Round 5 :
(2 sc, inc) x 6 (24)
Round 6 :
1 sc in each st (24)
Info :
These rounds form a broad foot. Add small white claws by making three tiny bobble claws separately and sewing them to the front of the foot later. Stuff foot firmly now for stability.
Round 7 :
Join tan yarn. (3 sc, inc) x 6 (30)
Round 8-14 :
1 sc in each st (30)
Round 15 :
(3 sc, dec) x 6 (24)
Round 16 :
(2 sc, dec) x 6 (18)
Round 17 :
(1 sc, dec) x 6 (12)
Round 19-22 :
If you want a longer leg, continue working 1 sc in each st for 4 rounds (6) per leg to reach desired length, then fasten off leaving a long tail for attaching to body
Info :
Sew legs to bottom front of body at rounds 2-6 around the circumference for a stable seated position. Reinforce with extra stitching through the foot base and body to prevent sagging when the toy sits upright.
— Ears (Make 2) :
Round 1 :
6 sc in magic ring (6)
Round 3 :
(1 sc, inc) x 6 (18)
Round 4 :
1 sc in each st (18)
Round 5 :
(2 sc, dec) x 4, 2 sc (14)
Round 6 :
1 sc in each st (14)
Round 7 :
Fold ear slightly and sc across top edge to create a cup (work 7 sc across fold)
Round 8-10 :
1 sc around to tidy cup shape and fasten off leaving a long tail for sewing
Info :
Sew ears to head at rounds 19-21, spaced about 10-12 stitches apart from the center top, curving slightly forward for a friendly look. Add a few surface slip stitches inside the ear to create inner ear shaping if desired.
— Wings (Make 2) :
Info :
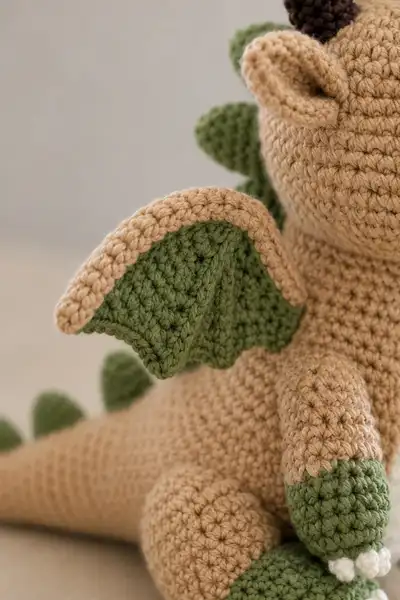
Wings are two-layered: inner membrane in olive green, then tan outer border worked around the membrane to create a ruffled edge. Each wing begins with a small flat oval and is shaped with scallops to create wing fingers.
Round 1 (Inner) :
6 sc in magic ring with green (6)
Round 3 :
(1 sc, inc) x 6 (18)
Round 4 :
1 sc in each st (18)
Round 5 :
(2 sc, inc) x 6 (24)
Round 6 :
1 sc in each st (24)
Round 7 (Shaping) :
Work scallops across one edge: *(sc in next 3 sts, 5 dc in next st, sc in next 3 sts)* across appropriate edge to create three scalloped 'fingers' (approx 3 scallops)
Round 8-9 (Outer Border) :
Join tan yarn and 1 sc in each st around the entire wing edge, placing 2 sc in each dc cluster to keep the edge smooth (approx 36-40 sc)
Round 10 :
Work 1 sc in each st BLO around to give a defined ridge and fasten off leaving a tail for sewing
Info :
Sew wings to the back of the body at rounds 11-14. Position the wing back slightly so it looks tucked. Use matching yarn to stitch the base of the wing to several rounds of the body for stability.
— Antlers (Make 2) :
Info :
Each antler is worked in dark brown as a tubular stem with small prong branches created by crocheting short tubes at specific points. The antler base will be sewn to the top of the head behind the ears between head rounds 19-22.
Stem Round 1 :
6 sc in magic ring (6)
Stem Round 2-4 :
1 sc in each st (6)
Info :
At round 4 begin first branch: attach a new mini tube into the chosen stitch. Branches are worked as short tubes 5-7 rounds long then flattened and sewn to the stem for a branching effect.
Branch A (create 1) :
6 sc in magic ring, 1 sc in each st for 4 rounds, flatten and sl st to stem. Fasten off leaving tail for sewing (approx 6-8 sts long)
Stem Round 5-7 :
1 sc in each st around stem (6)
Branch B :
Repeat Branch A at a higher stitch to create second prong (6 sts tube, 3-5 rounds), sew to stem
Stem Round 8-12 :
Continue 1 sc in each st (6) to desired antler height (approx 12 total rounds including branches)
Info :
Stuff antlers very lightly or not at all so they remain sturdy and less floppy. Insert a short piece of floral wire into the stem if you want them poseable; fold the wire ends inward and cover with yarn before stuffing. Sew antlers securely to head base between marked stitches behind ears.
Finish :
Fasten off leaving long tail for sewing into head. Make second antler mirror image of first.
— Back Spikes (Make 6) :
Round 1 :
6 sc in magic ring with green (6)
Round 3 :
1 sc in each st (12)
Round 4 :
(1 sc, dec) x 4 (8)
Round 5 :
1 sc in each st (8)
Round 6 :
Fasten off leaving long tail for sewing
Info :
Make 6 spikes and position them along the top center of the body from just behind the neck toward the tail (space evenly). Sew spikes through the base into the body rounds previously marked for precise spacing.
— Tail Fin (Optional Separate Piece) :
Round 1 :
6 sc in magic ring with tan (6)
Round 3 :
(1 sc, inc) x 6 (18)
Round 4 :
1 sc in each st (18)
Round 5 :
Switch to green and make a scalloped edge: *(sc in 3, 5 dc in next)* across to form 3 scallops, then join with sl st and fasten off leaving tail for sewing
Info :
Sew tail fin to the tapering end of the body. Fasten securely and weave in ends. If you integrated the tail into the body, you can skip this piece and simply add spikes and a slight shaping row to the final tail rounds.
— Small Details: Claws and Nostrils :
Tiny Claw (Make 6) :
Round 1: ch 2, 3 sc in 2nd ch, fasten off leaving tail for sewing. Sew three claws to each foot front using tail to stitch securely.
Nostril Embroidery :
Use a length of dark brown yarn and yarn needle to embroider two small nostrils on the snout plate just above the LED circle. Use small back stitches for subtle look.
Info :
Weave in all ends neatly. To hide LED wiring, tuck tail ends into the head seam and secure with a stitch or fabric glue so no wiring is exposed. Test LED functionality before final sewing.
— Finishing and Surface Details :
Info :
Use surface slip stitch to add eyebrow ridges or accents over the eyes for expression. You can also embroider a small smile below the snout with dark brown yarn. Add a few stitch lines along the wing membranes for texture using a running stitch technique with green yarn.
Final Assembly :
Follow Assembly instructions to sew all pieces together, checking symmetry frequently. Add a few hidden stitches through head and body to lock pieces in place for durability.
This sweet Reindeer Dragon is the perfect blend of holiday charm and fantasy whimsy — complete with antlers, leafy spikes, winged details, and a magical glowing nose. Every carefully crocheted piece comes together to form a plush that is both expressive and durable. Whether you gift it or keep it, this character is sure to delight and become a treasured companion. Happy stitching and have fun adding your personal touches! 🎄🧶