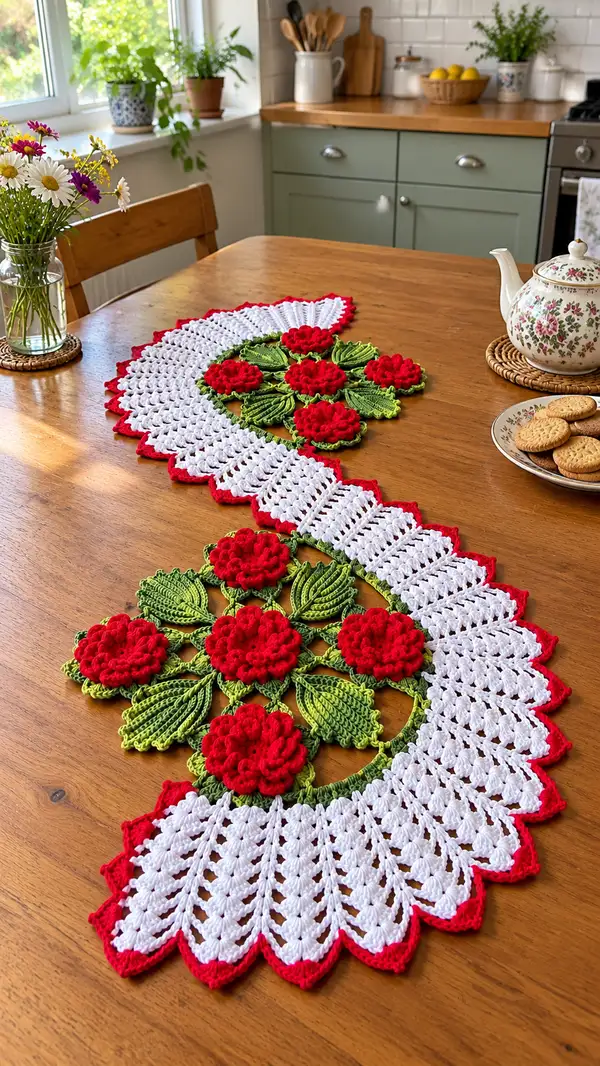
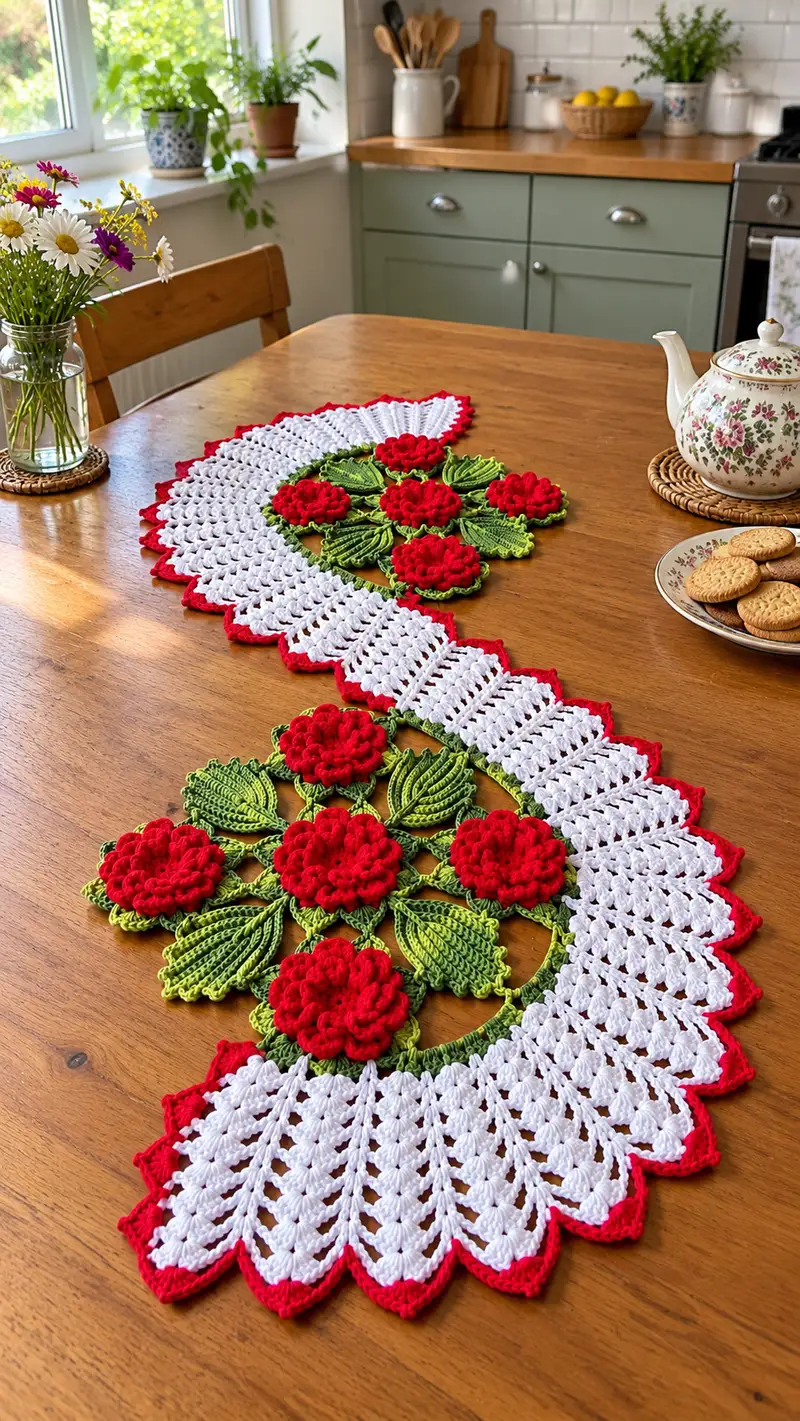
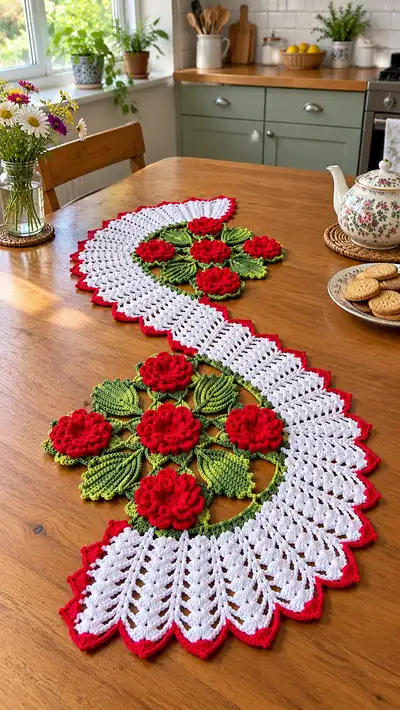
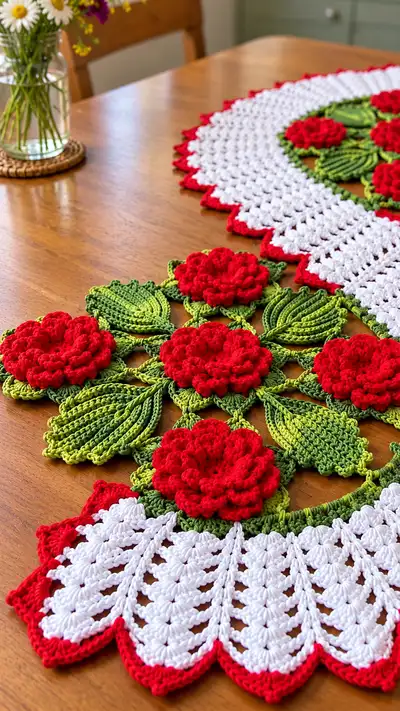
A graceful S-shaped table runner featuring layered red roses, textured green leaves, and a scalloped white fan edging with bright red trim. This decorative runner is worked in separate floral and lace motifs that are joined to form a flowing centerpiece. The design uses modular motifs, surface texture for petals and leaves, and a lacy scallop repeat to create a vintage-inspired, hand-crafted focal piece for your dining table.
Progress Tracker
0% Complete
— Overview :
Info :
This pattern is modular: you will make 'Rose Medallions' (each contains a 3D rose and 6 leaves), 'Leaf Units' where needed, a central 'Join Ring' that connects medallions, long 'Fan Lace' panels that form the wide white band, and a red scallop edging. The sample runner in the photo uses 7 rose medallions arranged in an S-line and two long fan panels joined around them. The instructions describe all motifs and detailed joining. Work loosely or tightly as indicated and block motifs before joining for best results.
Info :
Gauge and finished size: With suggested yarn and 3.5mm hook one rose medallion (rose + leaves + immediate join) measures ≈13–15 cm across; full runner sample measures ≈160 cm long and ≈30–35 cm at the widest points. Adjust number of fan repeats to lengthen/shorten runner.
— Rose Base (Make 7) :
Round 1 :
MR, 6 sc into ring (6)
Round 3 :
(1 sc, inc) x 6 (18)
Round 4 :
(2 sc, inc) x 6 (24)
Round 5 :
(3 sc, inc) x 6 (30)
Info :
Work base in bright red. This small round forms the inner hub where layered petals will be anchored. Keep tension even; the base should lie flat without cupping.
Round 6 :
1 sc in each st (30)
Round 7 :
1 sc in each st (30)
Info :
Prepare to work the first petal round into ch-spaces made of groups of sts. For 10-petal layout, we will create small loops around which petals are formed: see Round 8 for dividing the base into 10 loops (30 sts / 10 = 3 sts per section).
Round 8 :
(1 sc, ch 2, sk 2) x 10 (10 ch-2 loops evenly around base)
Round 9 :
Into each ch-2 loop: (ch1, 5 dc, ch1), sl st into next sc to secure (10 small loops made; base remains 30)
Info :
These small loops act as anchors for layered petals. Keep loops evenly spaced by checking that you land the sl st in the sc between loops.
Round 10 :
Working petals round 1: In each of the 10 loops work: (sl st, ch3, (3 tr in same loop), ch3, sl st) to form a tall petal shell. Repeat 10 times (base still 30)
Round 11 :
Fasten off red; join same red at base of first petal loop. Make inner petal layer: *ch1, (3 dc, 1 pop, 3 dc) in petal shell top sp; sl st to base;* repeat around for 10 inner bloom petals. (10 petals)
Info :
Popcorn technique :
Make a 5-dc popcorn: work 5 dc into same stitch, remove hook from last loop, insert hook into first dc of those 5, pull loop through to close the popcorn, ch1 to secure. Use consistent size so petals match.
Round 12 :
Make second petal layer anchored between each inner petal: *join in base space between petals, ch2, (4 dc, ch2, 4 dc) all in same anchor, sl st to next anchor* x10 (10 larger petals)
Round 13 :
Surface arrange petals: place petals so inner layer overlaps base shells. Fasten off and weave tails. The rose should present as two full concentric layers of petals; no change to base count.
Info :
After Round 13, lightly steam-block petals into shape or wet-block and pin with slight cupping to create natural petal curves. Do not overstretch stitches—cotton recovers well but keep shape gentle.
Round 14 :
Optional rose center swirl: rejoin red in center, ch1, (6 sc into MR formed by stitching into center base evenly) - create a small crown of 6 sc separated by sl sts to three of the base scs to form a tidy center. Fasten off. This is decorative only (6)
— Leaf Unit (Make 6 per Medallion) :
Round 1 :
Using mid green: MR, 6 sc into ring (6)
Round 3 :
(1 sc, inc) x 6 (18)
Round 4 :
Work base leaf shape: ch1, sc in next 9 sts along one side (9), ch2, turn and sc back along opposite side over remaining 9 sts (9) - leaf outline formed (18)
Info :
We will create raised ridges and veins using FLO/BLO and surface slip stitches. Keep stitch counts even across both sides for symmetrical leaf shape.
Round 5 :
Along tip: ch2, (3 dc in tip st), ch2, sl st back along side into each st; maintain 18 sts equivalent (no count change in the outline)
Round 6 :
Turn to make veins: Work in FLO around the leaf: 1 sc in each st FLO to create a slightly raised edge (18)
Round 7 :
Surface veins (use darker green): With yarn on surface, ch1, starting near base sl st up center for 7 sl sts to tip, then return with sl sts offset to mimic vein forks. Fasten off. (Decorative only)
Info :
Leaves are intentionally elongated. For more texture, add a second pass of surface slip stitches in lighter green on the opposite side. Block leaves flat with gentle curve on tip.
Round 8 :
Edge picot (optional): Rejoin mid green at base, sc evenly along outer edge, at each 3rd st work (sc, ch3, sl st in 3rd ch) to create tiny picot scalloping. Fasten off. (Edge decorative)
— Rose Medallion Assembly (Make 7) :
Round 1 :
Make central ring for medallion: Using green, MR, ch6 (counts as first sp), (ch3, sl st) x5 to form 6 loops around ring; sl st to join (6 loops)
Round 2 :
Work a round of sc around ring: *sl st into loop, sc 6 in loop, sl st into next loop* x6 (36)
Info :
Arrange six leaf attachment points around the green ring. The rose will sit on top of the ring; arrange leaves between petals so the medallion reads as a flower cluster.
Round 3 :
Sew rose to medallion center: place the finished rose over ring and use green or red yarn to sew rose base to ring by inserting needle through base sc rounds and ring sc evenly. Use 12 evenly spaced stitches to secure.
Round 4 :
Attach 6 leaves: position 6 leaves evenly around the ring between petals. Using green thread, mattress stitch each leaf base to the ring with 6–8 stitches per leaf. Fasten off and weave ends.
Info :
Pin rose and leaves in place before stitching to ensure even spacing and symmetrical medallion. The finished medallion diameter should be ≈13–15 cm depending on tension.
— Join Ring (Make 1 long ring chain to hold medallions) :
Round 1 :
Using mid green, ch 180 to form the length of runner skeleton (adjust for desired length). Join with sl st to form loose ring shape or work as chain to be held in S-curve - do not join if you intend to weave fans through the chain later.
Round 2 :
Working along chain, sc in each ch across to create a firm band: sc 180 (180)
Round 3 :
(1 sc, ch3, sk1) across to create small loops every other sc for medallion attachment: (sc, ch3, sk1) x 90 (90 sc + 90 ch-3 loops)
Info :
Mark attachment points with stitch markers where medallions will be sewn. In the sample arrangement medallions are attached at every 18–26 ch spacing depending on curvature. Pin the S-curve on your blocking mat to determine exact spacing, then transfer positions to the ring.
— Fan Lace Panel (Make 2 long panels) :
Round 1 :
Using white, ch 24 for one fan repeat base (this counts as chain for one fan scallop). Turn and sc in 2nd ch from hook and across (23)
Round 2 :
Ch3 (counts as dc), dc across in each st to end (23 dc)
Round 3 :
Fan increase row: *ch1, sk1, (5 dc cluster in next st), sk1, ch1, sl st into top of next dc* repeat across for 8 mini-fan groups (total 8 clusters)
Info :
Each fan panel in the runner is composed of repeating shell/fan motifs worked across the width. You will join many repeats together across the length—follow the repeat counts for consistent width. Work a gauge swatch: 4 fan repeats ≈ 16 cm width with worsted cotton and 3.5mm hook.
Round 4 :
Row of arches: ch2, 2 dc in each fan top to create taller shell, ch2 between shells to keep spacing (no change in repeat count)
Round 5 :
Edge shaping: *ch4, (sk 2 dc, sl st into base to create small leaf point), ch2, sl st* across. This sets up the scallop points to be contrasted in the red edging.
Round 6 :
Repeat Round 2 across every fan repeat to create height (use white). Work until total row count reaches 10 rows high (each dc-row counts as 1). Maintain stitch counts per repeat across the panel to keep width consistent.
Info :
Work fan panels long enough to extend beyond the medallion cluster on both sides. The sample uses 18 fan repeats along the visible length for each panel. Block flat once finished to open the lacy fingers before joining.
Round 7 :
Decorative rib row: 1 sc in each st BLO across to create a textured ridge where the fans will be attached to the green join ring (counts remain per repeat)
Round 8 :
Fasten off white and weave ends. Make second identical panel.
— Joining Medallions to Join Ring and Fan Panels :
Round 1 :
Arrange layout on blocking mat: place join ring in an S curve and position 7 medallions on top, spacing them evenly. Use pins to secure fan panels either side so they form a continuous border around medallions. Mark attachment points carefully using stitch markers.
Round 2 :
Sew medallions to join ring at the ch-3 loops: use green yarn to ladder stitch through ring sc and the back edge of medallion base. Use approx 10–12 evenly spaced mattress stitches per medallion to secure (decorative counts only).
Info :
When attaching each medallion, angle it so that leaves sit beneath the fan band and roses sit above the fan band, preserving the layered effect. Adjust spacing between medallions to create the flowing S shape visible in the photo.
Round 3 :
Attach fan panels: with white panel BLO ridge aligned to ring top, use green or white to whip-stitch through both the panel ridge and ring sc to secure along the entire panel length. Place extra stitches at medallion junctions for strength.
Round 4 :
Where fan panels meet medallion leaves, stitch through leaf bases and panel loops using small sl st or single crochet joins to integrate the pieces. Fasten off and weave ends carefully so that joins are invisible on the right side.
Info :
Take frequent breaks to check alignment across the full runner length; small shifts during joining can create ripple or twist. Blocking the assembled runner after joining will help even out any small unevenness.
— Fan Panel Detail Expansion (additional rounds to widen and texture fans) :
Round 1 :
Return to white half-worked panel: rejoin white at base and ch3, dc across every dc from earlier rows to make fans taller: work 6 dc rows total (height becomes 6 dc rows across repeats)
Round 2 :
(ch2, sk1, 7 dc in next st, sk1, ch2, sl st in next st) repeat across fan repeat for increased shell fullness.
Round 3 :
BLO ridge repeat: 1 sc in each st BLO across to define the inner crease between fan repeats. This row acts as a firm attachment edge where it meets the green join ring. (counts per repeat unchanged)
Info :
You can make the fan panels wider by adding extra dc rows in the middle; each additional dc-row increases the fan height by ≈0.8–1.0 cm depending on yarn. Keep the number of fan repeats equal on both panels for symmetry.
— Red Scallop Edging (Work around entire outer edge) :
Round 1 :
With red, join in the outermost white shell peak: *ch1, sc evenly around outer edge to form base (work approx 4 sc around each fan point), then in the peak space work (sc, ch3, 3 tr, ch3, sc) to make a pointed shell* repeat across visible peaks. Maintain an even peak every fan repeat. (counts depend on runner length)
Round 2 :
Work a decorative picot or small shell to sharpen points: in each red peak work (sl st, ch3, 3 dc in same sp, sl st) to form a crisp scallop edge. Join and fasten off. This gives the bright red points seen in the photo.
Info :
For a double-row edging: after Round 2, work a second pass of sc along the back to tidy the edge and hide join stitches. Use contrasting or matching red for a clean finish.
— Leaf Ridging and Surface Detail (Optional shading) :
Round 1 :
Using a darker green, take long surface slip stitches along the central vein of each leaf from base to tip, then on return execute offset surface slips to mimic branchlets. This does not change stitch counts but adds visual depth.
Round 2 :
With a lighter green, outline leaf edges with single crochet to make the leaves pop against the white fans: 1 sc evenly around outer edge (approx 18–22 sc per leaf depending on leaf shaping).
Info :
Use small whip stitches to tack the leaf edge to the fan panel at a few spots if you want leaves to lie flat and not lift up when the runner is displayed.
— Final Blocking & Finishing :
Round 1 :
Lightly spray block the entire runner: pin into desired S-shape on blocking mat and pin each scallop point to produce crisp edges. Allow to dry fully (12-24 hours).
Round 2 :
Trim and weave in all ends. If any join stitches are visible, neaten by sinking ends into backside with tapestry needle. Optionally press lightly with a steam iron held above fabric—do not press directly onto cotton to avoid shine.
Info :
For long-term use, consider backing runner with a thin lightweight fabric or sew small discreet stabilizing stitches at frequent points along back to keep medallions from shifting during washing or movement.
This Rose Garden Table Runner celebrates traditional floral crochet with modern construction—layered 3D roses meet delicate lace fans for a standout centerpiece. Each medallion and leaf adds texture and charm, and the bright red scallops give the runner a polished finish. I love how the design feels festive yet homespun—it's perfect for special occasions or to brighten an everyday table. 🧶🌹✨