🧢 Beautiful ✨ Detailed πŸ’ Adorable

Sunflower Table Runner Pattern

Sunflower Table Runner Pattern
4.8β˜… Rating
8-10 Hours Time Needed
2.5K Made This
βœ‚οΈ

Intermediate Level

Ideal for those with basic crochet experience, featuring slightly more advanced stitches and techniques to expand your skills.

⏱️

All-Day Adventure

Requires 8-10 hours, ideal for a full day of immersive crocheting.

🏑

Cozy Accent

A warm touch for your space that transforms ordinary corners into inviting nooks filled with handmade charm.

🧢 Jump to Pattern ↓

About This Sunflower Table Runner Pattern

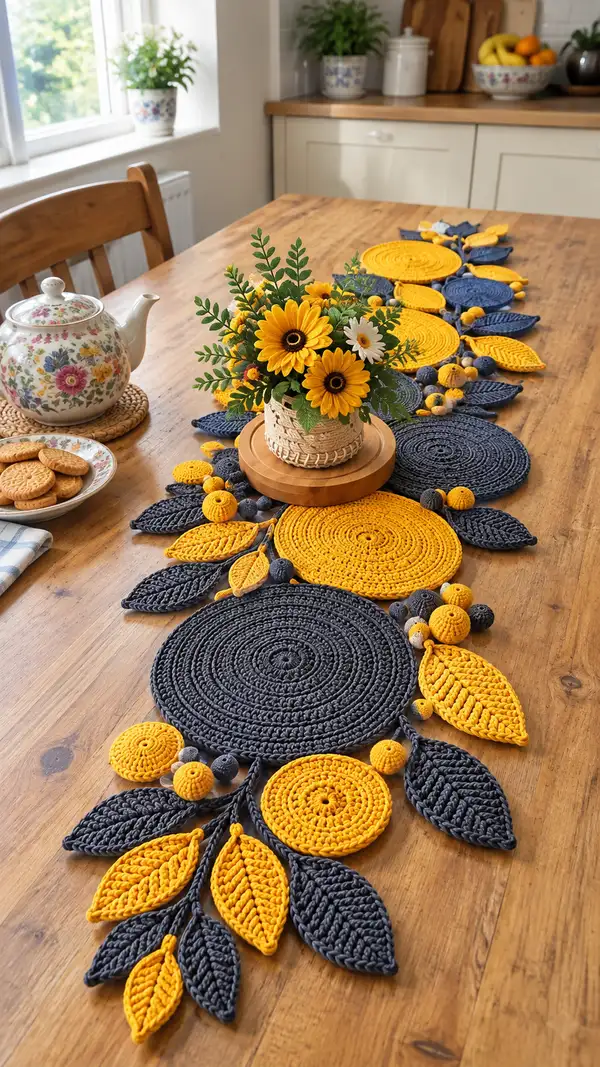
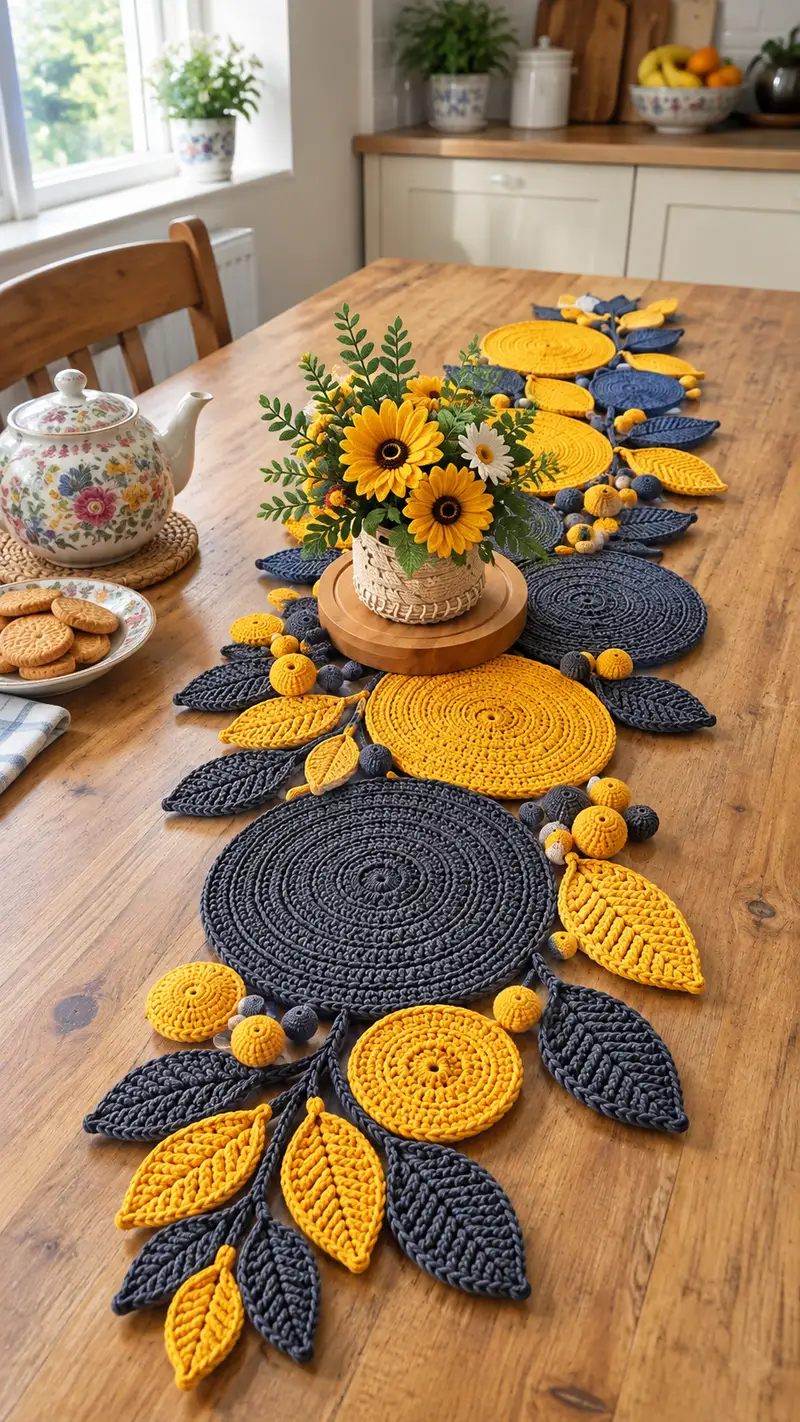
This pattern creates a modular table runner composed of large flat rounds, medium and small discs, elongated textured leaves and small crocheted bead clusters. The design alternates mustard yellow and charcoal for high contrast, with a few subtle light-grey beads for depth. Pieces are crocheted flat then joined with short braids and sewn beads for a soft but sculptural look. The result is an elegant, seasonal runner perfect for dining tables, sideboards, or centrepieces.

Sunflower Table Runner Pattern crochet pattern - detailed view of completed project

The pattern is modular and forgiving β€” you can repeat or omit motifs to fit your table length. All elements are worked in bulky cotton/t-shirt yarn for a structured, wipeable surface and a modern look.

Why You'll Love This Sunflower Table Runner Pattern

I love how this runner mixes graphic circles with organic leaves and tactile beads β€” it feels both modern and handmade. I also enjoy that each piece is small enough to crochet in an evening but together they make a big impact. The bold mustard-yellow paired with charcoal creates a graphic, joyful contrast that brightens any table.

Sunflower Table Runner Pattern step 1 - construction progress Sunflower Table Runner Pattern step 2 - assembly progress Sunflower Table Runner Pattern step 3 - details and accessories Sunflower Table Runner Pattern step 4 - final assembly and finishing

Switch Things Up

I absolutely love how modular this runner is β€” I often change the scale of the circles to suit different tables. Using larger discs makes a bold centerpiece while smaller repeats become a delicate table garland.

I like swapping colors too: try warm terracotta instead of mustard for autumn, or soft sage with cream for spring. You can also replace crocheted beads with wooden or ceramic beads for a mixed-material look.

For a quick swap, change the number of leaves around each disc or reverse the color dominance (more yellow leaves and fewer charcoal ones). The construction is forgiving, so experiment and make it your own.

Common Mistakes & How to Fix Them

βœ— Skipping stitch markers at the start of rounds leads to lost round counts and asymmetrical circles; always mark first stitch βœ— Working too loosely with bulky yarn creates floppy discs that won’t lie flat; use a hook slightly smaller than recommended for sturdiness βœ— Stuffing crocheted beads unevenly will make them lumpy; stuff in small amounts and shape carefully with a blunt tool βœ— Joining pieces without pinning first often yields uneven spacing; lay out the runner and pin motifs before sewing βœ— Not blocking discs and leaves can leave uneven spirals; wet-block or steam-block flat pieces for a professional finish βœ— Ignoring color changes and carrying yarn neatly can create visible stray strands; weave ends in carefully or carry inside where possible

Sunflower Table Runner Pattern

Create a striking sunflower-inspired table runner using bold mustard yellow and deep charcoal rounds, leaves and beaded clusters. This modular design combines large flat circles, layered smaller discs, textured leaves and crocheted beads to form a flowing centerpiece. Using bulky cotton or t-shirt yarn gives a clean, sculptural look that sits beautifully on a wooden table. The pattern includes detailed rounds, assembly tips and finishing notes so you can recreate the same elegant display.

Intermediate 8-10 Hours

Materials Needed for Sunflower Table Runner Pattern

β€” Main Fabric

  • 01
    Bulky weight cotton or t-shirt yarn (#5), approximately 350-450g in charcoal/dark grey (main large discs)
  • 02
    Bulky weight cotton or t-shirt yarn (#5), approximately 300-400g in mustard yellow (accent discs and leaves)
  • 03
    Small amount (50g) light grey or oatmeal for accent beads and small connectors
  • 04
    Optional: small contrasting color for decorative accent, 20-30g

β€” Tools Required

  • 01
    6.0mm (J) crochet hook for main work (or 5.5mm if you want tighter fabric)
  • 02
    5.0mm (H) crochet hook for smaller discs and beads (optional)
  • 03
    Yarn needle for sewing and weaving in ends
  • 04
    Stitch markers (at least 6)
  • 05
    Scissors
  • 06
    Tapestry needle with blunt tip
  • 07
    Pins and blocking mat or towel for flattening discs
  • 08
    Measuring tape or ruler
  • 09
    Polyester stuffing or scrap yarn for filling crocheted beads (small amounts)
  • 10
    Optional: fabric glue or hot glue for securing beads on underside

Progress Tracker

0% Complete

β€” Large Circular Placemat (Dark Charcoal) :

Round 1 :

6 sc in magic ring (6)

Round 2 :

6 inc (12)

Round 3 :

(1 sc, 1 inc) x 6 (18)

Round 4 :

(2 sc, 1 inc) x 6 (24)

Round 5 :

(3 sc, 1 inc) x 6 (30)

Round 6 :

(4 sc, 1 inc) x 6 (36)

Info :

Work tightly in the round. Using bulky yarn the circle will grow quickly; keep tension firm so the disc remains flat rather than cupping.

Round 7 :

(5 sc, 1 inc) x 6 (42)

Round 8 :

(6 sc, 1 inc) x 6 (48)

Round 9 :

(7 sc, 1 inc) x 6 (54)

Round 10 :

(8 sc, 1 inc) x 6 (60)

Info :

Check for flatness: if the disc starts cupping, slow down increases or work one even round to allow the fabric to relax.

Round 11 :

(9 sc, 1 inc) x 6 (66)

Round 12 :

(10 sc, 1 inc) x 6 (72)

Round 13-24 :

1 sc in each st (72)

Info :

Work these even rounds to build the placemat diameter. Count rows to repeat exactly for consistent size between discs. If you want a slightly larger placemat, add additional even rounds in multiples of 2.

Round 25 :

1 sc in each st BLO (72)

Round 26-36 :

1 sc in each st (72)

Info :

Round 25 in BLO creates a subtle ridge and firmer edge; this helps discs sit flat and gives a neat border. Fasten off and weave in ends. Make 3 large discs for the runner as pictured.

β€” Medium Circular Disc (Mustard Yellow) :

Round 1 :

6 sc in magic ring (6)

Round 2 :

6 inc (12)

Round 3 :

(1 sc, 1 inc) x 6 (18)

Round 4 :

(2 sc, 1 inc) x 6 (24)

Round 5 :

(3 sc, 1 inc) x 6 (30)

Round 6 :

(4 sc, 1 inc) x 6 (36)

Info :

Medium discs sit layered on the larger charcoal discs. Keep increases uniform to maintain a circular shape.

Round 7 :

(5 sc, 1 inc) x 6 (42)

Round 8 :

(6 sc, 1 inc) x 6 (48)

Round 9-20 :

1 sc in each st (48)

Round 21 :

1 sc in each st BLO (48)

Round 22-28 :

1 sc in each st (48)

Info :

Make 3-4 medium discs to balance the runner. For a denser look, make additional small discs to tuck between large motifs.

β€” Small Circular Disc (Accent) :

Round 1 :

6 sc in magic ring (6)

Round 2 :

6 inc (12)

Round 3 :

(1 sc, 1 inc) x 6 (18)

Round 4 :

(2 sc, 1 inc) x 6 (24)

Round 5-8 :

1 sc in each st (24)

Info :

These small discs are used as accent circles and bases for crocheted beads; make several in both colors. Leave a long tail when fastening off to sew beads or join.

Round 9-16 :

1 sc in each st (24)

Round 17 :

Fasten off leaving a long tail for sewing. Weave in ends or use tail to sew this disc to a larger piece.

β€” Textured Leaf (Large) (Make 8) :

Round 1 :

Ch 12, 1 sc in 2nd ch from hook, 1 sc across last 10 ch (11). Working along the opposite side of chain, 1 sc in each of the first 10 returned sts (total 21) - turn to work tip shaping

Round 2 :

Ch1, 1 sc in same st, hdc in next 5 sts, 3 dc across center tip, hdc in next 5 sts, 1 sc in next 1 st (21)

Round 3 :

Ch1, *sc in next 1, hdc in next 5, dc3tog across tip (3 dc worked tog), hdc in next 5, sc in next 1*, rep across both sides making symmetrical shaping (21)

Round 4 :

Ch1, 1 sc in each of the 21 sts working tightly to form a defined edge (21)

Info :

For the distinctive ribbing use BLO on rounds 5-8 to create raised veins. If desired, use a contrasting stitch in the center to mimic a midrib.

Round 5 :

1 sc in each st BLO (21)

Round 6 :

Ch1, *sl st in 2, hdc in next 3, sl st in 2, sc in 1* across to create textural dips (21)

Round 7 :

1 sc in each st (21)

Round 8 :

Fasten off leaving long tail for sewing. Block flat to shape the leaf and open the stitches so the ribbing shows.

Info :

Make 8 large leaves in charcoal and 6 large leaves in mustard yellow (or mix to your taste). Leaves can be slightly curved when sewn by batting the attachment edge tighter.

β€” Textured Leaf (Small) (Make 10) :

Round 1 :

Ch 8, 1 sc in 2nd ch from hook and across last 6 ch (6). 1 sc in each of the opposite chain sts to form base (total 11)

Round 2 :

Ch1, 1 sc in next 2, hdc in next 4, 2 dc in tip, hdc in next 4, sc in next 1 (11)

Round 3 :

1 sc in each st BLO to create a ribbed texture (11)

Round 4 :

1 sc in each st (11)

Round 5 :

Fasten off leaving long tail for sewing. Make 10-12 small leaves in both colors to use as filler pieces.

Info :

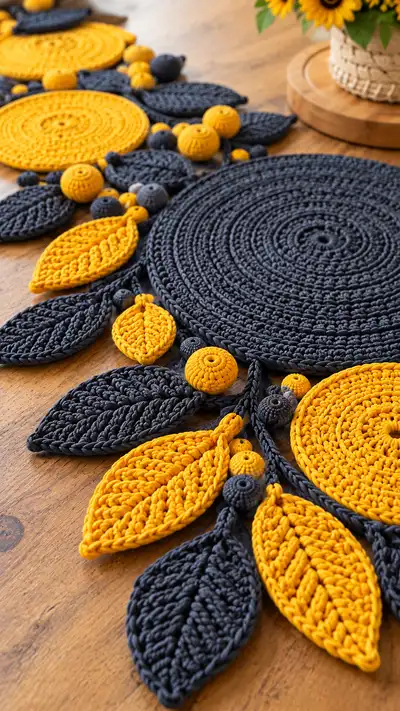
Small leaves tuck neatly between discs and under beads. Blocking them flat gives the neat braided-vein effect visible in the photo.

β€” Crocheted Bead (Large) :

Round 1 :

6 sc in magic ring (6)

Round 2 :

6 inc (12)

Round 3 :

(1 sc, 1 inc) x 6 (18)

Round 4 :

1 sc in each st (18)

Round 5 :

(4 sc, 1 inc) x 3 (21)

Round 6 :

1 sc in each st (21)

Info :

Begin stuffing firmly at this point. Use small amounts to avoid lumping. You can also use wooden beads inside for weight, crocheting around them.

Round 7 :

(4 sc, 1 dec) x 3 (18)

Round 8 :

(1 sc, 1 dec) x 6 (12)

Round 9 :

6 dec (6)

Round 10 :

Fasten off leaving long tail. Finish stuffing, sew opening closed and weave tail through several stitches to secure.

β€” Crocheted Bead (Small) :

Round 1 :

6 sc in magic ring (6)

Round 2 :

6 inc (12)

Round 3 :

1 sc in each st (12)

Round 4 :

(2 sc, 1 dec) x 3 (9)

Round 5 :

1 sc in each st (9)

Round 6 :

Fasten off leaving long tail. Stuff and close carefully. These smaller beads are used in clustered groups with the larger beads.

Info :

Make beads in both colors and in a couple of light grey accents. Crocheted beads add a handcrafted, cohesive look compared to wooden beads.

β€” Twisted Stem / Cord Connectors :

Round 1 :

Ch 30 (or desired length), sl st in 2nd ch from hook and each across to make a tight chain tube, or use sc in back bump to create a neat cord

Round 2 :

Fold chain and join ends with sl st, then work 1 sc in each st around the tube to form a sturdy cord (30)

Round 3 :

Twist the cord to create a rope; secure both ends and tack periodically with sl st for stability

Info :

Make several cords of varying lengths to link motifs. Braids and twisted cords soften transitions between discs and leaves and echo the photo’s tendrils.

β€” Alternative Leaf With Central Rib (Technique) :

Round 1 :

Ch 14, sc across then sc back along opposite side (total 26 sts)

Round 2 :

Work 1 sc in each st, but when you reach the central chain foundation work 3 dc in one stitch to form the tip (26)

Round 3 :

Working in BLO on next 2 rounds, 1 sc BLO to create raised vein effect (26)

Info :

This method creates a more pronounced single rib vein down the leaf’s center for a sculpted, botanical look.

β€” Edge Finishing For All Discs :

Round 1 :

With right side facing, join yarn in any stitch and work 1 rnd sc evenly around the edge, placing 2 sc in corner increases only if needed to avoid ripples

Round 2 :

1 rnd sl st for a neat edge or 1 rnd sc BLO for subtle ridge. Fasten off and weave ends to underside

Info :

Edge finishing unifies the look of the discs and prevents them from rolling or fraying with use. Choose the ridge if you want more texture.

β€” Quantity Summary :

Info :

Suggested pieces: 3 large charcoal discs, 3 medium mustard discs, 4 small accent discs, 8 large charcoal leaves, 6 large mustard leaves, 10 small leaves (mixed), 6 large beads, 12 small beads, and 6 twisted cords of varying lengths.

β€” Final Assembly Overview (Prep Before Sewing) :

Info :

Layout all pieces on a flat surface in the desired arrangement. Move pieces around until spacing is balanced. Pin leaves and discs in place and photograph layout for reference before sewing.

Assembly Instructions

  • Lay out the full runner on a large flat surface and arrange the discs, leaves and beads as pictured; take a photo to use as reference for stitching positions
  • Attach medium mustard discs to large charcoal discs by sewing through back loops using yarn tail from discs. Use whip stitch or mattress stitch and sew evenly around the overlap for a flat join
  • Sew leaves to the undersides of discs and between discs using long tails. Start sewing near the disc edge and work toward leaf tip, making small, hidden stitches to keep joins invisible
  • Use twisted cords to connect discs: tack one cord end to underside of a disc (between rounds 24-26), stretch to adjacent disc and sew securely; knot and weave ends to hide
  • Sew crocheted beads in clusters by threading tapestry needle with long tail and stitching through bead center and into discs or leaves multiple times for secure attachment
  • Once all pieces are joined, block the assembled runner lightly to ensure lies flat. Steam-block with caution or pin into shape and spray lightly with water, allowing to dry fully

Important Notes

  • πŸ’‘Use stitch markers consistently at the beginning of each round to avoid counting errors and maintain proper shaping
  • πŸ’‘Stuff beads gradually in small amounts to avoid lumps and ensure round shapes; use a blunt tool to push stuffing into small openings
  • πŸ’‘When joining pieces, sew from the underside so the top surface remains smooth and stitches are hidden
  • πŸ’‘Block discs and leaves flat prior to assembly for consistent shapes; pin pieces on a towel or blocking mat to dry
  • πŸ’‘Work tightly with bulky yarn to avoid visible stuffing and to ensure discs hold shape under tableware
  • πŸ’‘Weave in ends carefully and trim close; for extra security, catch ends in several cross stitches under the discs

This sunflower-inspired table runner marries bold geometry with organic leaf shapes to make a thoughtful, handmade centerpiece. Each disc, leaf and bead comes together to form a flowing composition that brightens any dining space. The modular approach invites experimentationβ€”make it longer, shorter, or a set of placemats with these motifs. I hope you enjoy every stitch and the warm glow it brings to your table! 🌻🧢

You ask,

we answer.

FAQs

What is the finished size of this runner?

When assembled exactly as written with bulky yarn and the suggested counts, the photographed runner is approximately 36-40 inches (90-100 cm) long and 10-12 inches (25-30 cm) wide at the widest point. You can repeat motif groups to lengthen it.

Can I use different yarn weights for this pattern?

Yes. Thinner yarn will create a more delicate runner and require more rounds to reach the same diameter; use a smaller hook accordingly. Thicker cord/t-shirt yarn will create a denser, sturdier runner with fewer rounds.

Do I need stuffing for the beads?

Small crocheted beads require tiny amounts of stuffing to retain their shape. For added weight and stability you can insert small wooden beads before finishing the crochet bead.

How do I ensure the discs lie flat and do not curl?

Maintain even increases and consistent tension. Blocking the discs while damp and pinning them flat will help relax the yarn and produce a flat surface. Avoid over-tightening the center rounds.

Can I wash this runner?

If using 100% cotton yarn, hand-wash gently and reshape while wet. T-shirt yarn may be machine-washable on a gentle cycle but check the yarn label; lay flat to dry to avoid stretching.

Can I substitute wooden beads for crocheted beads?

Absolutely. Wooden beads introduce weight and a mixed-material look. Ensure hole size allows sewing through the bead and secure with strong thread or glue if needed.

How many motifs should I make for a larger table?

For a longer table you can repeat the motif cluster groups. Each cluster as written spans about 12-14 inches; plan additional clusters as needed to reach your desired length.

How do I prevent holes showing when using bulky yarn?

Crochet with firm tension and consider using a hook one size smaller than the yarn label suggests. Work sc close together and avoid large gaps in joins. Weaving ends into inner overlaps helps hide any gaps.