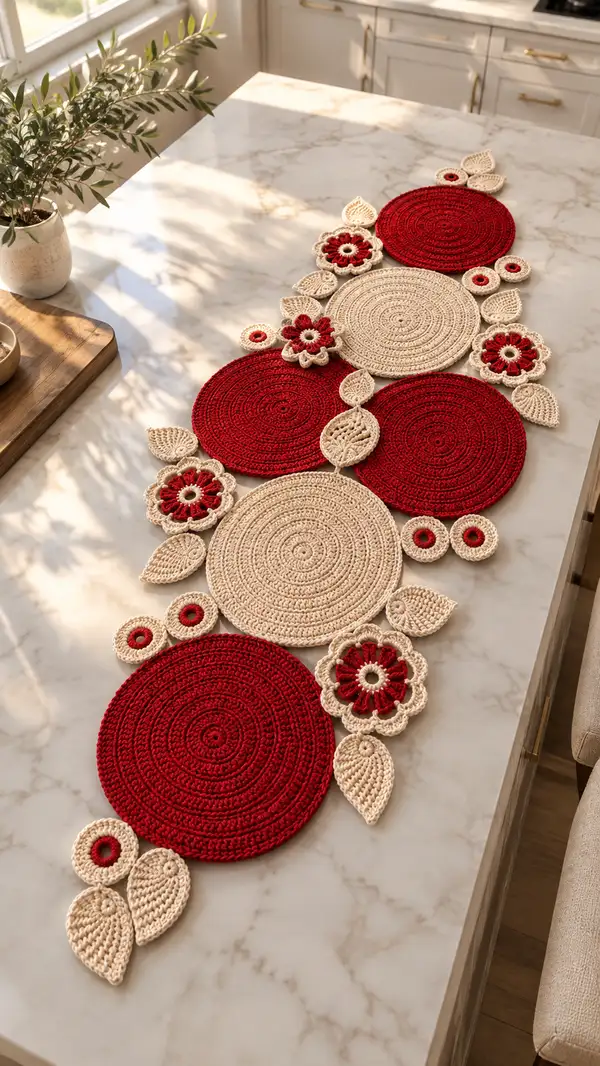
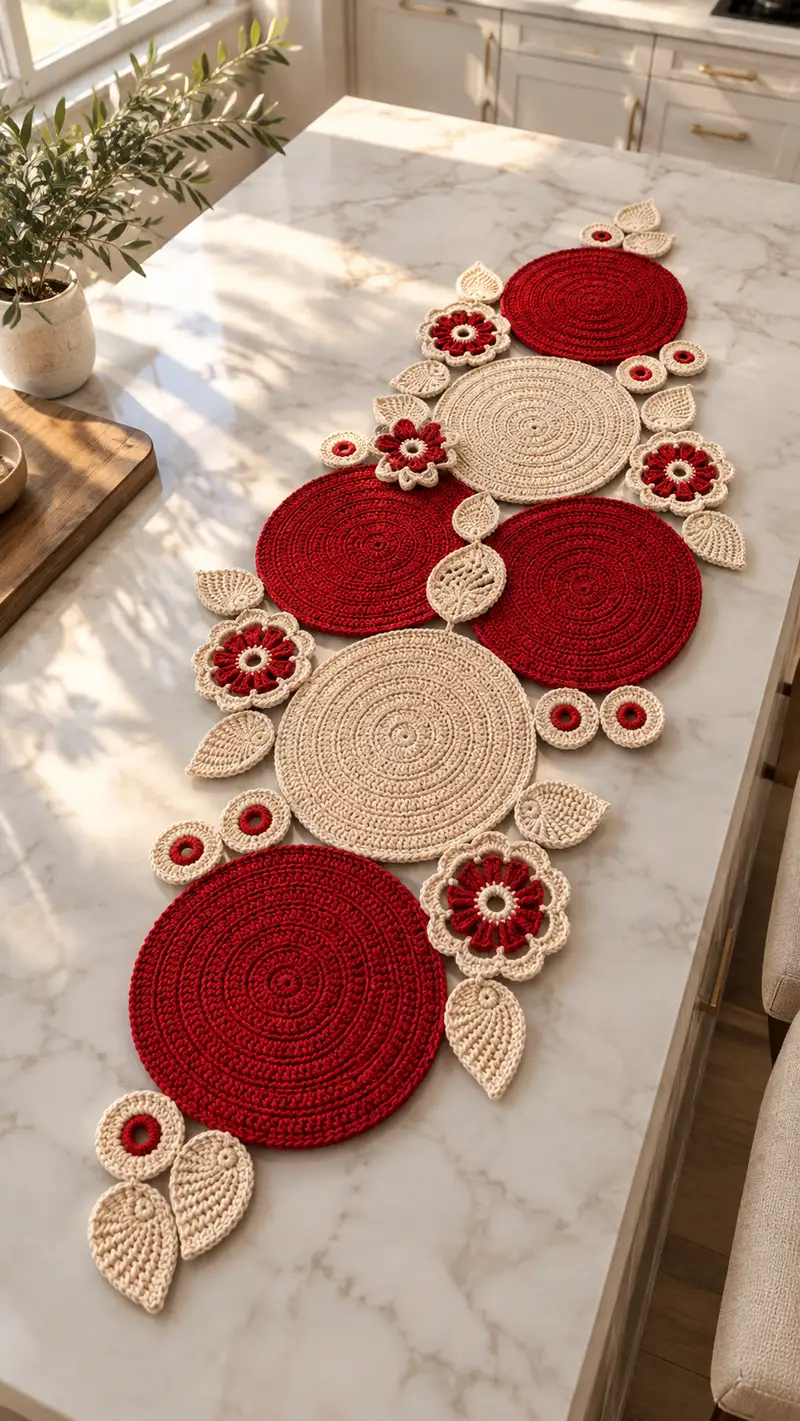
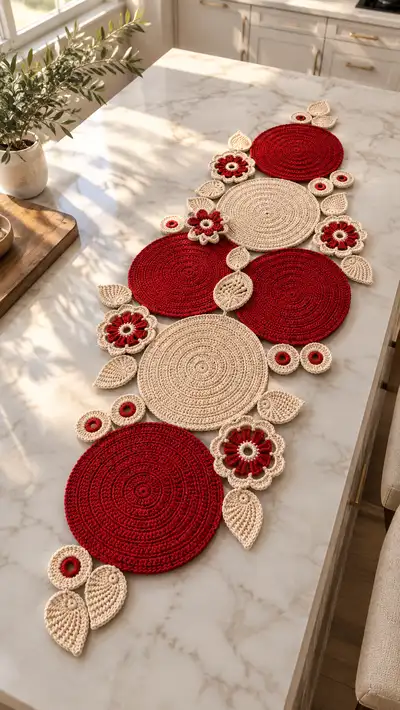
A beautiful roses table runner made from linked circular motifs, delicate floral medallions, and textured leaf accents. This runner alternates rich berry red and soft cream discs, finished with scalloped flower motifs and layered leaves for a handcrafted, elegant centerpiece. The pattern includes clear motif instructions and a step-by-step joining guide to arrange the peaceful floral cascade shown in the photo. Ideal for adding seasonal color to a dining table or sideboard.
Progress Tracker
0% Complete
— Large Disc (Make 4 in red, 3 in cream) :
Round 1 :
6 sc in magic ring (6)
Round 3 :
(1 sc, 1 inc) x 6 (18)
Round 4 :
(2 sc, 1 inc) x 6 (24)
Round 5 :
(3 sc, 1 inc) x 6 (30)
Info :
Check your center lays flat. If the circle begins to cup, reduce the increases in the next round; if it ruffles, add an extra increase repeat evenly.
Round 6 :
(4 sc, 1 inc) x 6 (36)
Round 7 :
(5 sc, 1 inc) x 6 (42)
Round 8 :
(6 sc, 1 inc) x 6 (48)
Info :
At this size you can optionally place a stitch marker at a quarter point to help when later attaching petals or joining motifs. For the runner pictured, markers help align seam points.
Round 9 :
(7 sc, 1 inc) x 6 (54)
Round 10 :
(8 sc, 1 inc) x 6 (60)
Round 11 :
(9 sc, 1 inc) x 6 (66)
Round 12 :
(10 sc, 1 inc) x 6 (72)
Info :
If your yarn has memory or curls slightly, block this disc flat now. Pin to blocking mat and steam or wet-block as yarn type requires. Allow to dry completely for best join results.
Round 13 :
(11 sc, 1 inc) x 6 (78)
Round 14 :
(12 sc, 1 inc) x 6 (84)
Round 15 :
(13 sc, 1 inc) x 6 (90)
Round 16 :
(14 sc, 1 inc) x 6 (96)
Info :
To reproduce the concentric ridges shown, after round 16 work 2–4 rounds in BLO: 1 sc in each st BLO to form a subtle ridge before continuing with full rounds. This adds texture similar to the photo.
Round 17 :
(15 sc, 1 inc) x 6 (102)
Round 18 :
(16 sc, 1 inc) x 6 (108)
Round 19 :
(17 sc, 1 inc) x 6 (114)
Round 20 :
(18 sc, 1 inc) x 6 (120)
Round 21-22 :
1 sc in each st (120)
Info :
Work 2 rounds even to stabilize the edge and get the concentric line look. If you prefer a slightly smaller disc, stop at round 18 or 19 per your visual reference.
Round 23 (Optional Edge Ridge) :
1 sc in each st BLO (120). This round creates a shallow ridge around the perimeter for an organic look.
Round 24 :
sl st evenly around to finish edge; fasten off and weave in ends (120)
Info :
Make the large discs in your chosen alternation of red and cream. For an exact match to the photo, make 4 red large discs and 3 cream large discs and block them flat before assembly.
— Medium Disc (Make 3-4 in cream) :
Round 1 :
6 sc in magic ring (6)
Round 3 :
(1 sc, 1 inc) x 6 (18)
Round 4 :
(2 sc, 1 inc) x 6 (24)
Round 5 :
(3 sc, 1 inc) x 6 (30)
Round 6 :
(4 sc, 1 inc) x 6 (36)
Round 7 :
(5 sc, 1 inc) x 6 (42)
Round 8 :
(6 sc, 1 inc) x 6 (48)
Info :
The medium disc is slightly smaller in diameter to sit nested with the large discs and provide contrast. If you need it slightly smaller or larger, stop increasing earlier or continue an extra increase round.
Round 9 :
(7 sc, 1 inc) x 6 (54)
Round 10 :
(8 sc, 1 inc) x 6 (60)
Round 11 :
(9 sc, 1 inc) x 6 (66)
Round 12 :
(10 sc, 1 inc) x 6 (72)
Round 13-16 :
1 sc in each st (72)
Info :
One of the cream discs in the photo shows more visible spiral lines; to get that look, work rounds 13-16 in BLO on one disc to create subtle ridges.
Round 17 :
1 sc in each st (72)
Round 18 :
sl st evenly to finish; fasten off and weave in ends (72)
— Small Ring Motif (Make multiple small circle pairs) :
Round 1 :
6 sc in magic ring (6)
Round 3 :
(1 sc, 1 inc) x 6 (18)
Info :
Some small rings in the photo are two-tone: a small central ring in red with a cream outer round. To create this effect, change color after round 1 and work round 2 in contrasting color.
Round 4 :
1 sc in each st (18)
Round 5 :
sl st evenly; fasten off leaving a long tail for sewing (18)
— Flower Medallion (Make 6 layered flowers) :
Round 1 :
With cream, ch 6, join with sl st to form ring, ch 1. Work 12 sc into ring (12)
Round 2 :
Change to red. *(ch 3, sl st into next st)* rep around to form 6 small loop petals; fasten off cream tail and continue in red if desired (12 loops)
Info :
This ring-style center creates the open-eyed flower seen in the photo. Adjust ch-3 loops to ch-4 for larger petal base if desired.
Round 3 :
Join red at base of a ch-3 loop, ch 1, 8 sc into loop, sl st to base (8) — repeat for each loop to create 6 small gathered petals (6 petals x 8 sc)
Round 4 :
Switch to cream. Around the outer edge of the red petals, work: *(ch 2, 3 dc, ch 2, sl st) in the sp between petals* repeat 6 times to form scallop edging (creates 6 scallops)
Round 5 :
1 sc in each stitch around scalloped edge, working evenly to neaten (approx. 72 sc depending on stitch placement)
Info :
Work tight gauge on the center rounds to keep the flower slightly three-dimensional. If your flower flops, add a drop of fabric starch during blocking and pin into shape.
Round 6 :
Optional: Add a picot or slip-stitch shell between scallops: *(sl st, ch3, sl st) at scallop peak* repeat for decorative finish
Round 7 :
Fasten off and leave long tail for sewing to discs (flower assembled)
Round 8-12 (Alternative Larger Petal Layer) :
If you prefer a fuller flower, join cream and work: (ch2, 5 dc, ch2, sl st) into each gap around the red petals, then 1 sc in each st to firm the layer. Fasten off and weave in.
Info :
Create 6 full flower medallions for placement at intersections of discs. The layered red center with cream scallops mirrors the visual in the photograph.
— Leaf Motif (Make 12-16 leaves) :
Round 1 :
With cream, ch 6. Row-equivalent shaping to create teardrop: sc in 2nd ch from hook, hdc, dc, hdc, sc (5 sts along chain) then rotate to work around opposite side: sc, hdc, dc2, hdc, sc into last chain to form a pointed leaf; sl st to starting sc; (approx. 12 sts)
Info :
This first round creates a small symmetrical leaf. Don’t fasten off if you plan to add a textured vein with BLO rounds next.
Round 2 :
Ch1, 2 sc in base stitch, (1 sc in next 2 sts), (hdc in next), (2 dc in center top), (hdc in next), (1 sc in next 2 sts), 2 sc in last base stitch; sl st to join (approx. 18 sts)
Round 3 :
1 sc in each st around in BLO to create a ridge on one side (18)
Round 4 :
1 sc in each st (18)
Info :
For the leaves visible in the picture, a definite central ridge is present. Working round 3 in BLO adds a subtle raised seam which catches light similarly.
Round 5 :
If desired, add a sl st at the tip and a small loop for sewing; fasten off leaving long tail for attachment
Round 6-8 (Optional Larger Leaf) :
Increase shaping with an extra dc row in the center for fuller leaves: work dc across center, then sc around to firm the edge. Fasten off and weave in ends.
— Joining Panel & Decorative Edging :
Info :
Lay out all motifs on a blocking mat in the desired runner arrangement: alternating large red and cream discs with medium cream discs inset, flowers and leaves placed at intersections as in the photo. Pin motifs in place to maintain spacing (approx. 0.25-0.5 in gaps) so motifs gently overlap at points.
Round 1 (Joining Preparation) :
Using matching cream yarn and a yarn needle, whip-stitch the touching edges of large and medium discs together at 6 evenly spaced anchoring points across the edge to hold arrangement (no counted stitches; secure seam evenly)
Round 2 :
For a neater seam, with crochet hook, sl st through adjacent stitches of both motifs at each join point to link them in a visible but tidy seam (work sl st joins about every 6-8 stitches along join line)
Info :
When joining, alternate between whip-stitch and slip-stitch joining if you want some seams to be invisible and others decorative. Use the cream yarn around red discs for continuity like the image.
Round 3 (Attach Flowers) :
Position each flower medallion on the seam intersection, pin in place. Sew through the back loops of the flower edge and the top loops of the disc seam using long tapestry needle and secure with tight stitches at 6–8 points per flower.
Round 4 (Attach Leaves and Small Rings) :
Sew leaves by their base into small gaps between discs and flowers, layering two leaves where cluster appears. Sew small ring motifs as accents near leaf bases with a couple of backstitches to hold them flat.
Round 5 (Outer Scallop Edging) :
Once all pieces are joined, work a soft scalloped edging around the outermost perimeter: join cream at an outermost disc st, *(ch3, sl st into same st, skip 2 sts, sl st into next)* repeat around to make scallop loops. Fasten off and weave ends.
Round 6 (Optional Decorative Puff Row) :
For extra texture, work a puff-stitch row in contrast colour: join red at select scallops, *((yo, insert, pull up loop) x 4, yo and draw through all loops, ch1)* at scallop peaks, sl st between peaks to secure.
Info :
Edge treatments are flexible: a tight sc border will read tidier and compact; the scallop shown in the photograph is softer and more decorative. Choose based on your desired look.
— Optional Reinforcement & Blocking :
Round 1 :
If you want a firm runner, block the entire assembled runner and optionally add lightweight interfacing or a thin felt backing cut to shape and stitched into place by hand around the edges.
Info :
Use careful hand-stitching to attach backing to avoid distorting outer shape. If adding backing, sew through both crochet and backing with small, even stitches and secure all ends.
Round 2 :
Final trim: weave in all ends securely. Use a drop of fabric glue at each knot if expecting heavy use, but allow glue to dry fully before placing on the table.
Info :
Press lightly or steam with care per the yarn manufacturer's instructions to preserve the handmade texture. Your runner is now ready to style the table.
This roses table runner transforms simple circles, delicate flowers and shaped leaves into a stunning floral cascade for your table. Working each motif separately and joining them gives you the freedom to create a truly bespoke centerpiece. The layered textures and red-and-cream contrast bring visual warmth and handmade charm to any dining experience. I hope you enjoy every stitch as the runner comes together — and that it adds a beautiful, personal touch to your home. 🌹🧶