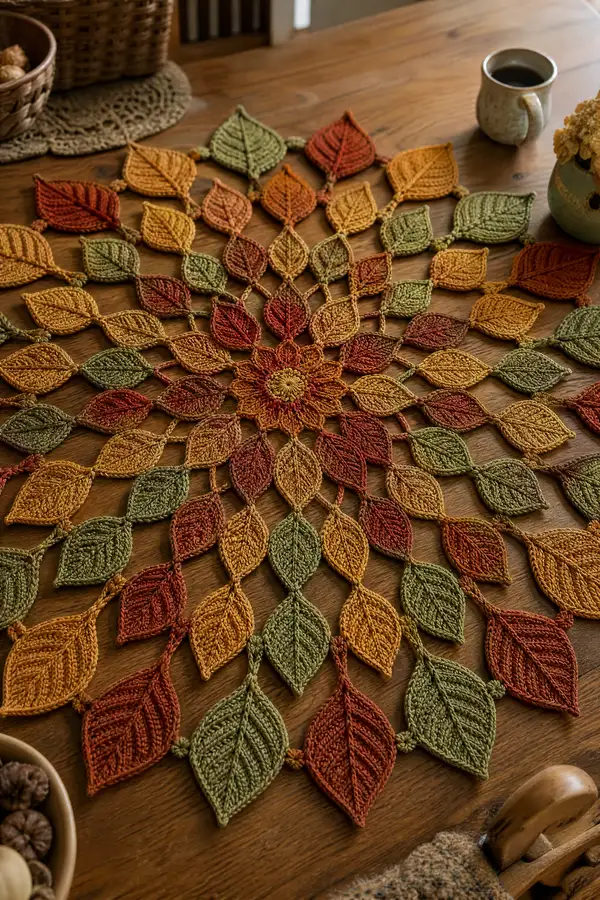
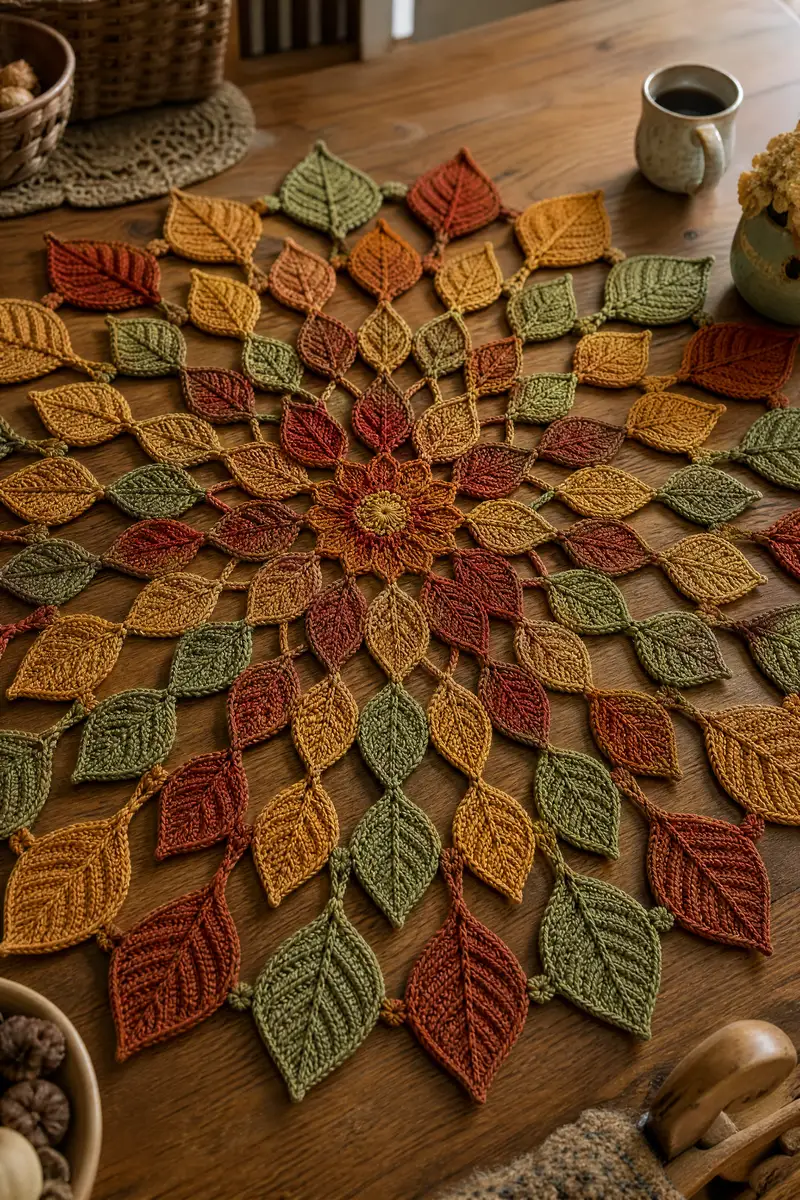
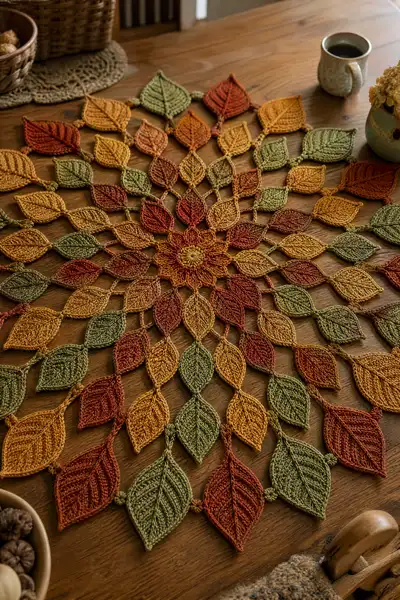
A warm autumn-inspired leaf mandala table runner worked in individual leaf motifs joined into a circular floral medallion. Rich fall tones—moss green, mustard, rust and burnt orange—form layered leaves radiating from a textured sunflower center. The open connectors and raised central veins create sculptural depth that looks beautiful on wood tables or as a centerpiece under a vase. This pattern uses simple stitches and shaping repeated across motifs for a relaxing, stitchable project.
Progress Tracker
0% Complete
— Notes and Overview :
Info :
This runner is made from a central sunflower medallion and concentric rings of leaf motifs. Work all leaf units identical and join them as you go using short connector chains and slip stitch joins. Blocking each motif before final joining produces the flattest result. All rounds listed are counted passes for each motif or section; counts are given in parentheses at end of each round line. Use a stitch marker to mark the first stitch of any round that is worked in continuous rounds.
Info :
Gauge: 22 sc x 28 rows = 10cm/4in in single crochet (unblocked). Finished sample measures approximately 26-28 inches (66-71 cm) in diameter. Adjust yarn weight or add/subtract motif counts to resize.
— Center Sunflower Medallion :
Round 3 :
(1 sc, inc) x6 (18)
Round 4 :
(2 sc, inc) x6 (24)
Round 5 :
(3 sc, inc) x6 (30)
Info :
Change to contrast color for petal base if desired. Keep tails long for weaving later. Place a stitch marker at the start of each round to maintain correct counts.
Round 6 :
(4 sc, inc) x6 (36)
Round 7 :
1 sc in each st (36)
Round 8 :
Work in FLO: 1 sc in each st BLO to create a ridge (36)
Round 9 :
(5 sc, inc) x6 (42)
Round 10 :
1 sc in each st (42)
Info :
We will create petal anchors around this round: mark every 6th st (42/7=6) to be used later as base points for the first ring of leaves. These markers ensure even spacing.
Round 11 :
(6 sc, inc) x6 (48)
Round 12 :
1 sc in each st (48)
Round 13 :
Ch3, *skip 2 sts, dc3tog shell over next 3 sts (work 3 dc cluster), ch3, sl st in next marked base st*, rep around to make 8 small petal anchors (48 sts around)
Info :
These anchors form crisp points for the first ring of leaf attachments. If you'd like a more solid center, increase stitch counts by adding an extra round of sc before making anchors.
Round 14 :
Work 8 petals: In each petal anchor: (ch3, 3 dc in anchor, ch3, sl st to center base). Fasten off center color and weave ends. Petal shells will create a floral base roughly 6–7 in/15–18 cm across (depending on tension).
Info :
Lightly block the center medallion to open petals. Let dry completely before attaching leaf units to prevent distortion during joining.
— Leaf Motif (Large Leaf) : make 24 (outer ring) :
Info :
Each large leaf is worked from a straight chain backbone and shaped with increasing rows to create a pointed leaf with a raised central vein worked in BLO and back-loop texture. Use 3.5mm hook unless you need a tighter gauge, then use 3.0mm.
Round 1 :
Ch 18 (counts as spine plus turning ch). Starting in 2nd ch from hook, sc across to end (17 sc). Turn and work along opposite side of chain: sc back across 17 sc. Do not join; we will count this as Round 1 edge (34 sts total around both sides).
Round 2 :
Change to pattern: On one side of the chain backbone, inc at the tip end to form point: work 2 sc in last ch, then continue sc along other side. Total should be 36 sts (1 inc).
Round 3 :
Work 1 sc in next 4 sts, inc, 1 sc in next 6 sts, inc, 1 sc in next 4 sts, inc, rep evenly to keep edges expanding (approx 39-42 sts depending on increases) - adjust to maintain symmetric shaping.
Info :
Because leaf shapes are symmetrical, always perform identical increases on both sides of the backbone. Use stitch markers at the central spine point and at the wide center to track shaping.
Round 4 :
Work in FLO: 1 sc in each st FLO around to create a flat raised ridge on the face (same count as round 3). (approx 42 sts)
Round 5 :
Shape the leaf: *(hdc, hdc, inc) along each side sections where you want fullness* maintain symmetry. After this round expect approx 48 sts.
Round 6 :
1 sc in each st (48)
Round 7 :
Begin central vein: Ch1, sc in next 2 sts, BLO hdc across next 6 sts to create rib, sc across remaining stitches to other tip, sl st at tip to create point (48)
Info :
Working BLO for the rib pulls the central stitches forward. If you prefer a deeper ridge, use a smaller hook for BLO rows only to tighten that area.
Round 8 :
Decrease slightly toward the tip: (sc2tog) at the very tip on both ends to make a pointed shape. Continue even around other stitches to keep body flat (44)
Round 9 :
Ch2, *1 tr in next 3 sts, ch1, sk1* rep around to add decorative ridges along edges, then sl st to join (44)
Round 10 :
Work 1 sc in each st across to reinforce shape (44)
Round 11 :
Work FLO 1 sc across (44)
Info :
At this point you have a wide leaf. If you want a narrower leaf, omit one increase round earlier. The counts above give a medium-large leaf ideal for the outer ring.
Round 12 :
Edge finish: *(sc, ch2, sc) in edge stitch to form a little picot-like edge every 6 stitches. This creates a soft serrated outline (44)
Round 13 :
Work a central vein: Attach yarn at spine center, ch1, sc in same stitch, *ch1, skip 1, sc in next* along spine to create a chain-of-stitches vein. Fasten off leaving 20cm tail for sewing (vein will be visible on top face)
Round 14 :
Optional embroidery: Using strand of contrasting color, make straight stitch veins from central spine to outer edge; secure and weave in ends.
Info :
Make 24 large leaves for the outer ring, or increase count if you prefer a larger final diameter. Keep leaf color distribution even: alternate rust, ochre, olive and moss for a balanced look.
— Small Filler Leaf : make 16 (inner filler) :
Round 1 :
Ch 12. Sc in 2nd ch from hook to end (11), sc 3 in last ch and sc back along opposite side (total approx 25 sts)
Round 2 :
1 sc in each st (25)
Round 3 :
*(1 hdc, inc) across the wide section to make a slight bulge at center, keep symmetry. Expect total ~28 sts
Round 4 :
Work BLO 1 sc across to create a small ridge (28)
Round 5 :
Edge finish: 1 sc in each st, sl st at tip and fasten off leaving tail for joining
Info :
Small filler leaves sit between central petals and the first ring of large leaves to soften joins; make 12–16 depending on desired density.
— Connector Chains and Joining Rounds :
Info :
Each leaf is joined to the medallion or neighboring leaves with short connector chains (typically 6–10 ch) and slip stitch joins. Consistent connector length yields a regular lattice; vary length slightly for a more organic shape.
Round 1 :
From center petal base marker: ch8, sl st into the base edge of the first large leaf at its tip point, ch8, sl st to next base marker. Repeat around to attach all first-ring leaves (use anchors from Center Round 13). Make sure each connector is the same number of chains for even spacing.
Round 2 :
Form second-tier connectors between large leaves: From the same sl st point on leaf, ch6, sl st in the midpoint of the adjacent large leaf to create a diamond-style lattice. Repeat around. Adjust ch count to make sure lattice sits flat (total connectors approx equal to leaf count).
Info :
When joining, use a smaller hook or the same hook but pull gauge slightly tighter on connectors to avoid sagging. Pin the layout on a blocking board as you work to keep spacing even.
Round 3 :
Embellish joins: Work 1 sc around each connector loop to thicken join and help the runner lie flat. If you prefer a decorative finish, work (sc, ch1, sc) across connectors to create small picots along join lines.
Round 4 :
Create scalloped edging between outer leaves: From the outer tip of each large leaf, ch10 and sl st in outer tip of next leaf, repeat around for edge loops. Work 5 sc in each edge loop to create a fuller border. Fasten off and weave ends.
Info :
Check flatness often. If scalloped edging pulls inwards, increase ch count on connectors slightly. If it sags, decrease ch count or work two rounds of sc reinforcement around connectors.
— Decorative Ribbing and Texture (applied to all leaves) :
Round 1 :
Using contrasting color or same color, pick up at leaf spine and work raised rib: *sc in spine stitch, ch2, sc in next spine stitch*, repeat along spine to create a dashed raised rib. Fasten off leaving tail for weaving (applies to each large and small leaf)
Round 2 :
Shadow rib: Using slip stitches in FLO along both sides of the spine adds subtle shadow ridges: sl st FLO across 1 row each side. This deepens definition without adding bulk (repeat for each leaf).
Info :
For the look in the photo, use a single strand of slightly darker yarn for the ribs; it creates a visible but gentle contrast that catches light.
— Outer Finishing Rounds and Stabilizing Edges :
Round 1 :
Working from outermost connector loops, sc evenly along edge (work 3 sc per connector loop) to create a continuous border (approx 120 sc depending on final leaf count)
Round 2 :
Work BLO 1 sc around this entire edge to create a slight raised rim that helps runner lie flat (same stitch count as R1)
Round 3 :
Final decorative stitches: In the same color as border, alternate (sc, ch2, sc) every 6th st to create subtle picot indents. Adjust spacing to taste for scallop frequency.
Info :
Weave all ends through matching motifs and steam-block the entire runner for final shape. Pin out fully on a flat surface and steam lightly from a distance; do not press iron directly on acrylic yarns—use a damp cloth barrier if needed.
— Alternative Smaller Leaf (for inner rings) :
Round 1 :
Ch 10, sc in 2nd ch from hook to end (9), sc3 in last ch, sc back up opposite side (approx 21 sts)
Round 2 :
1 sc in each st (21)
Round 3 :
Work BLO 1 sc across to create a rib and then sc2tog at tip to shape point (19)
Round 4 :
Edge finish with small picots along each long edge: *(sc, ch2, sc) every 5th st. Fasten off leaving tail to join.
Info :
Use these small leaves to fill gaps between larger leaves or to ring the center medallion closely for the layered look in the photo.
— Joining Plan and Layout Notes :
Info :
Layout suggestion: Center medallion, ring of 8 petals (center), ring of 12 small filler leaves, ring of 24 larger leaves, optional ring of additional leaves if you want a wider runner. Space connectors evenly. Use blocking to ensure center stays flat as you add rings.
Round 1 :
Begin final joining by pinning center medallion on blocking board and placing first ring leaves into position, aligning each leaf tip with center anchors. Use even-length connector chains (ch8 recommended) to link each leaf to center petal anchors. Secure with sl st and backstitch for strength.
Info :
Work in sections: attach 4–6 leaves, then step back and check symmetry. Adjust connector chains and leaf orientation as necessary before permanently sewing all leaves.
Round 2 :
After first ring is attached, place small filler leaves between the base of two large leaves and work a short connector ch6 to attach them into the lattice. This softens the transition from center to outer ring.
Round 3 :
Once all rings are attached, create the outermost connectors and scalloped edge per the Outer Finishing Rounds section. Weave ends and block as a single piece for final shaping.
Info :
Join with a yarn tail left long for whip stitch reinforcement. If you prefer a completely seamless look, use invisible ladder stitch along connector bases after initial sl st joins.
— Final Blocking and Care :
Info :
Soak runner in lukewarm water, gently press out excess water, then pin flat on blocking mat according to planned diameter. Use rust-proof pins and leave to dry thoroughly. For heat-proof yarns, a very light steam from distance will enhance flatness.
Round 1 :
Optional stabilization: sew a lightweight fabric backing in matching color to the underside of runner using running stitch if you intend to use this on high-traffic surfaces to protect yarn from friction.
Info :
Store flat folded between sheets to preserve shape. Spot clean gently as needed. Avoid direct heat and prolonged sunlight to prevent fading.
Completing this leaf mandala runner feels like bringing a piece of autumn into your home—textured ribs, layered leaves, and warm colors make it a standout centerpiece. Each repeated leaf is soothing to crochet, and the assembly turns simple motifs into a dramatic, table-ready piece. Whether you make one for seasonal decor or as a thoughtful handmade gift, this runner invites cozy moments and compliments. Enjoy the rhythm of stitches and the gentle satisfaction of watching the mandala bloom. 🧶🍂