🧶 Beautiful ✨ Detailed 💝 Adorable

Roses Table Runner Crochet Pattern

Roses Table Runner Crochet Pattern
4.5★ Rating
8-10 Hours Time Needed
2.6K Made This
✂️

Intermediate Level

Ideal for those with basic crochet experience, featuring slightly more advanced stitches and techniques to expand your skills.

⏱️

All-Day Adventure

Requires 8-10 hours, ideal for a full day of immersive crocheting.

🏡

Cozy Accent

A warm touch for your space that transforms ordinary corners into inviting nooks filled with handmade charm.

🧶 Jump to Pattern ↓

About This Roses Table Runner Crochet Pattern

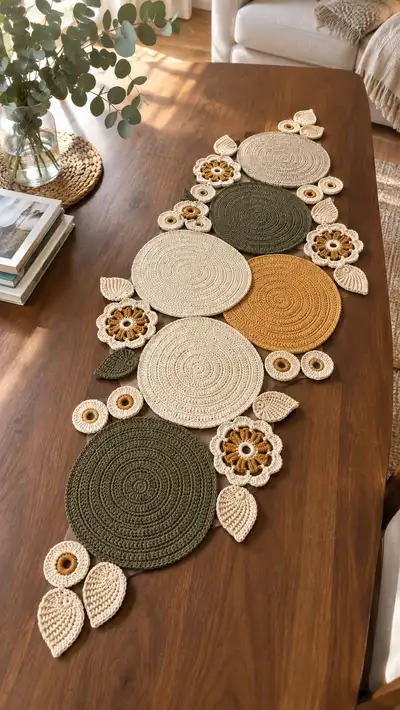
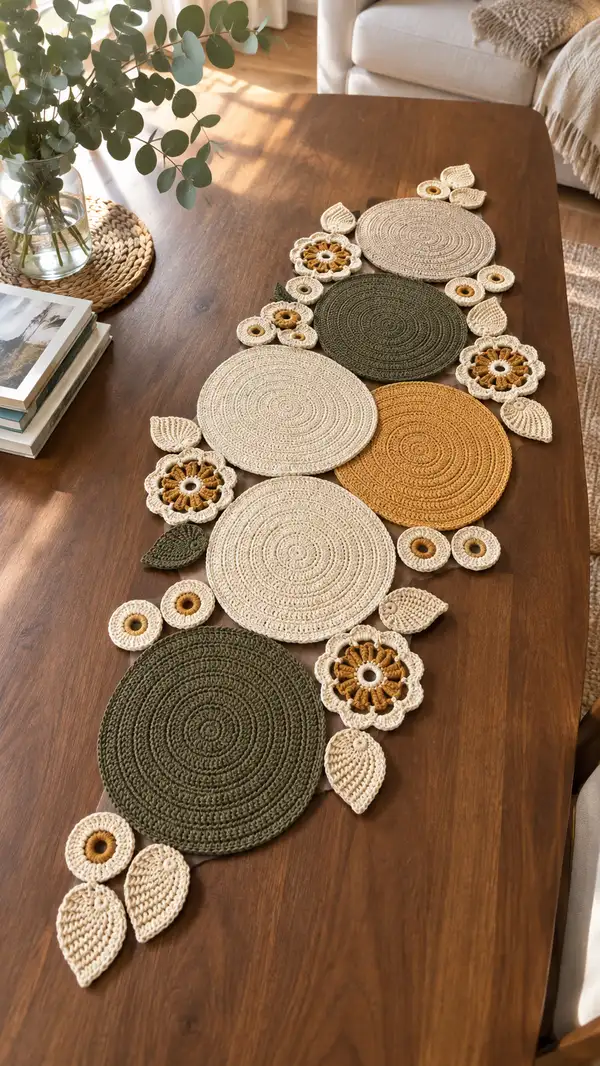
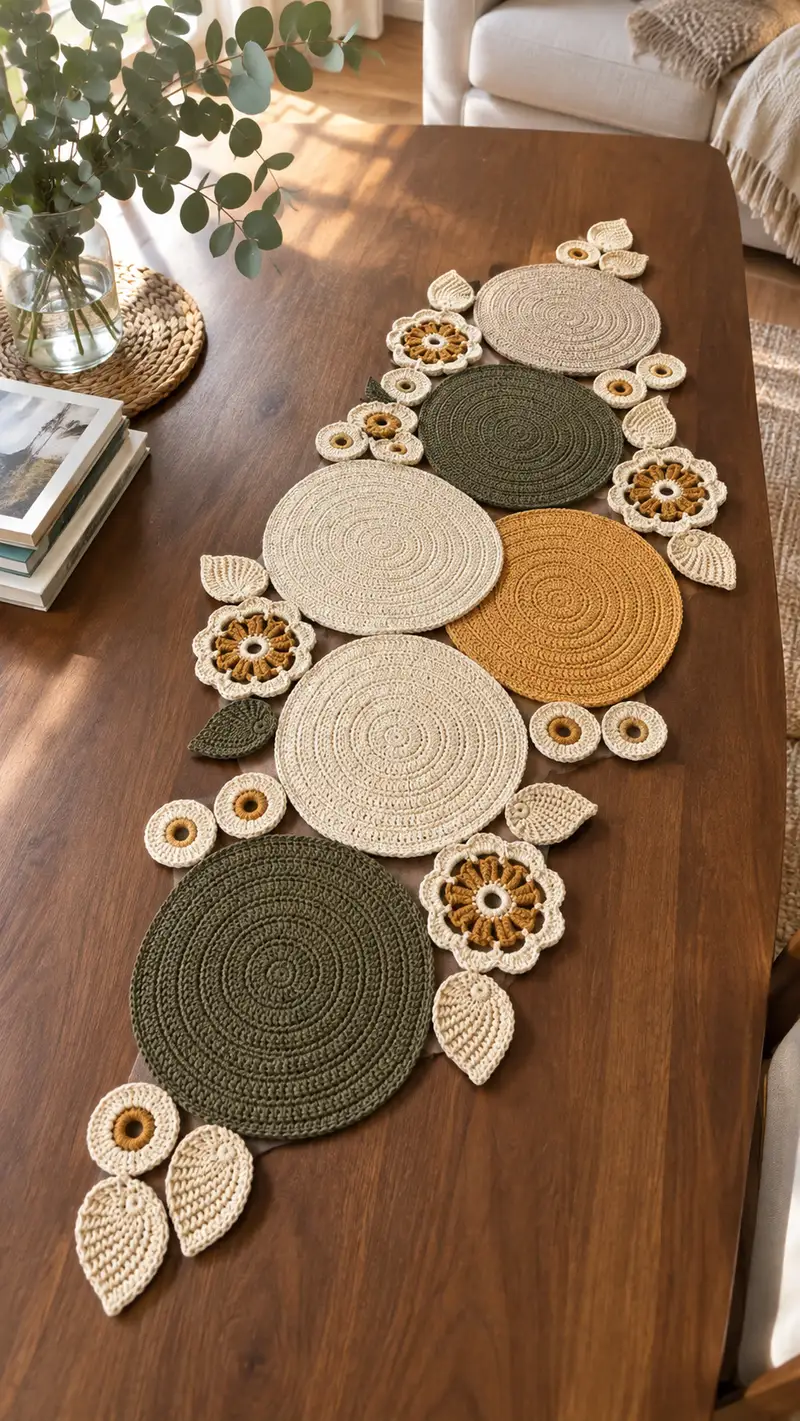
This table runner is made from a collection of flat circular placemats, floral motifs with open centers, small donut rings and sculpted leaves, assembled into an elongated organic composition. Colors seen: soft oatmeal/beige, warm mustard/gold, and deep olive/forest green. The look is textured but flat enough to use under centerpieces, vases or decorative objects. The pattern uses simple round crochet increases, shell petals, puff clusters and layered leaves to achieve a natural floral silhouette.

Roses Table Runner Crochet Pattern crochet pattern - detailed view of completed project

Motifs are made individually and joined as you go or sewn together after blocking for a tidy finish. This pattern emphasizes consistent tension and careful placement to maintain a smooth, even runner edge.

Why You'll Love This Roses Table Runner Crochet Pattern

I love this pattern because it blends simple round crochet technique with delicate floral details to create a polished centerpiece. I enjoy the calming repetition of making round mats and the playful variety of flowers and leaves that bring the runner to life. It’s satisfying to arrange and join motifs into a single flowing composition that looks custom-made for your table.

Roses Table Runner Crochet Pattern step 1 - construction progress Roses Table Runner Crochet Pattern step 2 - assembly progress Roses Table Runner Crochet Pattern step 3 - details and accessories Roses Table Runner Crochet Pattern step 4 - final assembly and finishing

Switch Things Up

I love how easily this runner can be customized — by changing colors you can adapt it to any season or table setting. Swap the olive and mustard for pastels for spring, or deep jewel tones for autumn warmth.

I often switch up the motif counts: fewer large circles and more flowers for a shorter runner, or build a long version by adding more neutral circles. You can also experiment with a chunky yarn for a textured, cozy variation or a finer thread for an elegant lace look.

I recommend adding small beads or a metallic thread to the flower centers for a subtle sparkle at holiday time. Personally, I enjoy arranging motifs before joining and stepping back to test different compositions — that’s where the design really comes alive.

Common Mistakes & How to Fix Them

✗ Skipping stitch markers at round starts can cause misaligned rounds and an off-center spiral; always mark your first stitch of each round. ✗ Using inconsistent tension during increase rounds will create a wavy or cupped circle; practice maintaining even tension through increases. ✗ Not blocking the flat circles and flower motifs before assembly can make joining difficult and produce an uneven final runner. ✗ Changing yarn brands or dye lots mid-motif without adjusting tension can cause subtle texture and color inconsistencies across the runner. ✗ Failing to stuff or block the petal motifs lightly will cause petals to fold inwards; flatten and steam/block gently for best shape. ✗ Joining pieces without pinning or laying them out first can lead to awkward spacing; always arrange and pin motifs before sewing to secure placement.

Roses Table Runner Crochet Pattern

A warm, modern floral table runner composed of layered round placemats, open flower motifs, small donut rings and textured leaves. Neutral beiges, deep olive and golden mustard create a calm, organic palette. The runner is built motif-by-motif and stitched together for a handmade, heirloom look. Perfect to dress a dining table, console or sideboard with natural, boho-inspired crochet charm.

Intermediate 8-10 Hours

Materials Needed for Roses Table Runner Crochet Pattern

— Main Fabric

  • 01
    Worsted weight cotton yarn (#4) - approximately 300g in main neutral beige (for majority of circles and leaves)
  • 02
    Worsted weight cotton yarn (#4) - 100g in deep olive green (for two large circular mats and some leaves)
  • 03
    Worsted weight cotton yarn (#4) - 80g in mustard/golden yellow (for one accent circular mat and flower centers)
  • 04
    Small amounts (20-30g each) in off-white and darker beige for donut rings and petal outlines

— Tools Required

  • 01
    3.5mm (E) crochet hook for main work (adjust for your tension)
  • 02
    3.0mm (C) hook for tighter detail work and small donuts (optional)
  • 03
    Yarn needle for sewing and weaving ends
  • 04
    Stitch markers (at least 4) to mark round starts
  • 05
    Scissors
  • 06
    Blocking pins and blocking mat
  • 07
    Tape measure or ruler
  • 08
    Optional: small stitch counter or row tracker
  • 09
    Optional: fabric glue to secure joins for table use (not dishwasher safe)

Progress Tracker

0% Complete

— Large Round Placemat (Make 5: 2 beige, 1 mustard, 2 olive) :

Round 1 :

6 sc in magic ring (6)

Round 2 :

6 inc (12)

Round 3 :

(1 sc, inc) x 6 (18)

Round 4 :

(2 sc, inc) x 6 (24)

Round 5 :

(3 sc, inc) x 6 (30)

Round 6 :

(4 sc, inc) x 6 (36)

Info :

Use a 3.5mm hook for the main mats for an even, flat fabric. Keep tension steady and work a continuous spiral if you prefer no sl st joins; otherwise, sl st to join each round and ch1 to begin the next.

Round 7 :

(5 sc, inc) x 6 (42)

Round 8 :

(6 sc, inc) x 6 (48)

Round 9 :

(7 sc, inc) x 6 (54)

Round 10 :

(8 sc, inc) x 6 (60)

Info :

At this stage the circle is expanding. If your circle begins to ruffle, stop increasing as often: add an extra sc between increases (i.e. (9 sc, inc)) until the row lays flat. Blocking will also help flatten the mat.

Round 11 :

(9 sc, inc) x 6 (66)

Round 12 :

(10 sc, inc) x 6 (72)

Round 13 :

(11 sc, inc) x 6 (78)

Round 14 :

(12 sc, inc) x 6 (84)

Info :

Work in rows of increases that add 6 stitches per round (common for flat circles). If you prefer a denser finish, switch to a smaller hook for rounds 10+ to tighten the stitch gauge.

Round 15 :

(13 sc, inc) x 6 (90)

Round 16 :

(14 sc, inc) x 6 (96)

Round 17 :

(15 sc, inc) x 6 (102)

Round 18 :

1 sc in each st (102)

Info :

Begin to work one or two even rounds (no increases) to let the circle expand in height rather than diameter if needed. For a flat placemat, aim for a final diameter of approximately 10-12 inches depending on yarn and hook.

Round 19 :

1 sc in each st (102)

Round 20 :

1 sc in each st (102)

Round 21 :

(16 sc, inc) x 6 (108)

Round 22 :

(17 sc, inc) x 6 (114)

Info :

Check diameter every few rounds. If you want a slightly smaller mat, stop increasing at rounds 16-18 and work even rounds to build height instead of diameter.

Round 23 :

(18 sc, inc) x 6 (120)

Round 24 :

(19 sc, inc) x 6 (126)

Round 25 :

(20 sc, inc) x 6 (132)

Round 26 :

1 sc in each st (132)

Round 27 :

1 sc in each st (132)

Info :

To create a subtle edge ridge, work the final 2 rounds in BLO (back loops only): 1 sc in each st BLO. This forms a tidy raised edge that helps the mat keep shape when placed under objects.

Round 28 :

1 sc in each st BLO (132)

Round 29 :

1 sc in each st BLO (132)

Round 30 :

Fasten off. Weave in ends and block flat on a mat using pins and a damp cloth or steam to set the shape

Info :

Make 5 large rounds in the color scheme shown: 2 in oatmeal/beige, 1 in mustard/gold, 2 in olive/forest green. Block each mat to the same diameter for consistent assembly.

— Small Donut Ring (Make 10) :

Round 1 :

Ch 6, join with sl st to form ch loop. Work 10 sc into loop (10)

Round 2 :

Work 2 sc in each st around (20)

Round 3 :

(1 sc, inc) x 10 (30)

Round 4 :

1 sc in each st (30)

Round 5 :

Switch to smaller 3.0mm hook for tighter ring (Info)

Round 5 :

1 sc in each st FLO (30)

Round 6 :

Fasten off, leaving tail to sew. Optional: Sew the inner hole tighter by stitching across 6-8 evenly spaced points to reduce opening if desired.

Info :

Make these donut rings in contrast colors: mustard center with beige body or vice versa. They are used as decorative connecting pieces between big rounds and flowers. You can also work fewer increases if you want a smaller ring.

— Flower Motif (Make 4) :

Round 1 :

6 sc in magic ring (6)

Round 2 :

6 inc (12)

Round 3 :

(1 sc, inc) x 6 (18)

Round 4 :

Change to mustard/golden yarn (Info)

Round 4 :

Ch 3 (counts as dc), *ch 2, skip 1 st, dc in next; rep around to create open spokes. Join with sl st to first dc. You should have 9-10 open spokes depending on tension.

Info :

This round forms the petal foundation; keep tension slightly loose for defined petals. If your spokes are too tight, increase ch2 to ch3 for a more lacy look.

Round 5 :

Switch back to neutral/beige. Working into each picot/spoke space: (sc, ch1, 3 dc, ch1, sc) to form a petal cluster in each space. Repeat around (9-10 petals)

Round 6 :

1 sc in each st around to tidy the petal base (approx 54)

Round 7 :

In each petal top: sl st, ch2, 5 dc cluster, ch2, sl st to form rounded scallop. Fasten off. Weave ends and block petals gently to shape.

Info :

For a 3D layered flower, work an additional inner round of small puff stitches in mustard before adding outer petals: *yarn over twice, insert, pull up loop, yarn over pull through 2 loops twice to form a puff; ch1 between each puff.

Round 8 :

Optional decorative edging: sc around petals in contrasting beige to emphasize shape

Info :

Make 4 flower motifs and block them flat. Sew a small donut ring into the center before adding outer petals if you want a visible ring like the photo.

— Leaf Motif (Make 12) :

Round 1 :

Ch 6, in 2nd ch from hook: sc, hdc, dc, hdc, sc (5 sts) (foundation)

Round 2 :

Working along one side of the ch: (sc, hdc, 2 dc, tr, 2 dc, hdc, sc) at the tip, then work back down the other side: hdc, sc, sl st to join to base. Fasten off one end to create a pointed leaf shape.

Info :

For a fuller leaf, add another round: work 1 sc in each st along both sides with an extra sc at the tip to round it. Use BLO on the final round to create a vein effect down the center.

Round 3 :

Re-join yarn at base, ch1, 1 sc in each st BLO around to create defined ridge (approx 18-22 sts depending on rounds)

Round 4 :

Optional: embroider a central vein using contrasting yarn and a yarn needle; make three straight running stitches from base to tip.

Info :

Make leaves in beige and olive. Block leaves over a slight curve (pinning to a curved template) to create the natural curved form seen in the runner.

Round 5 :

Fasten off and weave in ends.

— Small Raised Ring Flower (Alternative small flower, Make 6) :

Round 1 :

6 sc in magic ring (6)

Round 2 :

2 sc in each st (12)

Round 3 :

(1 sc, inc) x 6 (18)

Round 4 :

Ch 2, *7 dc into next st, sl st to next st; rep around to form 6 small raised petals. Fasten off and weave ends

Info :

These small flowers are used to fill gaps and to create little clusters near larger motifs. Work them in contrasting colors so their centers pop.

— Assembly & Joining Motifs :

Info :

Lay out all motifs on a flat surface in the desired runner composition before joining. The photo shows an alternating arrangement of large round mats, with flower motifs tucked into gaps and donut rings bridging spaces. Take a photo of your layout to reference while sewing.

Round 1 :

Option A - Sew-as-you-go method: When you reach a final round on a circular mat that will meet another motif, stop at the sl st join of the final round, align the adjacent piece, and use sc through both edges every 6-8 sts to join pieces flat.

Round 2 :

Option B - Post-assembly sewing: Block all motifs. Use a yarn needle and matching yarn to whip stitch adjacent motifs together along the edges, catching 2-3 loops per stitch for secure seams. For smaller connectors (donut rings), sew through the inner ring and attach to flower centers first, then attach the assembled piece to large rounds.

Info :

Sew with small, even stitches to maintain a flat join. If you prefer a stronger join for frequent handling, add a line of fabric glue along the seam on the underside after sewing and allow to dry before use.

Round 3 :

Reinforce joins by going around the outer seam a second time using mattress stitch to nest the edges together invisibly (optional but recommended for stability).

Round 4 :

Weave in all ends by threading tails through the sewn seam and back into the motifs for at least 3 inches to prevent slipping. Clip close to the fabric.

Info :

Arrange leaves after sewing to hide seams and soften edges. Pin leaves into position then sew at the base only so the tip remains slightly free and lifelike.

— Decorative Finishing Touches :

Round 1 :

Optional scalloped edging around the entire runner: Join yarn at any outer edge, *sc in next 3 sts, (5 dc in next st), sc in next 3 sts; sl st to next seam; rep along outer edges only to create scallops.

Info :

Use a contrasting cream or lighter beige for the scallop row so it frames the composition softly. Work slowly around curves—shorten repeats if you reach a tight corner to avoid puckering.

Round 2 :

Final blocking: pin runner in desired final shape on blocking mat and steam lightly or mist with water. Allow to dry fully before using. This sets joins and smooths any small distortions.

Info :

For table protection, consider placing a thin felt backing underneath the runner to prevent sliding and protect the yarn from spills. Do not machine wash unless using colorfast cotton and test first.

Assembly Instructions

  • Lay out all completed motifs on a large flat surface replicating the photo layout. Align large rounds in an alternating pattern with even spacing, then add flowers, donuts and leaves into the gaps before sewing.
  • Attach flower motifs to large circles by overlapping edges by 6-10 stitches. Pin in place, then whip stitch through both layers at consistent intervals to secure. Reinforce with a second pass of sewing if the runner will be frequently handled.
  • Sew donut rings into the center of flower motifs before attaching flowers to large mats when a visible center is desired. Use small stitches through the inner ring and the flower center to hold it tightly.
  • Position leaves at seam junctions to cover visible joining stitches. Sew leaves at the base only so tips keep natural lift; tack with 3-4 small stitches.
  • For long seams between large rounds, use sc through both edges from the right side to create a neat, visible join. Sew tightly but without pulling fabric so the runner remains flat.
  • After sewing all motifs, weave in all tails into seams and motifs for at least 3 inches to ensure they do not come loose. Block the entire runner flat and let dry fully before moving to the table.
  • If you want extra stability, apply a thin line of fabric glue to the underside seams once dry, or hand-stitch a strip of cotton fabric on the underside to stabilize the entire runner.
  • Trim any stray fibers and steam-block a final time to set the scallops and petal edges.

Important Notes

  • 💡Use stitch markers consistently at the beginning of each round to avoid counting errors and maintain proper shaping for flat motifs.
  • 💡Block every motif before assembly so joins are even, flat and predictable during sewing.
  • 💡Stuffing is not used in this project — instead use blocking and slight starching to shape petals if you want a crisper edge.
  • 💡When joining motifs, work from the right side and make the joining stitches small and even to maintain a neat top surface.
  • 💡Test colorfastness by dabbing a wet cloth on the yarn before blocking, especially for darker olive and mustard tones.
  • 💡Keep a note of how many rounds you made for each color so that all similar pieces match in diameter and look.
  • 💡Use yarn tails long enough for sewing so you can weave them into seams neatly; avoid short tails that pop out later.
  • 💡If using the runner under hot dishes or candles, add a heat-resistant mat under the hot item to protect the yarn.

Completing this table runner brings together soothing rounds of crochet and playful floral details into an elegant, handmade centerpiece. Each motif is meditative to create, and arranging them into the final composition is a creative joy. The neutral and earthy palette makes it versatile for many decor styles—perfect for seasonal or everyday use. Enjoy the slow, satisfying process and be proud to display your handcrafted work! 🧶🌼
You ask,

we answer.

FAQs

What is the finished size of this runner?

Based on the yarn weight and the specified round counts, the finished runner measures approximately 48-52 inches long and 12-14 inches wide depending on spacing and blocking. Adjust motif sizes or counts to shorten or lengthen.

Can I use different yarn weights for this pattern?

Yes — you can use different yarn weights, but you must adjust hook size accordingly and understand the final scale will change. A bulkier yarn will produce a larger, thicker runner and may require fewer rounds for the big circles.

Do I need to block motifs before assembly?

Absolutely. Blocking the motifs ensures consistent diameter and flatness, making it much easier to join pieces cleanly and achieve a professional finish.

What hook size should I use?

This pattern is written for a 3.5mm hook for the main motifs and a 3.0mm hook for small rings and tighter details. If your tension is loose, go down one hook size for flatter mats.

Is the runner washable?

If you use 100% cotton and colorfast dyes, the runner can be hand washed gently or machine washed on a delicate cycle in a laundry bag. Always test a scrap for colorfastness first.

How do I prevent the runner from sliding on the table?

Use a non-slip liner or add a light felt backing to the underside of the runner to prevent sliding and protect the yarn from wear.

Can I make this pattern smaller or larger?

Yes. Adjust the number of rounds on large circles to change diameter or make fewer/more motifs for overall runner length. Maintain round spacing ratio for visual balance.

What joining method is most durable?

Whip stitching with matching yarn and a second reinforcing pass of mattress stitch gives a durable, flat join. Optionally, glue the underside seams after sewing for extra security.