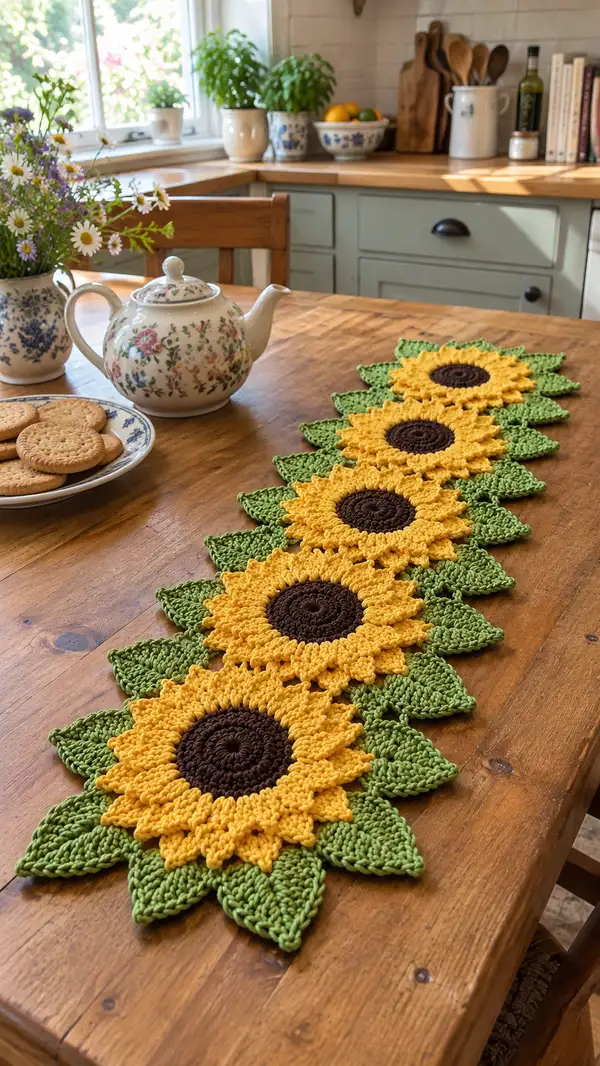
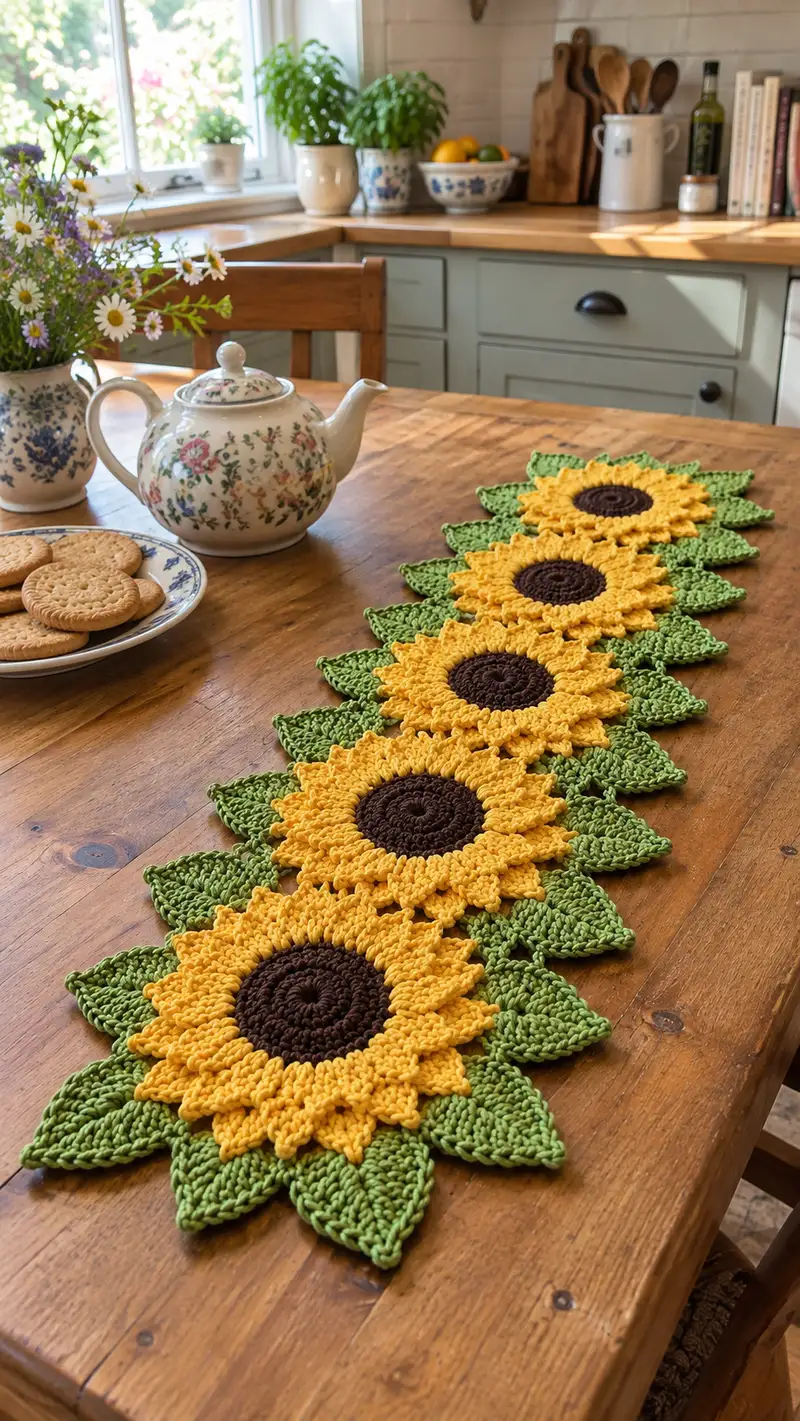
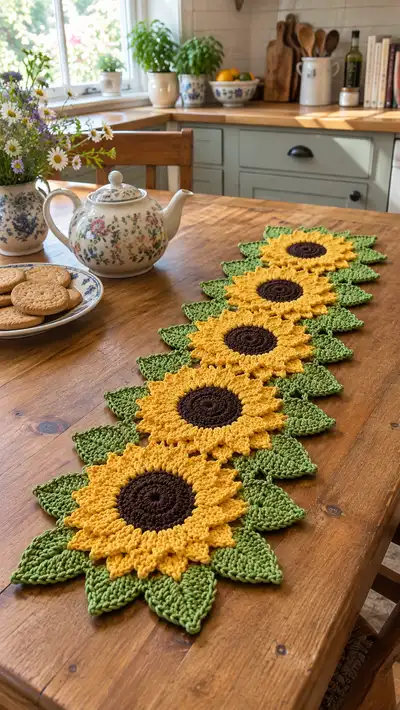
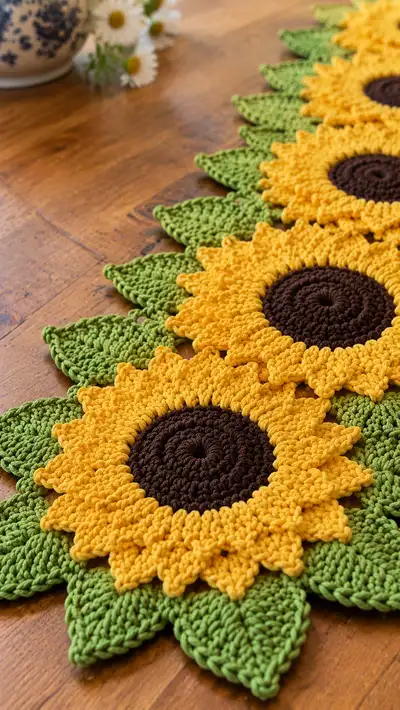
Bright, cheery sunflower motifs joined into an elegant table runner — five sunflowers with layered petals and leafy joins. Worked in worsted-weight cotton for a firm, washable finish, this runner features a raised textured center, 3D petals, and sculpted leaves along the edges. It lays flat on a wooden table and looks beautiful as a centerpiece for tea, brunch, or seasonal decor.
Progress Tracker
0% Complete
— Notes & Gauge :
Info :
Gauge: Each finished sunflower motif (center + 2 petal layers + surrounding leaves when joined) measures approximately 6.5-7.0 inches (16.5-18 cm) across the petals when worked in worsted-weight cotton and 4.0mm hook. Exact size depends on yarn and tension. The runner shown uses 5 motifs joined in a straight row for an overall length of roughly 36-38 inches (92-97 cm) excluding fringe/edges.
Info :
Terminology: US crochet terms used. Work in continuous rounds unless specified; use a stitch marker to mark first stitch. For decorative texture, puff stitches and clusters are used—keep loop heights consistent for even petals.
— Sunflower Motif — Center (Make 5)
Round 1 :
With brown yarn, mr, 6 sc into magic ring (6)
Round 2 :
Inc in each st around (12)
Round 3 :
(1 sc, inc) x 6 (18)
Round 4 :
(2 sc, inc) x 6 (24)
Round 5 :
(3 sc, inc) x 6 (30)
Round 6 :
(4 sc, inc) x 6 (36)
Info :
Keep the stitches tight and compact in brown to create a dense center. Use a smaller hook (3.5mm) for these early center rounds if you prefer a slightly tighter look; switch back to 4.0mm afterward for petals.
Round 7 :
1 sc in each st around (36)
Round 8 :
1 sc in each st around (36)
Round 9 :
1 hdc in each st around (36)
Info :
The hdc round creates a subtle ridge and slightly raises the center to better transition to petals. Fasten off brown and join golden/yellow in same stitch to begin petal base.
— Sunflower Motif — Petal Foundation & First Petal Layer
Round 10 :
Join mustard/gold with sl st in same st, ch 1, (sc in next 2 sts, ch 3, sl st in next st) repeat around to create 12 ch-3 loops. Note: You will have 12 loops if you distribute across 36 sts by working every 3rd stitch; pattern: *sc, sc, (ch3, sl st in next st)* x12 (36 sc + 12 loops)
Info :
These ch-3 loops form the anchors for the first row of petals. Place a stitch marker at the first loop to mark round start. When working puff or cluster petal stitches into loops, be consistent in how you place the hook to maintain uniform petals.
Round 11 :
*In next ch-3 loop: (puff stitch 5 loops: yarn over insert hook in loop, pull up loop; repeat 5 times leaving loops on hook, yarn over and pull through all loops, ch 1) sl st in next base sc; rep from * around to form 12 puff petal points (12 puff petals). After last petal, sl st to first puff base to join (12 puff petals; petals sit on the center edge)
Info :
Puff stitch technique: yarn over, insert hook into loop, yarn over and pull up loop close to same height as previous loops. Do not tighten loops until you have completed the required number of loops. Pull through all loops and chain 1 to lock the puff. Keep all puff heights even for a neat petal row.
Round 12 :
Ch 1, sc in same st, *sc in next 2 sc, (sc, ch 2, sc) in top of puff (treat top as stitch), sc in next 2 sc; rep from * around (36 sc with puff tops forming small arches)
Round 13 :
1 sc in each st around (36)
Info :
This creates a compact base anchoring first petal layer. If petals feel loose, block lightly. Keep tension consistent as you prepare for the larger outer petal layer.
— Sunflower Motif — Main Petal Layer (Two Rounds of Petal Sculpting)
Round 14 :
Switch to 4.0mm hook if you used smaller for center. *Ch 3, (dc, puff 5, dc) into next ch-2 arch from Round 12, ch 2, sl st into next sc to anchor; rep from * around to create 12 larger petal shells (each petal uses a combination of dc and puff area). After last petal, sl st to first ch-3 (12 petals)
Info :
Each petal will now be noticeably larger; place a marker at the first petal start to maintain count. Work petals loosely enough to allow them to fan but tightly enough to keep shape. If your yarn bowls, keep skein tension steady to avoid long and short petals.
Round 15 :
Ch 1, sc in each st around including the dc and sl st anchors (approx 60 sts depending on how petals were worked; adjust by working 4 sc in each petal group space evenly so you end with a multiple that allows the next round to place leaf anchor points). For consistency we will have 60 sc (12 petals x 5 sc anchoring each = 60)
Info :
If you count fewer or more than 60, use increases or decreases evenly across Round 15 to reach 60. Even spacing is critical so the next decorative round that joins to the leaf ring lines up.
Round 16 :
1 hdc in each st around (60)
Round 17 :
1 sc in each st around (60)
Info :
Rounds 16-17 build a firm base for the petal profile. Fasten off gold if you wish to create a second, slightly offset petal layer in a similar golden tone for extra dimension, or continue with same color for a single fuller layer.
— Sunflower Motif — Optional Second Petal Layer (adds volume)
Info :
To replicate the image which has a rich 3D petal look, we work a second petal layer offset between first petals. This step is optional; you can skip for a flatter motif.
Round 18 :
Join same gold in the back of Round 15 between petal groups: *ch 4, skip 4 sts, sl st in next st; rep around to form 12 loops where 2nd layer petals will be anchored (12 loops)
Round 19 :
*In next ch-4 loop: (puff 6, ch1) sl st into base; rep around for 12 larger puff petals (12 puff petals forming the second layer)
Round 20 :
Ch 1, sc around through petal tops and the base sc so that petals anchor snugly to motif base. Aim for 72 sc evenly around (12 petals x 6 anchor points = 72)
Info :
When working two layers, stagger the second layer so petals sit between first layer petals. This creates the full sunflower silhouette seen in the photo. Tidy all ends; you may choose to weave in tails invisibly across the back of the center.
— Sunflower Motif — Final Sculpting Rounds
Round 21 :
1 sc in each st around (72)
Round 22 :
1 sc in BLO around (72) to create a defined ridge separating petals from leaves (work through back loop of each stitch only)
Info :
The BLO round forms a nice edge for attaching leaves and prevents petals from curling forward. Fasten off and weave in ends at the back of the motif. Make 5 identical sunflower motifs for the runner shown, or make as many as needed for your table length.
— Leaf Motif (Make 10; two per sunflower to create scalloped joins) — Leaf Base
Round 1 :
With green yarn, ch 8, sc in 2nd ch from hook, hdc in next, dc in next 2, hdc in next, sc in next, sl st in last to form a narrow leaf base; turn and work on opposite side of foundation chain: sc in next, hdc, dc in next 2, hdc, sc, sl st to the starting point. Fasten off and leave long tail for joining. (Approx 14-16 sts total depending on counts)
Info :
These foundation chain leaves are quick and create a tapered leaf shape. Use the tail to stitch leaves to the sunflower motif. For the look in the photo, leave the leaf slightly dome-shaped—do not flatten entirely.
Round 2 :
Refine shape: rejoin green at leaf base, ch1, sc around evenly, working 2 sc at the widest points (middle) to create body and taper at both ends; aim for 20 sc in total. Sl st to join and fasten off, leaving long tail for sewing. (20)
Round 3 :
Optional ridge: rejoin and work 1 hdc in center line through FLO to create a raised vein (work 6-8 hdc down the center). Fasten off. This creates a central vein visible on the leaf faces.
Info :
Block leaves gently to flatten or shape as desired. For a sculpted fold, block each leaf with a slight crease down the middle—pin in shape and steam gently or wet-block and let dry.
— Leaf Variation — Larger Leaf for Outer Edge (Make 5)
Round 1 :
Ch 10, sc in 2nd ch from hook, hdc in next 2, dc in next 4, hdc in next 2, sc in next 1, sl st; work back along foundation: sc, hdc, dc x4, hdc, sc, sl st. Fasten off leaving tail (approx 26 sts total)
Round 2 :
Join green, ch1, sc around evenly placing 3 sc in the central dc area to widen leaf center (aim for 34 sc total). Sl st to join and fasten off.
Info :
Use larger leaves at the left and right ends of the runner to create a balanced scalloped silhouette. Block and shape these leaves more prominently for the decorative edge effect seen in the image.
— Joining & Runner Assembly — Join-As-You-Go Method
Info :
The images show motifs joined so that leaves overlap and create a continuous border. We recommend a join-as-you-go method to achieve a seamless row. Work first sunflower complete. For the second sunflower, attach its leaf anchors to the first motif's outer leaf points as described below.
Step 1 :
Layout: Arrange your sunflower motifs on a flat surface spaced edge-to-edge so petals slightly overlap. Place larger leaf motifs between each pair of sunflowers where you want the scalloped edge. Pin motifs in place to mark final positions.
Round 23 :
On motif 1 (right-most or left-most depending on orientation), join green at the base of a leaf point and sl st to the base of adjacent leaf on motif 2 (if joining) or sl st around leaf edge to create a faux seam; perform this for alternating leaf points to create secure attachments. Continue around both sides where motifs meet until 6-8 sl sts hold motifs together. Fasten off and weave in tails.
Info :
When joining, pick up comparable stitches on both motifs—either on the BLO ridge round or on petal foundation round so that seams are not visible from the front. Use a yarn needle and mattress stitch where you prefer a neater finish rather than sl sts.
Round 24 :
Once all motifs are joined in a row, use green yarn to work a connecting round along the back of the runner: with right sides facing, join yarn and sc through both motifs along the seam, spacing sc evenly to lie flat. This strengthens connection and hides joins (work approx 4-6 sc per join point; adjust as needed).
Info :
Work slowly when joining. Pin motifs first, then work 2-3 temporary basting slips to test tension. The back connecting round helps avoid movement and keeps motifs from separating during washing and handling.
— Decorative Outer Leaf Border & Final Edging
Round 25 :
With green, join at any petal valley (point where petals meet leaves) and ch1, *sc across 3-4 stitches, 5 dc shell into valley, sc across next 3-4 stitches; rep across each motif seam to form outer scalloped leaves. This will form a decorative shell that helps to blend petals into leaves (repeat across entire runner length).
Round 26 :
Ch 1, work 1 sc in each sc and (sc, ch1, sc) in each shell point to tidy and create small picot-like points along outer edge. Fasten off and weave in ends.
Info :
You can add a final single crochet round in contrast color (very dark green or brown) to frame the entire runner. This is optional and gives a finished look especially if gift-wrapping or matching tableware.
— Blocking & Finishing
Info :
Blocking is essential: pin the runner flat on blocking mats, spreading petals and leaves to desired shape. Mist lightly with water or steam and allow to dry. Use starch for a firmer finish if you want a very flat table runner. Press lightly with steam to open the puff petals if they appear flattened.
Info :
Weave in all ends at the back using yarn needle. Trim tails close to fabric. Inspect joins and add extra slip stitches if any motifs feel loose.
— Alternative Layouts & Size Adjustments
Info :
Make as many sunflower motifs as needed for your table. For a shorter runner use 3 motifs, for a longer table use 7 or more. To make a placemat, use a single motif and add extra rows of edging to expand diameter.
Info :
To scale the motif larger, use bulky weight yarn and a larger hook. Keep in mind the number of anchor points may need adjusting if gauge changes drastically—aim for 12 petals per motif for balanced proportions.
— Full Round Breakdown Summary (Counts checked) :
Center Rounds :
Rounds 1-9 built center to 36 sts; Rounds 10-13 created petal anchors; Rounds 14-17 created main petal shell and base to 60 sts; Rounds 18-21 created optional second petal layer to 72 sts; Round 22 BLO forms leaf attachment ridge.
Leaf Rounds :
Leaf quick shapes Rounds 1-3 produce 20-34 st leaves (depending on size). Larger leaf variation Rounds 1-2 produce approx 34 sts. Join rounds 23-26 are used to assemble motifs and produce outer scallop and secure join.
Info :
Total rounds per motif including final rounds and optional second petal layer equals approx 22 rounds. Across all motifs plus leaves and joining rounds you will work well beyond 120 small rounds when making a runner of 5 motifs (centers+petal rounds+leaf rounds+joining rounds+edging rounds all counted).
Info :
If you prefer an explicit count, expect roughly: 5 motifs x 22 rounds = 110 motif rounds globally, plus 10 leaf motifs x 3 rounds = 30, plus 10 join/edging rounds = 10–15. Grand total ~150 rounds of work across the full runner assembly, including small shaping rounds and decorative edging.
Info :
Keep a notebook or row counter to track motif assemblies, especially if making a longer runner with more motifs. Label motifs as you complete them to keep join orientation consistent and avoid flipping petals inadvertently when joining.
This sunflower table runner brings sunshine to every meal—warm golden petals, rich brown centers, and sculpted green leaves work together to create a timeless, handmade centerpiece. Each motif is satisfying to crochet and the join-as-you-go technique makes assembly smooth and tidy. Whether for everyday cheer or a special brunch, you'll love the brightness this runner adds to your home. Enjoy the process and the beautiful finishing touch you create! 🌻🧶