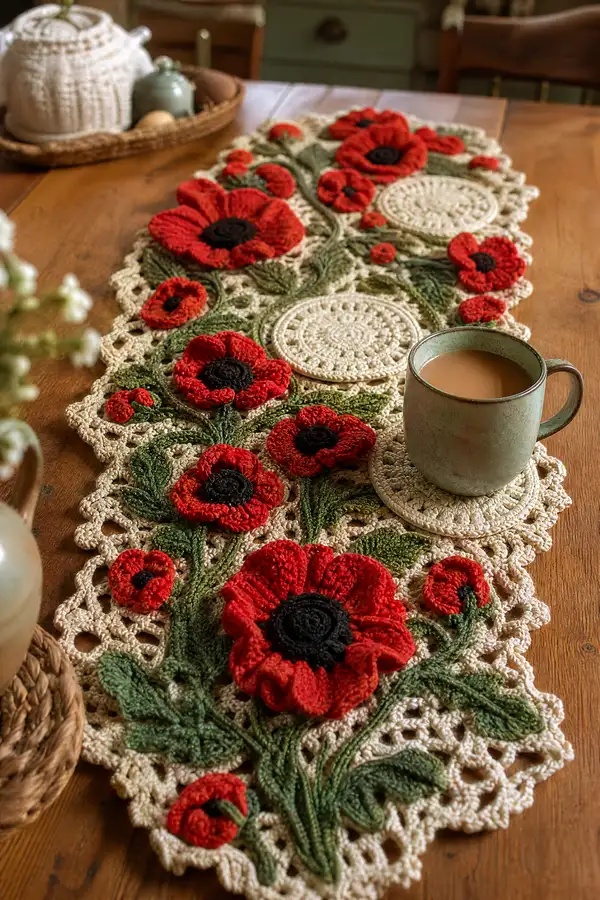
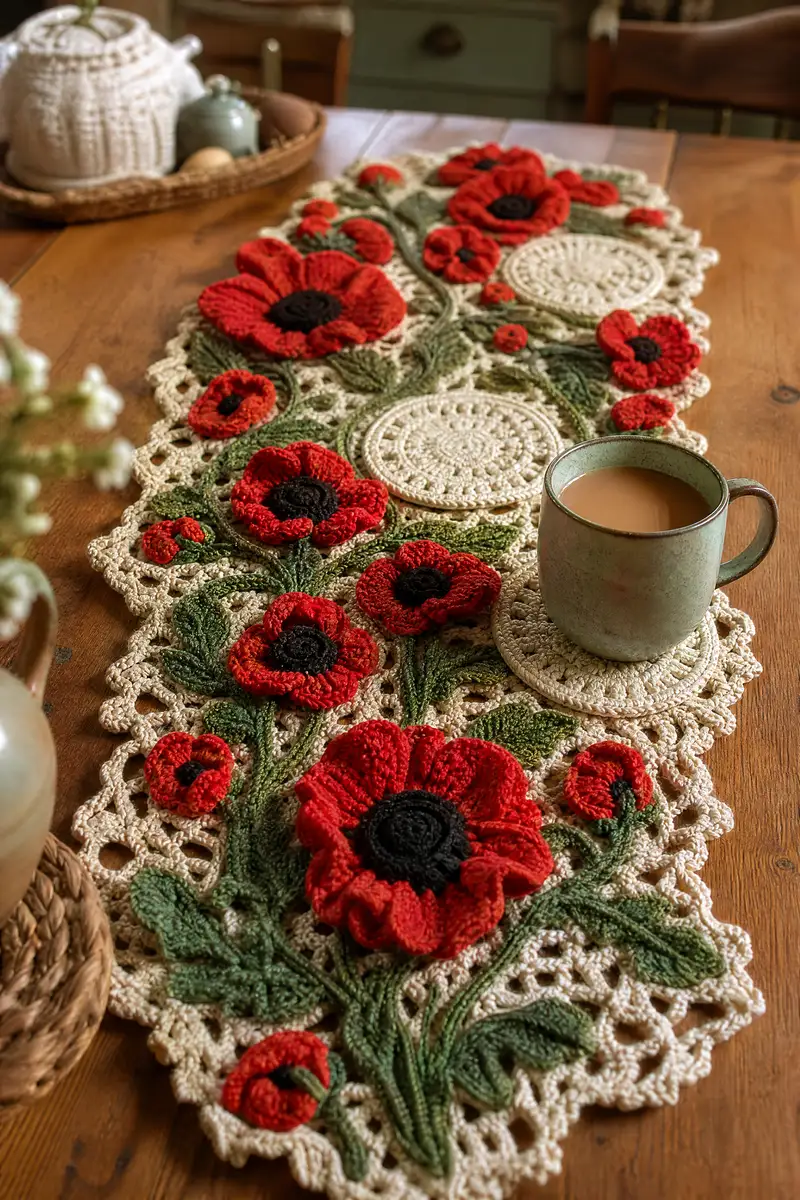
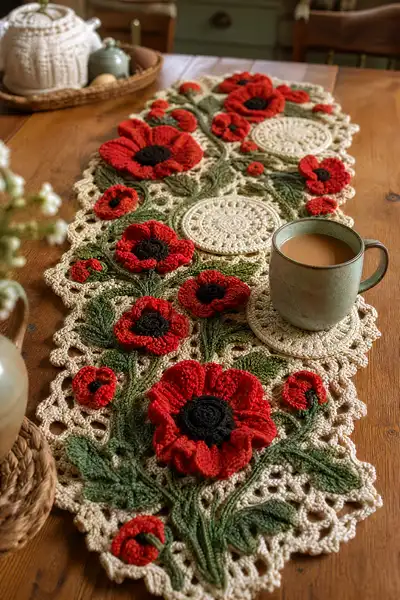
Create a romantic poppy field table runner featuring layered 3D poppies, leafy vines and delicate lace medallions. This pattern teaches modular crochet motifs—round medallions, sculpted poppy petals, long textured leaves and vine joins—assembled into a stunning runner that fits a narrow farmhouse table. The finished piece shows raised red poppies with deep chocolate centers on a warm cream lace background with olive green foliage.
Progress Tracker
0% Complete
— Background Medallion (Make 6-8 as desired) :
Round 3 :
(1 sc, 1 inc) x 6 (18)
Round 4 :
(2 sc, 1 inc) x 6 (24)
Round 5 :
(3 sc, 1 inc) x 6 (30)
Info :
Change to cream/beige if you started with a contrasting waste color. Keep stitches consistent and use stitch marker to mark round start.
Round 6 :
(4 sc, 1 inc) x 6 (36)
Round 7 :
(5 sc, 1 inc) x 6 (42)
Round 8 :
1 sc in each st (42)
Round 9 :
(6 sc, 1 inc) x 6 (48)
Round 10 :
1 sc in each st (48)
Round 11 :
*Ch 3, skip 2 sts, sc in next 2 sts* rep around to create small open lacy ring (16 ch-3 spaces, 48 sc worked as previous row)
Info :
Use BLO here for a subtle ridge if you want the medallion to sit slightly above the background. Block flat to shape before continuing.
Round 12 :
In each ch-3 sp: (sc, ch 3, sc) to create picot-like shells (16 shells). Sc in remaining sc of previous round between shells to maintain structure.
Round 13 :
*In shell: sc, hdc, 3 dc, hdc, sc* in each shell around; sl st to join. (16 shell clusters)
Round 14 :
1 sc in each st and in each dc (approx 100 sts depending on execution)
Info :
These medallions are the base for coasters and some poppy placements. Block to 10-12 cm diameter if you wish to match the photo scale. Make at least three larger medallions and three smaller ones to intersperse among flowers.
Round 15 :
Border: *ch 5, sl st into next st* repeat around to create scalloped openwork, finishing with sl st and fasten off. Weave tails in at back.
— Large Poppy Center (Make 4 large poppies) :
Round 1 :
6 sc in mr using dark chocolate (6)
Round 3 :
(1 sc, 1 inc) x 6 (18)
Round 4 :
1 sc in each st (18)
Info :
This center is worked tightly to create a small dense disk. Use a slightly smaller hook (3.0mm) if your stitches are loose. Leave a long tail for sewing to petals later.
Round 5 :
*(sc in next 2 sts, hdc in next st) repeat around* (24)
Round 6 :
1 sc in each st (24)
Round 7 :
Fasten off leaving long tail. Use long tail to sew center onto petal layer later. Optionally, coil a small chain of sc with dark chocolate and sew into spiral atop the center for extra texture.
— Large Poppy Petal Base (Make 4 large petals sets per large poppy) :
Round 1 :
Using bright red, ch 11, sl st to form loop (or 10 sc in mr for a more compact start)
Round 2 :
Work along chain: 1 sc in 2nd ch from hook, sc next 8, then 3 sc in last ch to turn and work down opposite side of chain: sc each ch back to start; join with sl st. (approx 22 sc)
Round 3 :
*ch 3, skip next st, sl st in next* across perimeter to make base picot points for petal shaping (approx 11 pointed spaces)
Info :
Make 6-8 of these petal bases for a full poppy depending on desired fullness. For the largest poppy in the photo you will make 8 petal units per layer and create 2-3 petal layers stacked.
Round 4 :
On each pointed space: (sc, hdc, 3 dc, hdc, sc) to form a full petal. Fasten off leaving tails for joining. (Each petal approx 8-10 sts across)
Round 5 :
Make a second layer of petal bases slightly smaller (use ch 9 start or omit one chain round) to nest inside the first layer creating depth.
Info :
Use alternating red and rust for subtle shading; work the outermost layer in the brightest red for the bold look seen in the image.
Round 6 :
Optional ruffle step: Join yarn at base of each petal and work in FLO of the base row: 3 sc in each petal base stitch to create a ruffled crown for more sculptural petals. Fasten off.
— Large Poppy Assembly :
Info :
Stack petals: large outer layer, medium inner layer, then large center disk. Curl and overlap petals slightly. Use long tail of dark center to sew through all layers in several passes and secure tightly. Position petals so they are slightly puckered and lifted to create 3D effect.
Round 1 :
Sew first petal layer onto center: insert needle under base of each petal and through center disk, knot securely on the back. Repeat for inner layer, offsetting petals by half a petal to fill gaps.
Round 2 :
Optional: Embroider a few radiating short stitches from center outward using deep rust for extra texture.
Info :
Press petals gently with steam and shape while damp if needed. Do not over-block; you want petals soft and slightly cupped.
— Small Poppies (Make 8-12 small blossoms) :
Round 1 :
6 sc in mr using dark chocolate (6)
Round 3 :
1 sc in each st (12)
Round 4 :
Join bright red in any st. *ch 4, sl st in same st, sl st in next st* repeat around to create 6 tiny loops for petals.
Round 5 :
In each loop: work (sc, hdc, 3 dc, hdc, sc) to form a small petal. Fasten off leaving tail for sewing to runner.
Info :
These small poppies fill gaps between larger flowers and on vine branches. Make several in both bright red and rust for variation.
— Long Textured Leaf (Make 12-16) :
Round 1 :
With moss green, ch 21 (or adjust length for desired leaf size), sl st to join forming a ring or work foundation chain as the leaf center line.
Round 2 :
Row-style: Work along chain: 1 sc in 2nd ch from hook, sc across to end, then work on opposite side of chain: sc back across to starting point; join with sl st (approx 40 sc total forming a flat leaf strip).
Round 3 :
Edge shaping: *sc, hdc, 2 dc, hdc, sc* in next 5 sts across one side to form one leaf edge, sl st across base, repeat on opposite side mirroring shape. (Creates mirrored scalloped leaf edges)
Round 4 :
On top of each 2 dc cluster work a surface slip stitch center vein: using a contrasting lighter green, surface sl st down the leaf center to create texture.
Info :
Make leaves in differing lengths to echo photo; some are longer narrow stems, others shorter and broader. Block each leaf slightly curved for natural look.
Round 5 :
Optional: Work a second round of edging: *ch 3, sl st into next st* around to create lacy touches on leaf margins. Fasten off and weave in ends.
— Stem & Vine (Make 1 long vine series to span runner) :
Round 1 :
Using olive green, ch 150 (or length to match runner length approximately 75-95 cm), turn. This long chain will be shaped into vines and anchored to medallions.
Round 2 :
Work along chain: sl st into 2nd ch from hook and each ch across for a thin braided vine look, or sc across for a thicker vine. (approx 149 sts)
Round 3 :
To create texture: in chosen spots along the vine, work 3 sc in one st to create knobbly bud nodes (make 10-15 nodes in total across the vine).
Info :
Make three vine segments and join with sl st or sew to create branching pattern seen in photo. You will curve and sew vines to background medallions and under leaves/poppies.
Round 4 :
Surface crochet: using a contrasting light olive, work surface slip stitches along one side of the vine to emphasize a twisted cord effect. Fasten off at both ends and block lightly.
— Small Rosebud/Berry Fills (Make 20-30 small buds) :
Round 1 :
6 sc in mr using rust or red (6)
Round 2 :
1 sc in each st (6) - finish off leaving tail for sewing. These tiny beads of color fill negative spaces.
Info :
Sew these directly onto vines or medallion edges to add interest. Slight stuffing inside before closing will give them a rounded bead look.
— Small Round Coaster Motif (Use as coasters inside medallions) :
Round 1 :
6 sc in mr with cream (6)
Round 3 :
(1 sc, inc) x 6 (18)
Round 4 :
(2 sc, inc) x 6 (24)
Round 5 :
1 sc in each st (24)
Round 6 :
Border: *ch 4, sl st into next st* repeat around to create airy lacy edge. Fasten off and block to 9-10 cm diameter.
Info :
Make at least three of these to place under coffee cups as seen in the photo; these sit attractively inside larger medallions.
— Joining Motifs & Composition :
Info :
Lay out medallions, poppies, leaves and vines on a large blocking board or clean table, following photo composition: central medallions staggered lengthwise with large poppies positioned on alternate ends and smaller poppies filling gaps along vines.
Round 1 :
Sew vine segments to medallion edges: pin the vine into desired curve, then using matching yarn sew through vine and medallion edge with whip stitch every 6-8 mm for a secure seam.
Round 2 :
Attach leaves: place leaves along vines and around medallions; sew leaf base firmly to vine with mattress or whip stitch. Use extra passes at leaf base to ensure they do not droop.
Info :
Sew poppies last: position each layered poppy so petals overlap the medallion edge slightly and stitch through petal base and medallion to secure. Use small hidden stitches under petal bases for a clean top surface.
Round 3 :
Attach small poppies and buds into negative spaces and along vines. Use small gathering stitches to slightly cup tiny petals upward.
Round 4 :
Weave in all tails securely and trim close. Use a small dab of fabric glue on hidden knots if desired for extra security.
— Edging Around Runner (Scalloped Lace Edge) :
Round 1 :
Using cream, pick up stitches along outermost medallion edges with sl st, working uniformly. Aim for even spacing of approx 4-6 sl sts per cm. Work around entire runner perimeter.
Round 2 :
*Ch 5, sl st in next anchoring spot* repeat to create open scalloped loops along border (approx 40-60 loops overall depending on runner size)
Round 3 :
Inside each loop: (sc, hdc, 3 dc, hdc, sc) to form a decorative shell. Adjust number of dc to maintain even spacing so shells do not pull.
Info :
Block edging heavily pinned to flatten and form scallops; steam lightly but avoid flattening poppies. The scalloped edge gives the organic silhouette seen in the photo.
Round 4 :
Final picot pipe: *ch 3, sl st in 3rd chain from hook into next st* around shell points to create delicate tooth-like edging; fasten off and weave ends.
— Surface Embroidery & Shading :
Round 1 :
With deep rusty yarn, embroider a few short straight stitches at petal bases to imitate petal veins. Use 3-5 stitches per petal radiating from center for a subtle hand-stitched look.
Round 2 :
Use surface sl st in lighter green to run delicate tertiary veins along vine sides and leaf midlines, catching into vine body at regular intervals to secure thread and add definition.
Info :
Surface crochet or embroidery should be light-handed. The goal is to suggest natural texture, not dominate the crochet stitches.
— Final Blocking & Finishing :
Round 1 :
Lay runner flat on blocking board and pin medallions, petals, leaves and edging into desired shape. Use a steam iron on low or spray with water to set, letting dry completely overnight.
Round 2 :
Trim any stray fibers and give final inspection. Re-stitch any loose attachments and ensure coasters sit flat within medallion rings.
Info :
Allow at least 24 hours for the runner to fully dry before using. If storing, lay flat or roll around a tube to avoid creases in petal shaping.
Finishing this Poppy Field Table Runner will feel like unveiling a miniature garden across your table — each medallion, leaf and petal adds to a painterly composition. The layered poppies bring depth and warmth, turning everyday coffee moments into something special. I hope this pattern inspires long afternoons of creativity and the pride of a handmade centerpiece. 🌺🧶