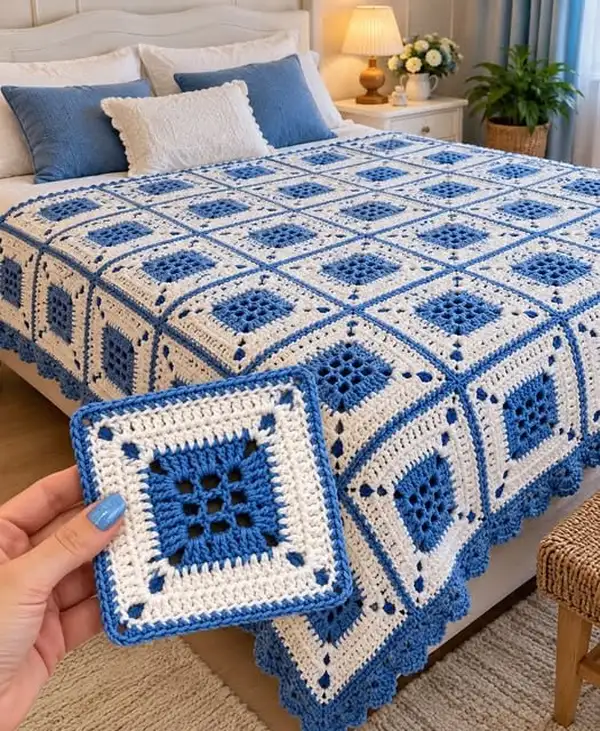
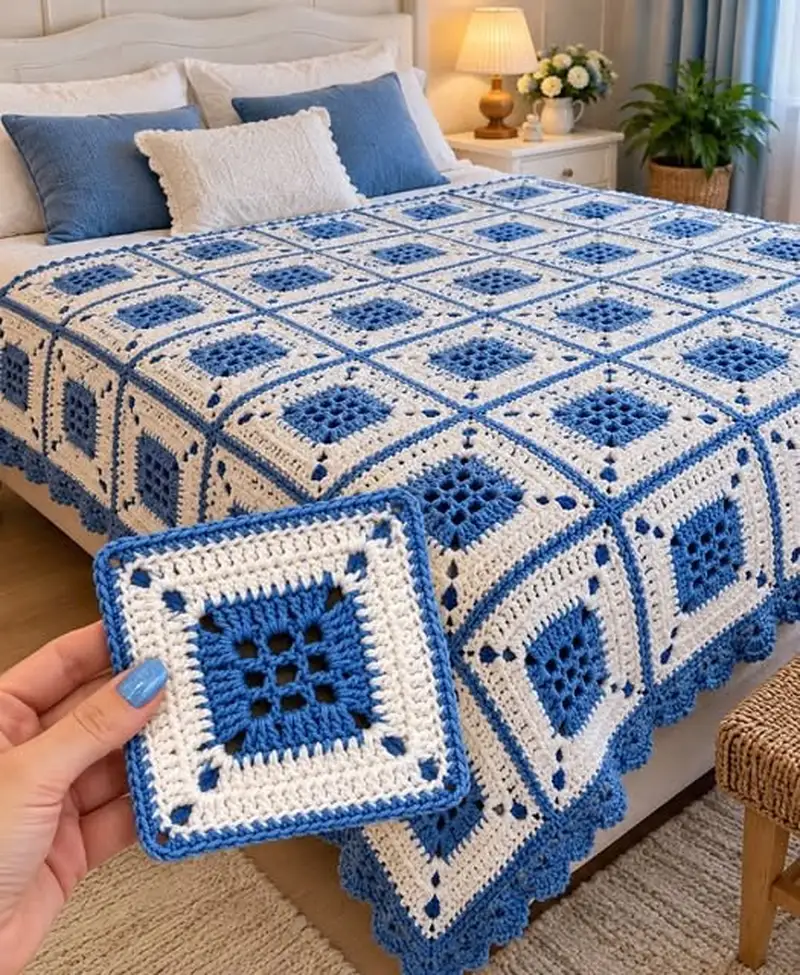
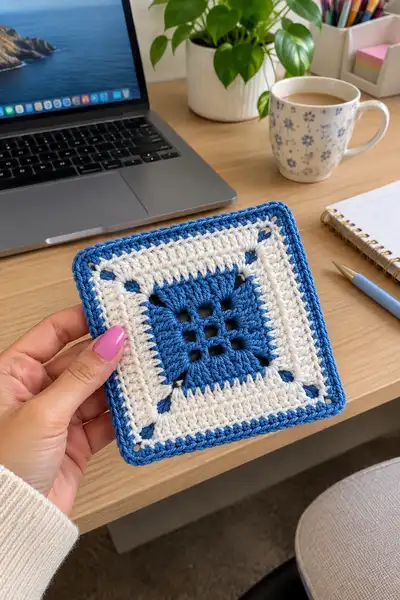
A classic, cozy bed throw built from elegant royal blue and cream granny squares. This pattern guides you through detailed square construction, color changes, joining and a scalloped outer border to create a polished, bed-sized blanket. Includes step-by-step rounds, tips for consistent tension, and multiple finishing options to make a heirloom-quality piece.
Progress Tracker
0% Complete
— Gauge & Notes :
Info :
Gauge is flexible for this style of blanket. Each finished 28-round square (as written) measures approximately 6.5-7.5 inches depending on yarn and tension. Adjust hook size to achieve desired size. The pattern is written in rounds joined with slip stitch at the end of each round; you may work joined rounds or continuous spirals but use slip stitch joins for cleaner color changes. Squares are worked from center out. Color sequence: Royal Blue (center rounds), Cream (middle rounds), Royal Blue (outer round and edging). For a bed throw shown, arrange a 6 x 6 grid (36 squares) - change grid size to suit your needs.
— Granny Square Motif (make 36 for 6x6 throw) :
Round 1 :
Using Royal Blue, make mr, ch3 (counts as first dc). Work 2 dc into ring, ch2, *3 dc into ring, ch2* repeat 2 more times, join with sl st to top of ch3. (12 dc, 4 ch2 corner spaces)
Round 2 :
Join Royal Blue in any corner ch2-sp, ch3, 2 dc in same ch2-sp (first corner made), ch2, 3 dc in same ch2-sp, *move to next corner ch2-sp, (3 dc, ch2, 3 dc) in corner* x3; join with sl st to top of beg ch3. (24 dc clusters total in groups of 3; 4 corner ch2s remain)
Round 3 :
Change to Royal Blue if you prefer continuing same color; otherwise keep Royal Blue. Into each side space (the ch1/side gap from Round 2), work 3 dc cluster; in each corner ch2-sp work (3 dc, ch2, 3 dc). Join with sl st. (36 dc total; clusters arranged 9 clusters around; effective stitch count 36)
Info :
Rounds 1-4 are compact and create the solid center. Keep clusters close—insert hook under both loops of chains and stitches to ensure fabric stability. Place a removable stitch marker in your first dc of Round 4 to track beginnings if you plan to work continuous rounds.
Round 4 :
Work 3 dc clusters into each available side space from previous round; in corners work (3 dc, ch2, 3 dc). Join. (48 dc total)
Round 5 :
Continue Royal Blue for a deep center: 3 dc cluster in each side space; corners (3 dc, ch2, 3 dc). Join. (60 dc total)
Round 6 :
Finish the royal-blue center round: repeat cluster pattern across sides and corners as before. Join. (72 dc total)
Info :
Change to Cream here (Round 7) for the main body of the square if you want the same look as the photo. When changing colors, complete the final pull-through of the last st of Round 6 with cream so the new color starts cleanly. Weave in ends later or carry a short tail to the next round.
Round 7 :
Info: Change to Cream yarn. Join cream in any corner ch2-sp, ch3, 2 dc in same ch2-sp (first corner), ch2, 3 dc in same ch2-sp. In each side space work 3 dc cluster separated by ch1 as needed to maintain flat square shape; corners remain (3 dc, ch2, 3 dc). Join. (84 dc total)
Round 8 :
1 dc in each dc across side spaces replacing clusters with single dc to create a denser texture for 2 rounds: In corners work (3 dc, ch2, 3 dc); along sides work 1 dc in each stitch (work counts = 96 dc total). Join.
Round 9 :
Work 1 dc in each st across (96 dc). Corners remain (3 dc, ch2, 3 dc). Join. (96)
Info :
These solid dc rounds create the wide cream band. Use consistent tension here so the square stays flat; if the fabric begins to ripple, check your stitch count and loosen tension slightly.
Round 10 :
1 dc in each st around maintaining corners as (3 dc, ch2, 3 dc). Join. (96 dc)
Round 11 :
Switch to a more open decorative round: in corner ch2-sp work (3 dc, ch2, 3 dc), along each side work: *skip first st, (dc, ch1, dc) in next st* rep across to create small eyelet accents between clusters; finish with corner repeat. Join. (Count remains 96 effective dc with ch1 spaces creating texture)
Round 12 :
1 dc in each st and ch1-space around (96 dc). Corners (3 dc, ch2, 3 dc). Join. (96)
Info :
You can repeat rounds 10-12 to widen the cream band if you prefer a larger cream area on the square. For the sample pictured, we maintain a moderate band before switching back to royal blue outer rounds.
Round 13 :
Change to Royal Blue. Join in corner ch2-sp, ch3, 2 dc in same ch2-sp, ch2, 3 dc in corner. Along sides work 1 dc in each st (work 96 dc) to create a crisp blue frame. Join. (96)
Round 14 :
Work 1 dc in each st around continuing the crisp frame (96 dc). Join. (96)
Round 15 :
To neaten corners and begin squared outer edge, in corners work (3 dc, ch2, 3 dc); along sides work 1 hdc in each st for a slightly lower profile outer band. Join. (96 hdc equivalents)
Info :
If your square looks slightly rectangular, press gently with steam or block it to square. Proper blocking aligns rounds and makes joining much neater. Place pins at corner points before sewing to ensure straight lines.
Round 16 :
Work 1 sc in each st around (sc into the top of each dc/hdc/stitch across), making sure to place 3 sc into each corner ch2-sp (total sc around = 96 sc). Join with sl st. (96 sc)
Round 17 :
Work 1 sc in each sc around in BLO (back loops only) to create a subtle ridge that frames the square nicely. (96 sc in BLO). Join.
Round 18 :
Switch to Royal Blue if you wish a final neat line: 1 sc in each st around in FLO (front loops only) for a lifted outer band. (96 sc). Join.
Info :
The combination of BLO/FLO rounds helps the outermost blue round sit proudly as a crisp frame while still remaining soft. Leave a long tail (approx 12-15 inches) when fastening off this round to use for seaming if you plan to sew squares rather than join-as-you-go.
Round 19 :
For squares matching the pictured scallop-ready motif, work a repeat of: *ch1, skip 1 sc, sc in next 4 sc, ch1, skip 1 sc* across each side, placing 3 sc into each corner ch2. This spaces the outer edge to accept the shell scallop in later edging rounds. (approx 96 sc spacing maintained)
Round 20 :
Finish outer shaping by working 1 sc around into each st/space created previously, adjust so that you have an even number of stitches between corner groups (aim for multiples of 6 between corners for the scallop pattern). Join and fasten off, weaving in ends or leaving tail for joining. (Stitch count ~96)
Info :
Each completed square should be blocked lightly to the same measured width before joining. Blocking ensures consistent seam allowances and helps the scallop border sit evenly across the blanket edge later.
— Repeat Notes :
Info :
Make the required number of squares for your target blanket size. For a sample bed throw as photographed, make 36 squares (6 wide x 6 high). For a lapghan, reduce to 4 x 4 or 5 x 5. For a larger blanket add columns/rows as desired. Keep the same tension and yarn throughout to maintain uniform squares.
— Joining Squares (join-as-you-go or whip stitch) :
Info :
Two methods are given: Join-As-You-Go (JAYGO) using slip-stitch joins in the final sc round, or sew the squares together with whipstitch using the long tails left at Round 18-20. JAYGO gives an integrated seam and avoids a second pass of sewing. If using JAYGO, join squares as you complete the final sc round by slip-stitching through corresponding stitches on adjoining square edge. For a neater seam, work the join in the same color as the outer frame (Royal Blue).
Join Method A (Whipstitch) :
Lay two squares right sides together aligning the outer sc round. Thread long tail onto yarn needle and whipstitch through both loops of corresponding stitches evenly from corner to corner. Use approx 12-14 stitches along each side for stability; ensure you don't pull too tight. Press seam flat and knot securely at end. Repeat to assemble a row, then join rows into the full blanket.
Join Method B (Join-As-You-Go) :
With right side of finished square facing, place next square with right sides together, pick up loops from edge stitch and slip stitch through both squares: *insert hook through edge stitch of finished blanket and into last sc of new square, yarn over, pull through both loops, sl st* repeat across edge. Corners: work sl st into corner ch2 to maintain alignment. Work across all internal joins first (joining squares into rows), then join rows to complete the grid. Fasten off and weave ends.
Info :
When joining, keep tension slightly relaxed so the join lays flat and not cinched. Use pins to align intersections, ensuring corners meet precisely. If using JAYGO, make a test join of 2 squares to confirm stitch placement before committing to entire blanket.
— Assembled Blanket Base :
Info :
Once all squares are joined into a rectangular grid (6 x 6 for sample), press lightly with steam or wet-block to even out join seams. The assembled blanket should measure approx 42-48 inches square depending on gauge. Adjust counts by removing or adding squares to reach your desired final measurement.
— Outer Scalloped Border (work around entire blanket) :
Round 1 (Border Round 1) :
With Royal Blue and right side facing, join with sl st to any corner. Work 1 sc evenly into each outer sc along blanket edge, placing 3 sc in corner spaces (aim for consistent multiples between corners). Work across the entire perimeter. (Stitch count variable depending on blanket size; maintain multiples of 6 between corners for scallops)
Round 2 :
1 sc in each sc around to firm the border. Join. (same stitch count)
Info :
Check that you have an even multiple of 6 stitches between each corner; if not, adjust by adding or skipping a sc in a non-prominent place so shells will sit symmetrically around the edge.
Round 3 (Scallop foundation) :
Work: *skip 2 sc, 5 dc in next sc (shell made), skip 2 sc, sl st in next sc* repeat across each side, placing a shell centered between corners and adjusting spacing to fit. In corners, work shell into the center sc of the 3-sc corner group. Join. (Number of shells will depend on perimeter stitch count but will be evenly spaced)
Round 4 :
Ch1, sc in same st, *ch3, sc in center dc of shell (this creates a picot-like arch), ch3, sc between shells* repeat across, anchoring corners with sc. Join. (Even spacing maintained)
Info :
If the scallop round looks too loose, work the shell stitches into tighter single stitches (work 5 dc in 3-st base instead of wide spacing). Always check the look at the end of each round before continuing to the next to avoid ripples.
Round 5 :
Switch to Cream for a soft final contrast. Into each shell work: sl st into first dc, ch1, (sc, hdc, 3 dc, hdc, sc) into shell peak to make a fuller scallop, sl st to next anchoring point. Repeat around. Join. (Shells become more pronounced)
Round 6 :
With Cream, 1 sc in each st around to tidy scallops and firm the edge; place extra sc in shell valleys as needed to hold shape. Join and fasten off. Weave in all ends securely. (Perimeter tidied)
Info :
For a larger, layered scallop, you may repeat Round 5 in alternating colors for a double scallop. The pictured throw uses a single deep blue scallop accent with a cream finish to highlight the pattern.
— Optional Decorative Edging Rounds (Add 4 extra rounds for a plush edge) :
Round 7 :
With Royal Blue, join at any scallop valley. Work 1 hdc in each st around, placing 3 hdc into each scallop peak for reinforcement. Join.
Round 8 :
With Cream, work 1 dc in each hdc around to add lift and soft contrast. Join.
Round 9 :
Switch to Royal Blue, work a reverse single crochet (crab stitch) along the final round for a twisted rope look. Work carefully from left to right (reverse) creating a tight, neat rim. Join and fasten off. (This finishing round visually frames the blanket)
Info :
Reverse single crochet provides a subtle rope-like finish that resists curling and provides professional polish. Ensure tension is even since the reverse motion can tighten stitches slightly.
— Finishing Touches :
Info :
Weave in all tails at the back of the blanket using a yarn needle, burying ends through multiple stitches to secure. Lightly block the entire blanket to size by pinning to a blocking board and misting or steaming. Allow to dry fully before using. If desired, add corner tassels or pompoms in royal blue for an extra decorative touch; attach securely with multiple passes and weave in ends.
Info :
For machine-washable care, choose superwash acrylic or cotton-blend yarns and wash on gentle cycle in cool water, then lay flat to dry. Avoid agitation or hot water which may cause felting or distortion in natural fibers.
Finishing this royal blue and cream granny square throw is so rewarding—each square comes together to create a classic, cozy blanket you will be proud to display. The bold blue centers pop against the soft cream bands, and the scalloped edging gives a handcrafted, elegant finish. Whether you gift it or keep it for yourself, this throw is a beautiful statement of slow, thoughtful craft. 🧶✨ Wrap up in it on chilly evenings and enjoy every stitch of your handiwork! 😊