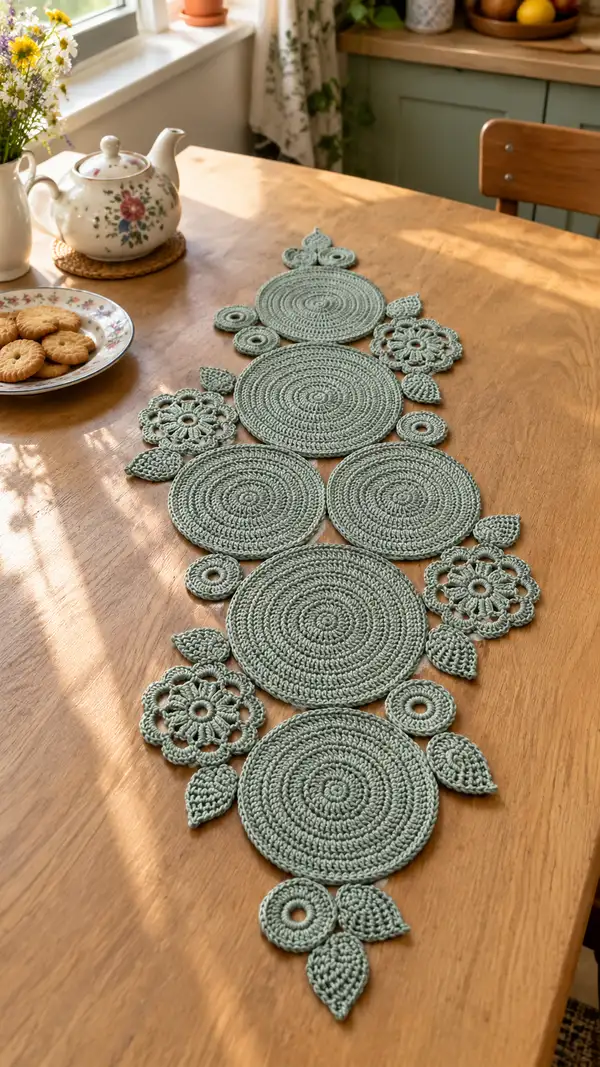
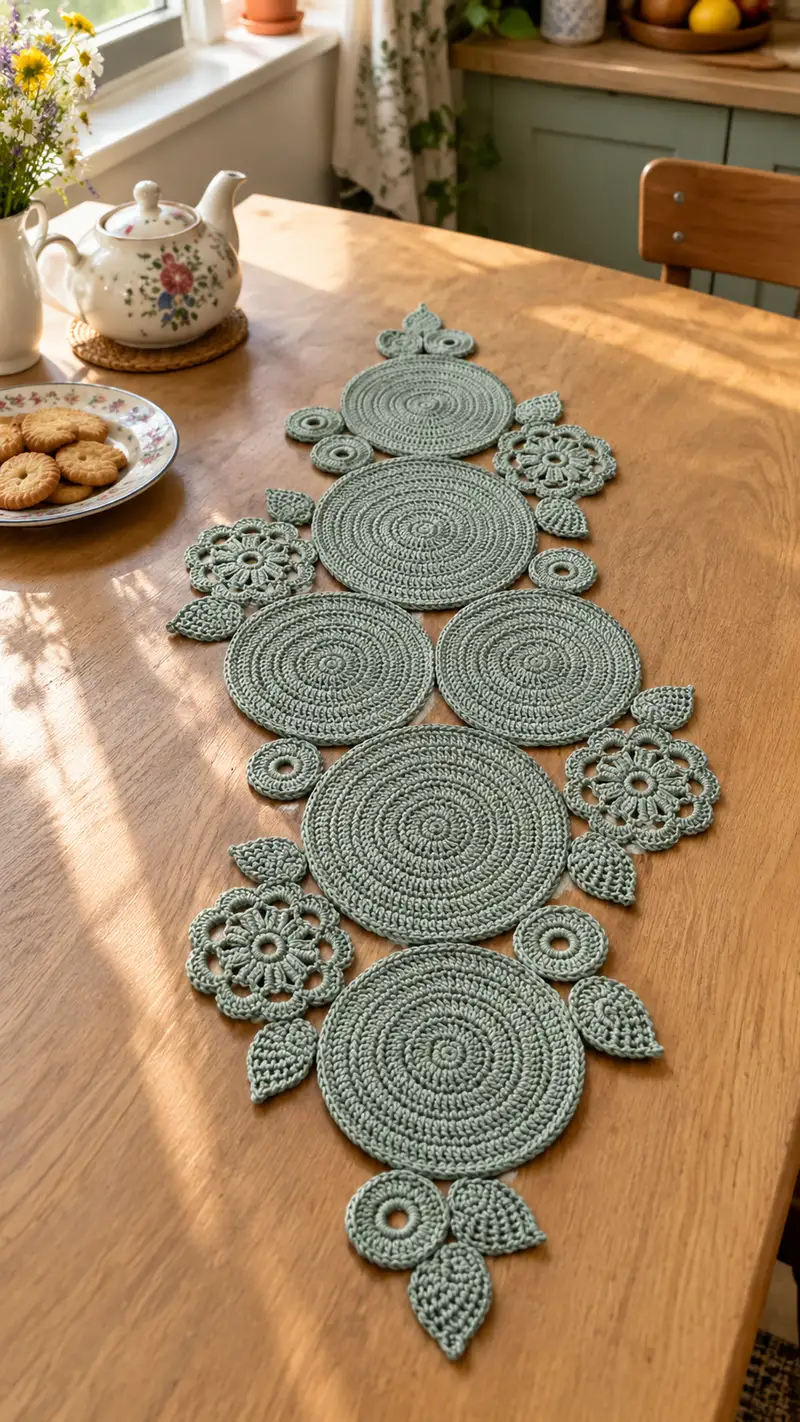
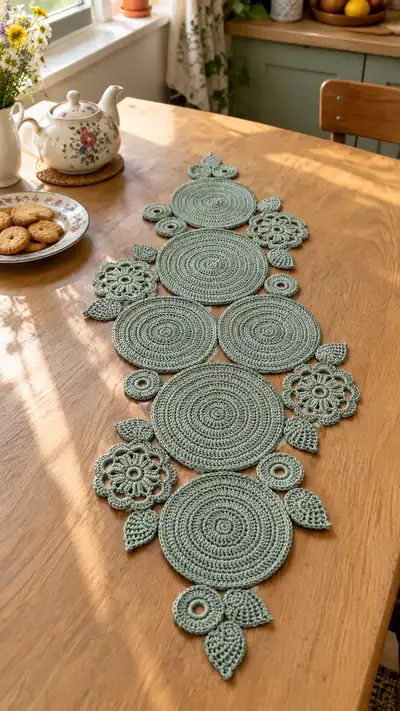
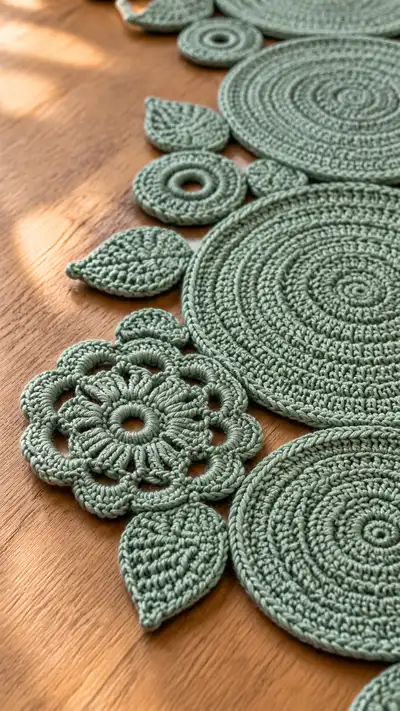
A graceful botanical-inspired table runner composed of concentric round motifs, delicate lace flowers, and sculpted leaves in a soft sage cotton. The design joins large circular placemat-like discs with smaller rings and floral motifs to create an elegant, organic runner. Perfect for a dining table, sideboard or dresser, the runner sits flat and has a slightly textured, handmade look that layers beautifully over wood. Finished piece shown in muted sage green with natural wooden tabletop styling.
Progress Tracker
0% Complete
— Materials & Gauge :
Info :
Gauge is measured on the large round motif: approximately 14 cm / 5.5 in diameter after 14 rounds using 3.5mm hook and cotton DK/light worsted weight yarn. Adjust hook if your gauge differs. Finished runner in photos is approximately 110-120 cm / 43-47 in long from tip to tip depending on spacing.
— Abbreviations & Notes :
Info :
All rounds are worked in continuous rounds unless stated 'join' or 'ch1 and sl st to join'. Use a stitch marker at the first stitch of each round. Work tightly enough that stitches are close but not so tight that the fabric curls. Block motifs flat before joining for best results.
— Large Round Motif (Make 5) :
Round 1 :
6 sc in magic ring (6)
Round 3 :
(1 sc, inc) x 6 (18)
Round 4 :
(2 sc, inc) x 6 (24)
Round 5 :
(3 sc, inc) x 6 (30)
Round 6 :
(4 sc, inc) x 6 (36)
Round 7 :
(5 sc, inc) x 6 (42)
Info :
At this point the disc begins to flatten. If you prefer a slightly domed look, pull yarn a little looser; for a flat coaster-like disc keep tension consistent and press flat while working.
Round 8 :
(6 sc, inc) x 6 (48)
Round 9 :
(7 sc, inc) x 6 (54)
Round 10 :
(8 sc, inc) x 6 (60)
Round 11 :
(9 sc, inc) x 6 (66)
Round 12 :
(10 sc, inc) x 6 (72)
Info :
For an extra flat edge, work this round in the BLO. To do so, make 1 sc in each st BLO around to create a subtle ridge which helps the discs lie flat when joined.
Round 13 :
(11 sc, inc) x 6 (78)
Round 14 :
(12 sc, inc) x 6 (84)
Round 15-18 :
1 sc in each st (84)
Info :
Work rounds 15-18 to build the height of the motif to match the photo. If you prefer a slightly larger disc, add more even rounds, maintaining stitch count.
Round 19 :
1 sc in each st BLO (84)
Round 20 :
1 sc in each st (84)
Info :
Fasten off, leaving a long tail for sewing if you want to stitch motifs together. Make 5 identical large motifs. Block flat and set aside.
— Medium Round Motif (Make 2) :
Round 1 :
6 sc in magic ring (6)
Round 3 :
(1 sc, inc) x 6 (18)
Round 4 :
(2 sc, inc) x 6 (24)
Round 5 :
(3 sc, inc) x 6 (30)
Round 6 :
(4 sc, inc) x 6 (36)
Round 7 :
(5 sc, inc) x 6 (42)
Round 8 :
(6 sc, inc) x 6 (48)
Round 9-12 :
1 sc in each st (48)
Info :
These medium discs fill the negative space between larger discs. Make 2 and block to flatten to about 10-11 cm diameter, depending on gauge.
— Small Donut Ring Motif (Make 8) :
Round 1 :
Ch 6, sl st to join to form ring, ch1
Round 2 :
12 sc around ring (12)
Round 3 :
(1 sc, inc) x 6 (18)
Round 4 :
(2 sc, inc) x 6 (24)
Round 5 :
(3 sc, inc) x 6 (30)
Info :
These little donut motifs look like small rings in the photo. Adjust number of rounds to shrink or expand the inner hole. Make 8 identical rings, block slightly to open the center hole cleanly.
— Lace Flower Motif (Make 4) :
Round 1 :
6 sc in magic ring (6)
Round 2 :
Ch2, (dc, ch2) x6 into ring, sl st to first dc to join (6 ch2 loops)
Round 3 :
In each ch2 loop: (sc, hdc, 3 dc, hdc, sc) x 6 - forming six petals
Round 4 :
Ch3, *sl st in next petal top, ch3; rep from * around to form 6 outer loops, sl st to join
Round 5 :
In each outer ch3 loop: (sc, 3 dc, sc) x 6 - creates scalloped edge
Round 6 :
1 sc in each st around scallop to tidy edge; sl st to finish
Info :
Flower centers are ring-like and airy; work petals loosely for open lace. Make 4 flowers and lightly block to open the petals evenly.
— Sculpted Leaf Motif (Make 12) :
Round 1 :
Ch 8, in 2nd ch from hook: sc, hdc, 2 dc, tr, 2 dc, hdc, sc (working back along foundation chain creates one side)
Round 2 :
Without turning, continue along opposite side of chain: sc, hdc, 2 dc, tr, 2 dc, hdc, sc - join with sl st to first sc (16 sts across both sides)
Round 3 :
Ch1, (sc, inc over next st) around to widen leaf edge; total depends on counts - aim for 24 sts
Round 4 :
BLO: 1 sc in each st BLO to create subtle rib on top surface (24)
Round 5 :
Sc diminuendo tip: dec at tip and base to create pointed ends (work 2 rounds decreasing 2-3 sts each round)
Round 6 :
Fasten off leaving tail for sewing. Block leaves gently; pin to shape prominent midrib if desired.
Info :
Leaves are worked flat. For thicker leaves, work an extra sc round then stitch through both layers along center with a running stitch to simulate a raised midrib.
— Alternative Leaf (Textured, Make 6) :
Round 1 :
Ch 10, sl st to form a ring (or work foundation chain), 10 sc around (10)
Round 2 :
Ch1, 2 sc in each st around (20)
Round 3 :
1 sc BLO in each st (20) - creates folded ridge when pressed
Round 4 :
Shape tip with dec rounds: (4 sc, dec) x3 (18)
Info :
Fold and stitch the rounded leaf along centerline to close and make a sculpted petal. These alternate leaves add variation seen in the photo.
— Small Decorative Disk (Make 4 - tiny solid circles) :
Round 1 :
6 sc in magic ring (6)
Round 3 :
(1 sc, inc) x 6 (18)
Round 4 :
1 sc in each st (18)
Info :
These small solid disks visually bridge spaces between larger motifs. Make 4 and block to flatten.
— Joining Layout & Placement :
Info :
Arrange motifs on a flat surface before joining. The pictured runner alternates five large discs along the center, two medium discs between large pairs, lace flowers offset to one side, small donuts and leaves filling gaps and edges. Allow 1-2 cm overlap for sewn joins so the runner appears continuous.
Info :
Suggested layout from bottom tip to top tip: small donut + leaf cluster, large circle #1, small donut + leaf + flower, large circle #2, medium circle, large circle #3, medium circle, large circle #4 + flower, small donut cluster + leaves, large circle #5, top leaf tip motif. Use photos as visual reference for spacing.
— Join Method A: Slip Stitch Join (Optional decorative) :
Round 1 :
Place two motifs with right sides up, holding edges flush where they overlap. Insert hook through both edge sts and sl st through both loops across the intended join line about every 3-4 stitches to attach lightly.
Round 2 :
Work sl st joins only in visible join seams so the surface remains mostly uninterrupted. Fasten off and weave tails neatly on the underside.
Info :
This method gives a clean, crocheted seam. Use it for lightweight motifs and when you want a continuous surface look. For stronger joins use sewing.
— Join Method B: Mattress or Whip Stitch (Recommended for durability) :
Round 1 :
Thread a long tail on a tapestry needle. Align motif edges with 1-2 cm overlap. Using mattress or whip stitch, sew motifs together with small even stitches through both layers, pulling snug but not tight to avoid puckering.
Round 2 :
Stitch around overlapping area, at least 6-10 stitches per 5 cm to secure. Tie off and weave ends through underside of motifs. Repeat for each join point following layout.
Info :
When sewing flower and leaf motifs to round discs, position petal and leaf tips to lift slightly outward for a dimensional look. Pin first and step back to check symmetrical placement before sewing.
— Assembly Sequence (Detailed) :
Round 1 :
Block all motifs flat per blocking instructions. Lay out the full runner on a table in your desired arrangement using photos for guidance. Mark key join points with pins.
Round 2 :
Begin joining from the center of the runner working toward each tip. Join large circle #3 to the two medium circles first if using centers as anchor points, then continue outward to attach adjacent large circles.
Round 3 :
Sew the lace flowers into the intended gaps, stitching through the center with small stitches to the underside of the larger discs so that petals sit on top and create an overlay effect.
Round 4 :
Place small donut rings and small solid discs in the negative spaces, sewing them flat so their outer edges align with the surrounding motifs. Add leaves last, tucking their narrow ends under adjacent discs and sewing along the base for secure attachment.
Info :
Where two motifs meet at an angle, use three small whip stitches spaced evenly to anchor the join without adding bulk. Check the runner's curvature as you go and adjust placement to achieve a natural flowing line.
— Edging Alternates & Finishing Touches :
Round 1 :
To finish raw joins and create a tidy outline, work a single round of sc around the entire perimeter picking up edges of adjacent motifs. Work slowly and evenly to keep tension matching the motifs.
Round 2 :
For a decorative scallop, work *sl st, ch3, sl st in next st* around perimeter where desired to create small loops. Alternatively, a round of puff stitches can add texture.
Info :
Block again after joining and finishing to settle stitches. Use gentle steam or light misting then pin flat until dry. This final blocking evens edges and opens lace flowers beautifully.
— Blocking & Care :
Info :
Wet-block or steam-block finished motifs: pin each motif to a blocking mat to exact dimensions, spray or mist until damp, and allow to dry completely. Cotton fibers will relax and flatten with blocking. For washing, hand wash gently in cool water and lay flat to dry.
— Optional Size Variations :
Info :
To lengthen runner make additional large discs and repeat the joining pattern; to shorten remove one large disc and adjust placement. Change hook by one size for larger or smaller motif diameters but maintain the same increase pattern to preserve shape.
— Troubleshooting Tips Throughout :
Info :
If discs cup or ripple: block strongly and consider adding a 1-2 round BLO ridge near edge to encourage flatness. If holes between stitches appear in solid rounds, use a slightly smaller hook to tighten fabric.
Info :
Keep spare motifs to audition replacements in the layout if a motif looks too large or small after blocking; small differences in tension are normal and easy to correct by swapping or adjusting spacing.
This botanical circle runner brings a handmade, modern vintage charm to your table — elegant, tactile, and perfectly imperfect in the best way. Each motif is a small meditative project and joining them into this flowing runner is deeply satisfying. Layer it over wood for a warm natural contrast or over fabric for a softer vibe. Enjoy the process of making, blocking, and arranging — your home will love the finished warmth. 🧶🌿