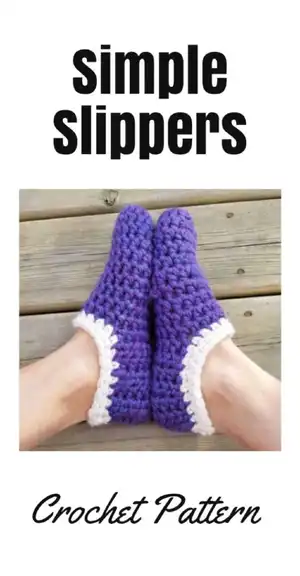
Make cozy, quick-to-crochet slippers using bulky weight yarn and a large hook. This pattern is perfect for using up yarn scraps and creates a soft, comfy pair you can wear right away. Clear round-by-round instructions for multiple sizes make it easy to follow along. Youll love how fast these come together and how warm they feel on your feet.
Progress Tracker
0% Complete
— What you need :
Info :
You will require roughly 90 to 110 yards bulky 5 weight yarn. I have been using all my bulky yarn scraps to create these cute little slippers.
Info :
Yarn, crochet hooks and scissors
Infos :
HDC – Half Double Crochet. RND - Round. CH - Chain. RPT - Repeat. SC – Single Crochet. ST – Stitch. RW – Row
Info :
Gauge: Width: 10 ST = 4" Length: 8 RW = 4"
— Pattern Notes :
Info :
I always wear out my slippers so when my last pair where on the way out I quickly whipped up a new pair to wear. These slippers are quick and easy and I am thrilled with how cozy they are. The CH 1 at the beginning of each row will NOT be counted as a stitch. However, you will also work your first stitch in the CH 1 Space. If you find the size you are working on is to big remove 1 or 2 rows before you start working on the heel. You may also remove 1 or 2 rows from the heel. Depending on the bulky yarn you choose to work with you may have to make small adjustments. Feel free to contact me at anytime if you need some extra guidance in sizing.
— Size 6 :
Round 1 :
RND 1 - 10 HDC in magic circle, SL ST to the 1st ST
Round 2 :
RND 2 – CH 1, 2 HDC in the same ST as CH 1, HDC in next ST, *2 HDC in next ST, HDC in next ST, RPT from * all around, SL ST to 1ST HDC, (15)
Round 3 :
RND 3 - CH 1, 2 HDC in the same ST as CH 1, HDC in next 2 STs, *2 HDC in next ST, HDC in next 2 STs, RPT from * all around, SL ST to 1ST HDC, (20)
Round 4 :
RND 4 – CH 1, HDC each ST around, SL ST to 1ST HDC (20)
Round 5-9 :
RND 5-9 – RPT RND 4
Round 10 :
RW 10 – CH 1, HDC into the next 14 (14)
Round 11 :
RW 11 – CH 1, turn your work so you are now working back across your work, HDC across (14)
Round 12-15 :
RW 12-15 – RPT RW 13
Info :
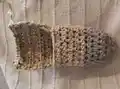
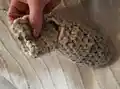
Cut yarn leaving 10 – 12 inch tail. Flip slipper inside out and SL ST the end together. Weave in all ends.
Finished Edge :
RND 1 - Starting at the back of the slipper SL ST yarn on SC 23 STs evenly around, SL ST to 1ST SC (23)
Round :
RND 2 – SC in each ST around, SL ST to 1ST SC, Cut yarn, weave in end (23)
— Size 7 :
Round 1 :
RND 1 - 10 HDC in magic circle, SL ST to the 1st ST
Round 2 :
RND 2 – CH 1, 2 HDC in the same ST as CH 1, HDC in next ST, *2 HDC in next ST, HDC in next ST, RPT from * all around, SL ST to 1ST HDC, (15)
Round 3 :
RND 3 - CH 1, 2 HDC in the same ST as CH 1, HDC in next 2 STs, *2 HDC in next ST, HDC in next 2 STs, RPT from * all around, SL ST to 1ST HDC, (20)
Round 4 :
RND 4 – CH 1, HDC each ST around, SL ST to 1ST HDC (20)
Round 5-10 :
RND 5-10 – RPT RND 4
Round 11 :
RW 11 – CH 1, HDC into the next 14 (14)
Round 12 :
RW 12 – CH 1, turn your work so you are now working back across your work, HDC across (14)
Round 13-17 :
RW 13-17 – RPT RW 13
Info :
Cut yarn leaving 10 – 12 inch tail. Flip slipper inside out and SL ST the end together. Weave in all ends.
Finished Edge :
RND 1 - Starting at the back of the slipper SL ST yarn on SC 24 STs evenly around, SL ST to 1ST SC (24)
Round :
RND 2 – SC in each ST around, SL ST to 1ST SC, Cut yarn, weave in end (24)
— Size 8 :
Round 1 :
RND 1 - 10 HDC in magic circle, SL ST to the 1st ST
Round 2 :
RND 2 – CH 1, 2 HDC in the same ST as CH 1, HDC in next ST, *2 HDC in next ST, HDC in next ST, RPT from * all around, SL ST to 1ST HDC, (15)
Round 3 :
RND 3 - CH 1, 2 HDC in the same ST as CH 1, HDC in next 2 STs, *2 HDC in next ST, HDC in next 2 STs, RPT from * all around, SL ST to 1ST HDC, (20)
Round 4 :
RND 4 – CH 1, HDC each ST around, SL ST to 1ST HDC (20)
Round 5-11 :
RND 5-11 – RPT RND 4
Round 12 :
RW 12 – CH 1, HDC into the next 14 (14)
Round 13 :
RW 13 – CH 1, turn your work so you are now working back across your work, HDC across (14)
Round 14-19 :
RW 14-19 – RPT RW 13
Info :
Cut yarn leaving 10 – 12 inch tail. Flip slipper inside out and SL ST the end together. Weave in all ends.
Finished Edge :
RND 1 - Starting at the back of the slipper SL ST yarn on SC 25 STs evenly around, SL ST to 1ST SC (25)
Round :
RND 2 – SC in each ST around, SL ST to 1ST SC, Cut yarn, weave in end (25)
— Size 9 :
Round 1 :
RND 1 - 10 HDC in magic circle, SL ST to the 1st ST
Round 2 :
RND 2 – CH 1, 2 HDC in the same ST as CH 1, HDC in next ST, *2 HDC in next ST, HDC in next ST, RPT from * all around, SL ST to 1ST HDC, (15)
Round 3 :
RND 3 - CH 1, 2 HDC in the same ST as CH 1, HDC in next 2 STs, *2 HDC in next ST, HDC in next 2 STs, RPT from * all around, SL ST to 1ST HDC, (20)
Round 4 :
RND 4 – CH 1, HDC each ST around, SL ST to 1ST HDC (20)
Round 5-13 :
RND 5-13 – RPT RND 4
Round 14 :
RW 14 – CH 1, HDC into the next 14 (14)
Round 15 :
RW 15 – CH 1, turn your work so you are now working back across your work, HDC across (14)
Round 16-20 :
RW 16-20 – RPT RW 13
Info :
Cut yarn leaving 10 – 12 inch tail. Flip slipper inside out and SL ST the end together. Weave in all ends.
Finished Edge :
RND 1 - Starting at the back of the slipper SL ST yarn on SC 26 STs evenly around, SL ST to 1ST SC (26)
Round :
RND 2 – SC in each ST around, SL ST to 1ST SC, Cut yarn, weave in end (26)
Info :
I hope you enjoy making these slippers as much as I do! Have fun using up all your scarp yarn and make some cozy slippers.
Info :
Please note that you are welcome to sell your finished products
These slippers are a quick, cozy project that turn scrap bulky yarn into warm footwear youll love to wear. Theyre fast to make, simple to customize, and perfect for gifting or lounging at home. 🧶 Make a pair for everyone you know and enjoy the cozy results! 🧵