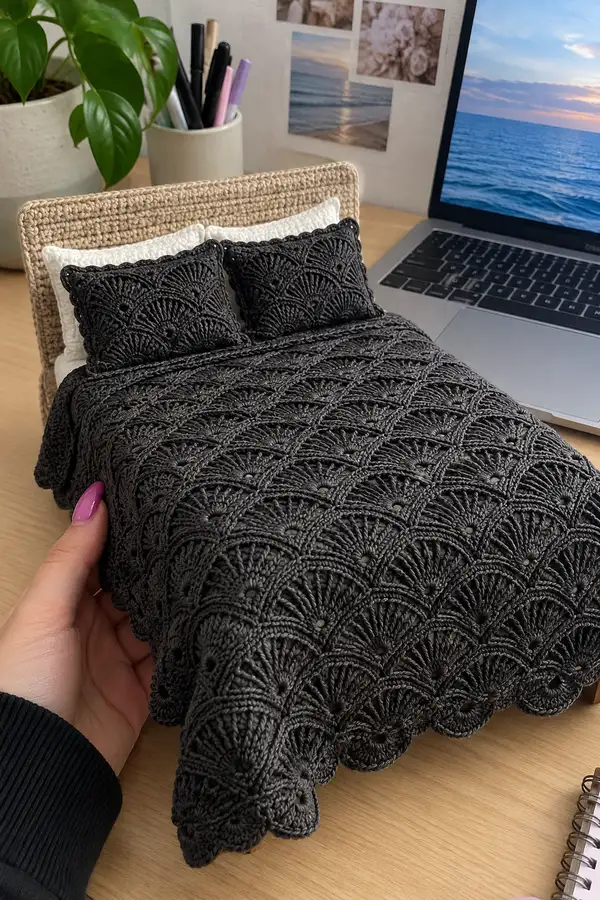
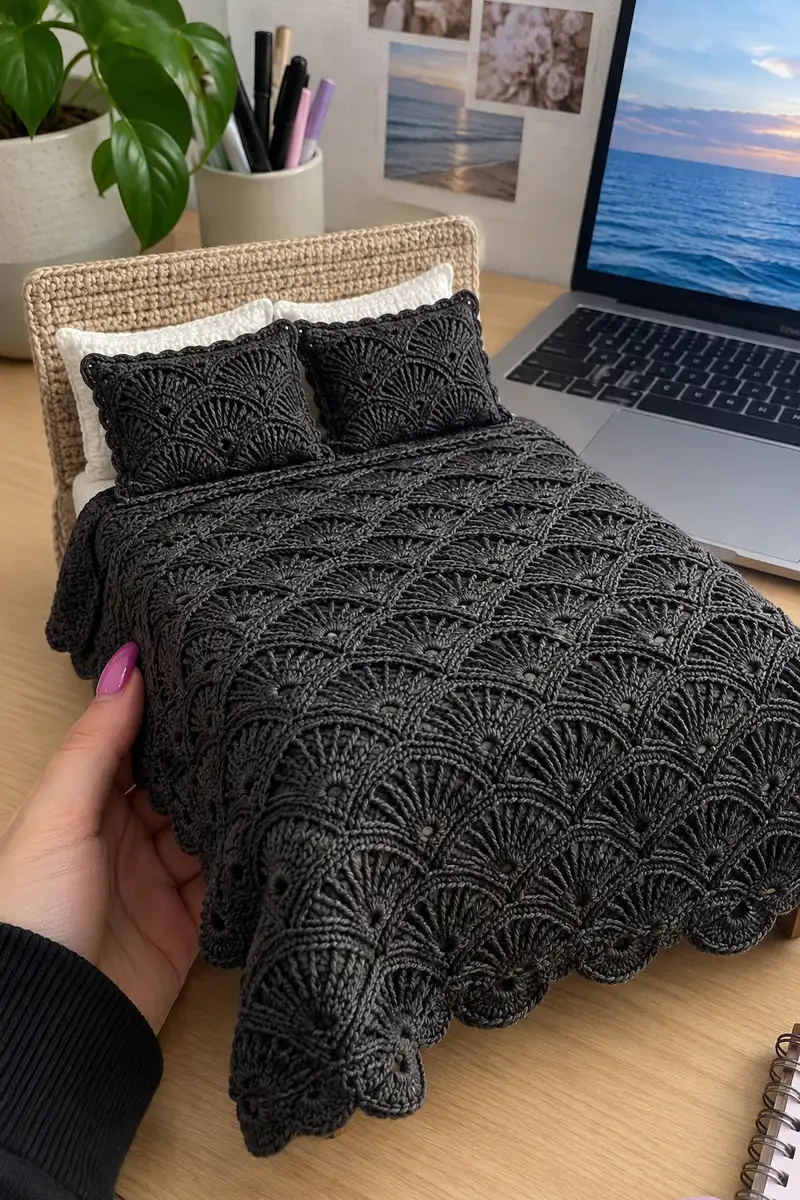
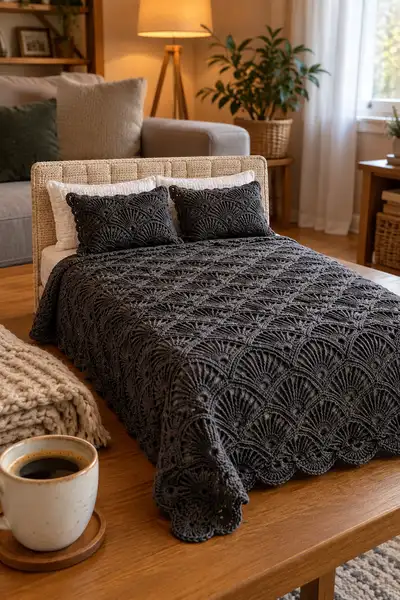
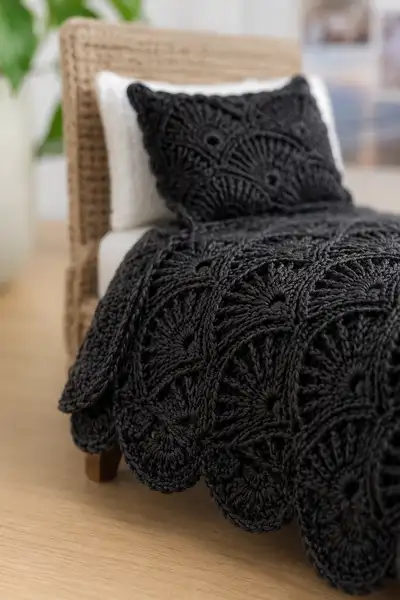
A sophisticated fan-shell bedspread in deep charcoal, made from repeat crochet motifs joined to form an elegant scalloped coverlet. The pattern includes matching pillow covers and a scalloped border to give a finished, modern look. Clear, step-by-step instructions and plenty of tips make this a rewarding project for an intermediate crocheter who loves texture and structured motifs.
Progress Tracker
0% Complete
— Notes & Gauge :
Info :
This pattern is written in US terms and constructed from repeat fan-shell square motifs. Gauge is not critical for motif look but is important for final size and drape. Gauge sample: 10 x 10 cm should equal approximately 12 stitches x 7 rows when working one full motif repeat (sample two motifs and block to verify).
Finished Size (approx) :
Queen/Full bedspread shown: approximately 220 cm wide x 240 cm long (86 x 94 inches). You can scale by reducing or increasing motif count. One motif block after blocking measures roughly 17–20 cm square (6.5–7.75 in). For final size, plan to work a grid of motifs: e.g., 13 motifs across by 14 motifs down for the shown size (adjust as needed).
— Motif (Fan Shell Square) :
Round 1 :
Make a magic ring. Ch1, work 12 sc into ring. Pull ring closed and join with sl st to first sc. (12)
Round 2 :
Ch3 (counts as dc), 1 dc in same st, *ch2, sk next st, 2 dc in next st* repeat from * to * around, ch2, join with sl st to top of ch3. You will have 6 two-dc pairs separated by ch2 spaces. (12 dc pairs, 6 ch2 sps)
Info :
Round 2 establishes the base points for the fan petals. Each 'ch2' space will become a petal center later. Keep tension even to make the fan arcs sit nicely.
Round 3 :
Sl st into first ch2 sp, ch3 (counts as dc), 8 dc in same ch2 sp (work a 9-dc fan into each ch2 sp), *sl st into next two-dc pair between fans, sl st into next ch2 sp, ch3, 8 dc in same ch2 sp* repeat around. Join with sl st to top of starting ch3. (6 fan shells of 9 dc each)
Round 4 :
Ch1, 1 sc in same st, *ch3, 1 sc into center of next fan (into the 5th dc of the fan) to anchor, ch3, 1 sc into the base space between fans (the sl st join area)* repeat around. Join with sl st to first sc. This creates 12 ch3 arches around the circle. (12 anchor sc positions)
Info :
Use the anchor sc into the center of each fan (the 5th dc) to keep the fan balanced. The ch3 arches will be worked into on the next round to expand the motif while preserving fan shape.
Round 5 :
Work into each ch3 arch as follows: sl st into ch3 sp, ch3 (counts as dc), 7 dc, ch4, 8 dc, sl st into next anchor sc. This increases the fan height and adds a chain 4 corner arc between adjacent fans. Join with sl st to first ch3. Each fan is now taller and separated by ch4 corner arcs. (6 tall fans)
Round 6 :
Ch1, sc in same st, *sk 3 dc of fan, (3 dc in next dc, ch2, 3 dc in next dc) forming a double cluster to create a petal ridge, sk last dc, sc into top of chain-4 corner arc* repeat around. Join with sl st to first sc. This begins to transform the round into a more squared outline by creating points at the arcade corners. (12 sc anchor points, 6 double-cluster petals)
Info :
At this stage the motif will start to look like a set of radiating pineapple petals. Keep track of cluster placement — mark the first cluster if needed to avoid drift as you build outward.
Round 7 :
Sl st to the top of a cluster, ch1, 1 sc in same st, *ch5, sk across the fan to the valley between clusters, 1 sc into ch4 corner arc top, ch5, 1 sc into next valley (between fans)* repeat around. Join with sl st to first sc. You now have long ch5 arches around motif (12 ch5 sps). (12 anchor sc positions)
Round 8 :
Work into each ch5 arch: sl st into arch, ch3 (counts as dc), 11 dc into arch (12 dc total), sl st into top of next sc anchor. This builds a deep fan shell across each arch. Join with sl st to starting ch3. (12 deep fans of 12 dc each)
Info :
If your fans seem too wide, reduce to 9 dc in each arch on this round; consistency between motifs is more important than exact stitch number. Block motifs uniformly later to match sizes.
Round 9 :
Ch1, sc in same st, *ch3, 1 sc in the top of next fan (into the 6th dc to center it), ch3, 1 sc in between fans into the previous round's anchor sc* repeat around. Join with sl st. This round starts squaring the motif with ch3 bridge arcs. (24 ch3 sps approximately)
Round 10 :
Into each ch3 bridge: sl st, ch3 (counts as dc), 5 dc, ch3, sl st into next sc. Work this so that each small arch forms a mini-fan to add texture and create straight edges. Join with sl st. (24 mini-fans)
Info :
Rounds 9-10 create a grid effect that will allow motifs to sit flush against each other when joined. Make sure mini-fans line up evenly by counting stitches between anchors before continuing.
Round 11 :
Ch1, sc into same st, *ch1, sc into next 2 dc of mini-fan, ch1, sc into bridge top, ch1, sc into next 2 dc of mini-fan, ch1, sc into anchor* repeat around to build a defined square edge. Join with sl st. (count: motif perimeter now has 48 sc anchors)
Round 12 :
Work 1 sc in each sc around for two rounds to stabilize the edge: Round 12 and Round 13 — maintain 48 sc each round. This creates an even base to join motifs. (48)
Info :
Work Rounds 12-13 firmly and evenly; these are the rounds you will use for slip-stitch joining as-you-go if you prefer. Alternatively, leave long tails and whip-stitch motifs together later.
Round 13 :
1 sc in each st around. (48)
Round 14 :
Ch3, *dc in next 3 sc, (sk 1 sc, 5 dc in next sc) forming a scallop, sk 1 sc, dc in next 3 sc, ch1, sl st into next sc to secure scallop base* repeat around to make scalloped corners. After final repeat, join with sl st to top of starting ch3. (total scallop count around equals number of repeats; perimeter still being handled in 48 base positions)
Info :
Round 14 builds the decorative scallop edge that becomes the bedspread's elegant textured surface. Keep shells symmetrical by placing the 5-dc scallop consistently into the same perimeter stitch in each repeat.
Round 15 :
Ch1, sc in same st, *sc in next 2 dc, (ch3, 1 sc in center of scallop to anchor), sc in next 2 dc, sl st into valley between scallops* repeat around. Join and fasten off. Block motif flat to the same dimensions as others before joining. (48 anchor points preserved)
Info :
Fasten off leaving a 30–40 cm tail for sewing if you will join motifs with whip stitch or mattress stitch. For as-you-go joining slip-stitch method, leave a shorter tail and join directly in Round 12-13.
— Motif Notes & Variations :
Info :
Each motif as written has 15 rounds. If you want a slightly larger motif, repeat Round 8 (fan expansion) and then redo Rounds 9-15 proportionally to square off. If smaller, stop at Round 12 and proceed to joining.
— Joining Motifs (As-You-Go Slip-Stitch Method) :
Info :
Decide your grid: for example 13 across by 14 down for a large bedspread. Work the first row of motifs fully and leave them unjoined. For the second row onwards, join motifs to the previous row as you complete Round 12 (the even base round) using slip stitches through corresponding sc anchors.
Join Round 1 (per motif) :
Start motif Round 12. When you reach the side where the neighboring motif is already placed (to the left), perform the following for each sc anchor around that side: sl st into your sc, then sl st into the corresponding sc on the neighbor motif, then continue with next sc — this creates a neat seam. Work across two sides (left and bottom) to anchor the motif. Finish Round 12 and continue Rounds 13-15 as normal. (48 sl stitch join points across perimeter positions as needed)
Info :
Keep joins loose enough that motifs lie flat. If you pull too tight, fans will bunch. Use a removable stitch marker on the starting corner to keep orientation consistent for each motif.
Join Round 2 :
For interior joins (when your motif is surrounded on both left and top), join on two adjacent sides: work slip-stitch joins into both neighboring motifs as you encounter each corresponding sc anchor. Continue Rounds 13-15 after joining. This is the simplest as-you-go join method and creates a nearly invisible seam on the underside of the bedspread.
Info :
If you prefer a visible decorative seam, use a contrasting yarn and single crochet through both motifs instead of sl st. That will create a ridge that can be highlighted or used to outline the grid.
— Joining Grid Plan & Counts :
Info :
Example grid: 13 motifs across x 14 motifs down = 182 motifs. Each motif has approximately 15 rounds of work. Total motif rounds if worked individually: 182 x 15 = 2730 motif rounds of work, but motifs are small and quick. For a smaller throw, try 7 x 9 motifs (63 motifs).
Info :
To speed work, create a motif assembly station and join as you go to reduce final sewing time. Keep motifs in neat stacks and block after joining rows to keep edges straight.
— Blanket Border (Scalloped Multi-Round Edge) :
Border Round 1 :
With bedspread assembled and blocked lightly, pick up yarn at a corner. Work 1 sc evenly around the entire perimeter, placing 1 sc into every sc anchor around motif joins and 3 sc into each valley where two motifs meet to keep corner fullness. Maintain stitch count by working 1 sc per anchor approximately (estimate ~48 x motifs per edge depending on grid). Join with sl st. (perimeter sc count varies by motif grid)
Info :
This base round evens out the edges and creates a continuous surface to work the decorative scalloped border into. Work snugly but not tightly.
Border Round 2 :
Ch3 (counts as dc), *skip 2 sc, 7 dc in next sc (large scallop), skip 2 sc, dc in next sc* repeat around. Join with sl st to top of starting ch3. This produces a large scallop every 3–4 base stitches. Adjust repeat to fit perimeter stitch count evenly. (scallop count will be approx perimeter/3)
Border Round 3 :
Ch1, sc in same st, *ch4, sc into center of next large scallop (into 4th dc of the 7-dc cluster) to anchor, ch4, sc into next valley* repeat around. Join with sl st. (anchors placed per scallop)
Info :
Border Rounds 2-3 deepen the scallops and create points for the final decorative ridges. Use blocking pins to shape these scallops during wet-blocking for maximum effect.
Border Round 4 :
Into each ch4 arch: sl st, ch3 (counts as dc), 11 dc, ch3, sl st into anchor to form a tall shell; repeat around. Join and fasten off. This creates the large decorative scalloped edge seen in photos. (scallop shells equal number of anchors)
Border Round 5 :
Optional decorative ridge: With contrasting yarn, work reverse single crochet (crab stitch) in the final round to create a hand-crafted look and additional weight to the edges. Alternatively, finish with slip st and weave in ends. Fasten off and block thoroughly. (edge finishing round)
Info :
If your bedspread edges are not perfectly even, pin heavily during blocking and steam-spray to encourage edge shape. Blocking will transform the texture and open the fans for the best visual effect.
— Pillow Covers (Make 2 matching) :
Info :
Each pillow uses four motifs joined in a 2 x 2 square (or more motifs for larger pillows). Instructions below assume 2 x 2 motif pillow; increase motif count for larger pillows as desired.
Pillow Motif Rounds 1-15 :
Make motif as written above (Rounds 1–15). Block each motif to match the others.
Info :
Make 8 motifs per pillow set (4 for front, 4 for back) if making two pillow covers. Join as-you-go or whip stitch for a hidden seam. Leave one side open or add a zipper for removable covers.
Pillow Assembly Round 1 :
Join 4 motifs into a square matching fans so that scallops meet at seams. Join on three sides leaving the fourth side open for insertion. Use mattress stitch or whip stitch with the long tail from Round 15 to create a near invisible seam. Ensure corners are square and fans line up across seams.
Pillow Assembly Round 2 :
Insert pillow form, then close final seam by sewing the remaining motif edges together. Weave in ends and block lightly to set shape. Optionally add an inner lining fabric to protect the yarn inside.
Info :
For a neat finish, work a single crochet border around the pillow after sewing it closed. Work 1 sc evenly around to tidy the seam and add stability (optional 2 rounds). This also creates a channel to hide any zipper if you add one.
— Alternative Joining (Whip Stitch Invisible Join) :
Info :
If you prefer a sewn join, place two blocked motifs with right sides together and whip stitch through the back loops of border rounds (Rounds 12-13) so the seam sits mostly on the underside. Use a mattress stitch technique for a flat join through the front loops if you want a completely invisible front join.
Whip Join Round 1 :
With a 30–40 cm tail, align motifs, and with a yarn needle, insert under first stitch of motif A (back loop only), then insert under corresponding stitch of motif B (back loop only). Pull snug but not tight; repeat across the seam until motifs are joined. Knot and weave tail inside motif and trim.
Info :
Space seams equally and keep tension relaxed so fans don't pucker. Test a short seam first to find the right tension and stitch placement for the neatest result.
— Final Finishing Rounds :
Finishing Round 1 :
Once all motifs are joined and the bedspread is assembled, perform an overall wet-block. Lay the bedspread flat on blocking mats or on a carpeted surface covered with towels. Pin the scallop edges into the desired shape. Spray with water or steam gently until damp and allow to dry completely overnight.
Finishing Round 2 :
Weave in all remaining ends. Inspect seam joins and reinforce any loose join points with three small whip stitches. If you added a contrasting edge or a crab-stitch round, check for evenness and re-stitch any uneven scallops.
Info :
Blocking and final finishing are what make this bedspread look polished and professional — don't skip this step. The fans will open during blocking and the scallops will take on crisp, decorative curves.
— Scaling & Sizing Tips :
Info :
To scale the bedspread, change the number of motif columns and rows. For a twin-size bed, try a 9 x 10 grid; for queen, 13 x 14 as recommended. For a throw, 7 x 9 works well. When changing grid sizes, ensure you have a whole number of motifs to create balanced scallops at the edges — odd motif counts often leave partial scallops unless you trim or add a border to even the edge.
Info :
To make a reversible version: use a slightly looser hook and join motifs with single crochet in the same yarn, then work rounds that look good on both sides such as slip-stitch ridges and small shells. Blocking and using the same tension on both sides is key.
Completing this sleek dark bedspread is a gratifying, textural journey — each fan motif builds into a beautifully sculpted surface that drapes elegantly over the bed. The monochrome charcoal color gives a modern, cozy feeling while the scalloped border adds a handcrafted flourish. After blocking and a final weave-in, you’ll have a statement piece ready to transform any bedroom. 🧶✨ Don't forget to share a photo of your finished spread — it always feels great to see the final reveal! 🖤