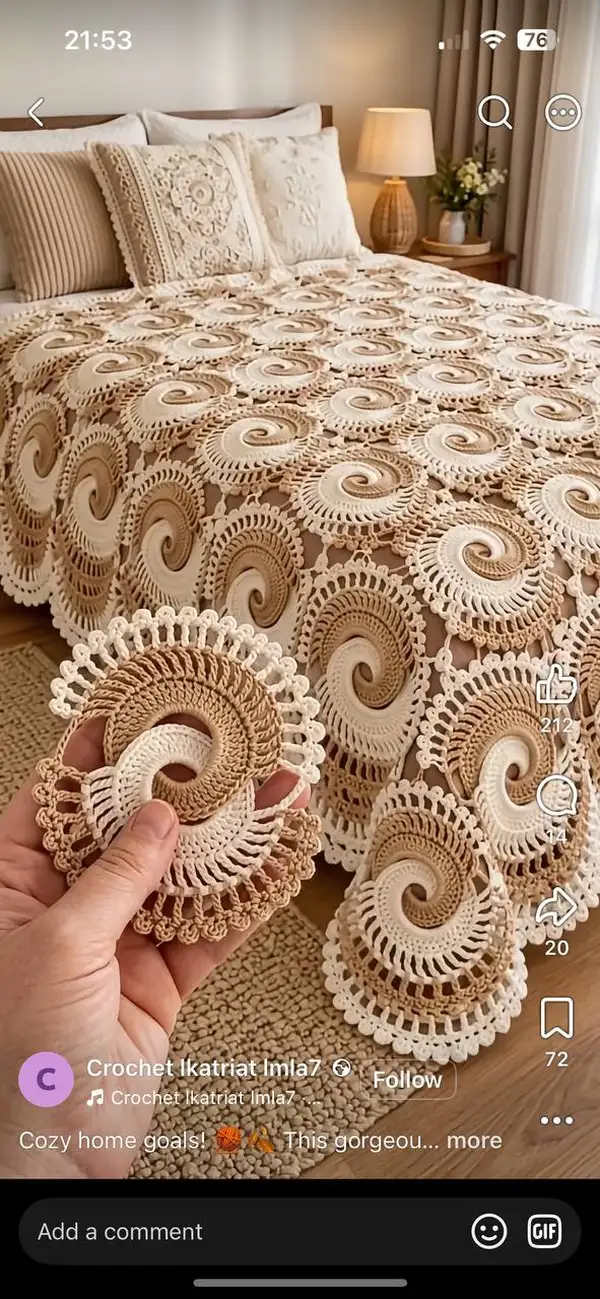
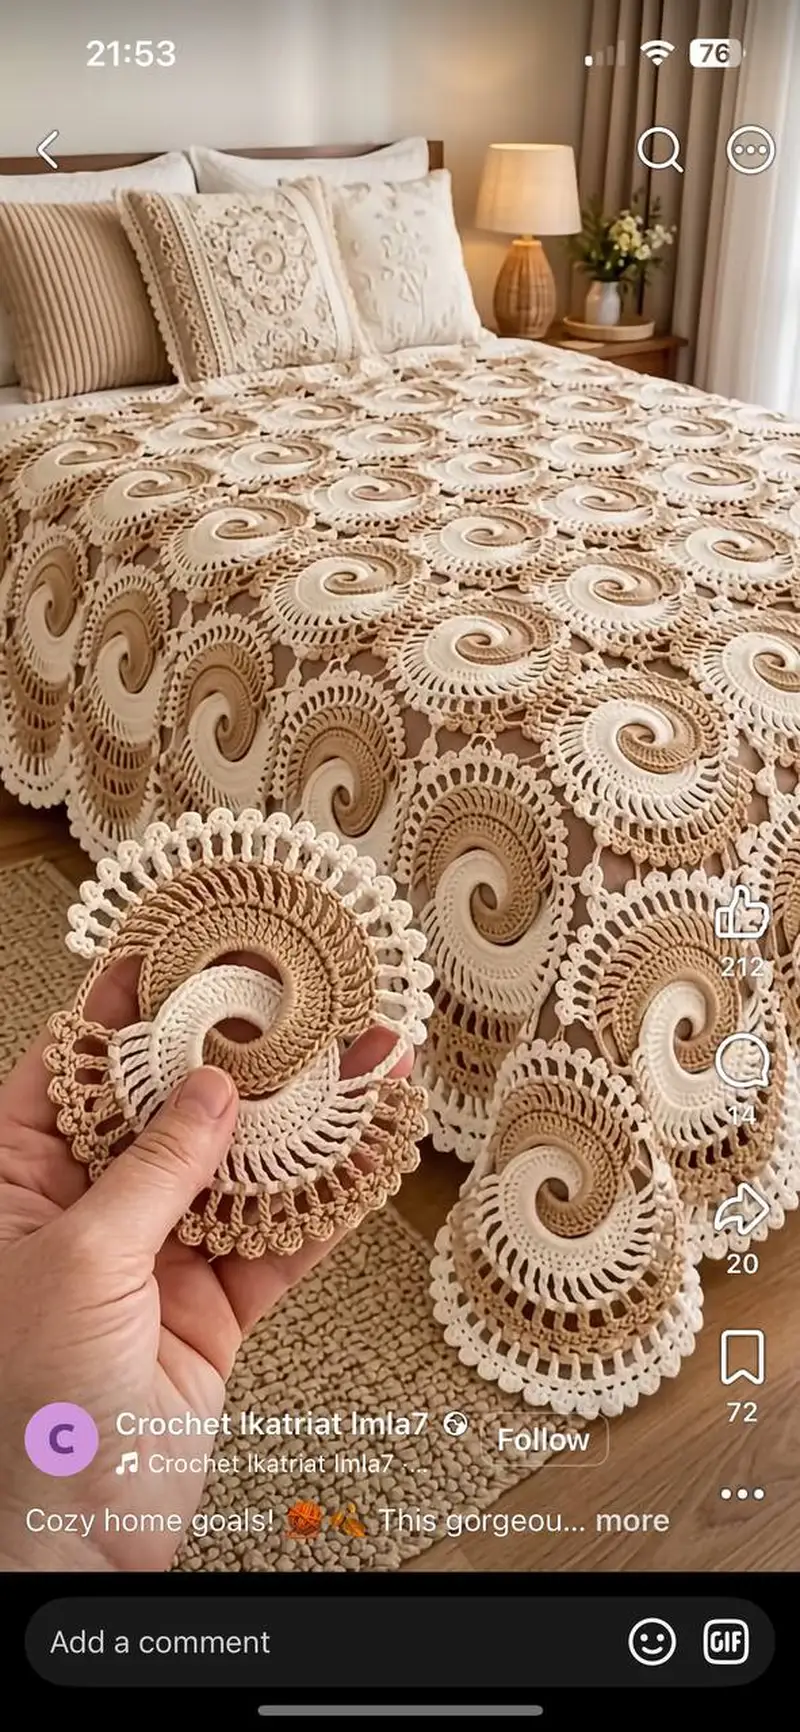
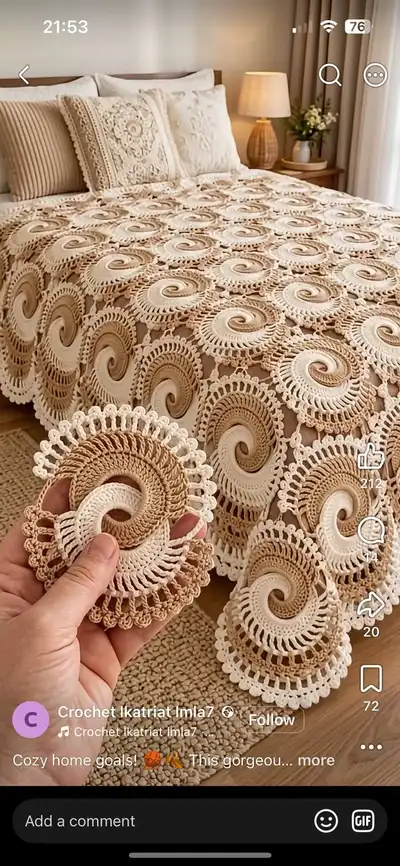
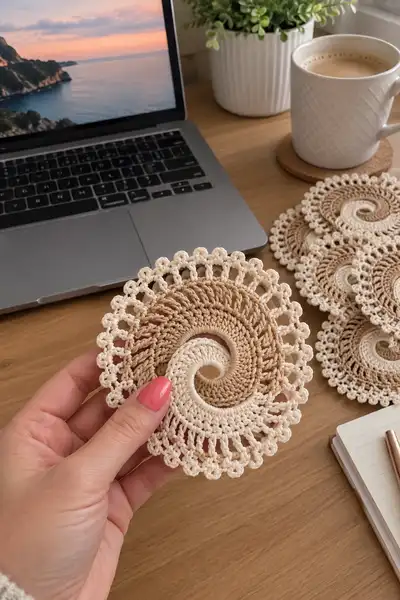
An elegant neutral spiral-lace bedspread made from joined circular motifs in cream and warm beige. Each motif features a smooth spiral center and a delicate looped scallop edge that joins into a vintage-inspired lace blanket. The pattern explains motif construction, color transitions, join-as-you-go options and a finished border for a bedspread-sized throw.
Progress Tracker
0% Complete
— Overview :
Info :
This bedspread is made from identical Spiral Lace Motifs worked in two colors and joined together. Each motif is crocheted in rounds from the center outward, with carefully placed increases and color changes to produce a spiral effect. After motifs are complete and blocked, they are joined in a grid using a join-as-you-go method to create a seamless lace bedspread. The pattern below lists every round for a single motif, a detailed outer lace sequence and complete join and border instructions.
— Spiral Lace Motif (Make as many as needed) :
Info :
Work in continuous rounds or join/chain to start each round — whichever you prefer for smoother seams. I recommend continuous rounds (no turning) to emphasize the spiral look. Use stitch marker to mark the first st of each round and slide up as you work. The motif below uses two colors: Color A (Cream/Ivory) and Color B (Warm Tan). Begin with Color A for the center and alternate as indicated.
Round 3 :
(1 sc, 1 inc) x 6 (18)
Round 4 :
(2 sc, 1 inc) x 6 (24)
Round 5 :
(3 sc, 1 inc) x 6 (30)
Info :
Keep tension even. At this small stage the spiral is forming — keep the work flat by blocking lightly if needed before proceeding.
Round 6 :
(4 sc, 1 inc) x 6 (36)
Round 7 :
(5 sc, 1 inc) x 6 (42)
Round 8 :
(6 sc, 1 inc) x 6 (48)
Info :
To encourage spiral shaping, orient your increases slightly biased toward one side of the motif: when you begin the round, place the first increase in the first repeat and continue; later rounds will create the visible spiral when color changes are alternated.
Round 9 :
(6 sc, 1 inc) x 6 (54)
Round 10 :
1 sc in each st (54)
Round 11 :
(7 sc, 1 inc) x 6 (60)
Info :
Change to Color B (Warm Tan) at the end of Round 11 to begin the color drift for the spiral. Use a standing sc or join with a sl st then carry the unused yarn neatly along the back if you prefer to avoid many ends; otherwise break yarn and weave later.
Round 12 :
1 sc in each st (60) with Color B
Round 13 :
(8 sc, 1 inc) x 6 (66) Color B
Round 14 :
1 sc in each st (66) Color B
Round 15 :
(9 sc, 1 inc) x 6 (72) Color B
Info :
If you want a stronger spiral contrast, alternate single rounds of Color A and Color B at this stage: for example, R14 in Color A then R15 in Color B. The pictured motifs use an inner cream center transitioning to tan bands then finishing with cream for the outer loops.
Round 16 :
1 sc in each st (72) Color B
Round 17 :
1 sc in each st (72) Color B
Round 18 :
1 sc in each st (72) Color B
Round 19 :
Change to Color A. 72 hdc evenly around (72) Color A
Info :
Switch to half-double crochet in Color A to build a slightly taller band that helps the next shell rounds sit neatly. Work BLO on the next round if you want a thin ridge before shells.
Round 20 :
1 hdc in each st BLO (72) Color A
Round 21 :
(2 sc, 3 dc in next st) x 24 (72) Color A
Info :
The pattern above turns every 3rd stitch into a 3-dc shell so you end up with 24 evenly spaced shells around the motif. Shells create depth and a base for the looped outer edge.
Round 22 :
sl st into first dc of shell. *ch 5, sl st into center dc of next shell; rep from * around to create 24 ch-5 loops (work sl sts into shell centers) Color A
Round 23 :
In each ch-5 loop: (sc, ch 3, 5 dc) into same loop, sl st into next sl st on base. Repeat in each of 24 loops (result: 24 fan clusters) Color A
Info :
Work these decorative fans gently so they remain flat — don't pull the ch-3 too tight. The 5-dc fan forms the beginning of the scallop and supports the picot loops that follow.
Round 24 :
Ch 1, sc between each fan top (24 sc), then ch 4, sl st at top of next fan to form a small vertical loop over each fan (24 loops total) Color A
Round 25 :
Change to Color B. In each ch-4 loop: (3 dc, ch 2, 3 dc) into loop to make a double cluster arch; sl st into next sc between fans. Repeat around (24 arches) Color B
Info :
This round builds a lacy arch around the motif that will read as the large scallop on the bedspread. Keep your stitch count consistent by working clusters and then single slip stitches into the base so total anchor points remain 24.
Round 26 :
Ch 1, sc in each sl st/anchor point (24 sc) Color B
Round 27 :
(sc, ch 7, sc) into each arch apex (24 ch-7 loops) Color B
Info :
Ch-7 loops are the major decorative loops seen in the photo. The length (7) is proportional; increase or decrease loop length to enlarge or tighten the scallops. Count loops to ensure you have 24 before proceeding.
Round 28 :
Change to Color A. Into each ch-7 loop: (sc, ch 3, sc, ch 3, sc) to create 2 small picot-style loops per large loop — repeat for all 24 loops (24 x 3 sc anchors, leaving ch-3 loops as picots) Color A
Round 29 :
sc in each anchor around to tidy (72 sc) Color A
Round 30 :
(sc, ch 4, sl st in next sc) x 72 to create a fine picot edge (72 small loops) Color A
Info :
At this stage the motif should measure approximately 9–11 cm (3.5–4.5 in) across blocked, depending on yarn weight and hook. Block flat before joining to ensure consistent size across motifs. If motifs differ, adjust next motifs and blocking to match.
Round 31 :
Optional decorative round: *sk 1, sc in next, (5 dc in next sc), sc in next; rep around to create bold scallops (24 large scallops) Color A or B
Round 32 :
Work trimmed picots on every other scallop: in each scallop top work (ch 3, sl st) for a small decorative chain picot; repeat around Color B
Info :
If you prefer the simpler delicate edge shown in the close-up, stop after Round 30. Rounds 31–32 are for a more ornate look. Blocking after finishing the edge is essential to reveal the loops and make them even.
Round 33 :
Fasten off leaving long tail for weaving if you plan to sew motifs together. If joining immediately using join-as-you-go method, do not fasten off — continue to join as indicated in joining section. Weave in ends later after assembly.
Info :
Repeat motif until you have the number required for your bed size. Example motif counts: Twin ≈ 6 x 8 = 48 motifs; Full/Double ≈ 8 x 10 = 80 motifs; Queen ≈ 9 x 11 = 99 motifs; King ≈ 10 x 12 = 120 motifs (these are approximate — measure as you go).
— Joining Motifs (Join-As-You-Go Method) :
Info :
The pictured bedspread is joined using a join-as-you-go (JAYG) slip-stitch method that keeps the lace open and seamless. Join motifs at the last decorative round (preferably Round 30) by aligning loops and working slip stitches through the adjacent motif's corresponding loop. Pin motifs to blocking board to keep alignment.
JAYG Round 1 :
With current motif on hook on its final round, hold motif B next to motif A (already blocked and placed). Insert hook through corresponding ch-4/ch-7 loop on motif A, yarn over and sl st to join, then continue working the final picot/edge stitch on motif B. Repeat along edge to join along one side.
Info :
When joining three motifs at a corner intersection, join motif B to motif A along one edge until the corner, then align motif C perpendicular and sl st through both A and B loop points at the corner for a strong triangular junction.
JAYG Round 2 :
Join every adjoining loop position: for each ch-7 loop on motif B that meets a ch-7 on motif A, sl st through both loops (one sl st on B, insert through corresponding loop on A then sl st). Maintain even tension so the joint is flat.
JAYG Round 3 :
If the motif you are joining to has a slightly different loop count, add a small ch-2 bridge between adjacent loops and sl st into the next loop to even out counts. This preserves an even grid without gaps.
Info :
For a more visible join use a contrasting color for the joining sl sts to create a decorative chain grid. For invisible joins, match the dominant outer edge color.
JAYG Round 4 :
Continue joining motifs in rows: join the first row of motifs to create a strip, then join strips together horizontally. Attach new motifs by matching loop counts and working sl sts every anchor point. Allow motif seams to dry after blocking if you applied spray starch.
— Assembling Full Bedspread Layout :
Info :
Lay out motifs on a large table or floor in the grid you have planned. Pin motifs to a blocking board at their desired location. I recommend assembling one row fully then joining rows together to maintain a straight edge. Leave motifs unattached on one row to adjust for fit as you approach edges and corners.
Step 1 :
Decide bedspread dimensions in motifs (e.g., queen = 9 x 11). Arrange motifs in that number of columns/rows and pin to board to check coverage before joining.
Step 2 :
Join motifs in each row using JAYG across the width. When you reach a corner where two rows meet, join both the adjacent motif from the new row and the motif from the row below so you create a secure three-way join at intersections.
Info :
When joining rows, keep one short edge of the bedspread open until the last row is attached so you can adjust the bedspread to the mattress precisely, trimming one motif if necessary to fit.
Step 3 :
After all motifs are joined and the blanket is assembled, weave in ends and block the entire piece. Pin the whole bedspread to final dimensions, spray lightly with blocking spray or water and allow to dry fully. This will flatten joins and open all loops to match.
— Optional Border and Framing (work after assembly) :
Info :
Finishing border frames the blanket and unifies the joined motifs. The border below is sized to fit a dense lace edge; adjust chain counts to expand or contract the frame. Work border with Color A for a light frame or Color B for subtle contrast.
Border Round 1 :
With blanket laid flat, join yarn at any outer loop point. Work 1 sc in each outer loop around, placing 3 sc in each corner loop to turn smoothly. Maintain continuous rounds; count total sc to verify spacing.
Border Round 2 :
Ch 3 (counts as dc), *skip 1 sc, 5 dc in next sc, skip 1 sc, dc in next sc; rep around. At corners work 7 dc in the corner anchor for fullness. This forms a rounded scallop frame. Fasten off.
Info :
Optional additional lace rounds: add one round of ch-5 loops and picots over the large scallops for a more romantic antique look. If you add rounds, block again to keep the frame even.
Border Round 3 :
Attach contrasting thread and work a decorative picot-row: *(sc, ch 3, sc) in top of each large scallop; rep to edge. Fasten off and weave ends.
Info :
Trim any long tails and steam-block lightly if using cotton; avoid excessive heat. For a softer spread, omit starch and allow natural drape.
— Alternative Join Method (Sewing) :
Info :
If you prefer sewing joins for greater strength: pin motifs together on the blocking board aligning outer loop anchors. Use a matching thread and whip stitch through the base of loops (not on the picot tips) to create nearly invisible seams. Use small, even stitches and knot securely. Weave ends through several stitches for safety.
Sew Join Step 1 :
Position two motifs with right sides facing up and align outer loops evenly. Insert yarn needle under the base of the loop on motif A and under the base of the corresponding loop on motif B; bring yarn through, leave a short tail and continue with a small whip stitch every 3–4 mm.
Sew Join Step 2 :
At intersections where three or four motifs meet, secure by taking an additional cross-stitch that passes under the base of all meeting loops for added reinforcement. Tie off and weave in ends tightly.
Info :
Sewing takes longer than JAYG but produces a stronger seam and slightly flatter join line. Choose according to how much durability you want for daily bed use.
— Finishing Touches and Blocking :
Info :
Blocking is essential to make all motifs uniform and to open the lace. Pin each motif to size (for example 10 cm across) using rust-proof pins. For the whole blanket, pin the outer border square/rectangular and spray lightly with blocking solution. Let dry completely before removing pins.
Finishing Step :
Weave ends: after joining and blocking weave all ends back into the nearest lace loops for a hidden finish. Trim close. If you used blocking spray or starch and want a softer hand afterwards, wash gently and dry flat.
Info :
For bedspread use choose a cotton or cotton-blend thread for durability and washability. Poly-cotton blends soften faster and are easier to care for than 100% cotton which can be stiff until washed.
This neutral spiral lace bedspread is a labor of love that combines precise stitchwork with delicate lace finishing. Each motif forms part of a calming spiral landscape that looks beautiful draped across a bed or sofa. The modular construction makes sizing flexible and satisfying to assemble, and the final blocking brings out the full elegance of the lace. 🧶✨ Whether you keep it for yourself or gift it to someone special, this bedspread will be a treasured handmade heirloom. Happy crocheting! 🛏️