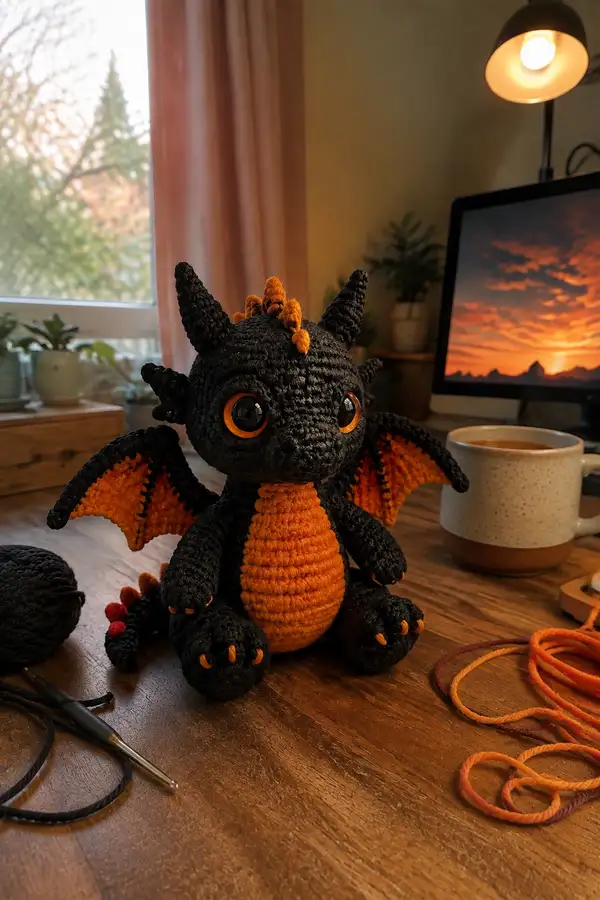
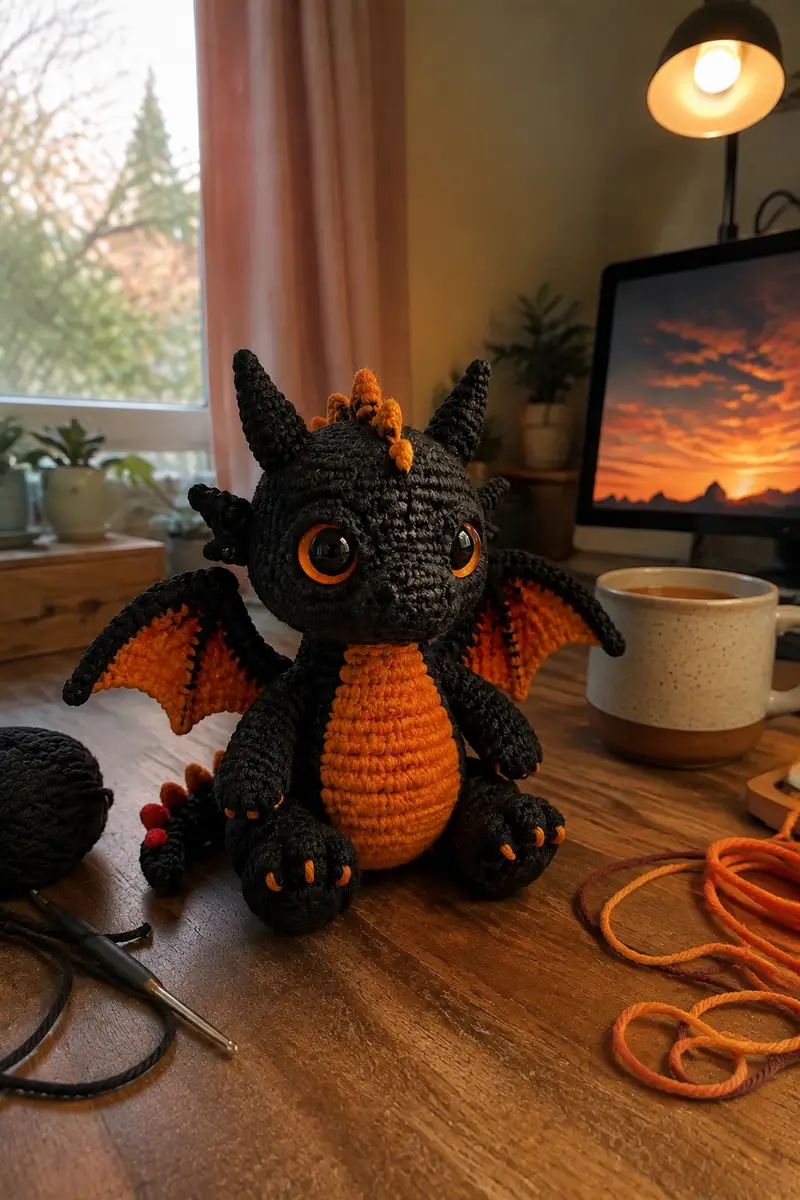
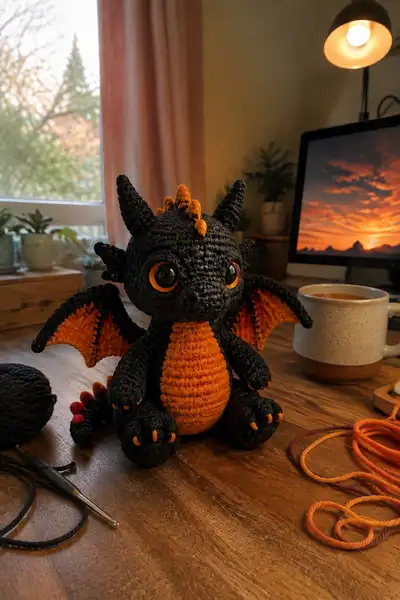
Create a cute, slightly spooky mini dragon with glossy orange-ringed eyes, deep black body, and a bright orange belly. This pattern recreates the plush dragon shown—complete with horns, wing membranes, tail spikes, and tiny orange claws. Perfect for gifting or a seasonal display, the finished dragon sits upright and measures roughly 10-12 inches tall when completed with worsted weight yarn.
Progress Tracker
0% Complete
— Head :
Round 1 :
6 sc in magic ring (6)
Round 3 :
(1 sc, inc) x 6 (18)
Round 4 :
(2 sc, inc) x 6 (24)
Round 5 :
(3 sc, inc) x 6 (30)
Round 6 :
(4 sc, inc) x 6 (36)
Round 7 :
(5 sc, inc) x 6 (42)
Round 8 :
(6 sc, inc) x 6 (48)
Round 9 :
(7 sc, inc) x 6 (54)
Round 10-12 :
1 sc in each st (54)
Info :
Place safety eyes between rounds 12-13, approximately 12-14 stitches apart center-to-center depending on desired wide-eyed look. Insert safety eyes before final stuffing; orange eye rings will frame the eyes for the exact look in the photo.
Round 13 :
1 sc in each st (54)
Round 14 :
1 sc in each st (54)
Round 15 :
(7 sc, dec) x 6 (48)
Round 16 :
1 sc in each st (48)
Info :
Begin lightly stuffing head from the lower neck area after round 15. Use small amounts of stuffing and press into the snout and around eyes with a stuffing tool or blunt pencil to achieve smooth shaping.
Round 17 :
(6 sc, dec) x 6 (42)
Round 18 :
(5 sc, dec) x 6 (36)
Round 19 :
(4 sc, dec) x 6 (30)
Round 20 :
(3 sc, dec) x 6 (24)
Info :
Increase stuffing so head is firm but not overpacked. Ensure eye area has enough fiberfill behind eyes to keep them flush with the head without gaps.
Round 21 :
(2 sc, dec) x 6 (18)
Round 22 :
(1 sc, dec) x 6 (12)
Info :
Fasten off leaving a long tail for sewing to the neck. Close remaining hole with yarn needle and weave tail through remaining stitches to finish, but do not over-tighten if you plan to attach horns and top spikes later; keep top of head slightly roomy for horn insertion.
Round 24 :
Reattach yarn at base of head to form neck opening: sc evenly around neck opening adjusting to match body neck stitch count (see Body neck rounds for matching). Work 1 sc in each st for 2 rounds to create a short neck tube for joining to body. (Use 30-36 stitches to match body—adjust as required)
Info :
If you are combining head and body seamlessly, leave neck stitches live and direct-join to body. Otherwise close neck and whip-stitch later. Head shaping can be adjusted by adding or removing two stitches in earlier rounds to match desired proportions.
— Horns (Make 2 large, 2 small) :
Horn (Large) Round 1 :
6 sc in magic ring (6)
Round 3 :
(1 sc, inc) x 6 (18)
Round 4-6 :
1 sc in each st (18)
Round 7 :
(2 sc, dec) x 6 (12)
Round 8-10 :
1 sc in each st (12) — shape the horn into a tapered cone by gently stuffing as you go. Fasten off leaving long tail for sewing.
Horn (Small) Round 1 :
6 sc in magic ring (6)
Horn (Small) Round 2 :
1 sc in each st (6) for 3 rounds (6)
Horn (Small) Round 5 :
dec x3 (3). Stuff lightly and close. Fasten off leaving tail for sewing.
Info :
Sew large horns to upper sides of head between rounds 6-8. Small horns/spikes are sewn in staggered rows down the center top and back of the head as shown—pin first to check spacing and tilt angle so they point slightly backwards.
— Body :
Round 1 :
6 sc in magic ring (6)
Round 3 :
(1 sc, inc) x 6 (18)
Round 4 :
(2 sc, inc) x 6 (24)
Round 5 :
(3 sc, inc) x 6 (30)
Round 6 :
(4 sc, inc) x 6 (36)
Round 7 :
(5 sc, inc) x 6 (42)
Round 8 :
(6 sc, inc) x 6 (48)
Round 9-12 :
1 sc in each st (48)
Info :
If you want the body to sit stable, add a small disc of felt inside the base later and place a little plastic pellet bag before final stuffing. Keep the bottom slightly flattened to help the dragon sit upright.
Round 13 :
(6 sc, dec) x 6 (42)
Round 14 :
1 sc in each st (42)
Round 15 :
(5 sc, dec) x 6 (36)
Round 16 :
1 sc in each st (36)
Info :
Begin stuffing the body firmly from the bottom up around round 16, leaving the top area less stuffed to allow a neat neck attachment. Use small stuffing increments so you can shape the belly curve.
Round 17 :
(4 sc, dec) x 6 (30)
Round 18 :
1 sc in each st (30)
Info :
Change to Orange yarn for belly panel now. We will create the belly as a separate oval panel and sew it onto the front center of the body. Carry black yarn inside the body if you prefer to keep tidy joins.
Round 19 :
With Orange: Chain 21, join to the body opening area and single crochet along the chain to create an oval panel. Alternatively work a separate belly piece (see Belly Panel section) then sew on.
Round 20-22 :
1 sc in each st around body (30) — continue stuffing the body progressively. Ensure the belly panel is centered lengthwise and sewn with neat whip stitches.
Round 23 :
(3 sc, dec) x 6 (24)
Round 24 :
(2 sc, dec) x 6 (18)
Round 25 :
(1 sc, dec) x 6 (12)
Info :
Leave the top opening wide enough to insert the neck portion of the head. If you closed the head neck earlier, open a gap you can stitch through; otherwise align live neck stitches for a seamless join. Keep a stitch marker at the front center to align belly panel and head connection.
Round 26 :
6 dec (6) — Fasten off leaving a long tail for sewing the head to the body if you are closing separately. If joining live, join head neck stitches to body opening with slip stitch evenly around then switch to sewing for a secure join.
— Belly Panel (Separate) :
Round 1 :
With Orange: 6 sc in magic ring (6)
Round 3 :
(1 sc, inc) x 6 (18)
Round 4 :
(2 sc, inc) x 6 (24)
Round 5-6 :
1 sc in each st (24) — create a slightly elongated oval by adding a few more rows if needed to reach the height shown. Fasten off and block slightly by pinning to shape for neat sewing.
Info :
Sew belly panel centered to the front of the body aligning top of panel around body round 18-20. Use ladder stitch or whip stitch for a flat seam. Weave in ends inside the body afterward.
— Right Arm (Make 1) :
Round 1 :
6 sc in magic ring (6)
Round 3 :
(1 sc, inc) x 6 (18)
Round 4-6 :
1 sc in each st (18)
Round 7 :
(2 sc, dec) x 6 (12)
Round 8-10 :
1 sc in each st (12) — these rounds form the wrist area. Add a small bit of stuffing into the hand at this point.
Info :
Add tiny orange claw decoration by sewing three short loops of orange yarn at the front of the paw, or crocheting small short spike pieces and sewing them on. Stuff the hand firmly to give a rounded paw appearance.
Round 11-14 :
1 sc in each st (12) — work longer tube for upper arm and shape slightly by varying stuffing density.
Round 15 :
(1 sc, inc) x 4 (16) — create shoulder flare for joining
Round 16 :
1 sc in each st (16)
Round 17-18 :
1 sc in each st (16) — fasten off leaving long tail for sewing. Repeat for left arm mirror image.
Info :
Sew arms to the sides of the body around body rounds 14-18. Position slightly forward so hands can rest on the belly. Use a yarn needle and secure with several passes to create a stable join.
— Left Arm (Make 1) :
Round 1 :
6 sc in magic ring (6)
Round 3 :
(1 sc, inc) x 6 (18)
Round 4-6 :
1 sc in each st (18)
Round 7 :
(2 sc, dec) x 6 (12)
Round 8-10 :
1 sc in each st (12)
Round 11-14 :
1 sc in each st (12)
Round 15 :
(1 sc, inc) x 4 (16)
Round 16-18 :
1 sc in each st (16). Fasten off leaving tail for sewing.
Info :
If you want the arms to be poseable, insert a thin piece of floral wire inside the arm before stuffing. Wrap the wire ends with small bits of yarn so there are no sharp points near the fabric.
— Right Leg (Make 1) :
Round 1 :
6 sc in magic ring (6)
Round 3 :
(1 sc, inc) x 6 (18)
Round 4 :
(2 sc, inc) x 6 (24)
Round 5-7 :
1 sc in each st (24) — These rounds create the foot sole width.
Round 8 :
(3 sc, dec) x 6 (18)
Round 9-12 :
1 sc in each st (18) — shape top of foot and begin ankle.
Round 13 :
(2 sc, dec) x 6 (12)
Round 14-18 :
1 sc in each st (12) — build leg length. Stuff foot firmly before completing ankle rows.
Round 19 :
(1 sc, dec) x 4 (8)
Round 20-22 :
1 sc in each st (8) — leave a long tail for sewing to the body. Repeat for left leg.
Info :
Sew legs to bottom of body at the front base so the dragon can sit. Place legs approximately 8-10 stitches apart (center to center) for a balanced sitting posture. Add extra whip stitches at the base joint for stability.
— Left Leg (Make 1) :
Round 1 :
6 sc in magic ring (6)
Round 3 :
(1 sc, inc) x 6 (18)
Round 4 :
(2 sc, inc) x 6 (24)
Round 5-7 :
1 sc in each st (24)
Round 8 :
(3 sc, dec) x 6 (18)
Round 9-12 :
1 sc in each st (18)
Round 13 :
(2 sc, dec) x 6 (12)
Round 14-18 :
1 sc in each st (12)
Round 19 :
(1 sc, dec) x 4 (8)
Round 20-22 :
1 sc in each st (8) — Fasten off leaving tail for sewing.
— Ear/Side Head Fins (Make 2) :
Round 1 :
6 sc in magic ring (6)
Round 3 :
(1 sc, inc) x 6 (18)
Round 4 :
1 sc in each st (18)
Round 5 :
(2 sc, dec) x 4 + 2 sc (14) — shape into wing-like fin by flattening, then sc around for an ear/fin shape.
Round 6-8 :
1 sc in each st (14) — fasten off leaving tail for sewing. Pin and attach to side of head behind eyes, pointing slightly backward.
Info :
The side head fins add silhouette to the face—hang them slightly downwards to match the reference. Attach securely by sewing through several stitches at the base.
— Tail :
Round 1 :
6 sc in magic ring (6)
Round 3 :
(1 sc, inc) x 6 (18)
Round 4-6 :
1 sc in each st (18)
Round 7 :
(3 sc, dec) x 3 (15)
Round 8-11 :
1 sc in each st (15)
Round 12 :
(2 sc, dec) x 3 (12)
Round 13-15 :
1 sc in each st (12) — fasten off leaving long tail for sewing to body back. Stuff tail lightly; it should taper and be flexible so the dragon can curl it.
Info :
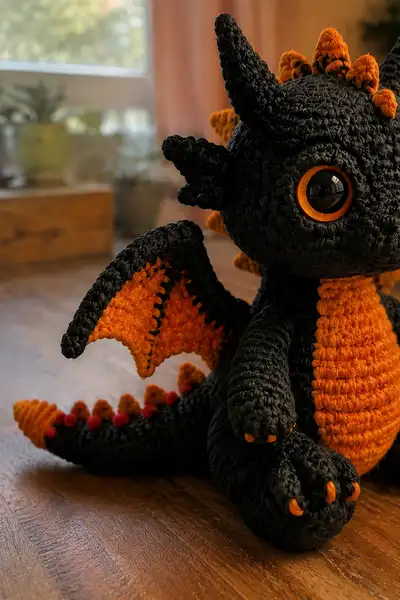
Sew tail onto back center between body rounds 10-14. Add small red pom accents along the top row of tail by sewing tiny round knots or tiny bobbles in red spaced every 4-6 stitches as pictured.
— Tail Spikes (Make 8 small) :
Spike Round 1 :
4 sc in magic ring (4)
Round 2 :
1 sc in each st (4) for 3 rounds (4)
Round 5 :
dec x2 (2) — stuff lightly and close. Fasten off leaving long tail for stitching.
Info :
Sew spikes evenly spaced along the top of tail. Use a small number of stitches to create a triangular profile; the largest spike sits at the tail base and smallest near the tip.
— Wings (Make 2 mirrored) :
Wing Base Round 1 :
With Black: 6 sc in magic ring (6)
Round 3 :
(1 sc, inc) x 6 (18)
Round 4 :
1 sc in each st (18)
Info :
We will construct wings in two layers: an orange membrane and a black border. Work the membrane first flat, then crochet the black rim around it joining both layers.
Wing Membrane Round 5 (Orange) :
Switch to Orange yarn. Chain 1 at edge and sc evenly to begin forming an elongated triangle shape: (sc 6, turn) repeat across 8 rows to form triangular membrane approx 8 rows high and 18 stitches base — adjust for desired wing size.
Round 6-12 :
Work even rows of sc across the membrane (same stitch count) shaping three scalloped points along the outer edge by using small decreases and increases (e.g., 3 sc, dec, 3 sc across each scallop). Fasten off membrane when desired size reached.
Wing Rim Round 13 (Black) :
Join Black yarn along the curved outer edge and sc around the entire membrane adding 1 sc per membrane row, and at the scalloped points work (1 sc, inc, 1 sc) to create small ridges. This will create the thick black rim visible in the photo.
Round 14 :
Sc 1 in each st BLO to create a pronounced ridge along the rim if you want a more sculpted look. Fasten off leaving long tail for sewing to body.
Info :
When attaching wings, position them on the body between rounds 10-14 slightly behind the arms. Pin and check the angle so they fan outward naturally. Sew through rim only for a clean join that leaves membrane free and slightly curved.
— Wing Finger Spikes (Make 3 per wing) :
Spike Round 1 :
6 sc in magic ring (6)
Round 2-4 :
1 sc in each st (6)
Round 5 :
dec x3 (3) — stuff lightly, close and leave a tail for sewing.
Info :
Sew these 3 spikes along the upper rim of each wing to form the bony fingers. Position with the largest at the top and smaller ones following down the outer edge.
— Belly Scales / Ridge (Make 6 small orange bumps) :
Scale Round 1 :
6 sc in magic ring (6)
Round 2 :
1 sc in each st (6)
Round 3 :
dec x3 (3) — stuff barely and close. Fasten off leaving tail for sewing.
Info :
Sew these scales in a vertical line down the center of the belly, from chest to lower abdomen. Use evenly spaced pins to maintain symmetry and spacing as shown in the reference.
— Eye Rings / Detail :
Round 1 :
With Orange: ch 2, 6 sc in 2nd chain from hook and join to make a small ring (6)
Round 2 :
1 sc in each st (6). Fasten off leaving short tail to glue or stitch behind safety eyes to create the orange halo look. The safety eye is then inserted so orange ring frames it.
Info :
For the glossy orange-ringed look, buy safety eyes with removable orange washer or place the orange ring behind the eye before locking. Glue washer lightly if needed to keep ring from turning.
— Nose / Muzzle Embroidery :
Info :
Use a contrasting black embroidery thread or yarn tail to stitch two small nostrils between rounds 9-11 of the head. Make two short vertical stitches approximately 4-6 stitches apart. Add a small mouth line under the eyes with a curved stitch or French knot ends depending on expression preference.
— Assembly Instructions and Finishing Touches :
Info :
Weave in all loose ends inside the body for a clean finish. Use safety eye washers securely and check that all small parts are firmly sewn—safety first if the toy is for a child.
Info :
Use a yarn needle and matching black yarn to sew the head to the body. Stitch through the neck rounds and body opening evenly. Then add horns and spikes, sewing several times through the base for durability. Add tiny orange claws by crocheting short loops or using simple embroidery stitches.
Info :
Optional: add a tiny bit of blush to cheeks using fabric-safe pastel or makeup and seal lightly with textile fixer if desired. Avoid use if giving to small children.
This adorable demon dragon amigurumi combines bold color contrast and sculpted shaping to create a small friend full of personality. Each carefully crafted part—from the orange belly to the expressive eyes and sculpted wings—comes together to make a plush you will love to display or gift. The reward of stitching all the little spikes and details is a toy that looks like a tiny mythical companion. 🧶🖤✨ Happy crocheting and enjoy bringing this mini dragon to life!