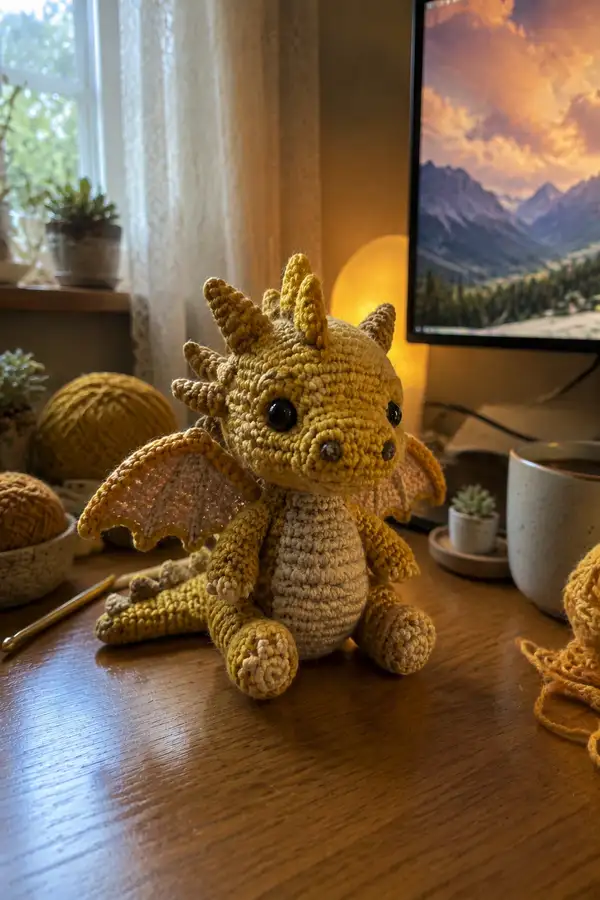
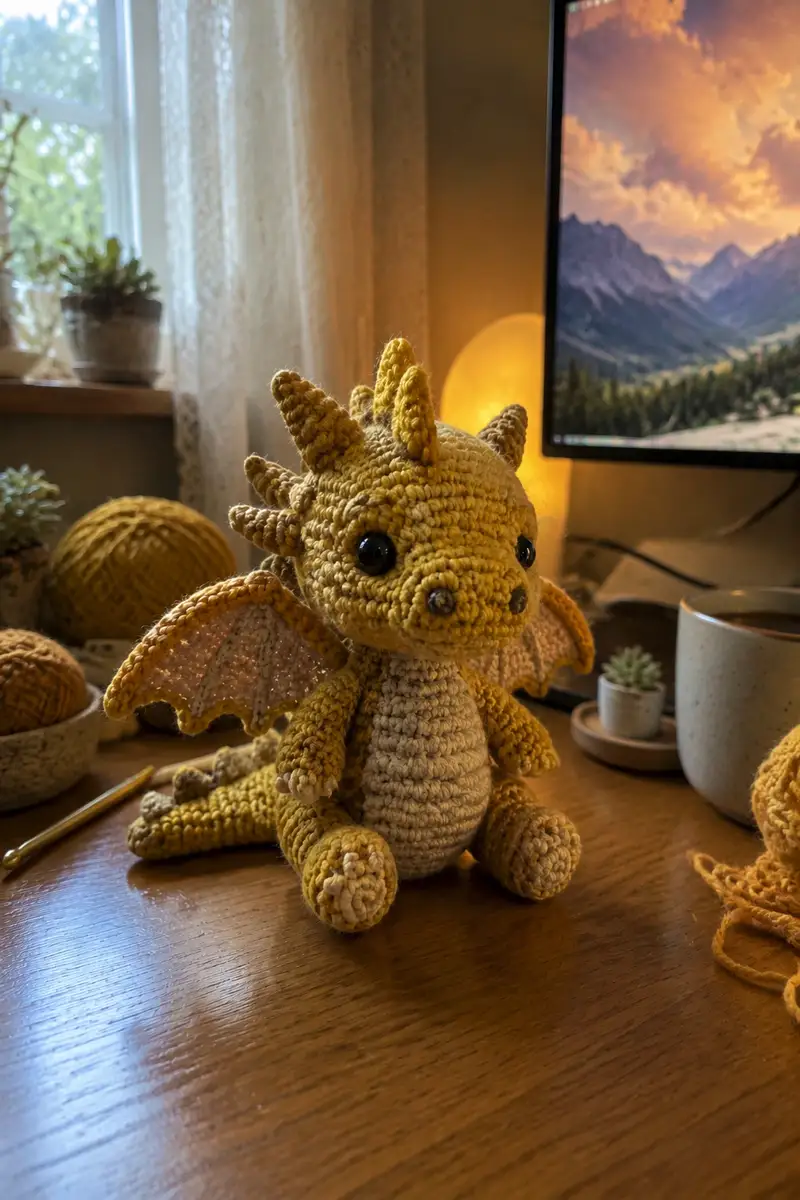
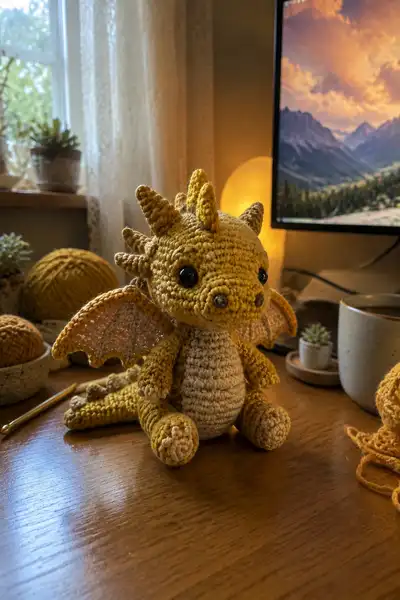
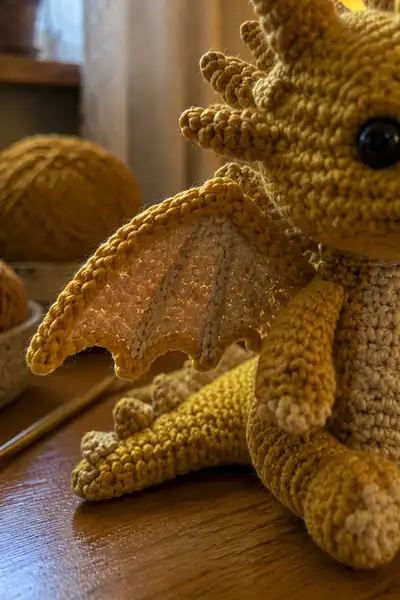
A charming small golden dragon amigurumi with a rounded head, cream belly, tiny scalloped wings and a row of spiky horns down its head and back. This cuddle-friendly dragon features glossy black safety eyes, a rounded snout and short limbs—perfect for gifting or desk decor. The pattern uses two complementary yarn tones to create contrast in the belly and wing membranes. Detailed construction and assembly tips included for a neat, professional finish.
Progress Tracker
0% Complete
— Head :
Round 1 :
6 sc in magic ring (6)
Round 3 :
(1 sc, 1 inc) x 6 (18)
Round 4 :
(2 sc, 1 inc) x 6 (24)
Round 5 :
(3 sc, 1 inc) x 6 (30)
Round 6 :
(4 sc, 1 inc) x 6 (36)
Round 7 :
(5 sc, 1 inc) x 6 (42)
Round 8 :
(6 sc, 1 inc) x 6 (48)
Round 9 :
(7 sc, 1 inc) x 6 (54)
Info :
At this point the head is wide enough for 12mm eyes. Decide which round you prefer eyes to sit; typical placement for this model is between rounds 14-15. Place stitch marker at the first stitch of each round to track rounds easily.
Round 10-13 :
1 sc in each st (54)
Round 14 :
1 sc in each st (54)
Info :
Eye placement: count across from the center front stitch. For a friendly, slightly wide look, place the eyes on round 14 so the eyes are about 8-10 stitches apart (measure 9 stitches between centers to start). Insert safety eyes between rounds 13 and 14 and secure washers before adding more stuffing.
Round 15-18 :
1 sc in each st (54)
Round 19 :
(7 sc, 1 dec) x 6 (48)
Round 20 :
(6 sc, 1 dec) x 6 (42)
Info :
Begin stuffing the head firmly at this stage, adding small amounts of fiberfill and shaping with your fingers. Make sure to stuff under the eye area well to support the eyes and keep the facial curve smooth.
Round 21 :
(5 sc, 1 dec) x 6 (36)
Round 22 :
(4 sc, 1 dec) x 6 (30)
Round 23 :
(3 sc, 1 dec) x 6 (24)
Round 24 :
(2 sc, 1 dec) x 6 (18)
Info :
Now is a good moment to sew on the muzzle (if you made it separately) or prepare to attach snout details. Continue stuffing to keep the head rounded but not rock-hard. Use small pieces of stuffing to shape around the eyes and nose for natural expression.
Round 25 :
(1 sc, 1 dec) x 6 (12)
Round 27 :
Fasten off leaving long tail for sewing neck into body (6) - if you prefer a neck tube, do not fasten off: continue into neck rounds below
Info :
Fasten off and weave the tail through remaining 6 stitches and pull tight to close if you will later sew to body opening. Leave long tail (approx 30-40cm) for secure attachment and weaving through several body rounds during assembly.
— Muzzle (make 1) :
Round 1 :
6 sc in magic ring (6)
Round 3 :
(1 sc, 1 inc) x 6 (18)
Round 4 :
1 sc in each st (18)
Round 5 :
(4 sc, 1 dec) x 3 (15)
Round 6 :
1 sc in each st (15)
Round 7 :
(2 sc, 1 dec) x 3 (12)
Round 8 :
Fasten off leaving long tail for sewing (12)
Info :
Use a small amount of stuffing to fill the muzzle lightly for rounded shape. When sewing to the head, position muzzle centered and approximately 4-5 rounds below the eyes. Use ladder stitch for an invisible seam and make two small nostril stitches using a darker yarn through the tip of muzzle.
— Body :
Round 1 :
6 sc in magic ring (6)
Round 3 :
(1 sc, 1 inc) x 6 (18)
Round 4 :
(2 sc, 1 inc) x 6 (24)
Round 5 :
(3 sc, 1 inc) x 6 (30)
Round 6 :
(4 sc, 1 inc) x 6 (36)
Round 7 :
(5 sc, 1 inc) x 6 (42)
Info :
At this size the body will sit upright. If you prefer a firmer base, you can add a small flat felt circle inside at the base or work the last 4 rounds in a tighter hook (decrease hook size by 0.25-0.5mm for the final rounds).
Round 8-12 :
1 sc in each st (42)
Info :
Color change for belly: join cream/beige yarn on the first stitch of round 13 to work the belly panel or change to a contrasting color now if you prefer stripes. When changing color, carry unused yarn inside the body or cut and weave tails to avoid long floats.
Round 13-18 :
1 sc in each st (42)
Round 19 :
(5 sc, 1 dec) x 6 (36)
Round 20 :
(4 sc, 1 dec) x 6 (30)
Info :
Begin stuffing the body moderately at round 19-20. The body should be filled firmly enough to sit upright but still soft; add stuffing gradually and shape as you go. Keep an opening large enough to attach the head before closing completely.
Round 21 :
(3 sc, 1 dec) x 6 (24)
Round 22 :
(2 sc, 1 dec) x 6 (18)
Round 23 :
(1 sc, 1 dec) x 6 (12)
Info :
Leave a long tail before closing completely if you plan to sew the head on after finishing. If you prefer to attach the head directly, align the head's closing round with the body's opening and sew through comparable rounds for a tight join. Fasten off and weave in tail once secure.
— Belly Panel (make 1) :
Round 1 :
6 sc in magic ring (6)
Round 3 :
(1 sc, 1 inc) x 6 (18)
Round 4 :
(2 sc, 1 inc) x 6 (24)
Round 5 :
1 sc in each st (24)
Round 6 :
1 sc in each st (24)
Round 7 :
Fasten off leaving long tail for sewing to the front of body (24)
Info :
Sew the belly panel centered on front of body using mattress stitch. Align the top of belly with about round 8 of the body working downward so that it fills the torso area naturally. Use evenly spaced stitches to avoid puckering.
— Arms (Make 2) :
Round 1 :
6 sc in magic ring (6)
Round 3 :
1 sc in each st (12)
Round 4 :
(2 sc, 1 inc) x 4 + 0 sc extra to keep 16 total (16)
Round 5-8 :
1 sc in each st (16)
Info :
Finger/thumb shaping: for this design we keep hands rounded and simple. Add a small bump by using front loop only (FLO) in one round closer to the end to make a wrist fold if desired.
Round 9 :
(3 sc, 1 dec) x 4 (12)
Round 10-14 :
1 sc in each st (12)
Round 15 :
(1 sc, 1 dec) x 4 (8)
Round 16 :
1 sc in each st (8)
Round 17 :
Fasten off leaving long tail for sewing (8)
Info :
Stuff palms firmly but leave arms slightly softer toward shoulder. Sew arms to sides of body between rounds 14-17 of the body for a natural seated position, spacing them evenly from the center front. If you want poseable arms, insert thin floral wire before final stuffing.
— Legs (Make 2) :
Round 1 :
6 sc in magic ring (6)
Round 3 :
(1 sc, 1 inc) x 6 (18)
Round 4 :
(2 sc, 1 inc) x 6 (24)
Round 5 :
(3 sc, 1 inc) x 6 (30)
Round 6-9 :
1 sc in each st (30)
Info :
These rounds form a wide rounded foot. Make sure the foot is stuffed quite firmly so it supports the body. You can also insert a small disc of cardboard or felt in the foot sole for extra stability before closing.
Round 10 :
(3 sc, 1 dec) x 6 (24)
Round 11-16 :
1 sc in each st (24)
Round 17 :
(2 sc, 1 dec) x 6 (18)
Round 18-20 :
1 sc in each st (18)
Round 21 :
(1 sc, 1 dec) x 6 (12)
Round 22 :
Fasten off leaving long tail for sewing (12)
Info :
Sew legs to base of the body with about 8-10 stitches between them (centered) so the dragon can sit. Make sure to shape toes slightly by using slip stitch embossing or very small surface embroidery if desired.
— Tail :
Round 1 :
6 sc in magic ring (6)
Round 3 :
(1 sc, 1 inc) x 6 (18)
Round 4-6 :
1 sc in each st (18)
Round 7 :
(2 sc, 1 dec) x 6 (12)
Round 8-12 :
1 sc in each st (12)
Round 13 :
(1 sc, 1 dec) x 4 + 0 sc ext to shape (8)
Round 14-18 :
1 sc in each st (8)
Round 19 :
2 dec, 1 sc in remaining stitches (4)
Round 20 :
Fasten off leaving long tail for sewing and leave tip open for attaching spikes if desired (4)
Info :
Sew the tail to the back lower portion of the body between rounds 2-6 for a natural sitting curve. Add small cone spikes along the top of the tail using the spike pattern below; attach them spaced evenly for a realistic ridge.
— Horns/Spikes (Make 10-12 small cones, plus 3 larger horns for top of head) :
Small Cone Round 1 :
6 sc in magic ring (6)
Small Cone Round 2 :
1 sc in each st (6)
Small Cone Round 3 :
(1 sc, inc) x 3 (9)
Small Cone Round 4 :
1 sc in each st (9)
Small Cone Round 5 :
(2 sc, inc) x 3 (12)
Small Cone Round 6 :
1 sc in each st, fasten off leaving tail for sewing (12)
Info :
Stuff cones lightly so they keep shape but remain slightly soft; for larger horns use extra increases to create a broader base (repeat rounds adding +3 stitches per increase round). Make 10 small cones for back and tail, and 3 slightly larger cones (increase pattern one more round) for the top of the head.
— Wings (Make 2) :
Info :
Wings are worked flat in a rounded triangle with an inner membrane in cream and an outer edge in golden yellow. Each wing uses short rows to create the scalloped lower edge and ribs formed by working partial rows in FLO to create vertical lines. Work each wing using continuous rows; count and mark the center spine to align ribs.
Row 1 :
With cream yarn ch 20, sc in 2nd ch from hook and across (19)
Row 2 :
Ch1, turn, sc across (19)
Row 3 :
Ch1, turn, sc 9, dec, sc rest (18)
Row 4 :
Ch1, turn, sc across (18)
Row 5 :
Ch1, turn, sc 8, dec, sc rest (17)
Row 6 :
Ch1, turn, sc across (17)
Row 7 :
Ch1, turn, sc 7, dec, sc rest (16)
Info :
These rows create a tapered membrane. After you have your basic shape, work 3 evenly spaced chain ribs by crochet surface slip stitches or by sewing a contrasting tube of single crochet down the length of the wing. This sample uses cream for the membrane and worked 3 vertical contrast ribs in the same cream via single crochet tubes sewn on top.
Row 8 :
Ch1, turn, sc across (16)
Row 9 :
Ch1, turn, sc 6, dec, sc rest (15)
Row 10 :
Ch1, turn, sc across (15)
Row 11 :
Ch1, turn, sc 5, dec, sc rest (14)
Row 12 :
Ch1, turn, sc across (14)
Row 13 :
Ch1, turn, sc 4, dec, sc rest (13)
Row 14 :
Ch1, turn, sc across (13)
Info :
Now change to golden yarn to form the scalloped outer edge. Work rounds of slip stitch and single crochet around the outer curved edge (the long edge opposite the straight sewn-in edge) to create 1 row of edging then 1 round of scallops using (3 sc in one st, sl st next) repeats for small scallops.
Row 15 :
Join golden yarn along long edge, sc evenly around the curved edge working 2 sc into each outer row end to maintain shape (approx 30-36 sc depending on shaping)
Row 16 (Scallop Edge) :
(3 sc in next st, sl st in next st) x around to create scallops, sl st to join, fasten off (scalloped edge completed)
Info :
Optional ribs: create three raised ribs by working short single crochet tubes in golden down the membrane from the base to near the scalloped edge and sew in place. To make wings sturdier, insert a thin piece of flexible wire along the leading edge before sewing; wrap wire ends in a couple passes of yarn so they are covered and secure.
— Wing Edge Reinforcement (optional) :
Round 1 :
With golden yarn, join at base of wing and sc around the straight base 1 round to create a neat seam (work sc evenly, sl st to join)
Round 2 :
Work 1 sc in each st BLO along base if you want a ridge and a neat seaming surface (this helps when sewing to body)
Info :
Sew each wing to the upper sides of the body between rounds 12-15 of body for a slightly raised wing position. Pin wings first to ensure symmetry. If using wire, be sure ends are wrapped and covered and positioned so they won't come loose during play.
— Wing Attachment Ribbing (sew-on method) :
Info :
Use matched golden yarn and a yarn needle: whip stitch through the body rounds and the Wing Edge Reinforcement round. Use small, evenly spaced stitches and pull taut so the wing sits flush but still has a little lift for expression.
— Finishing Spikes for Head (Make 3 larger horns) :
Large Horn Round 1 :
6 sc in magic ring (6)
Large Horn Round 2 :
6 inc (12)
Large Horn Round 3 :
1 sc in each st (12)
Large Horn Round 4 :
(2 sc, inc) x 4 (16)
Large Horn Round 5 :
1 sc in each st (16)
Large Horn Round 6 :
Fasten off leaving long tail for sewing (16)
Info :
Sew the three larger horns to the crown of the head: one centered and two slightly set back to form a small crest. Use a slightly darker yarn for the base of horns or a subtle variation to create visual interest.
— Decorative Details & Facial Embroidery :
Info :
Embroider two small nostrils on the muzzle using dark brown or black yarn with 3-4 small stitches each. For eyebrows or small smile lines, use a long embroidery stitch on top of the muzzle. For a more defined mouth, sew a short horizontal stitch under the muzzle center with darker thread.
Info :
Use a yarn needle to weave in all ends. Reinforce joints where arms and legs meet body by sewing through several rounds at attachment points. Make sure safety eyes are securely fastened and washers fully seated; add a dollop of fabric glue behind washer if desired for extra safety.
— Decorative Assembly Ridges and Final Touches :
Info :
Once all pieces are attached, give the dragon a final shaping by rolling it on a flat surface to set balance. Add tiny surface slip stitches at shoulder lines to suggest a seam or use a small chain stitch to draw wing membranes slightly inward for lifelike pose.
This little golden dragon is a true delight to finish — every spike and scalloped wing adds character and charm. As you sew the final seams, you'll see the personality emerge from simple stitches into a tiny, magical companion. Fill it with love (and just the right amount of stuffing) and enjoy the warm glow of a handmade friend on your desk or as a thoughtful gift. 🐉✨🧶